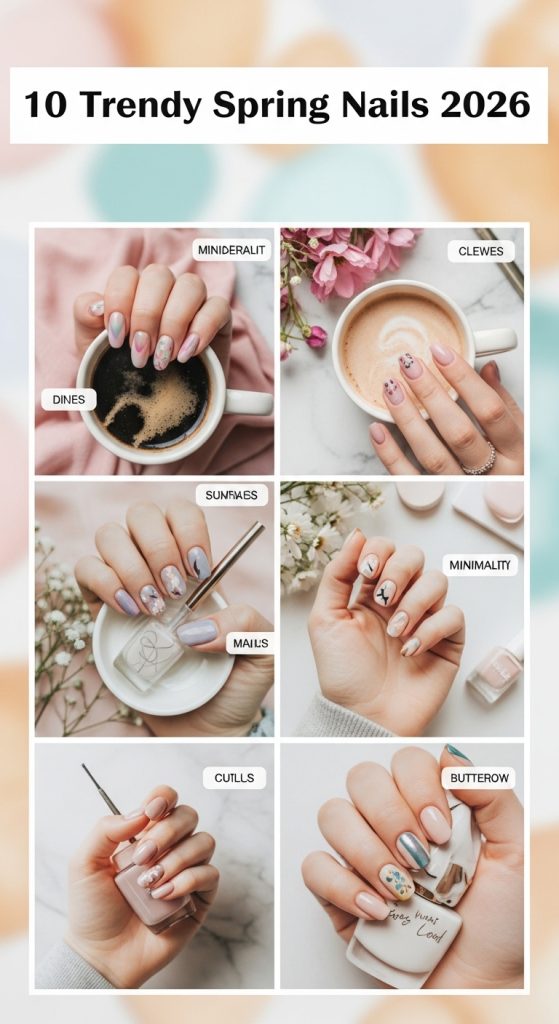
Spring is the perfect season to refresh your look, and nothing elevates your style quite like trendy, eye-catching nails. Every year, nail art trends evolve, bringing new colors, textures, and designs that capture the spirit of the season. In 2026, spring nail trends are all about playful creativity, pastel palettes, and statement details, offering something for everyone—whether you prefer subtle elegance or bold, artistic expressions. From intricate floral designs and modern geometric patterns to chic minimalist styles and holographic accents, the nail trends for this spring are versatile, Instagram-worthy, and perfect for Pinterest inspiration.
The essence of spring nails lies in their ability to blend freshness with personal style. This season, nails are no longer just an accessory—they are a canvas. Nail artists and enthusiasts are experimenting with layering techniques, negative space designs, textured finishes, and mixed media styles. Pastels remain popular, but designers are combining them with metallic foils, glitter accents, and unexpected pops of neon for a modern twist. Soft pinks, lavender, mint green, and buttery yellows are making a strong comeback, often accented with subtle gold, silver, or iridescent details. These colors reflect the rejuvenation and vibrancy of spring, offering a cheerful yet sophisticated vibe.
In addition to color trends, nail shapes are evolving in 2026. Almond and coffin shapes continue to dominate, but rounded tips and short square nails are also gaining popularity for a more practical and everyday-friendly approach. The shape of your nails can significantly influence how the design appears, with longer shapes allowing for more detailed artwork and shorter nails highlighting minimalist elegance. For those experimenting at home, understanding the interplay between shape, length, and design is essential to achieving a professional, polished finish.
Spring nail art in 2026 is also highly personalized and expressive. Minimalist nails with single-stroke florals or tiny accent gems are just as popular as full-on vibrant designs covering every nail. This season encourages mixing styles, such as combining geometric lines with floral motifs or pairing soft gradients with metallic embellishments. The result is unique, save-worthy nail art that looks fresh, modern, and perfect for social media or Pinterest boards. Nail enthusiasts are drawn to these creative possibilities because they allow self-expression while keeping nails chic and seasonally appropriate.
Another standout feature of 2026 spring nails is the incorporation of innovative textures and materials. Matte and glossy finishes are paired with holographic foils, iridescent glitters, and microbeads to create multidimensional effects. These designs not only look stunning but also add tactile interest, transforming nails into a statement accessory. For beginners and DIY enthusiasts, many of these techniques can be recreated at home with accessible tools like stamping plates, striping tapes, dotting tools, and nail stickers. With practice, anyone can achieve Pinterest-worthy results that feel professional without visiting a salon.
The functionality of spring nail designs is also improving. Many trends this year focus on durability and versatility, using long-lasting gel polishes or hybrid techniques that maintain vibrancy while resisting chipping. This is especially helpful for busy lifestyles where nails need to look polished yet withstand everyday activities. At the same time, seasonal designs allow flexibility: a pastel floral manicure can easily transition from casual daytime outfits to evening events, making your nails an essential component of your spring wardrobe.
In addition to aesthetic trends, spring nails are increasingly inspired by nature and seasonal motifs. Florals, blossoms, leafy designs, butterflies, and subtle sky-inspired gradients bring the outdoors into your manicure. These motifs are perfect for embracing the seasonal spirit, adding light, airy, and joyful energy to your style. Spring 2026 nail trends also highlight color blocking and abstract art, giving your nails a contemporary, editorial feel. Whether you prefer soft and feminine or bold and artistic, there is a nail trend this spring to suit your personality.
For nail artists, beginners, and enthusiasts alike, mastering spring nail trends involves understanding a combination of technique, color coordination, and creative flair. From DIY-friendly designs to advanced salon-ready creations, this year’s spring nail ideas offer something for every skill level. Learning how to balance intricate patterns with negative space or combine multiple textures effectively can help anyone achieve nails that are both professional-looking and playful.
In this article, we will explore 10 trendy spring nail ideas for 2026, offering detailed step-by-step instructions, materials needed, and tips for achieving Pinterest-worthy results. Each idea is carefully curated to be on-trend, save-worthy, and beginner-friendly, ensuring you can recreate them whether you’re visiting a salon or doing your nails at home. You’ll discover a mix of floral designs, abstract patterns, pastel color palettes, metallic accents, and innovative textures—all tailored to make your nails stand out this spring.
By the end of this guide, you’ll feel inspired to refresh your manicure routine, experiment with new colors and shapes, and showcase nails that are modern, stylish, and perfect for the spring season. Whether you’re looking for subtle elegance, bold statements, or playful designs, these 10 spring nail ideas for 2026 will elevate your style and make your nails the highlight of any outfit. Get ready to create Pinterest-worthy, trendy spring nails that reflect your personality, creativity, and seasonal flair.
Idea 1: Pastel Gradient Nails
Introduction
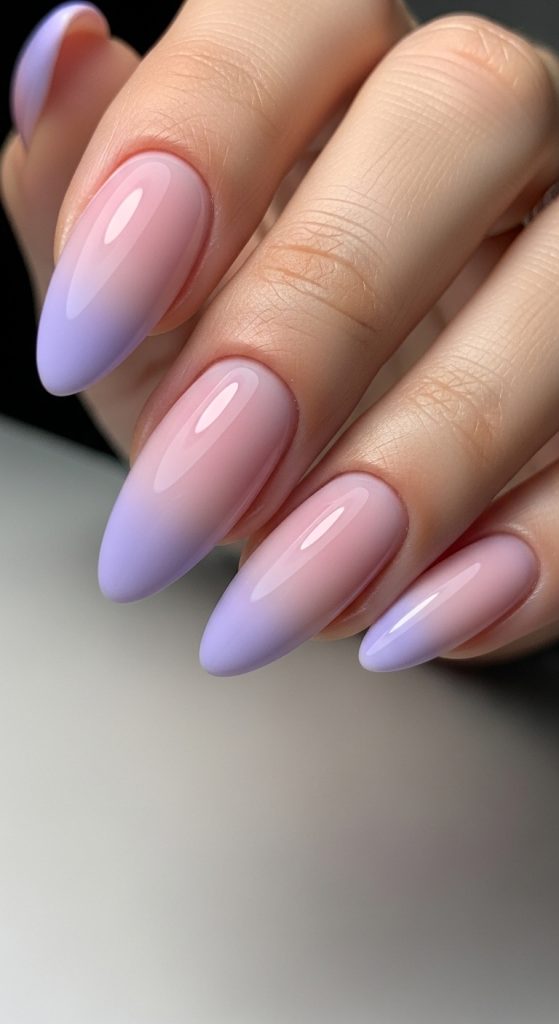
Spring 2026 is all about soft, cheerful colors, and nothing embodies this seasonal vibe better than pastel gradient nails. This design is perfect for anyone looking to showcase a subtle yet elegant look that instantly lifts your style. Gradients—also called ombré nails—blend two or more colors seamlessly from tip to base, giving a dreamy and artistic feel. Pastels like soft pinks, mint greens, lilacs, and pale yellows are trending this spring, reflecting the season’s gentle and refreshing energy. Pastel gradient nails are highly versatile: they suit short or long nails, can be paired with glitter accents, and can be adapted for minimalist or more decorative styles. This design is especially Pinterest-worthy because of its soft visual appeal, making it ideal for social media photos or fashion inspiration boards. Even beginners can recreate this look at home with simple tools, yet the result looks polished and professional, giving nails a fresh, modern spring aesthetic.
Definition/Explanation:
Pastel gradient nails are a manicure style where two or more pastel shades blend seamlessly across the nail, creating a soft transition. The look is ethereal, fresh, and perfect for spring, offering both subtlety and elegance.
Step-by-Step How-to:
- Prep Nails – Clean, file, and buff nails; apply a base coat to protect them.
- Choose Colors – Pick 2–3 complementary pastel shades. Popular 2026 combos include pink-to-lavender or mint-to-yellow.
- Apply Base Color – Paint nails with the lightest color as a base and let dry completely.
- Use a Sponge – Dab a makeup sponge with all selected pastel shades in stripes.
- Apply Gradient – Gently press the sponge onto your nail, blending colors from tip to base. Repeat for opacity.
- Clean Up Edges – Use a small brush and nail polish remover around cuticles.
- Seal the Design – Apply a glossy top coat to smooth gradients and enhance shine.
Materials/Things Needed:
- Pastel nail polishes
- Base coat and top coat
- Makeup sponge or nail gradient sponge
- Nail file and buffer
- Small brush and nail polish remover
Idea 2: Minimalist Line Art Nails
Introduction
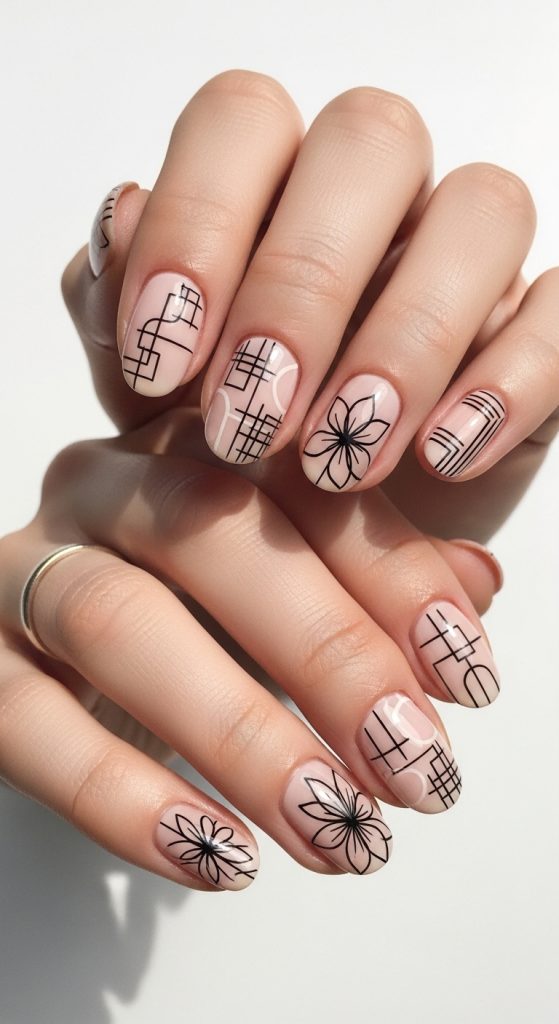
For a chic, modern look, minimalist line art nails are a must-try trend in spring 2026. These designs feature simple, elegant lines drawn over neutral or pastel backgrounds, combining subtlety with style. Perfect for both casual and professional settings, line art nails allow for endless creativity—think abstract shapes, tiny florals, or geometric patterns. The beauty of this trend is its simplicity: even a small accent nail can elevate your entire manicure. Minimalist line art aligns with the spring trend of understated elegance, making nails look artistic without overwhelming the overall look. This style is particularly beginner-friendly because it often requires only one or two accent lines per nail, but with practice, you can create full sets of intricate designs. Its Instagram- and Pinterest-ready appeal comes from the sleek, contemporary aesthetic, making it a favorite among fashion-forward nail enthusiasts.
Definition/Explanation:
Minimalist line art nails use clean, thin lines to create abstract or representational designs over a simple base. The focus is on precision and simplicity, making the nails elegant and trendy.
Step-by-Step How-to:
- Prep Nails – Shape and buff nails, then apply a base coat.
- Select Base Color – Neutral shades like beige, soft pink, or mint work best.
- Choose Design – Decide on abstract shapes, geometric lines, or tiny florals.
- Use a Fine Brush or Nail Pen – Draw thin lines carefully over the nail.
- Add Accent Details – Optional dots, tiny hearts, or minimalistic shapes.
- Seal with Top Coat – Ensure longevity and smooth finish.
- Maintain Simplicity – Less is more; one accent nail can be enough for style impact.
Materials/Things Needed:
- Neutral or pastel nail polishes
- Fine nail art brush or nail pen
- Base coat and top coat
- Nail file and buffer
- Optional dotting tools
Idea 3: Spring Floral Nails
Introduction
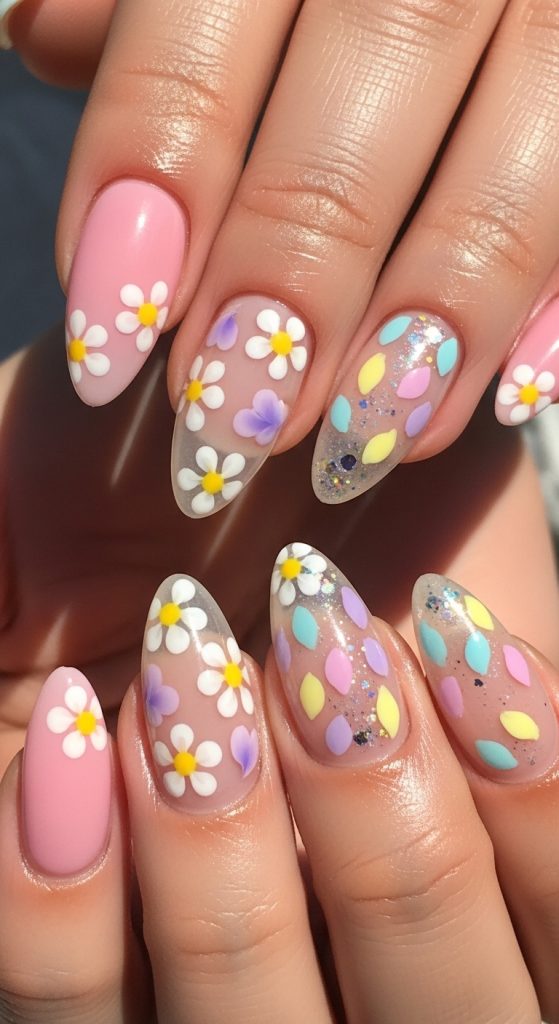
Nothing says spring like floral nails, and in 2026, floral designs are evolving into delicate, detailed mini artworks on nails. From tiny daisies to abstract blossoms, floral nail art adds a cheerful and feminine touch to your spring style. This trend pairs beautifully with pastel and nude bases, creating soft, elegant aesthetics while remaining vibrant and eye-catching. Floral nails are versatile—they can be minimalist for everyday wear or elaborate for special occasions. This spring, layering flowers with subtle glitter, metallic foils, or watercolor techniques is trending, giving nails depth and dimension. The combination of freshness, beauty, and creativity makes floral nail designs highly Pinterest-worthy. With patience and practice, even beginners can recreate charming flowers using dotting tools, fine brushes, or nail stickers for a polished look. Spring floral nails are perfect for anyone seeking cheerful, stylish, and photo-ready designs this season.
Definition/Explanation:
Spring floral nails feature tiny flowers, leaves, or blossoms painted on a nail surface, usually over neutral or pastel backgrounds. The designs range from delicate single flowers to full nail floral patterns.
Step-by-Step How-to:
- Prep Nails – Clean, shape, and buff nails; apply a base coat.
- Choose Base Color – Soft pastel or nude colors provide the perfect canvas.
- Select Flower Colors – Use contrasting shades for petals and centers.
- Use Dotting Tool or Fine Brush – Draw petals in circular patterns.
- Add Leaves or Stems – Paint small green strokes for realism.
- Optional Accents – Add glitter, rhinestones, or metallic foil highlights.
- Seal with Top Coat – Protect artwork and add shine.
Materials/Things Needed:
- Pastel or nude nail polishes
- Dotting tools and fine brushes
- Green nail polish for stems/leaves
- Glitter or metallic foil (optional)
- Base coat and top coat
Idea 4: Negative Space Nails
Introduction
Negative space nails are one of the most trendy and creative looks for spring 2026. This style leaves portions of the nail bare, creating a modern, minimalist effect while adding dimension and interest. Negative space designs can incorporate geometric patterns, half-moons, stripes, or abstract shapes, often paired with pastel or soft metallic colors. The beauty of negative space nails is their versatility: they look polished, trendy, and artistic while keeping nails breathable and lightweight. This design is perfect for those who want modern elegance with a playful twist, ideal for work, casual outings, or photoshoots. Negative space nails are also beginner-friendly when using striping tape or guides, making it easy to create clean, precise shapes. Their sleek, contemporary aesthetic makes them highly Pinterest-worthy for spring, reflecting 2026’s trend toward minimalism mixed with creative detail.
Definition/Explanation:
Negative space nails incorporate sections of the natural nail left unpainted, combined with polish patterns. They highlight the contrast between bare nail and color, creating a sophisticated, artistic effect.
Step-by-Step How-to:
- Prep Nails – File, buff, and apply base coat.
- Choose Nail Shape – Almond, oval, or coffin shapes enhance the effect.
- Select Colors – Soft pastels, metallics, or vibrant shades work well.
- Use Tape or Guides – Apply striping tape to mark negative space areas.
- Paint Design – Apply polish to exposed areas, leaving tape sections bare.
- Remove Tape Carefully – Reveal clean negative space lines.
- Seal with Top Coat – Smooth and protect design.
Materials/Things Needed:
- Pastel or metallic nail polishes
- Striping tape or nail guides
- Base coat and top coat
- Nail file and buffer
Idea 5: Glitter and Holographic Accents
Introduction
Spring nails 2026 are embracing shimmer and sparkle, and glitter and holographic accents are a must-try trend. Adding glitter or holographic polish brings nails to life, reflecting light and creating dynamic, eye-catching effects. This style works perfectly with pastel or neutral bases, allowing glitter accents to pop on tips, cuticles, or as a full nail feature. Holographic finishes, in particular, create a rainbow effect that changes with lighting, adding magic and dimension to your manicure. Glitter and holographic accents are versatile—they can complement minimalist designs, floral patterns, or gradient nails, making your manicure both modern and fun. Even beginners can achieve professional results using pre-made glitter polishes, loose glitter, or nail foils. These accents make nails Pinterest-worthy and shareable, ideal for those who want a glamorous yet playful spring look.
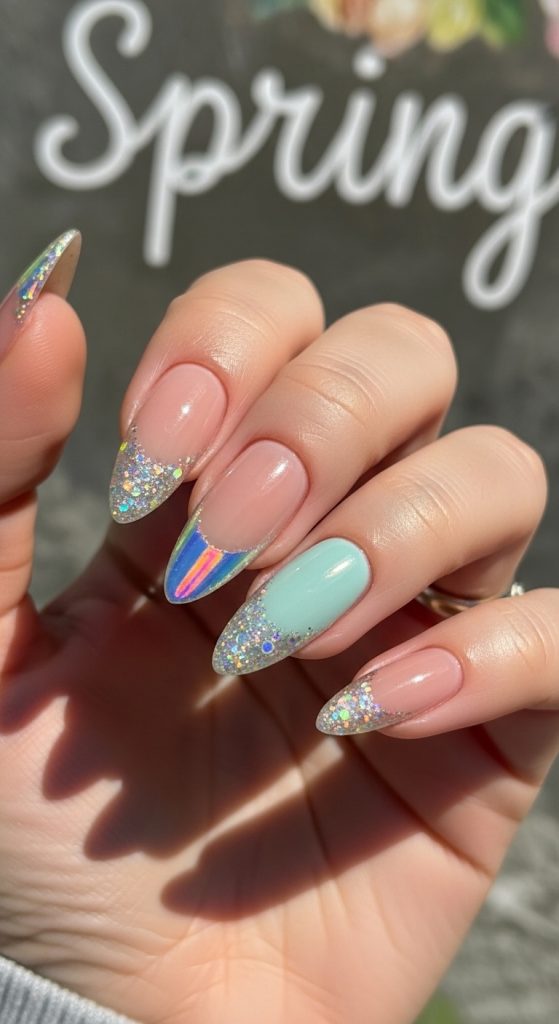
Definition/Explanation:
Glitter and holographic accents involve applying sparkly elements to nails, either as polish, loose glitter, or reflective foils. They add shine, dimension, and visual interest, making nails vibrant and trendy.
Step-by-Step How-to:
- Prep Nails – Clean, shape, and apply base coat.
- Choose Base Color – Pastels, nudes, or soft metallics are ideal.
- Apply Glitter – Use glitter polish on tips, accent nails, or the entire nail.
- Add Holographic Elements – Apply foils or holographic powder for rainbow effect.
- Blend for Smooth Finish – Ensure even coverage for sparkle and shimmer.
- Seal with Top Coat – Protect glitter and holographic details, enhancing shine.
- Optional Accents – Combine with floral, gradient, or line art designs for variety.
Materials/Things Needed:
- Glitter polish or loose glitter
- Holographic nail powder or foils
- Pastel or neutral nail polishes
- Base coat and top coat
- Nail file and buffer
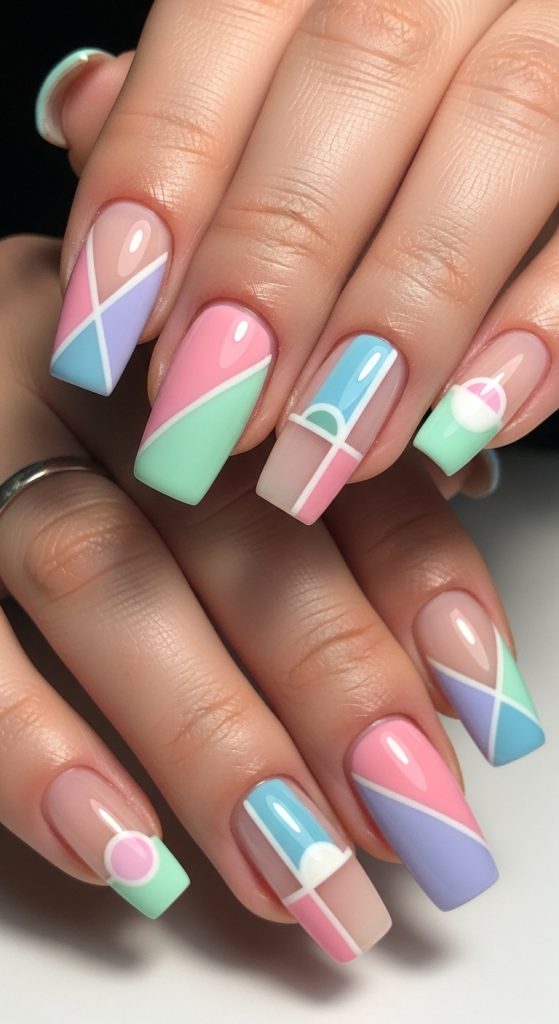
Idea 6: Color-Blocked Nails
Introduction
Color-blocking is a bold, modern way to elevate your spring nails in 2026. Color-blocked nails feature contrasting blocks of color on each nail, creating a geometric, high-fashion effect that is both playful and artistic. This trend is perfect for anyone looking to make a statement while embracing the pastel and vibrant shades of spring. By combining soft pinks, mint greens, lavender, butter yellows, or even brighter neon pops, you can create a manicure that is visually dynamic and Instagram-worthy. Color-blocking allows for creativity and versatility: you can vary colors, shapes, or block sizes for a custom look. This style pairs well with minimalist line accents or glitter tips for added flair. Color-blocked nails are beginner-friendly using striping tape or nail guides, making it accessible even for DIY enthusiasts. Pinterest boards are full of inspiration for this trend because it perfectly balances artistic expression and seasonal charm, making it a must-try manicure for spring 2026.

Definition/Explanation:
Color-blocked nails use two or more contrasting colors in distinct, geometric sections on a single nail. The result is bold, modern, and highly visual, offering a playful yet polished spring look.
Step-by-Step How-to:
- Prep Nails – Clean, file, and buff nails; apply a base coat.
- Select Colors – Pick 2–4 complementary or contrasting shades.
- Use Striping Tape – Mark sections of the nail for color blocks.
- Apply Colors – Paint each block separately, allowing drying between colors.
- Remove Tape Carefully – Reveal crisp, geometric lines.
- Optional Accents – Add thin lines or glitter to enhance contrast.
- Seal with Top Coat – Smooth and protect the design.
Materials/Things Needed:
- 2–4 nail polish colors
- Striping tape or nail guides
- Base coat and top coat
- Nail file and buffer
- Optional glitter or line accents
Idea 7: French Tip with a Twist
Introduction
The classic French manicure is reinvented for spring 2026 with playful twists. Traditional white tips are replaced with pastel, neon, or metallic hues, often paired with subtle embellishments like tiny florals, glitter, or line art. This trend combines elegance with creativity, giving nails a polished look while staying modern and playful. French-tip variations are perfect for work, casual outings, or special events because they balance sophistication and seasonal charm. In 2026, nail artists are experimenting with diagonal tips, asymmetrical designs, or half-moon accents to create a unique twist on the classic style. The versatility of French-tip twists makes them beginner-friendly with basic tools, while still offering Pinterest-worthy results. This design is ideal for those who want sophisticated nails with a playful spring vibe, capturing the essence of 2026 trends.
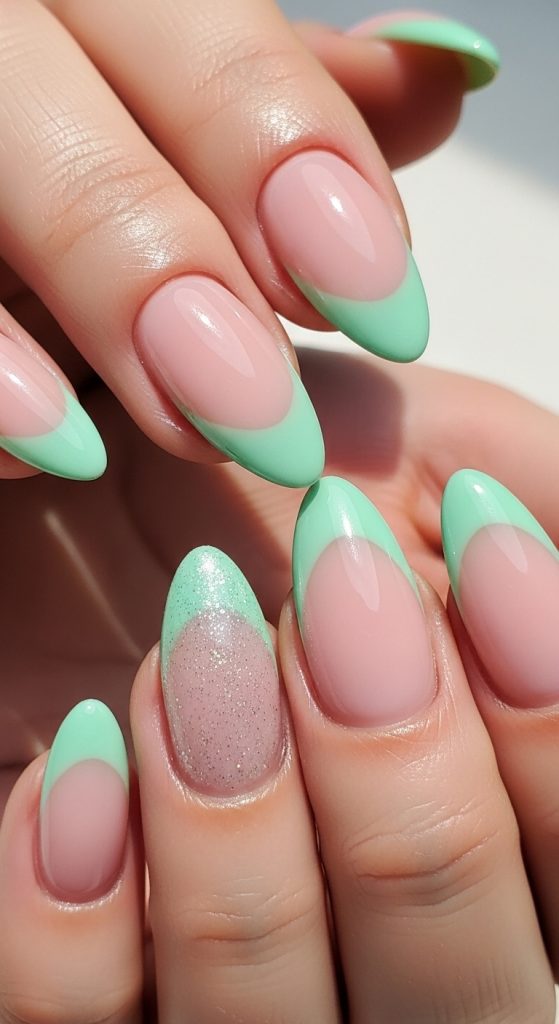
Definition/Explanation:
French-tip nails with a twist update the classic manicure by incorporating colors, patterns, or asymmetrical designs at the tip. They retain elegance while adding playful, modern flair.
Step-by-Step How-to:
- Prep Nails – Shape, buff, and apply a base coat.
- Choose Tip Color – Select pastel, neon, or metallic polish.
- Use Guides or Tape – Mark tips for a clean edge.
- Paint Tips – Apply color carefully, ensuring even coverage.
- Optional Embellishments – Add glitter, tiny florals, or line accents.
- Remove Guides Carefully – Reveal crisp tips.
- Seal with Top Coat – Protect polish and add shine.
Materials/Things Needed:
- Base coat and top coat
- Pastel, neon, or metallic nail polish
- Nail guides or striping tape
- Nail file and buffer
- Optional glitter or floral accents
Idea 8: Marble Effect Nails
Introduction
Marble effect nails are a sophisticated and Pinterest-worthy trend for spring 2026. This style mimics natural stone patterns, combining multiple colors swirled together to create a unique, high-fashion look. Spring trends favor soft pastels, white, and neutral tones with subtle metallic or iridescent accents to mimic marble’s depth. Marble nails are ideal for anyone seeking a professional yet artistic manicure, as each nail is unique, and the design adds texture and visual interest. DIY enthusiasts can achieve this look at home using simple techniques like water marbling or using a brush to swirl polish on the nail. Marble effect nails pair beautifully with glitter tips or negative space accents for added creativity. This trend is perfect for social media, Pinterest boards, or special occasions, offering a sleek, stylish, and modern spring look.
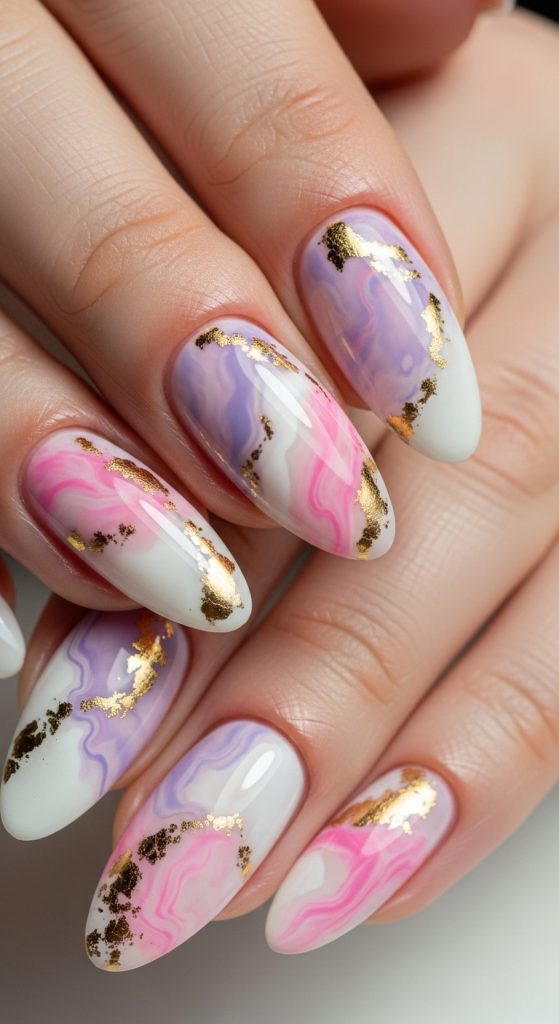
Definition/Explanation:
Marble nails replicate the swirling, textured look of natural stone using polish blending techniques. The effect creates a sophisticated, artistic, and modern appearance.
Step-by-Step How-to:
- Prep Nails – Clean, shape, and buff nails; apply base coat.
- Select Colors – Pick 2–4 complementary pastel or neutral colors.
- Apply Base Color – Paint nails in a light shade.
- Create Marble Effect – Drop different colors onto a sponge or brush, swirl gently, and press onto nail.
- Optional Metallic Accents – Add gold or silver foil for extra dimension.
- Clean Edges – Remove excess polish from cuticles.
- Seal with Top Coat – Protect design and enhance shine.
Materials/Things Needed:
- Base coat and top coat
- 2–4 pastel or neutral nail polishes
- Small brush or makeup sponge
- Gold/silver foil (optional)
- Nail file and buffer
Idea 9: Polka Dot Nails
Introduction
Polka dots are playful, timeless, and perfect for spring 2026 nails. This trend combines fun patterns with modern twists, using pastel or contrasting colors for a cheerful effect. Polka dots can be bold or subtle, large or tiny, and are versatile for all nail lengths and shapes. Spring 2026 favors asymmetrical dot arrangements, varying sizes, and mixing metallic dots with pastel bases. This design is beginner-friendly, making it ideal for DIY enthusiasts, and works for casual wear, work, or photoshoots. Polka dot nails are highly Pinterest-worthy because they are colorful, fun, and visually appealing. Their simplicity allows for creativity—dots can be arranged in lines, clusters, or random patterns to suit your personality. With the right tools, anyone can achieve a polished and trendy spring look at home, making polka dot nails a must-try for 2026.
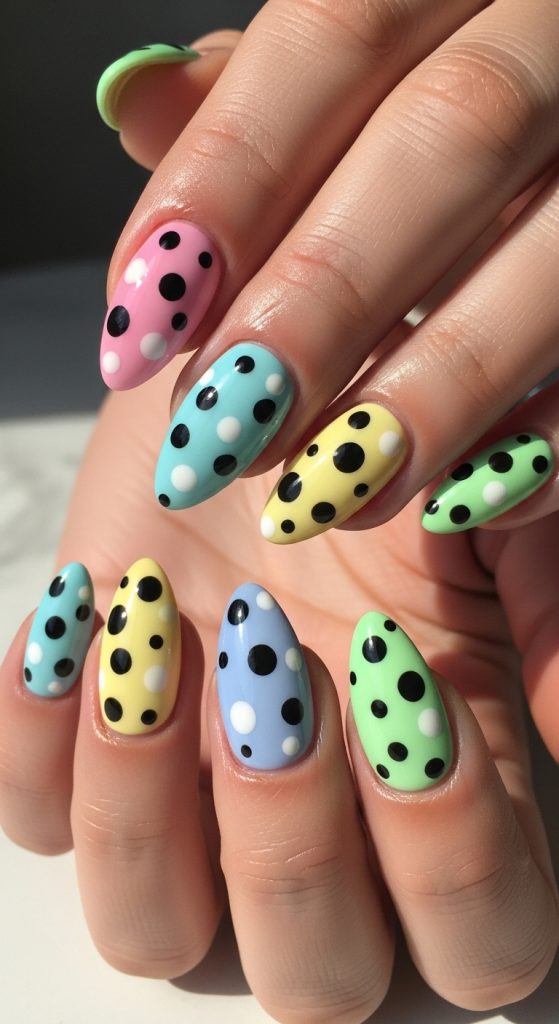
Definition/Explanation:
Polka dot nails feature circular dots arranged over a base color, ranging from small and subtle to large and playful. The design adds fun, personality, and seasonal flair to nails.
Step-by-Step How-to:
- Prep Nails – Clean, file, buff, and apply a base coat.
- Choose Base Color – Soft pastel shades work best for spring.
- Select Dot Colors – Pick contrasting or complementary colors.
- Use Dotting Tool or Toothpick – Dip into polish and apply dots evenly.
- Arrange Patterns – Cluster, line, or scatter dots as desired.
- Optional Accents – Add glitter, tiny flowers, or metallic dots.
- Seal with Top Coat – Protect design and add shine.
Materials/Things Needed:
- Pastel base polish
- Contrasting polish for dots
- Dotting tool, toothpick, or fine brush
- Base coat and top coat
- Nail file and buffer
Idea 10: Cute Animal-Inspired Nails
Introduction
Animal-inspired nails are playful, whimsical, and perfect for spring 2026 trends. From tiny bunnies, chicks, and kittens to abstract paw prints or cartoon-inspired motifs, these designs capture the joy and fun of the season. Spring animal nails pair beautifully with pastel backgrounds, creating a soft, vibrant, and cheerful aesthetic. This trend is ideal for casual wear, festivals, or Pinterest and Instagram inspiration. Designs can range from full nail illustrations to small accent nails, making them versatile for different skill levels. Beginners can use nail stickers, stamps, or simple brush techniques to create cute animal motifs. The playful nature of these designs makes them highly save-worthy, reflecting spring’s lighthearted spirit while offering endless creative opportunities. Animal-inspired nails are a fun way to experiment with color, shape, and miniature art while staying trendy and modern.
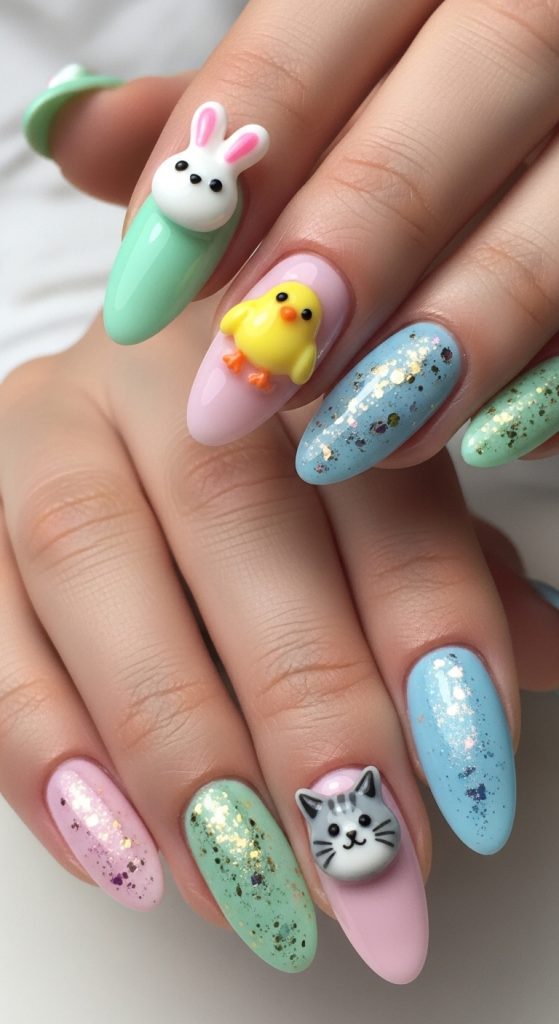
Definition/Explanation:
Animal-inspired nails feature motifs of animals, paw prints, or cartoonish creatures over nail surfaces, typically paired with pastel or neutral backgrounds. These designs are playful, creative, and seasonal.
Step-by-Step How-to:
- Prep Nails – Clean, shape, and apply base coat.
- Choose Base Color – Pastels or neutral shades work well.
- Select Animal Design – Tiny bunnies, kittens, or abstract prints.
- Use Nail Stickers, Stamps, or Brushes – Apply chosen animal motif.
- Add Details – Eyes, noses, or accents with fine brush or dotting tool.
- Optional Embellishments – Add glitter, tiny flowers, or line accents.
- Seal with Top Coat – Protect design and enhance shine.
Materials/Things Needed:
- Pastel or neutral base polish
- Nail stickers or stamping plates
- Fine nail brush or dotting tool
- Base coat and top coat
- Nail file and buffer