
Step into a world filled with wild flower fields, winding stone pathways, and gentle rivers. Building a cottagecore garden in Minecraft brings peaceful rural energy to your world. It connects your cozy homes with hidden forest clearings and farmsteads. Every garden bridge creates a fairytale crossing over quiet streams and muddy banks. You will feel instant tranquility as you craft these organic structures. The natural surroundings make every wooden plank feel alive and purposeful.
Unlocking the Potential of Cottagecore Block Palettes
Cottagecore architecture thrives on warm, natural materials and rich floral textures. You can combine pale oak wood with weathered spruce or dark oak timbers. Blending stone bricks with mossy cobblestone creates authentic ancient foundations quickly. Every single bridge design offers endless creative options for your survival landscape. Mixing different wood species gives your structures a weathered, hand-built aesthetic. Your world will transform into a picturesque countryside sanctuary overnight.

Setting the Mood for Cozy Forest Water Crossings
Creating a cozy atmosphere requires careful block choices and strategic placement ideas. You can blend spruce slabs with stripped oak logs or dark deepslate supports. Adding hanging lanterns creates a warm, inviting glow at dusk. Lighting plays a major role in setting a calm, peaceful tone. Redstone torches or soul lanterns work wonderfully along foggy riverbanks. Soft ambient light reflects beautifully across quiet river surfaces late at night.
Mastering the Harmony of Curves and Overgrown Foliage
A proper fairytale bridge uses stepped slabs and stairs to form gentle arches. Mixing oak leaves with flowering azaleas creates an overgrown, aged look fast. Every block choice adds extra structural depth to your river crossing. Think about how vines and moss reclaim wooden beams over time. Texture variations keep simple wooden walkways from looking flat or boring. Organic curves break the rigid grid system of default blocks effortlessly.
Enhancing Textures with Natural Garden Flora
Realistic natural details bring your cottagecore garden builds to life instantly. Spore blossoms cast soft, drifting green particles over calm water surfaces. Stacked oak fences create delicate handrails and support posts effortlessly. You can build incredible natural garden scenes using simple decorative details. Wild flowers and leaf blocks break up straight riverlines with rustic charm. Surrounding flower beds make every build feel deeply connected to nature.
Crafting Stories Through Weathered Timber and Stone
Weathered materials make garden bridges look historic, rustic, and deeply charming. Break a few wood slabs to show natural timber wear over time. Let weeping vines and moss cover lower stone support pillars completely. Your builds will instantly look decades old and naturally integrated. Scatter loose leaf carpet along walkways for fallen foliage. Broken pathways tell silent stories of ancient travelers and long-forgotten journeys.
Idea 1: The Flowering Azalea Arch Bridge
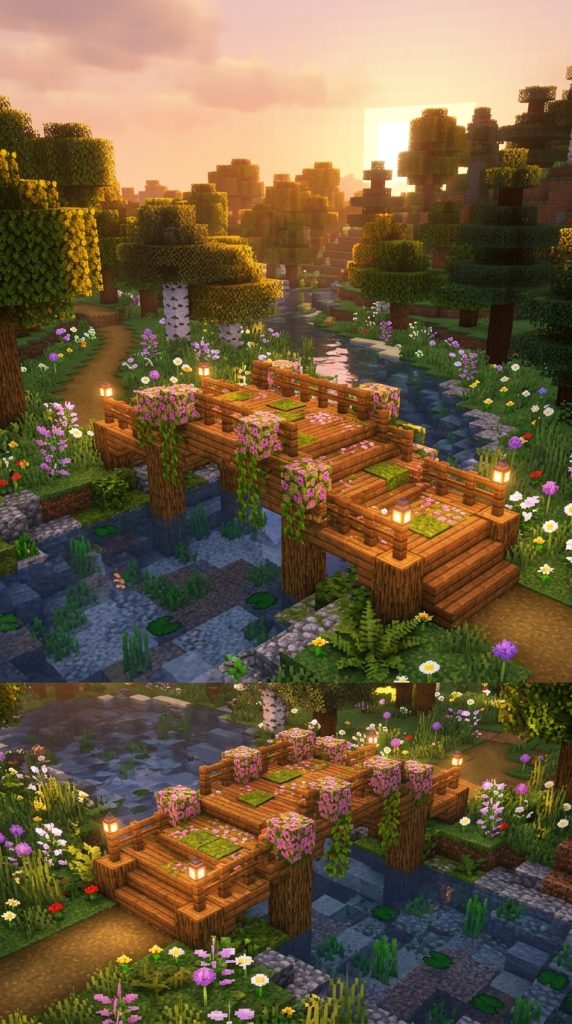
A Delicate Floral Crossing Over Gentle Streams
Imagine a gentle wooden bridge arching gracefully over a winding forest creek. Its curved frame is built using warm spruce wood and stripped oak. Overgrown flowering azalea bushes cascade down its sides in bright pink hues. It looks completely nestled inside a wild, sunlit flower meadow. Pink petals drift down onto the calm water below every afternoon. The gentle scent of blossoms seems to hang in the air.
How to Build the Curved Wooden Foundation Frame
Start by laying a gentle stone brick foundation on both riverbanks. Frame the main bridge curve using sturdy stripped oak logs underwater. Fill the walkway surface using spruce slabs and oak wood stairs. Replace some solid floor blocks with spruce trapdoors for extra texture. Keep the total bridge width around three or four blocks wide. This builds a sturdy base for your cozy garden walkway.
Crafting the Overgrown and Flowering Side Handrails
Construct low side railings using spruce fences along the walkway edges. Place flowering azalea leaf blocks directly on top of the fence posts. Attach weeping vines underneath the bridge arch to trail into water. Add oak trapdoors along the side log beams for extra detail. Let the leaf blocks spill onto the riverbanks for natural blending. The bridge will look completely wrapped in vibrant spring blooms.
Final Touches for an Enchanted Garden Ambiance
Place glowing lanterns on the outer fence posts for night safety. Scatter pink petals and moss carpet along the wooden floorboards. Place a few lily pads on the water surface near supports. Your flowering azalea bridge is now finished and fully detailed. Add pointed dripstone along underwater stone bases for pebble details. Travelers will love crossing this dreamy floral river bridge.
Detailed Steps for Shoreline Pathways and Flower Beds
Step onto the riverbank to build a winding garden approach path. Lay down path blocks mixed with coarse dirt and mossy cobblestone. Frame the path edges using wild alliums, oxeye daisies, and dandelions. Place a wooden bench using spruce stairs nearby under a tree. Add a single lantern hanging from an overhanging oak tree branch.
Fill the surrounding garden space with dense, leafy foliage clusters. Plant sweet berry bushes along the muddy water edges for detail. Position dark oak trapdoors as low retaining walls along dirt banks. Add moss carpet patches covering flat stone surfaces near the path. Scatter oak buttons across the wooden walkway for fallen acorns. Your azalea arch bridge now looks completely organic and charming.
Required Materials and Block List
- Spruce Slabs: 6 Stacks
- Spruce Stairs: 5 Stacks
- Stripped Oak Logs: 4 Stacks
- Spruce Fences: 4 Stacks
- Flowering Azalea Leaves: 5 Stacks
- Mossy Cobblestone: 4 Stacks
- Spruce Trapdoors: 3 Stacks
- Lanterns: 2 Stacks
- Pink Petals: 3 Stacks
- Weeping Vines: 2 Stacks
Idea 2: The Old Mossy Stone Arch Bridge

Ancient Weathered Stone Covered in Soft Green Vines
An ancient stone bridge brings timeless fairytale history to your world. Combining grey stone bricks with mossy variants creates rich age contrast. The pale leaves look like ancient climbing ivy vines trailing down. It creates a historic monument spanning a quiet forest river channel. Wind rustles softly through the dense leaf canopy overhead daily. The ancient stonework stands strong despite centuries of steady water erosion.
Building the Weathered Stone Arch Base Structure
Mark out a gentle curve across the water using stone bricks. Build uneven support pillars anchored firmly into the muddy riverbed below. Mix mossy stone bricks randomly into the main arch underside. Leave wide openings under the arch for small wooden boats to pass. Make the base walls at least two blocks thick for strength. Thicker stone arches give the bridge a heavy, historic visual feel.
Adding Structural Wear and Overgrown Vegetation
Place oak leaf blocks along the upper stone handrail edges. Let green vines trail down from the central arch underside pillars. Add mossy cobblestone slabs along the worn walking path surface. Place coarse dirt patches around the shore foundation entry points. Mix in cracked stone bricks to represent centuries of natural weathering. Nature is slowly reclaiming this ancient stone crossing point.
Decorating the Bridge with Mystical Garden Lighting
Position hanging soul lanterns under the central stone arch frame. Place a single carved pumpkin lantern near the entry path. Surround the bridge base with glowing sea pickles underwater nearby. Scatter bone block fragments into deep water patches for ancient debris. Add a few ruined stone brick walls along the path approaches. Historic mystery will surround every step across this stone arch.
Expanding the Riverbanks and Water Detail
Build fallen stone pillars resting along the grassy riverbank edges. Use chiseled stone bricks for decorative pillar end caps. Wrap green vines around these fallen stone columns on land. Place water source blocks in dirt cracks for small muddy puddles. Add lily pads floating on the quiet river surface nearby.
Surround the bridge with tall, leafy birch trees and azaleas. Place spruce fences as simple wooden boundary posts along roads. Scatter gravel and stone buttons across the path for loose pebbles. Use moss carpet to cover flat stone brick surfaces smoothly. Add glow lichen creeping along the lowest stone foundation blocks. Your mossy stone arch bridge is now completely detailed today.
Required Materials and Block List
- Stone Bricks: 8 Stacks
- Mossy Stone Bricks: 6 Stacks
- Cracked Stone Bricks: 4 Stacks
- Mossy Cobblestone Slabs: 5 Stacks
- Oak Leaves: 5 Stacks
- Green Vines: 4 Stacks
- Coarse Dirt: 4 Stacks
- Soul Lanterns: 4 Blocks
- Glow Lichen: 3 Stacks
- Gravel: 4 Stacks
Idea 3: The Suspended Rope and Plank Bridge

Swaying Timber Walkways Crossing Wide Forest Ravines
Crossing a wide forest ravine requires a rustic suspended bridge. A spruce plank walkway provides a flexible, swaying path across. Dark oak fence posts give it strong anchor points on both cliffs. Hanging vines drape down into the shadowy forest valley far below. Morning mist settles over the wooden planks early every day. Adventurers will cross this swinging bridge with thrilling visual caution. The deep chasm below amplifies the sense of wild wilderness exploration.
Constructing the Heavy Cliff Anchor Posts
Build four heavy support posts on opposite cliff edges using oak logs. Use dark oak fence blocks to form strong anchor framing posts. Space the anchor posts evenly to hold the main suspended ropes. Connect the anchor posts together using dark oak trapdoors for bracing. Make sure the posts extend deep into the grassy cliff soil. Solid log anchors make the bridge feel visually secure and balanced.
Laying the Curved Suspended Wooden Walkway
Span the wide ravine gap using spruce wood slabs and planks. Curve the path gently downward towards the absolute center point. Use spruce fences for side handrail supports along the walkway. Place oak trapdoors along the outer floor edges for safety rails. Mix stripped spruce logs into the center walkway floor section. The gentle sagging curve adds authentic realism to the structure.
Weathering the Walkway with Hanging Vines and Leaves
Attach green vines under every single wooden bridge slab section. Place moss carpet blocks directly onto the spruce plank walkway floor. Drape oak leaves over the side handrail post tops. Add hanging lanterns along the fence path for night lighting. The warm flames reflect softly on the dark forest floor below. Crossing becomes an exciting, atmospheric gameplay experience in your world.
Adding Structural Wear to the Timber Frame
Remove a few wooden slabs to create small rustic floor gaps. Place dark oak trapdoors beneath gaps as weathered support repair boards. Wrap green vines tightly around all cliff anchor log posts. Place sweet berry bushes along the cliff edges surrounding anchor logs. Add pointed dripstone hanging underneath the central bridge arch frame.
Place glowing lichen on the cliffside rock faces nearby. Scatter button detailing across the wooden log anchor sides. Build a small wooden lookout post near the bridge entrance. Use dark oak fences and spruce slabs for the shelter. Light the post with a single flickering warm copper lantern. Your suspended rope bridge is complete and ready for travel.
Required Materials and Block List
- Oak Logs: 6 Stacks
- Dark Oak Fences: 5 Stacks
- Spruce Planks: 8 Stacks
- Spruce Slabs: 6 Stacks
- Spruce Fences: 5 Stacks
- Green Vines: 6 Stacks
- Moss Carpet: 3 Stacks
- Lanterns: 4 Blocks
- Dark Oak Trapdoors: 4 Stacks
- Pointed Dripstone: 2 Stacks
Idea 4: The Cherry Blossom Canopy Bridge
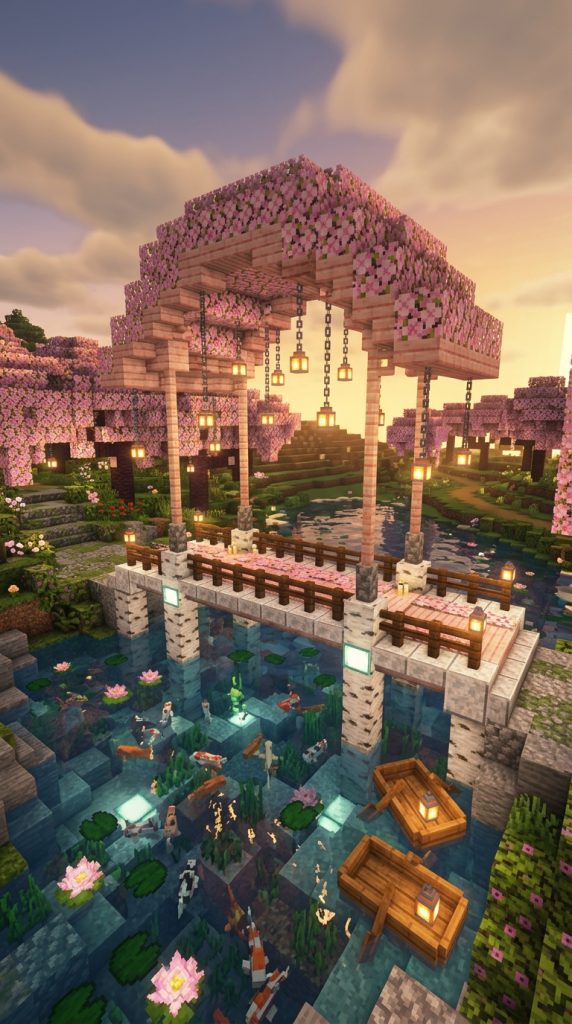
Pastel Pink Petals Framing a Light Birch Wooden Path
A cherry blossom bridge brings dreamy pastel colors to your garden. It stands suspended over a peaceful, crystal-clear koi pond. Built with light birch wood and pink cherry timber, it glows. It looks like a romantic crossing for storybook garden paths. Silence hangs heavy around its blooming pink leaf canopy overhead. The pink roof cuts dramatically through green forest foliage beautifully. Sunlight filters through pink leaves to create magical speckled patterns.
Framing the Light Birch Bridge Foundations
Create a low arch base using polished diorite and stone slabs. Raise four main corner posts using stripped birch wood logs. Fill the floor walkway using light birch planks and slabs. Leave open side railings for clear views of the water. Build the base at least three blocks wide across the stream. Light wood choices keep the structure looking airy and graceful.
Building the Sweeping Pink Cherry Leaf Roof
Extend the upper roof frame using soft pink cherry wood stairs. Build a curved roof canopy using dense cherry leaf blocks above. Construct a pointed roof peak using cherry wood slabs along top. Place cherry fence posts along the sides for delicate support columns. The pink leaf canopy gives the bridge an enchanting appearance. It can be seen from far away across garden flower fields.
Adding Dreamy Petal Details and Water Features
Cover the surrounding banks with floating pink petal carpet blocks. Replace lower stone blocks with mossy diorite for rustic moisture. Scatter cherry leaf blocks around the wooden bridge foundation base. Hang glowing paper lanterns from the pink leaf roof eaves. The lanterns cast a soft light down onto the water below. Your cherry canopy bridge stands proud over garden waters.
Decorating Surrounding Koi Ponds and Flower Beds
Build shallow pond edges using smooth quartz and diorite slabs. Place glowing sea pickles under water for hidden blue light. Add pink lotus blossoms using pink tulip items in item frames. Place sugar cane stalks growing along muddy pond bank edges. Add a small wooden boat floating near the bridge landing.
Decorate the birch handrails with hanging pink petal garlands. Attach iron chains holding swinging lanterns from the roof peak. Place spore blossoms inside the pink leaf roof canopy above. The blossoms will drop soft green particles down constantly onto visitors. Surround the bridge entry with blooming peony and lilac bushes. Your cherry blossom canopy bridge is now fully open.
Required Materials and Block List
- Stripped Birch Logs: 5 Stacks
- Birch Planks: 6 Stacks
- Birch Slabs: 5 Stacks
- Cherry Wood Stairs: 6 Stacks
- Cherry Leaves: 8 Stacks
- Pink Petals: 6 Stacks
- Polished Diorite: 4 Stacks
- Sea Pickles: 3 Stacks
- Spore Blossoms: 2 Blocks
- Lanterns: 4 Blocks
Idea 5: The Log Cabin Covered Bridge
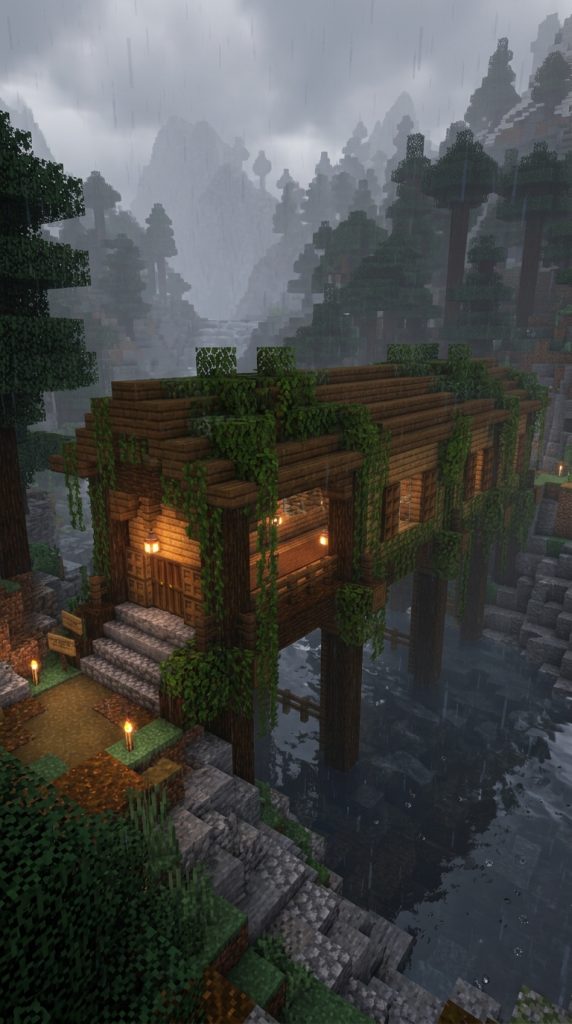
A Cozy Enclosed Timber Tunnel Protecting Travelers from Rain
Covered timber bridges bring rustic mountain warmth to river crossings. Dark oak logs mixed with spruce planks create heavy warmth. The enclosed roof keeps travelers dry during heavy rainstorms. It warns players of deep wilderness terrain stretching ahead beyond rivers. Cool mountain air rushes through open wooden side windows continuously. Warm indoor lighting invites travelers inside for safe crossing nights. Echoing footsteps create a comforting sound inside the wooden hallway.
Carving out the Heavy Timber Bridge Frame
Build a heavy stone foundation along both muddy riverbanks. Frame the outer bridge structure using thick dark oak logs. Use stripped spruce wood logs to shape a sturdy rectangular tunnel. Line the inner walkway floor with dark oak planks and slabs. The heavy log frame creates a completely enclosed bridge tunnel. Darkness inside is softened by warm hanging wall lanterns throughout.
Detailing the Wooden Side Windows and Roof
Build side window openings using spruce fence grates along walls. Place spruce trapdoors as openable wooden window shutters outside. Surround the log frame with dense green oak leaf blocks. Hang long strands of green vines across the roof entry. The dark wood roof contrasts nicely with bright forest leaves. The bridge looks like a rustic mountain cabin over water.
Illuminating the Cozy Enclosed Walkway Interior
Lay an interior path using spruce wood planks and brown carpet. Place iron lantern posts along the inner wooden walkway walls. Scatter barrel blocks inside side alcoves for rustic bridge storage. Add oak leaf blocks climbing up the outer log walls. The green leaves soften the heavy dark oak timber edges. Your covered bridge offers total protection from wild mountain weather.
Building Riverbank Bench Seats and Fishing Spots
Place wooden bench seating outside near the covered entrance doors. Use spruce stairs and trapdoors for comfortable river benches. Wrap green vines over the outer wooden bench backrests smoothly. Scatter fish items inside item frames on inner wall posts. Add campfire smoke rising through a small stone roof chimney.
Construct wooden support pillars extending deep into riverbed mud below. Use stripped oak logs to form these sturdy submerged pillars. Hang iron lanterns from chains under the bridge outer floor. Place sculk veins creeping along lower damp stone riverbank blocks. Add cobwebs along the top inner roof support beams. Your cozy log cabin covered bridge is fully completed now.
Required Materials and Block List
- Dark Oak Logs: 8 Stacks
- Stripped Spruce Logs: 6 Stacks
- Spruce Planks: 8 Stacks
- Spruce Trapdoors: 5 Stacks
- Spruce Fences: 4 Stacks
- Oak Leaves: 6 Stacks
- Green Vines: 4 Stacks
- Brown Carpet: 4 Stacks
- Lanterns: 6 Blocks
- Barrels: 4 Blocks
Idea 6: The Sunken Garden Stepping Stone Crossing

Natural Stone Slabs and Lily Pads Merging with River Waters
A stepping stone crossing offers a low-profile, natural river pathway. Weathered stone slabs sit just above shallow, flowing water levels. The surrounding stream is bursting with water lilies and moss. Nature completely integrates this path into the river landscape effortlessly. Gentle water currents lap softly against smooth stone stepping blocks. Crossing feels like a playful stroll through an untouched spring brook. Small freshwater fish swim curiously between the submerged stepping stones.
Constructing the Weathered Stone Stepping Blocks
Outline the stepping path layout using smooth stone and cobble blocks. Place individual stone slabs spaced one block apart across water. Mix mossy cobblestone slabs randomly into the stepping block path. Create a zigzagging pathway shape across the shallow river channel. The low stone slabs sit right at the water line surface. Stepping between stones creates an interactive, charming garden crossing experience.
Adding Natural River Flora and Water Lilies
Fill the surrounding shallow water using dense lily pad clusters. Place sea pickles underwater beside stepping stones for subtle light. Let green sea kelp trail down beneath flowing river water currents. Add mossy cobblestone blocks popping out of nearby muddy banks. Nature completely envelops the low stepping stone path across water. The simple layout preserves natural river beauty completely today.
Decorating the Riverbanks with Lush Wildflowers
Cover the surrounding grass riverbanks with soft moss carpet blocks. Plant bright oxeye daisies, poppies, and ferns along mud edges. Add sculk sensor blocks hidden nearby for subtle water sounds. Place campfires under trapdoors nearby for soft morning mist rising. The misty riverbank stays filled with peaceful, enchanting garden ambiance. Wild flora thrives along this untouched, natural stepping stone crossing.
Detailing Shoreline Resting Spots and Wooden Benches
Build a small wooden bench on the bank using birch slabs. Place flower pots holding red tulips beside the bench. Add brewing stands with water bottles on low wooden tables. Scatter glass bottles across the lush grass bank near water. Hang paper lanterns from low birch tree branches above paths.
Construct mossy stone stepping steps leading down to river water. Place spore blossoms high in nearby oak tree branches above. Wrap green vines heavily around all overhanging tree trunks. Add glowing glow lichen along underwater stepping stone sides. Place fish swimming freely around the stepping stone paths today. Your sunken garden stepping stone crossing is now fully open.
Required Materials and Block List
- Mossy Cobblestone Slabs: 6 Stacks
- Smooth Stone Slabs: 5 Stacks
- Lily Pads: 8 Stacks
- Moss Carpet: 6 Stacks
- Sea Pickles: 4 Stacks
- Oxeye Daisies: 4 Stacks
- Ferns: 4 Stacks
- Birch Slabs: 3 Stacks
- Flower Pots: 3 Blocks
- Spore Blossoms: 2 Blocks
Idea 7: The Fairycore Mushroom Bridge

Vibrant Red and Brown Mushroom Caps Forming a Magical Arch
A fairytale mushroom bridge brings whimsical magic to fantasy gardens. Giant red and brown mushroom caps form colorful stepping arches over water. Glowing lichen and cave vines illuminate the damp, mystical river below. It looks like a magical pathway built by forest spirits. Glowing particles drift softly through the cool, magical air nightly. Wandering players will feel transported into an enchanted fairy realm. Mystical spores create a constant glowing atmosphere under dark canopies.
Building the Giant Mushroom Cap Arch Foundation
Erect two giant mushroom stem columns on opposite riverbanks. Use mushroom stem blocks to form thick, curving white support legs. Place large red mushroom blocks forming an arched cap walkway. Connect the red mushroom caps together across the central river gap. The bright red cap bridge creates an instantly iconic fairytale silhouette. The rounded mushroom shapes feel soft, playful, and deeply magical.
Constructing the White Stem Handrails and Windows
Place mushroom stem blocks along cap sides for low handrails. Cut small window openings into the red mushroom cap sides. Frame the openings using spruce trapdoors as rustic wooden shutters. Add spore blossoms to the underside of the red caps. Glowing green particles drop down constantly over the river water below. The magical particles add constant visual motion to the structure.
Adding Glowing Vegetation and Mystical Lighting
Wrap glowing cave vines with glowberries around mushroom stem supports. Place red and brown mini-mushrooms along the wooden cap edges. Scatter moss carpet across the red mushroom walkway floor surface. Add copper lanterns along the cap path for soft golden light. The glowing berries cast warm reflections onto the water below. Your mushroom bridge provides an unforgettable fairytale river crossing today.
Crafting Surrounding Fairy Ring Clearing Details
Build a circle of mini-mushrooms on the grassy riverbank edge. Place shroomlight blocks hidden beneath moss carpet for soft ground light. Add pink petals scattered across the surrounding grass cleared area. Hang iron chains holding soul lanterns from overhanging tree branches. Place a small wooden fairy house nearby built into a tree trunk.
Lay a path using mud bricks and coarse dirt leading up to caps. Use spruce slabs for small stepping steps up cap stems. Place sweet berry bushes along outer fairy ring clearing edges. Add cobwebs inside hollow stem bases for subtle aged texture. Surround the river area with tall, shadowy dark oak trees. Your fairytale mushroom bridge is completely ready for magic.
Required Materials and Block List
- Red Mushroom Blocks: 8 Stacks
- Mushroom Stem Blocks: 6 Stacks
- Cave Vines with Glowberries: 5 Stacks
- Spore Blossoms: 2 Blocks
- Moss Carpet: 5 Stacks
- Shroomlights: 3 Blocks
- Mud Bricks: 4 Stacks
- Spruce Trapdoors: 4 Stacks
- Copper Lanterns: 4 Blocks
- Pink Petals: 4 Stacks
Idea 8: The Rustic Log Drawbridge and Winch
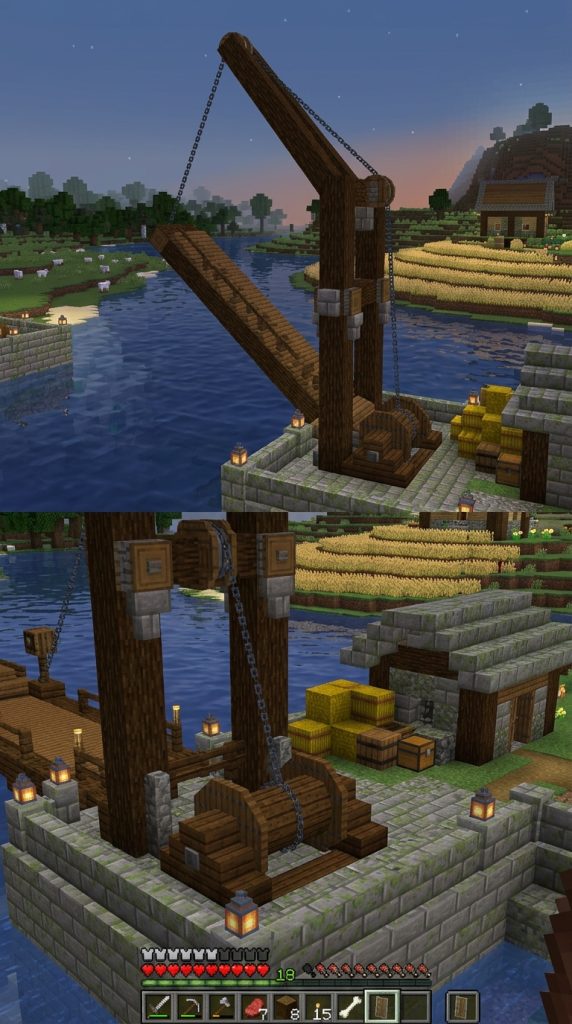
A Functional Country Bridge Raising for Passing River Boats
A rustic wooden drawbridge adds interactive farm life to riverways. Heavy oak timber logs form a thick, raiseable plank deck. A simple wooden winch mechanism sits anchored on the shore. It provides a practical, country transit bridge with working farm charm. You can imagine farmers raising the bridge for passing hay barges. Daily life moves at a calm, productive pace along riverbanks. The heavy timber winch gears give a feeling of functional machinery.
Building the Heavy Shore Anchor Platform
Locate a river channel bordering open wheat fields and pastures. Build a heavy stone anchor abutment using mossy stone bricks. Extend a thick wooden log frame using stripped dark oak. Support the drawbridge hinge using thick oak log posts underneath. Make the shore anchor platform wide enough for loaded farm carts. Solid stone foundations prevent heavy drawbridges from sagging over time.
Constructing the Raised Wooden Drawbridge Deck
Build the sloped drawbridge deck using dark oak wood slabs. Layer spruce wood planks directly on top of the log frame. Add spruce trapdoors along outer deck edges as side bumpers. Angle the bridge deck slightly upward toward the open water center. Use dark oak fences to create heavy hinge joints at bases. The angled wooden deck looks ready to raise for boats.
Connecting Drawbridges with Heavy Iron Winch Chains
Build vertical winch posts on shore using dark oak log beams. Use oak fences and trapdoors to form a winding chain winch. Wrap iron chains from high winch posts down to deck ends. Place bright lanterns along shore posts for night working safety. Moving across the drawbridge feels like entering an active farming hub. Look out over golden wheat fields from the bridge deck.
Detailing Farmer Supply Stacks and Shore Line Paths
Place stacked hay bales and barrel blocks near the winch platform. Add dark oak doors surrounded by spruce trapdoor tool sheds. Hang soul lanterns directly from small winch post roof corners. Use spruce slabs for comfortable bench seating along river roads. Add a wooden notice board using oak signboards on stone walls.
Decorate the grassy riverbank base around the drawbridge frame. Surround stone abutments with smooth river gravel and sea shells. Wrap kelp and seagrass around lower underwater support log pilings. Add floating barrels tied with rope nearby in shallow water. Place iron bars along the water approach for boat safety. Your rustic log drawbridge is completely ready for farm trade.
Required Materials and Block List
- Stripped Dark Oak Logs: 8 Stacks
- Dark Oak Slabs: 6 Stacks
- Spruce Planks: 8 Stacks
- Spruce Trapdoors: 5 Stacks
- Iron Chains: 4 Stacks
- Hay Bales: 6 Stacks
- Barrels: 6 Blocks
- Mossy Stone Bricks: 5 Stacks
- Lanterns: 4 Blocks
- Signboards: 1 Stack
Idea 9: The Romantic Rose Arched Bridge

A Fairytale Wooden Crossing Decorated with Vibrant Red Roses
A romantic garden bridge creates a stunning focal point for estates. The gentle wooden arch is wrapped in dense crimson rose hedges. Red wool carpet paths line the center of the wooden walkway. It serves as a beautiful meeting place for fairytale castle gardens. Soft red rose petals float gently along quiet river currents below. Love and beauty radiate through every single wooden and floral detail. Vibrant red colors contrast dramatically with pristine white quartz framing.
Building the Curved Birch and Quartz Base Frame
Build a gentle arch frame using smooth quartz and diorite stairs. Line the lower riverbank foundations using white calcite and stone. Build a wide wooden floor walkway using light birch wood planks. Keep the bridge arch gentle and wide across the quiet river. Light stone and wood materials create an elegant, romantic foundation. The clean white base contrasts beautifully with vibrant red rose hedges.
Constructing the Crimson Rose Arch and Handrails
Build high side handrail arches using dark oak fence posts. Wrap flowering rose bushes and red wool blocks along fence railings. Place red tulip flower pots along the white quartz bridge steps. Add dark oak trapdoors along side quartz beams for rich contrast. The bright crimson flowers transform the simple bridge into art. Passing underneath feels like walking through a private botanical garden.
Detailing the Elegant Walkway with Red Carpets
Cover the center birch floor with a plush red carpet runner. Place glowing paper lanterns suspended from high dark oak fence arches. Drip green weeping vines from the underside of the quartz arch. The warm lantern light reflects beautifully on red wool carpets. Your romantic rose bridge offers an unforgettable garden crossing experience.
Expanding Surrounding Botanical Gardens and Water Paths
Carve a peaceful flower garden along both riverbank entry paths. Use mossy cobble and gravel for winding garden walking paths. Place smooth quartz benches and pink tulip beds along riverbanks. Add dark oak fence railings blocking steep river drops safely. Scatter red rose petals across smooth quartz entry steps for detail.
Add dark oak support columns extending down into river water. Wrap green vines along outer white quartz support columns smoothly. Place red banners on dark oak fence posts near bridge landings. Use campfire smoke beneath floorboards for subtle rising river mist. Add sea pickles hidden beneath river water for subtle night glow. Your romantic rose arched bridge is completely finished today.
Required Materials and Block List
- Smooth Quartz Stairs: 8 Stacks
- Birch Planks: 6 Stacks
- Dark Oak Fences: 6 Stacks
- Red Wool: 5 Stacks
- Red Carpet: 4 Stacks
- Rose Bushes: 6 Stacks
- Calcite: 5 Stacks
- Lanterns: 4 Blocks
- Weeping Vines: 3 Stacks
- Red Tulips: 4 Items
Idea 10: The Bamboo and Lantern Water Path
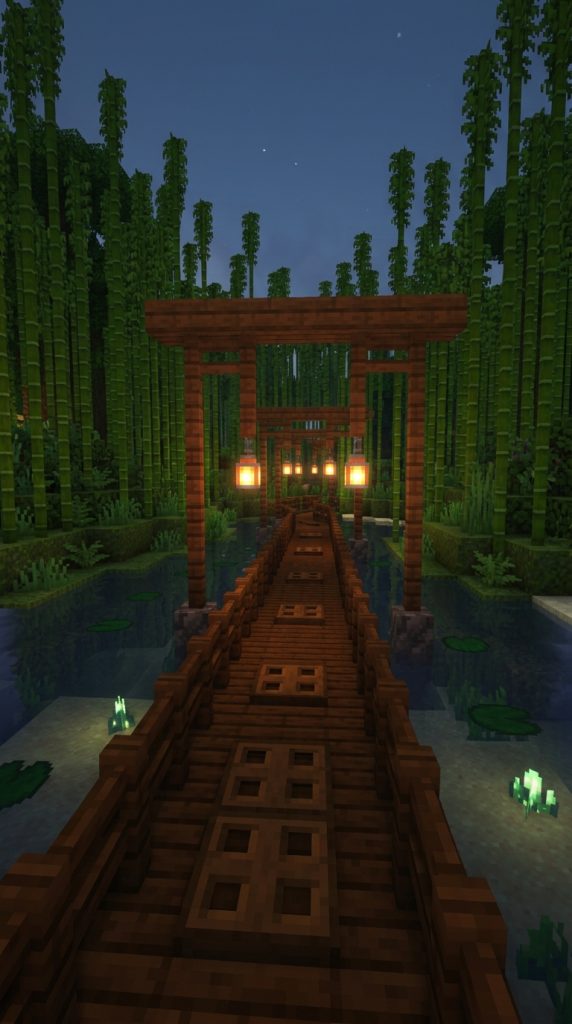
Minimalist Asian-Inspired Timber Pathways Over Calm Waters
A minimalist bamboo bridge brings peaceful Eastern elegance to your world. Smooth dark oak log paths sit low over quiet water channels. Soaring green bamboo stalks line the muddy riverbanks on both sides. Hanging paper lanterns cast a warm, tranquil glow over water reflections. Wind rustles softly through high green leaves across the garden. Life moves with quiet grace along this simple wooden water path. Gentle ripples spread across the calm water as you walk.
Laying Out the Low Log Water Channel Walkway
Anchor low wooden support pillars directly into muddy riverbed sand. Scatter mossy cobblestone blocks across shallow water pathway paths. Place dark oak slabs forming a flat, low-profile water walkway. Add smooth spruce trapdoors along outer log walkway edges for detail. The low-profile timber path sits just two blocks above water. Minimalist wooden lines complement natural bamboo gardens around it seamlessly.
Constructing Minimalist Bamboo Handrails and Arches
Build simple side handrail posts using dark oak fence posts. Connect handrail posts using dark oak trapdoors placed horizontally. Erect simple wooden archways at both bridge entry points using logs. Place paper lanterns hanging from top archway beams for light. Simple geometric wood lines keep the focus on surrounding nature. The clean timber path creates a peaceful, meditative garden atmosphere.
Overgrowing Riverbanks with Soaring Bamboo Stalks
Plant dense rows of green bamboo stalks along both riverbanks. Bone meal the bamboo to grow towering green plant walls. Cover private garden banks with smooth moss and coarse dirt. Add small stone water basins near wooden bridge entry steps. Bright green bamboo stalks contrast sharply with dark oak walkway logs. Your bamboo water path creates a deeply tranquil garden environment.
Detailing Waterway Features and Stone Lantern Posts
Build small carved stone brick lanterns along the outer gravel paths. Line inner water channel beds using river gravel and clay blocks. Place glowing sea pickles underwater beside dark oak support pillars. Add floating lily pads and pink lotus flowers across calm water. Hang bright paper lanterns from wooden arch posts over the water.
Build a small wooden teahouse shelter near the bridge landing. Place smooth birch slabs inside for simple floor seating benches. Add a brewing stand with water bottles on a low table. Hang red wool banners along outer teahouse entry posts proudly. Add cobwebs stretching over roof storage rafters in attic spaces. Your bamboo and lantern water path is fully completed now.
Required Materials and Block List
- Dark Oak Slabs: 8 Stacks
- Dark Oak Logs: 6 Stacks
- Dark Oak Fences: 5 Stacks
- Dark Oak Trapdoors: 5 Stacks
- Bamboo: 8 Stacks
- Moss Carpet: 6 Stacks
- Sea Pickles: 4 Stacks
- Paper Lanterns: 6 Blocks
- Gravel: 5 Stacks
- Lily Pads: 4 Stacks
Idea 11: The Whimsical Willow Tree Bridge

A Bridge Integrated into the Living Roots of a Giant Willow
This organic bridge is built directly into a massive willow tree. Thick wooden root arches curve gracefully across the river channel. Drooping green willow leaves form a living canopy over the path. It forms a breathtaking natural centerpiece for any cottagecore forest. Soft green light filters through dense drooping leaf walls daily. The willow tree bridge feels like an ancient, living forest structure. The tree and bridge exist in complete harmony over flowing waters.
Framing the Living Root Bridge Base and Arch
Construct a massive custom willow tree trunk using dark oak logs. Extend thick, curving wooden root beams across the river channel. Layer spruce wood slabs directly over the central root arch. Use stripped oak wood logs to form organic support curves underneath. Make the root bridge arch span at least fifteen blocks wide. Organic log curves make the bridge look like a growing tree.
Constructing the Sweeping Willow Canopy Overhead
Build massive drooping branches extending out over the river water. Layer oak leaf blocks and azalea leaves densely over branches. Attach weeping vines and leaf blocks trailing down to the water. Create open archway tunnels through the hanging green leaf walls. The drooping leaf canopy creates a private, cool green tunnel. Green leaves shade the wooden walkway floor from bright sunlight.
Decorating the Living Root Path with Forest Flowers
Cover side root handrails with moss carpet and wild ferns. Place spore blossoms high in the willow leaf canopy above. Hang glowing cave vines with glowberries from drooping root arches. Light the root path using warm copper lanterns on fence posts. The combination creates a magical, living organic river crossing. Your willow tree bridge stands as a masterpiece of natural design.
Detailed Waterway Flora and Hidden Root Alcoves
Build a small sheltered seating alcove inside the hollow trunk. Frame wall alcoves using spruce slabs and dark oak trapdoors. Place a cozy reading bench made of spruce stairs inside. Lay down green wool carpet runners through clean trunk spaces. Use dark oak trapdoors for storage chest covers throughout rooms.
Place lily pads and water hydrangeas along shallow riverbanks. Add glowing sea pickles underwater beside submerged root support pillars. Build small stepping stone paths leading up to the root entry. Scatter oak buttons and trapdoors across textured wood root paths. Wrap green vines heavily around outer willow trunk log walls. Your whimsical willow tree bridge stands fully grown today.
Required Materials and Block List
- Dark Oak Logs: 12 Stacks
- Stripped Oak Wood: 8 Stacks
- Spruce Slabs: 8 Stacks
- Oak Leaves: 10 Stacks
- Azalea Leaves: 6 Stacks
- Weeping Vines: 5 Stacks
- Spore Blossoms: 3 Blocks
- Cave Vines with Glowberries: 4 Stacks
- Moss Carpet: 6 Stacks
- Copper Lanterns: 4 Blocks
Idea 12: The Sunflower Meadow Wooden Footbridge
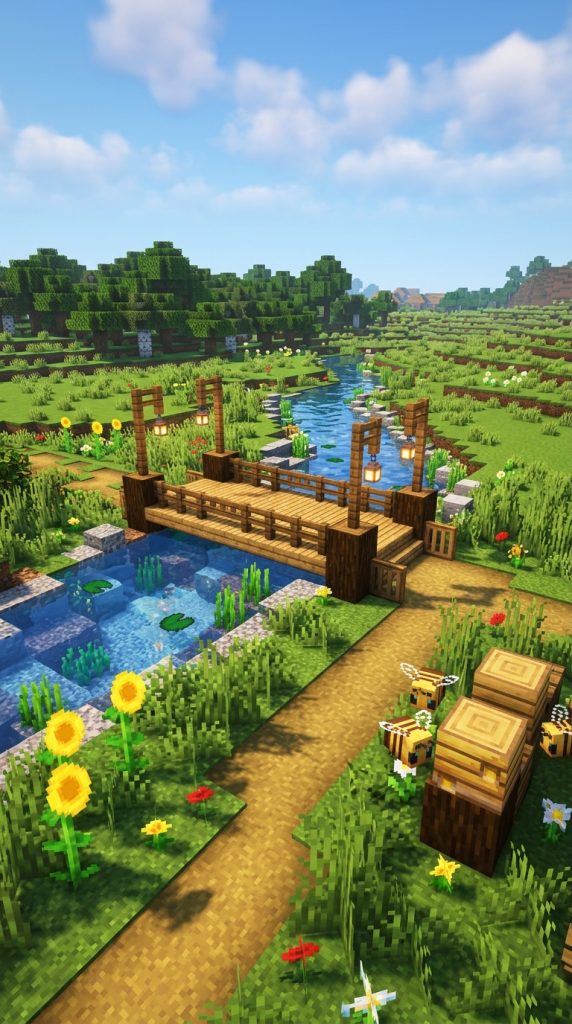
A Simple Country Plank Walkway Surrounded by Tall Yellow Flowers
A humble wooden footbridge brings cheerful country charm to meadows. Simple oak planks span a small, babbling farm creek gently. Towering golden sunflowers line the dirt pathways on both sides. It offers a warm, sun-drenched crossing for peaceful rural farmsteads. Honeybees buzz lazily around blooming flower heads all afternoon long. Pastoral peace fills every inch of this simple wooden footbridge layout. The golden yellow hues make every sunny day feel bright and joyous.
Building the Simple Oak Plank Foundation Platform
Lay a low, flat foundation across a narrow farm creek channel. Use oak wood planks to build a simple three-block-wide walkway. Frame the outer bridge edges using sturdy dark oak log beams. Keep the bridge height just one block above the grassy riverbanks. Simple, low-profile plank layouts look humble, practical, and rustic. Natural creek banks frame the wooden planking with wild grasses.
Constructing Rustic Fence Handrails and Lantern Posts
Erect low side railings using simple oak fence posts along edges. Add oak fence gates at both bridge entry points for charm. Place tall fence posts at bridge corners to hold warm lanterns. Add dark oak trapdoors along side log beams for clean edging. Simple wooden fence lines preserve open views of surrounding fields. The clean footbridge looks like a classic farm crossing point.
Surrounding the Creek Banks with Golden Sunflowers
Plant dense rows of tall sunflowers along both dirt bank approaches. Intermingle yellow dandelions, poppies, and tall grass along paths. Cover surrounding soil with warm moss carpet and path blocks. Add small wooden bee nests on nearby fence posts for farm life. Bright yellow sunflowers create a cheerful, sunlit country environment. Your sunflower footbridge adds bright rustic joy to farmsteads.
Crafting Creek Bed Details and Farm Water Paths
Build shallow creek bed paths using gravel, sand, and clay blocks. Water flows gently over low smooth stone stepping blocks nearby. Scatter small river pebbles using stone buttons along muddy banks. Add campfire smoke rising from a nearby farmhouse chimney smoothly. Lay a soft dirt path winding through golden sunflower fields.
Place water cauldrons with floating duckweed near creek banks. Add flower pots containing yellow dandelions on fence posts. Hang string lines holding drying herbs across nearby wooden fences. Place armor stands dressed in straw leather armor as farm scarecrows. Surround the meadow creek with fluttering yellow butterflies and bees. Your sunflower meadow wooden footbridge is completely open.
Required Materials and Block List
- Oak Planks: 8 Stacks
- Dark Oak Logs: 6 Stacks
- Oak Fences: 6 Stacks
- Oak Fence Gates: 4 Items
- Sunflowers: 10 Stacks
- Path Blocks: 6 Stacks
- Moss Carpet: 5 Stacks
- Lanterns: 4 Blocks
- Gravel: 5 Stacks
- Dandelions: 4 Stacks
Idea 13: The Grand Cottage Estate Stone Bridge

An Impressive Multi-Arch Stone Bridge Leading to Manor Houses
Enormous multi-arch stone bridges form grand entrances to large estates. These heavy stone structures feature detailed carved arches and pillars. Winding cobblestone roads carry horse carriages across wide river valleys. Flowering azalea hedges and iron lamps trim the upper stone walkways. White swans glide peacefully on smooth water currents under stone arches. Wealth and classic elegance radiate through these grand stone river crossings. Impressive architectural symmetry commands respect from approaching visitors.
Framing Heavy Multi-Arch Stone Foundations
Build three massive stone arch pillars across a wide river valley. Set heavy foundation blocks using tough, weathered stone bricks. Space structural arch pillars every six blocks for balanced proportions. Curve inner arch undersides using smooth stone brick stairs. Make the main bridge deck span at least twelve blocks wide. Solid stone arch foundations support heavy traffic heading to manors.
Constructing Detailed Upper Stone Balustrades and Roadways
Build the wide upper road deck using polished granite and stone. Erect decorative side handrail walls using stone brick walls and slabs. Place carved chiseled stone brick blocks at regular pillar intervals. Install elegant iron lamp posts along the upper stone balustrades. Large stone arch openings allow wide river barges to pass easily. Multi-arch symmetry creates a commanding, regal presence over valleys.
Decorating Upper Walkways with Flowering Azalea Planters
Place carved stone planter boxes along the upper balustrade walls. Fill planter boxes with pink flowering azalea leaves and tulips. Set up iron lamp posts holding bright sea lanterns along roads. Hang green weeping vines from the underside of stone arches below. The colorful floral planters soften the heavy stone brick architecture. Every stone arch section showcases rich estate landscaping craft.
Adding River Valley Roads and Carriage Landings
Build wide gravel carriage roads leading up to both bridge landings. Place stone retaining walls along sloped riverbank road approaches. Frame outdoor estate entrance gates using tall stone pillars and iron bars. Scatter loose stone buttons and pressure plates across road surfaces. Add estate signboards above main bridge entry posts proudly.
Set up guard duty shelters holding lecterns near estate bridge gates. Place armor stands wearing polished iron armor as manor gate guards. Add iron bars along lower arch foundations for water debris control. Surround the bridge exterior with manicured lawns and flower beds. Connect the grand stone bridge directly to main manor driveways. Your grand cottage estate stone bridge is fully operational now.
Required Materials and Block List
- Stone Bricks: 12 Stacks
- Stone Brick Stairs: 10 Stacks
- Stone Brick Walls: 8 Stacks
- Polished Granite: 8 Stacks
- Chiseled Stone Bricks: 4 Stacks
- Flowering Azalea Leaves: 6 Stacks
- Sea Lanterns: 4 Blocks
- Iron Bars: 6 Stacks
- Gravel: 8 Stacks
- Pink Tulips: 4 Stacks
Idea 14: The Fairy Ring Lantern Bridge

A Magical Circular Wooden Bridge Built Around a Glowing Pond
A circular wooden bridge surrounds a sacred fairy pond in deep woods. Curving spruce plank walkways wrap completely around glowing water. Glowing shroomlights and red mushrooms illuminate the central water basin. It delivers an unforgettable magical spectacle to exploring forest travelers. Ethereal green spore particles drift continuously over glowing water lilies. Magic and nature unite in a breathtaking circular river crossing. Soft magical light illuminates the surrounding dark tree trunks nightly.
Constructing the Circular Spruce Wooden Walkway
Grid out a wide circular walkway frame suspended over a forest pond. Use spruce wood planks and slabs to shape smooth curving decks. Build inner and outer handrails using dark oak fence posts. Space support pilings evenly using thick stripped dark oak logs. Leave two main bridge entry ramps connecting to forest paths. Circular wooden bridge decks permanently surround sacred garden water springs.
Building the Central Fairy Ring Water Basin
Enclose a central circular water pool using mossy stone brick walls. Place glowing shroomlight blocks submerged beneath clear pond water. Build a small stone island in the exact center of the pond. Plant a giant red mushroom or crystalline spire on the island. Magical underwater lighting casts brilliant glow across the wooden walkways.
Decorating Circular Balustrades and Flower Paths
Top all dark oak fence handrails with glowing paper lanterns. Surround outer bridge decks with dense pink petal carpet blocks. Place carved stone lanterns holding soul torches along forest entry paths. Hang weeping vines from the underside of wooden bridge supports. Deep blue and orange light reflects across circular pond waters. Your fairy ring bridge stands as a magical forest sanctuary.
Detailing Forest Clearing Paths and Mystical Flora
Build inner forest walking paths leading up to circular bridge entryways. Place moss carpet, coarse dirt, and path blocks along forest trails. Install spore blossoms in high oak tree canopies over the pond. Add green dripleaf plants floating along the central pond water edges. Place glowing sea pickles under water for hidden blue light paths.
Scatter red and brown mini-mushrooms around outer wooden bridge pilings. Place glowing glow lichen along damp lower stone foundation blocks. Add warning bells inside small wooden gate shelters along forest entry roads. Surround outer clearing edges with soaring dark oak and birch trees. Connect the circular bridge seamlessly to surrounding enchanted forest trails. Your fairy ring lantern bridge is fully active today.
Required Materials and Block List
- Spruce Planks: 12 Stacks
- Spruce Slabs: 10 Stacks
- Dark Oak Fences: 8 Stacks
- Stripped Dark Oak Logs: 8 Stacks
- Shroomlights: 6 Blocks
- Mossy Stone Bricks: 8 Stacks
- Pink Petals: 6 Stacks
- Paper Lanterns: 8 Blocks
- Spore Blossoms: 3 Blocks
- Dripleaves: 4 Item