
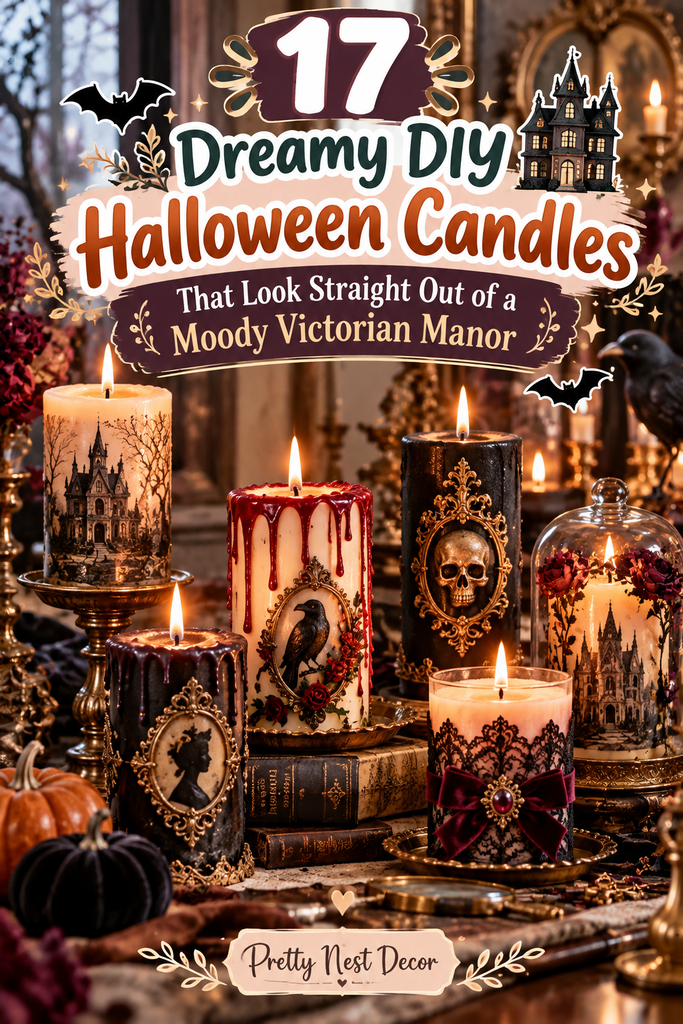
Crafting bespoke, moody candlelight elevates autumn evenings into atmospheric séances of antique mystery and romantic gloom. Therefore, designing Victorian manor-style candles provides an alluring, budget-friendly alternative to generic store-bought holiday decor. Moreover, intentional distressing, botanical infusions, and rich wax drips prevent flat, modern tapers from breaking your dark academia aesthetic. Consequently, gothic interior enthusiasts constantly seek elevated ways to recreate centuries-old estate lighting for their mantels and dining tables. Furthermore, handcrafted vessels look breathtaking when lit against dark walls, tarnished silver trays, and gilded mirrors. Every single layer of aged wax and antiqued glass transforms simple paraffin into museum-worthy gothic decor.
Why Victorian Manor Aesthetics Transform Candle Crafting
First impressions depend on textural decay, heavy shadows, and organic, uneven drip profiles. In addition, the authentic Victorian mourning aesthetic relies on tactile historical details rather than tacky plastic novelties. For example, pairing distressed amber glass with deep burgundy wax pools evokes private alchemical studies and dimly lit conservatories. As a result, standard tabletop candles transform into haunting artifacts of romantic gothic literature effortlessly. Meanwhile, the slow, flickering dance of low-burning wicks casts dramatic, spidery shadows across rooms. Investing creative hours into purposeful candle aging brings immense domestic satisfaction and timeless seasonal beauty. Ultimately, moody candlelight creates an immersive sanctuary of cozy, vintage mystery throughout the crisp autumn months.
Selecting Your Signature Dark Romantic Palette
However, curating an authentic 19th-century color story requires moving past neon oranges and stark synthetic purples. Indeed, your wax and vessel shades should complement rich wood finishes, leather-bound books, and tarnished metals. Furthermore, blending deep oxblood reds, raven blacks, antiqued parched ivory, and mossy forest greens produces timeless historical sophistication. Subsequently, incorporating warm translucent amber, smoky quartz, and bruised plums adds jewel-toned depth to glass vessels. Hence, establishing an intentional, cohesive color scheme remains your foundational artistic step before melting a single drop of wax. Never settle for pristine, glossy white tapers that look freshly unboxed from a supermarket shelf. Instead, layer matte waxes, antiquing washes, and soot-dusted patinas to evoke generations of manor history.
Modern Gothic Candle Trends For 2026
Contemporary holiday home styling emphasizes dark academia elegance, botanical alchemy, and textural aging techniques. Additionally, natural beeswax sheets, raw wooden crackling wicks, and apothecary vessel upcycling pair gorgeously with moody interior styling. For instance, embedding pressed ferns and dried nightshade blossoms beneath sheer outer wax skins introduces breathtaking natural-history intrigue. Consequently, your festive mantle display looks completely fresh, refined, and visually captivating on social feeds. In contrast, cheap novelty candles shaped like cartoon pumpkins feel cluttered, uninspired, and quickly dated. Embracing historic wax-carving methods, wax-seal stamps, and antique metallic gilding ensures an authentic, heirloom-worthy aesthetic. Truly, these artistic modeling techniques elevate humble candle supplies into timeless gothic decor centerpieces.
Essential Chandler Tools And Safety Foundations
Fortunately, most gothic candle-making methods utilize accessible, inexpensive kitchen tools and safe everyday materials. In fact, standard double-boiler setups using empty tin cans protect your cookware while melting waxes with total precision. Similarly, natural soy wax flakes and dense paraffin blends offer versatile foundations that take concentrated color dyes seamlessly. Afterward, pre-waxed braided cotton wicks and metal wick-centering tabs ensure steady, clean burns without excessive tunneling. Thus, ambitious, boutique-level candle making becomes wonderfully accessible for home crafters without specialty studio machinery. You avoid purchasing hazardous, unstable materials that smoke heavily or crack under heat. Instead, dependable waxes, reliable wick sizing, and thoughtful heat management anchor your moody crafting journey.
Mastering The Art Of Realistic Wax Dripping
Additionally, achieving that iconic, centuries-old dripping silhouette demands deliberate temperature control and strategic wax layering. First, select a slow-burning ivory taper candle to serve as your structural, burning core. Next, melt high-melt-point burgundy, charcoal, or deep crimson wax in a separate container until fluid but viscous. Therefore, spooning or dripping this hotter, colored wax along the cold taper sides creates thick, coagulated rivers that freeze instantly. Finally, layer drips repeatedly over previous runs to build organic, heavy stalactites of dried wax around bases. Proper wax dripping creates an architectural cascade that feels organically formed through decades of nocturnal reading. Thus, your completed Victorian candles stand as breathtaking testaments to timeless dark romance.
Essential Pro Tips For Pinterest Virality
Creating shareable pins requires moody low-key lighting, macro focus on wax textures, and authentic atmospheric backdrop staging. Therefore, always capture finished candles in a darkened room illuminated primarily by their own glowing flames. In addition, low-angle perspective photography makes tall candelabras appear towering, dramatic, and vault-like against dark velvet drapery. Furthermore, short looping video clips capturing flickering flame movements or drifting wisps of snuffed wick smoke generate massive saves. Consequently, your romantic candle designs will inspire thousands of dark academia and DIY crafters worldwide. Always stage finished pieces alongside antique brass scissors, leather books, and dried botanical clippings for cohesive visual storytelling.
1. The Bleeding Oxblood Taper Pillar
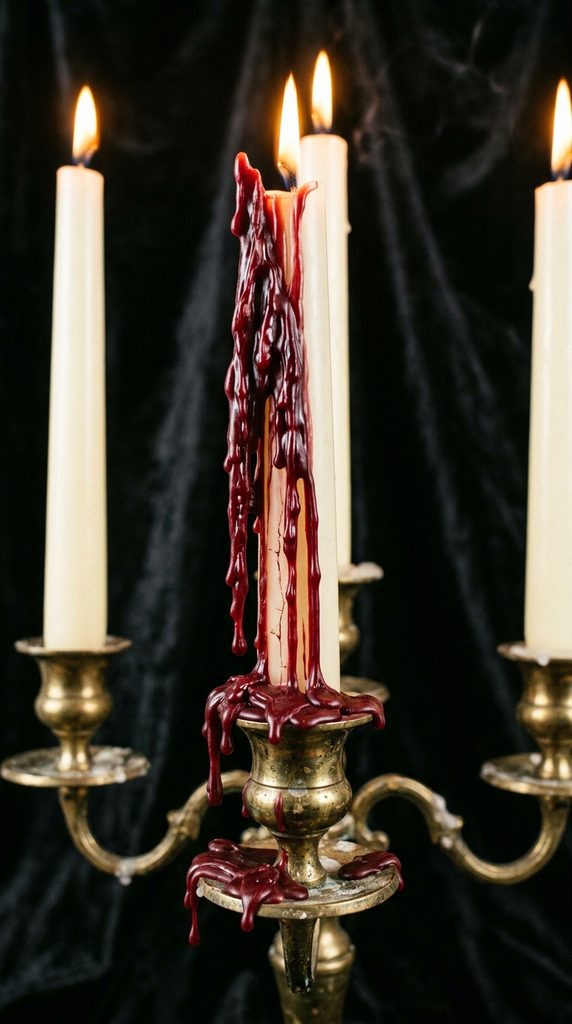
Dripping Coagulated Wax Manor Sconce
This iconic centerpiece features tall, distressed ivory taper candles heavily encrusted with thick cascades of deep oxblood-red wax. Furthermore, as the center wick burns, the hidden crimson core melts and breaches the pale exterior, simulating realistic bleeding. Consequently, your candelabra display radiates theatrical vampire romance that captivates every guest seated at your dinner table. Additionally, the coagulated red stalactites pooling around tarnished brass sconces provide exquisite, dramatic three-dimensional texture. Hence, gothic decorators adore this classic Victorian staple for mantels, piano tops, and moody feast tables alike. It transforms plain household tapers into a legendary gothic conversation piece with minimal effort.
Engineering The Hidden Crimson Core
Moreover, drilling a narrow vertical cavity down a standard white pillar allows you to pour a core of concentrated crimson wax. In fact, using a high-pigment red wax dye disc ensures the melting core flows in rich, opaque scarlet rivers. Meanwhile, cooling the pillar thoroughly before lighting keeps the white exterior walls crisp until the wax breaches. Therefore, the candle maintains its dignified, antique ivory exterior right up until the dramatic, bleeding melt begins. As a result, this theatrical candle looks breathtaking when placed inside multi-arm candelabras.
Required Materials And Crafting Supplies
- Thick white or ivory paraffin taper candles
- Block of dark red or oxblood candle dye
- Extra paraffin wax flakes for melting drips
- Antique metal or brass candelabra holder
- Craft skewer or heat-safe dripper spoon
Step-By-Step Construction Guide
- First, secure ivory taper candles firmly into an antique metal candelabra base.
- Next, melt paraffin flakes in a double boiler, stirring in concentrated oxblood dye until nearly black.
- In addition, let the dyed wax cool slightly until a thin skin begins to form on top.
- Afterward, tilt the melted wax container and drizzle rivers carefully down the taper shoulders.
- Finally, repeat dripping in layers, allowing each run to solidify before building thicker pooling stalactites at the base.
2. Antique Apothecary Amber Bottle Candles
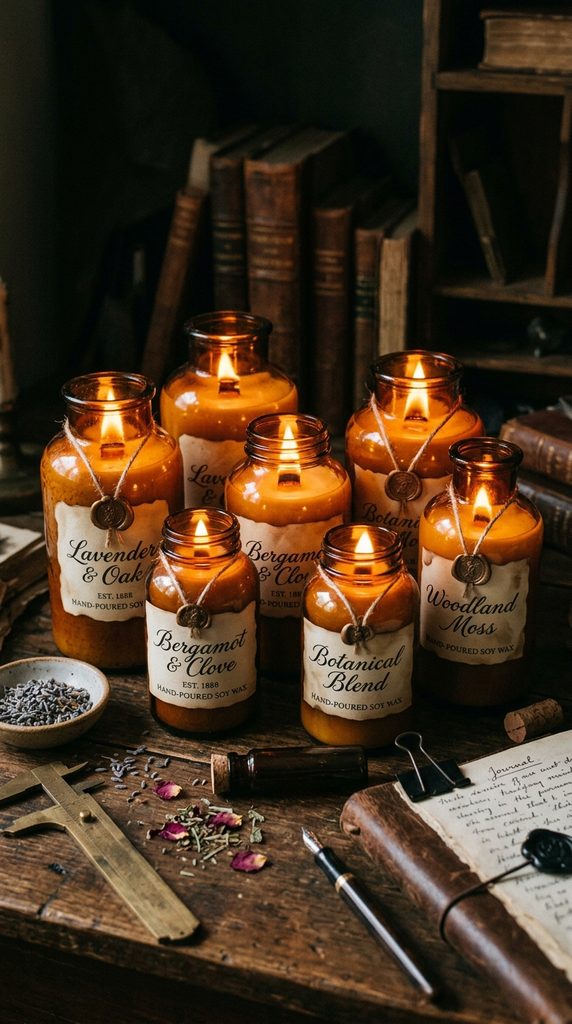
Alchemical Elixir Amber Glass Vessel
Embrace 19th-century apothecary science by pouring rich, woodsy scented soy wax directly into vintage amber glass medicine bottles. Moreover, the warm honey-toned glass radiates an intoxicating, golden halo when illuminated from within by a low flame. Therefore, your mantle acquires the brooding, scholarly atmosphere of a Victorian herbalist’s moonlit study. In fact, trimming cracked medicine bottles with aged parchment labels reading “Belladonna” or “Arsenic” enhances historical authenticity. Similarly, wooden wicks produce a comforting, fireplace-like crackle that adds captivating acoustic warmth to quiet evenings. You immediately project authentic dark academia mystery and apothecary charm across your entire living space.
Pouring Soy Wax Into Narrow Vessels
Furthermore, heating amber glass bottles gently with an embossing heat gun prevents cooling cracks and uneven wax shrinkage. In addition, stabilizing wooden wicks with metal base clips keeps the flame centered along narrow glass shoulders safely. Meanwhile, scenting the wax with notes of smoked cedarwood, clove bud, and black amber fills the room with antique warmth. Therefore, the candle delights both the eyes and the senses with rich, historical manor ambiance. Consequently, these amber apothecary vessels make exquisite, reusable seasonal decor you can burn throughout autumn.
Required Materials And Crafting Supplies
- Vintage amber glass apothecary bottles or medicine jars
- Natural golden soy container wax flakes
- Wide wooden candle wicks with metal sustainers
- Candle fragrance oils in clove, cedarwood, and smoke
- Tea-stained paper printed with antique Victorian apothecary labels
Step-By-Step Construction Guide
- First, clean and thoroughly dry vintage amber glass bottles, wiping insides with rubbing alcohol.
- Next, adhere metal-clipped wooden wicks securely to the center bottom of each bottle.
- In addition, melt soy wax flakes to 85°C (185°F), stirring in autumnal fragrance oils thoroughly.
- Afterward, pour hot wax smoothly down bottle necks, leaving one inch of space beneath rims.
- Finally, let wax cure undisturbed for 24 hours before adhering aged paper labels to the glass.
3. Botanical Herbarium Pressed-Fern Pillars
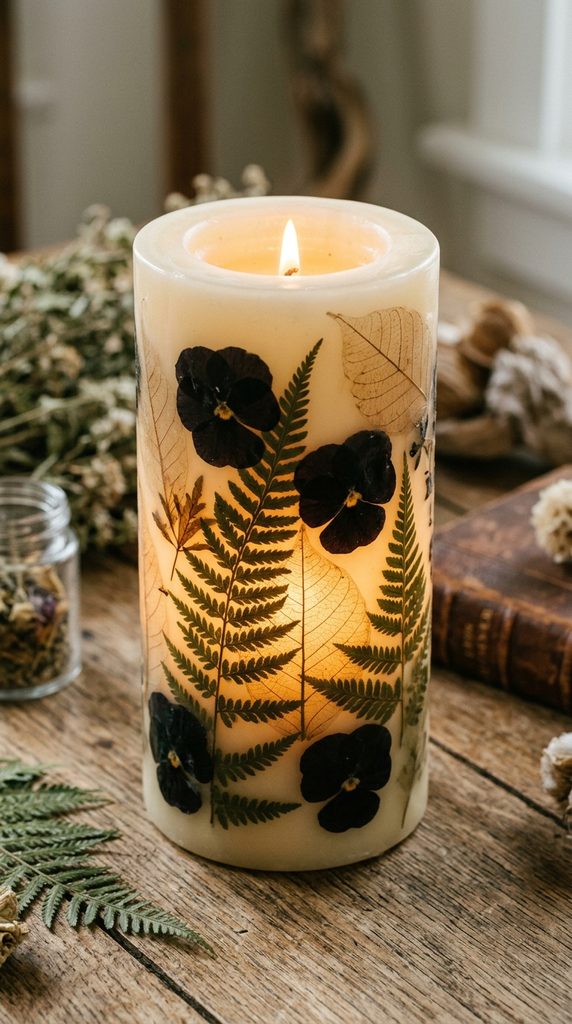
Preserved Victorian Glasshouse Flora Pillar
Celebrate Victorian botanical curiosity by embedding real dried ferns, black pansies, and skeletal leaves directly into creamy pillar wax. Furthermore, when the wick burns, the backlit pressed foliage creates striking, botanical silhouette shadows against the glowing wax wall. Consequently, your candle mirrors the elegant glass conservatories and pressed-plant scrapbooks of 19th-century naturalists. Additionally, sealing delicate dried botanicals beneath a paper-thin exterior wax glaze protects leaves while preserving crisp details. Hence, nature-loving crafters adore this refined, historic project for bookshelf vignettes and cozy study nooks. It merges natural history preservation with luminous gothic elegance effortlessly.
Applying Dried Botanicals With Warm Spoons
Moreover, heating the back of a metal soup spoon over a candle flame creates a gentle iron for smoothing botanical stems. First, position dried pressed ferns flat against the curved exterior of an ivory pillar candle. Next, glide the warm spoon back across the greenery, melting just enough surface wax to draw leaves into the pillar. Meanwhile, a final rapid dip into clear molten paraffin locks all botanical edges securely under a protective shell. Therefore, the embedded foliage looks like ancient botanical lithographs suspended inside solid marble.
Required Materials And Crafting Supplies
- Large smooth ivory or cream pillar candles
- Dried pressed fern fronds, dark pansies, and autumn leaves
- Metal soup spoon and disposable votive candle for heating
- Clear dipping paraffin wax and tall dipping container
- Tweezers for delicate botanical placement
Step-By-Step Construction Guide
- First, arrange pressed dried ferns and dark botanical clippings into a balanced layout on tables.
- Next, place a fern against the pillar candle surface, holding the stem in place with tweezers.
- In addition, heat a metal spoon over a flame, wiping soot away with paper towels.
- Afterward, glide the warm spoon over the leaf, allowing melting wax to encapsulate the botanical.
- Finally, dip the entire pillar briefly into melted clear paraffin to seal all leaf edges smoothly.
4. Distressed Tarnished Silver Trophy Votive
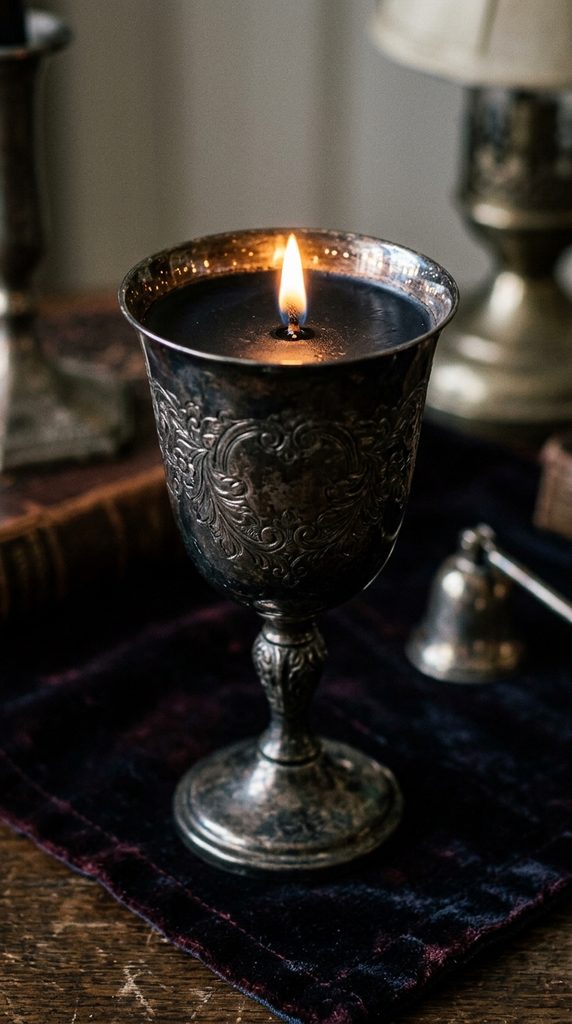
Decaying Aristocratic Silverware Vessel
Transform thrifted antique silver goblets and miniature trophy cups into sumptuous, tarnished gothic votive containers. Furthermore, natural silver oxidation and dark patina along ornate repoussé scrollwork catch flickering candlelight with dramatic contrast. Therefore, your tabletop arrangement looks like salvaged silverware from an abandoned ancestral dining hall. In contrast to modern glassware, weighted metal vessels add authentic historical heft and antique grandeur to decor. As a result, this upcycled metal craft delivers unbeatable gothic manor luxury at a fraction of boutique prices. You bring aristocratic estate decadence into your Halloween home with effortless antique-store foraging.
Accenting Antique Silver Patina
Additionally, brushing a diluted wash of black acrylic paint into engraved metal crevices enhances century-old tarnish. In fact, wiping raised metal highlights with fine polishing cloths leaves deep charcoal shadows behind intricate scrollwork. Next, pour midnight-black or dark plum soy wax into the goblet core around a centered cotton wick. Therefore, the dark wax pools look like mysterious, enchanted draughts held within royal chalices. Meanwhile, the polished rim edges reflect dancing flame points with enchanting, moonlit shimmer.
Required Materials And Crafting Supplies
- Thrifted silver-plated goblets, sugar bowls, or trophy cups
- Matte black acrylic craft paint for artificial patina aging
- Black soy or paraffin wax flakes
- Cotton braided candle wicks with metal tabs
- Fragrance oils featuring notes of plum, incense, and patchouli
Step-By-Step Construction Guide
- First, wash thrifted silver vessels, then dab black acrylic paint into ornate engraved details.
- Next, buff raised metal ridges gently with a damp cloth to reveal high-contrast dark tarnish.
- In addition, center and glue a braided cotton wick into the bottom of the silver vessel.
- Afterward, melt black-dyed soy wax with deep incense fragrance oils to 75°C (167°F).
- Finally, pour wax into the chalice, trimming the wick to one-quarter inch once fully solid.
5. Black Lace Mourning Tapers
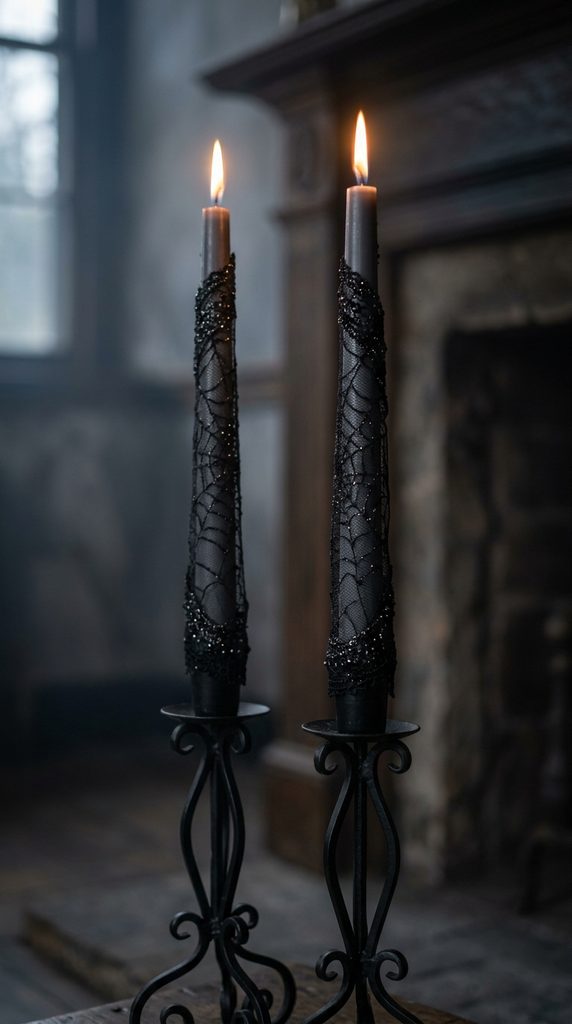
Victorian Jet-Beaded Mourning Veil Candle
Delicate mourning rituals of the Victorian era inspire these haunting tapers wrapped in sheer black spiderweb lace. Furthermore, dark floral patterns create an immediate tactile sensation of Victorian mourning veils and funeral parlors. In contrast to plain solid candles, the textured lace relief introduces exquisite, couture-level surface detail. Therefore, these tapers serve as sophisticated, dramatic statement pieces inside tall wrought-iron or brass holders. As a result, your mantle display commands intense admiration from guests who appreciate historical fashion and gothic tailoring. You evoke the somber, dignified romance of Queen Victoria’s court through simple textile decoupage.
Adhering Delicate Lace To Taper Bodies
Moreover, using clear matte Mod Podge or melted surface wax adheres sheer lace sleeves smoothly without messy bubbling. In fact, trimming lace seams neatly along the candle’s rear ensures a seamless, tailored fit around the slender column. Meanwhile, dusting the finished lace with a whisper of fine black mica powder adds subtle, jet-bead shimmer under candlelight. Therefore, the taper looks like a luxury gothic garment tailored specifically for nocturnal ceremonies. Consequently, these mourning candles deliver high-fashion elegance to seasonal tabletop displays.
Required Materials And Crafting Supplies
- Pairs of smooth charcoal or deep gray taper candles
- Strips of fine black floral or spiderweb stretch lace trim
- Matte decoupage sealer or beeswax transfer paste
- Detail embroidery scissors for precise lace trimming
- Pearlescent black or charcoal mica dust for shimmering highlights
Step-By-Step Construction Guide
- First, measure and cut a strip of black lace that wraps precisely around the taper circumference.
- Next, brush a thin, uniform coat of matte decoupage glue down the candle body.
- In addition, wrap the black lace firmly around the taper, smoothing out wrinkles with fingers.
- Afterward, trim any overlapping fabric edges at the back seam using fine scissors.
- Finally, dust lace surfaces lightly with dark mica powder and let dry completely before displaying.
6. Weathered Cemetery Moss Stone Pillars
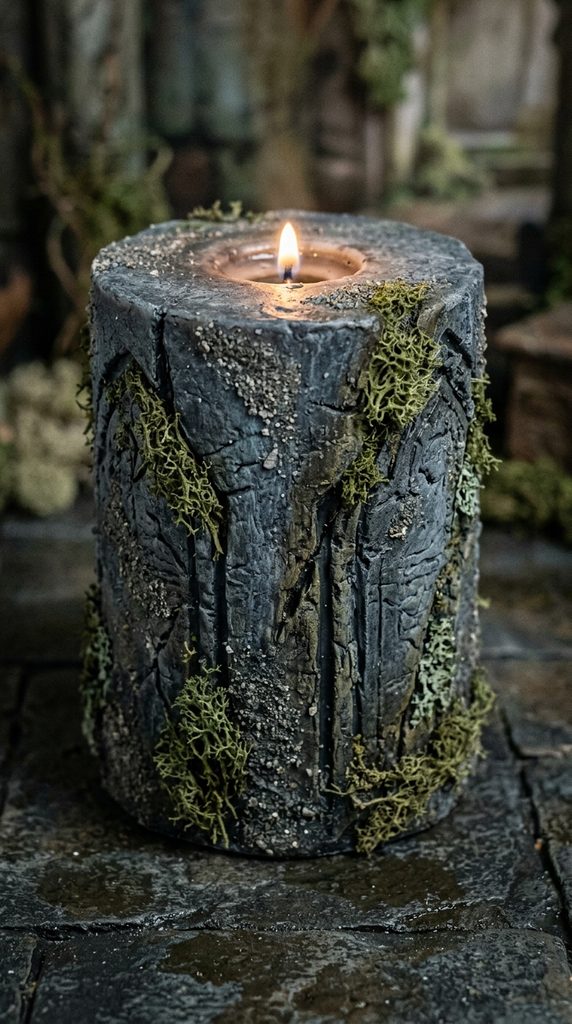
Overgrown Churchyard Marker Sconce
Bring the mossy, time-worn texture of ancient graveyard headstones indoors with these textured faux-granite pillar candles. In addition, layered gray stone textures paired with patches of real dried moss evoke forgotten gothic churchyards. Consequently, your Halloween display gains an undeniable archaeological weight and realistic, weathered outdoor charm. Furthermore, recessed wicks burning down through the center create a lantern-like glow through textured stone walls. Thus, this design commands intense respect among decorators who favor grounded, atmospheric gothic realism. It merges rustic fieldstone textures with cozy, flickering candle illumination seamlessly.
Stippling Faux Stone Textures With Sand
Furthermore, rolling adhesive-coated pillar candles in fine gray stone sand and modeling paste creates realistic granite grit. For instance, stippling charcoal, slate, and olive-green acrylic paints across the dry sand mimics centuries of damp weather. Meanwhile, adhering small flecks of preserved reindeer moss into stone fissures completes the forgotten cemetery aesthetic. Therefore, the candle looks genuinely chiseled from weathered cemetery slate rather than cast from basic wax. Consequently, your home gains an authentic, moody churchyard relic that looks incredible on flagstone hearths.
Required Materials And Crafting Supplies
- Wide, flat-topped dark gray or charcoal pillar candles
- Coarse decorative silica sand or fine model railway ballast
- Textured stone modeling paste or thick matte decoupage glue
- Acrylic paints in granite gray, dark olive, and soot black
- Small clusters of preserved dark green reindeer moss
Step-By-Step Construction Guide
- First, coat the exterior sides of a gray pillar candle with thick textured decoupage paste.
- Next, roll the wet pillar in fine decorative sand, pressing grains firmly into paste.
- In addition, let dry completely, then stipple diluted olive and charcoal paints across sand.
- Afterward, use craft glue to attach tiny clumps of preserved moss along lower crevices.
- Finally, burn the center wick down one inch to create a glowing stone cavern effect.
7. Gilded Gold Leaf Alchemist Votives
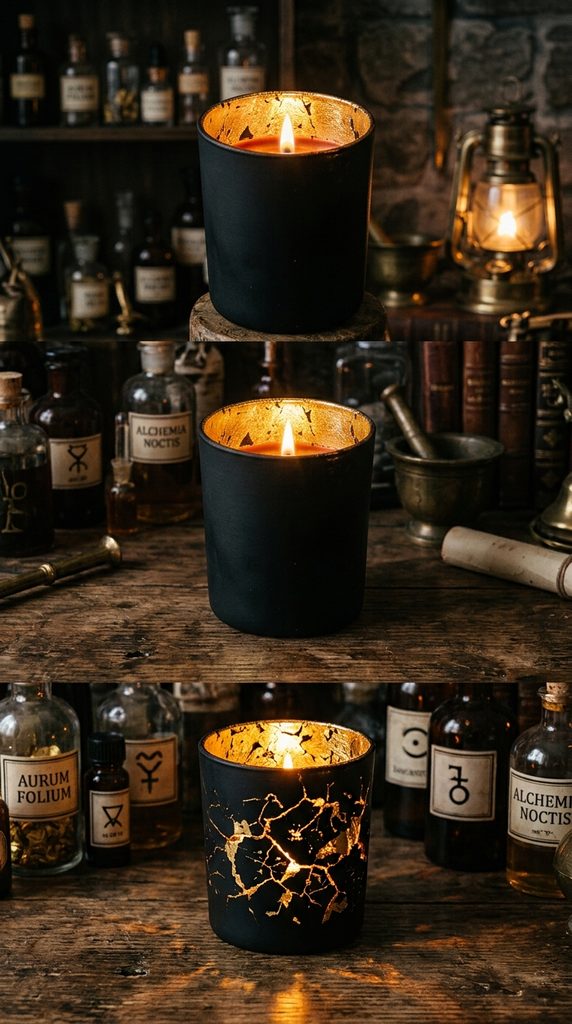
Tarnished Metallic Sorcery Glassware
Moody alchemical symbolism meets aristocratic grandeur through votives lined with flaky, distressed 24-karat gold leaf. Furthermore, glowing flames shining through fractured cracks in the gold leaf create a dazzling, celestial star-map pattern. Consequently, your room fills with dancing, jewel-like pinpricks of warm light that shimmer across dark ceilings. Meanwhile, painting the exterior glass with matte chalkboard black creates stark contrast against the glittering interior foil. Therefore, this mystical alchemical design captivates admirers who love ancient astronomy, magic, and royal gothic decor. You evoke the secret laboratory of a Renaissance philosopher with effortless glass gilding.
Gilding And Fracturing Metallic Leaf
Moreover, brushing gilding adhesive inside clear glass tumblers allows gold leaf sheets to bond firmly to walls. In addition, using a dry, stiff stencil brush to crack and distress the gold leaf creates organic fracture fissures. Meanwhile, pouring blood-orange or clove-scented soy wax inside provides rich seasonal fragrance to match the golden glow. Therefore, this candle balances ancient royal metallurgy with warm domestic fragrance and breathtaking optical effects. Consequently, your mantle display gains an opulent, glowing centerpiece that commands attention all season long.
Required Materials And Crafting Supplies
- Straight-sided clear glass tumblers or heavy votive cups
- Sheets of imitation gold leaf or variegated copper leaf
- Metal leaf gilding size adhesive and soft bristle brushes
- Matte black exterior chalk paint for outside glass walls
- Rich gold-tinted or natural soy container wax with wicks
Step-By-Step Construction Guide
- First, brush gilding size adhesive across the interior walls of clean glass tumblers.
- Next, place gold leaf sheets inside, smoothing with a soft brush to coat the glass.
- In addition, tap a stiff dry brush against the gold to create deliberate fractures and cracks.
- Afterward, paint the exterior glass surface with matte black chalk paint, leaving bottom bases clean.
- Finally, secure a wick and pour scented soy wax inside, letting it cure into a gleaming lantern.
8. Dripping Blood-Tears Skull Candles

Carved Anatomical Memento Mori Candle
Celebrate the solemn Victorian tradition of memento mori with hand-poured skull candles that weep tears of scarlet wax. In fact, placing red wax reservoirs behind the carved skull’s eye sockets causes blood-red tears to stream down cheekbones as it burns. Furthermore, the stark ivory cranial structure provides undeniable anatomical realism that commands visual authority. Therefore, your desk or bookcase acquires an academic, brooding presence straight out of an old anatomy theater. Afterward, onlookers will watch in fascinated wonder as the skull slowly transforms during evening burns. It turns basic mold-making and candle pouring into a mesmerizing kinetic art piece.
Positioning Scarlet Wax Eye Pockets
Additionally, embedding small pellets of concentrated crimson wax directly behind the eye cavities creates the bleeding effect. For example, when the primary white paraffin melts downward, it breaches the red wells, releasing dramatic crimson tears. Next, aging the exterior bone with an antiquing brown wax rub highlights cranial sutures and teeth sockets. Thus, your skull candle radiates ancient historical authenticity before it is ever ignited. Consequently, this striking memento mori centerpiece stands out as the ultimate conversation starter during Halloween gatherings.
Required Materials And Crafting Supplies
- Silicone anatomical human skull candle mold
- White pillar paraffin wax flakes and cotton wicks
- Highly concentrated red wax dye chips for eye reservoirs
- Brown liquid antiquing wax or raw umber oil wash
- Soft cotton cloth for buffing bone highlights
Step-By-Step Construction Guide
- First, thread a primed cotton wick through the center of a silicone skull mold.
- Next, place two small marble-sized balls of red-dyed wax into the eye socket cavities.
- In addition, melt white paraffin wax to 80°C (176°F) and pour carefully into the mold.
- Afterward, let the candle cool completely for 12 hours before demolding the solid skull.
- Finally, buff brown antiquing wax across facial bone crevices to accentuate cranial features.
9. Victorian Wax-Sealed Spell Bottles
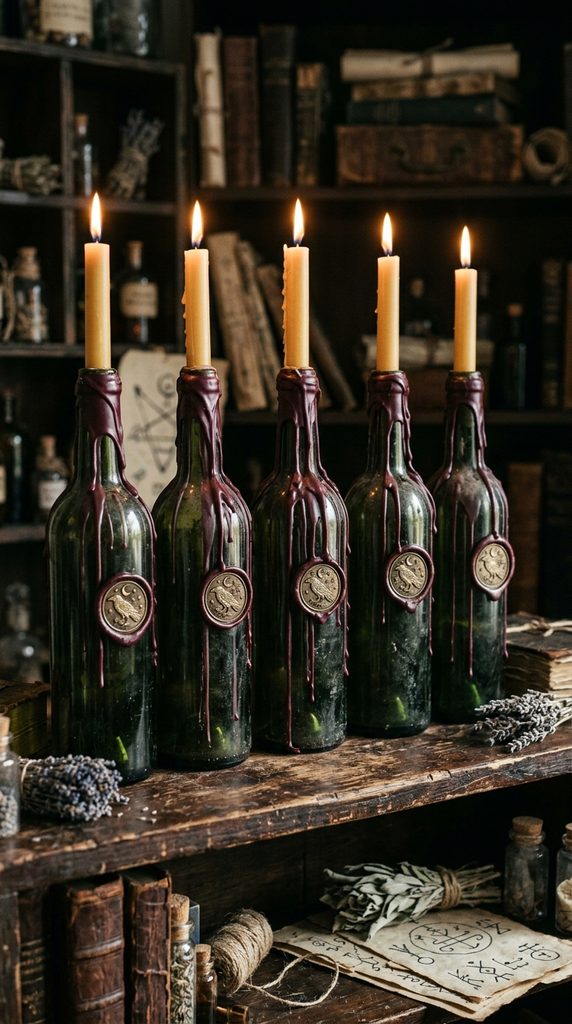
Sealed Sorcery Manuscript Candle Vessel
Celebrate esoteric Victorian occultism by topping vintage glass corked bottles with dripping wax and metal wax seals. Moreover, stamping an authentic brass seal bearing ravens, crests, or moons into warm dripping wax creates royal heirloom drama. Hence, you present a collection of sealed alchemical elixirs that look plucked straight from a private manor library. Additionally, inserting a slender taper candle directly into the corked bottle neck creates a functional, towering silhouette. Consequently, this design feels historically important, wonderfully secretive, and visually commanding on mantels. You embody the thrilling romance of hidden Victorian diaries and clandestine midnight societies.
Stamping Heavy Heraldic Wax Seals
Furthermore, pooling contrasting burgundy or gold sealing wax over bottle shoulders provides an opulent foundation. In addition, pressing an engraved brass seal firmly into wet wax creates crisp, raised relief designs. Meanwhile, using matte charcoal and olive tapered candles creates tall, dignified vertical proportions. Therefore, every single bottle balances antique alchemical utility with elegant, functional candle illumination. As a result, your collection of sealed spell bottles looks worthy of a high-end curiosity shop.
Required Materials And Crafting Supplies
- Vintage green or clear glass corked wine bottles
- Flexible colored wax sealing sticks (burgundy, bronze, or black)
- Metal wax seal stamps featuring gothic crests, moths, or ravens
- Slender beeswax taper candles that fit snugly into bottle mouths
- Craft heat gun or melting spoon for pooling seal wax
Step-By-Step Construction Guide
- First, insert a trimmed cork into the neck of a vintage glass bottle, shaving it flush.
- Next, carve a small circular hole in the cork center to anchor a slender taper candle.
- In addition, melt sealing wax and pour heavy pools across the cork and glass lip.
- Afterward, press an oiled brass seal stamp firmly into the cooling wax pool for ten seconds.
- Finally, insert the taper candle into the neck, lighting it to let natural drips cover the seal.
10. Charcoal Beeswax Rolled Hex Tapers
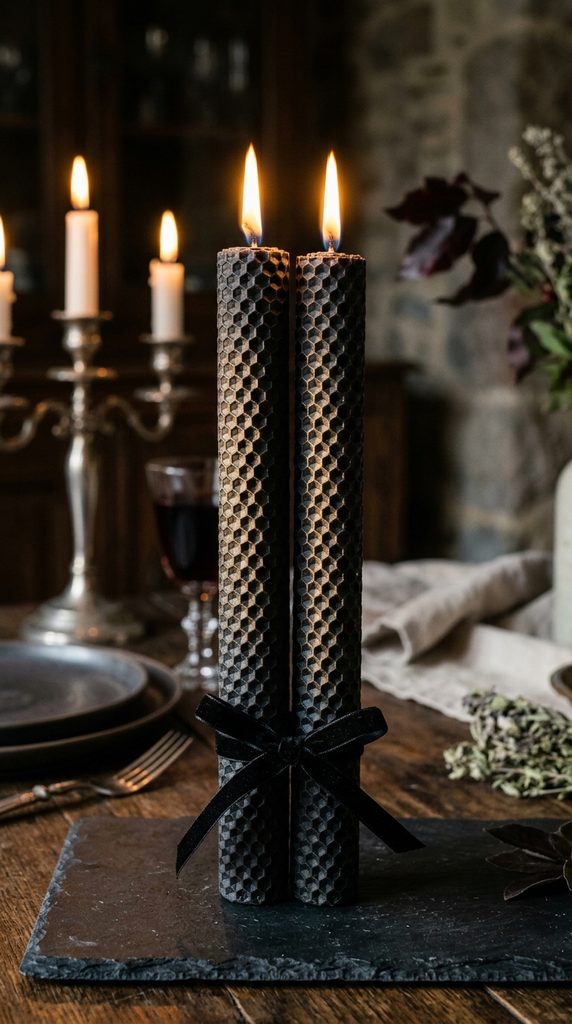
Textured Honeycomb Witching Tapers
Subvert smooth paraffin tapers by rolling natural sheets of textured beeswax dyed in velvety midnight charcoal. Furthermore, natural honeycomb cell textures catch side lighting with subtle, geometric shadows that feel wonderfully organic. Therefore, these rolled tapers burn with a clean, honey-scented flame that fills dining rooms with natural autumn sweetness. As a result, your table setting looks sophisticated, intentional, and undeniably connected to nature’s harvest. Similarly, the rich matte-black honeycomb sheets roll into sturdy, non-drip tapers in under five minutes. You project artisanal apothecary expertise across your seasonal dining table effortlessly.
Rolling Tight Architectural Hexagon Columns
Moreover, pressing square cotton braided wicks firmly into the warm beeswax sheet edge ensures a straight, centered burn. First, warm beeswax sheets slightly with a gentle hairdryer to make the wax pliable without melting. Next, roll the sheet tightly and evenly like a cigar, maintaining uniform pressure along the entire length. Consequently, the finished taper feels solid, heavy, and delightfully textured in hands. Afterward, tying pairs of finished tapers with black velvet ribbons creates charming gifts for holiday hosts.
Required Materials And Crafting Supplies
- Sheets of natural beeswax foundation dyed charcoal black or raven
- Square braided cotton wick specifically sized for rolled beeswax
- Handheld hairdryer for gently warming wax sheets
- Metal ruler and sharp utility knife for trimming straight edges
- Slender black velvet ribbon for bundling tapers together
Step-By-Step Construction Guide
- First, warm a sheet of black beeswax gently with a hairdryer until flexible and soft.
- Next, lay a length of braided cotton wick along the short edge of the wax sheet.
- In addition, fold the wax edge tightly over the wick, pressing down firmly with thumbs.
- Afterward, roll the candle forward across a flat table, keeping tension even and straight.
- Finally, press the final seam flat into the honeycomb pattern and trim the top wick to half an inch.
11. Antique Teacup Soy Wax Scents
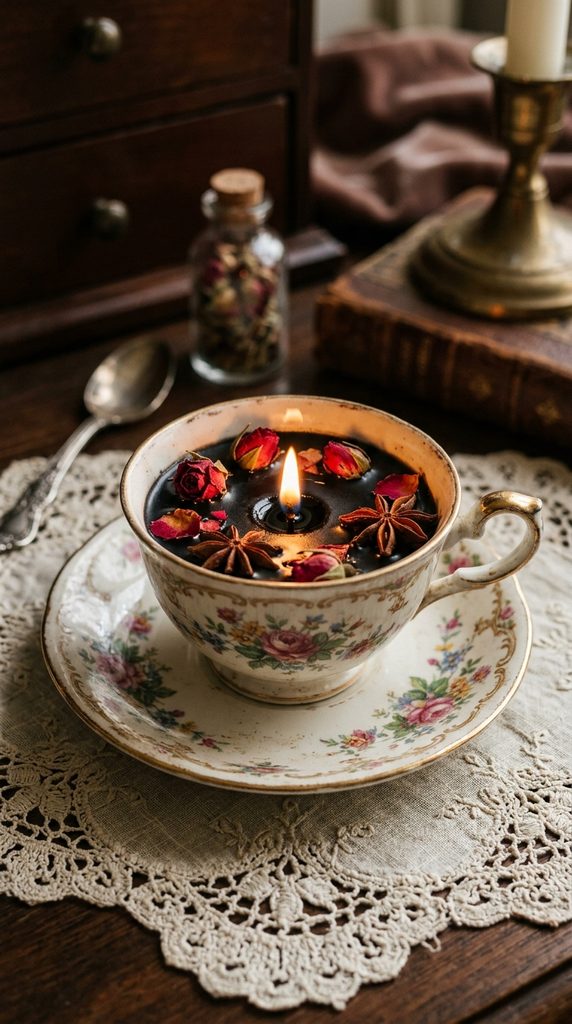
Decaying Tea Salon Porcelain Candle
Invoke decadent Victorian afternoon tea culture with a dark twist by pouring black wax into ornate, mismatched antique china. In addition, gilded gold rims and delicate faded floral patterns provide charming contrast against inky, shadowy wax. Consequently, the finished piece appears deeply atmospheric, eccentric, and steeped in aristocratic ghost stories. Furthermore, burning scents of black tea, bergamot, and smoky vanilla reinforces the high-tea séance theme. Thus, you merge comforting domestic porcelain with spooky gothic storytelling effortlessly. You capture captivating, cozy autumnal personality through charming thrift-store porcelain transformations.
Centering Wicks In Curved China Bowls
Additionally, securing tabbed cotton wicks with glue dots inside porcelain cups ensures perfectly balanced burns. For instance, using rich black dye flakes colors soy container wax into an inky pool resembling steeped dark tea. Next, floating small dried rose petals or star anise pods on the cooling wax surface completes the herbal elixir aesthetic. Therefore, your upcycled teacup looks like an enchanted ceremonial brew simmering quietly on an antique vanity. Meanwhile, the porcelain handle makes moving the warm candle from room to room remarkably safe and comfortable.
Required Materials And Crafting Supplies
- Thrifted vintage porcelain teacups and matching saucers with gold trim
- Natural soy container wax flakes
- Black candle wax liquid dye or concentrated dye chips
- Fragrance oils with notes of black tea, bergamot, and dried rose
- Dried miniature rosebuds and whole star anise for surface garnish
Step-By-Step Construction Guide
- First, wash and dry vintage teacups, securing a tabbed cotton wick centered to the bottom.
- Next, melt soy container wax to 80°C (176°F), stirring in black dye until completely opaque.
- In addition, incorporate black tea and bergamot fragrance oils, stirring gently for two minutes.
- Afterward, pour the inky wax into the cup, stopping a quarter-inch below the gilded rim.
- Finally, let the wax cool until semi-firm, then place dried rosebuds delicately on top.
12. Poison Apple Velvet Red Votives
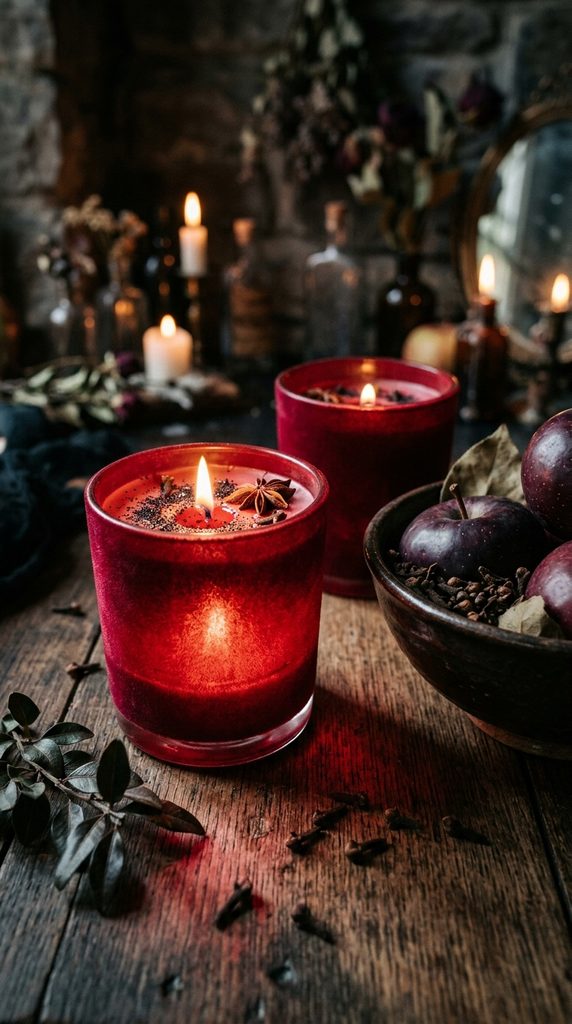
Wicked Fairy-Tale Orchard Glass Sconce
Channel classic dark fairytale folklore by styling deep scarlet wax inside frosted glass votives coated in crimson velvet flocking. Moreover, the velvety, tactile finish absorbs room reflections while allowing inner candle glow to project an intoxicating crimson blush. Therefore, your mantle acquires the seductive, dangerous beauty of an enchanted poisoned apple in an ancient orchard. Meanwhile, topping the wax with black glitter flakes and clove bud garnishes adds alchemical intrigue. Consequently, this enchanted orchard design captivates visitors who adore classic fairytale fantasy and rich jewel-toned luxury. You effortlessly project royal storybook villainy across your autumn living room.
Applying Seamless Velvet Powder Flocking
In addition, coating clear glass votives with spray adhesive allows red flocking fibers to bond into plush velvet skins. First, apply a uniform mist of craft glue across the glass exterior, avoiding the inner rim. Next, dust fine red nylon flocking powder densely over the wet adhesive, tapping away excess fibers. Thus, your glass votive transforms into a soft, velvety fruit that feels sumptuous to touch. Furthermore, the crimson candlelight filtering through the red velvet creates an alluring, cozy romantic warmth.
Required Materials And Crafting Supplies
- Clear glass votive cups or heavy whiskey tumblers
- Spray adhesive or brush-on decoupage glue
- Fine crimson red nylon flocking powder
- Red-dyed soy container wax and scented autumn oils
- Cotton wicks and metal centering collars
Step-By-Step Construction Guide
- First, tape off the top rim of a clean glass votive to keep the inner glass clean.
- Next, coat the exterior glass with a uniform layer of spray craft adhesive.
- In addition, shake crimson flocking powder over the adhesive until fully coated in plush velvet.
- Afterward, adhere a wick inside and pour warm red-dyed soy wax scented with spiced apple.
- Finally, allow the wax to cure completely before removing tape and trimming wicks.
13. Weathered Parchment Hymn Votives
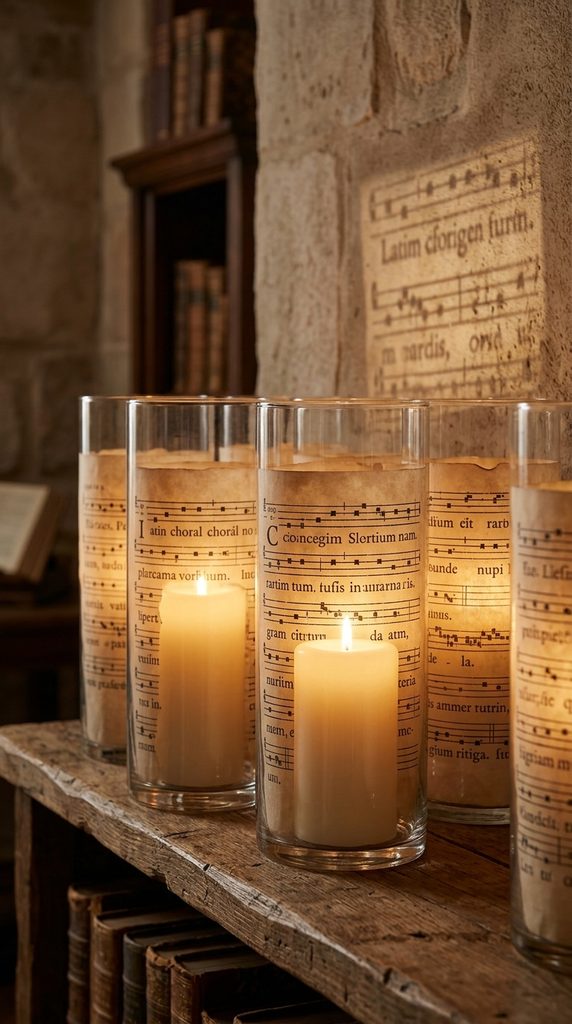
Liturgical Gothic Manuscript Hurricane
Celebrate historic cathedral architecture and sacred choral music with glass hurricanes wrapped in aged liturgical hymns. In addition, yellowed musical notation and Latin verses catch flickering candle rays with soft, parchment-toned luminescence. Consequently, your mantle display feels ancient, scholarly, and wonderfully reminiscent of moonlit abbey libraries. Furthermore, singing flame light through aged paper provides a gentle, flattering reading glow for cozy autumn rooms. Therefore, this literary project captivates readers who appreciate historic sheet music, monasteries, and gothic book arts. You bring sacred choir stall majesty into your home with humble recycled paper and hot tea.
Aging And Translucence Treatments For Paper
Furthermore, soaking vintage sheet music in brewed black tea and coffee produces believable antique parchment stains. In addition, brushing dried sheets with a whisper of mineral oil makes paper fibers semi-translucent like real vellum. Meanwhile, wrapping the treated sheet music around tall glass cylinder vases creates an authentic hurricane shade. Therefore, the dancing wick flame projects sharp musical notes and gothic script onto nearby walls. As a result, your room looks steeped in centuries of liturgical history and contemplative gothic romance.
Required Materials And Crafting Supplies
- Tall straight-sided glass cylinder hurricane vases
- Vintage printed sheet music or Latin choral hymnal pages
- Strong black tea and instant coffee for parchment aging
- Clear matte decoupage glue or double-sided craft tape
- Pillar candles or glass-encased votives that fit inside cylinders
Step-By-Step Construction Guide
- First, tear edges of sheet music pages, soaking them in black tea for ten minutes to age.
- Next, dry the stained paper flat with an iron to create crisp, crinkled parchment sheets.
- In addition, lightly wipe paper with a drop of baby oil to enhance translucent glow.
- Afterward, wrap the music sheet snugly around the glass cylinder, securing seams with tape.
- Finally, place a tall ivory pillar candle inside the hurricane to illuminate the musical notes.
14. Eerie Cobwebbed Tallow Candelabra
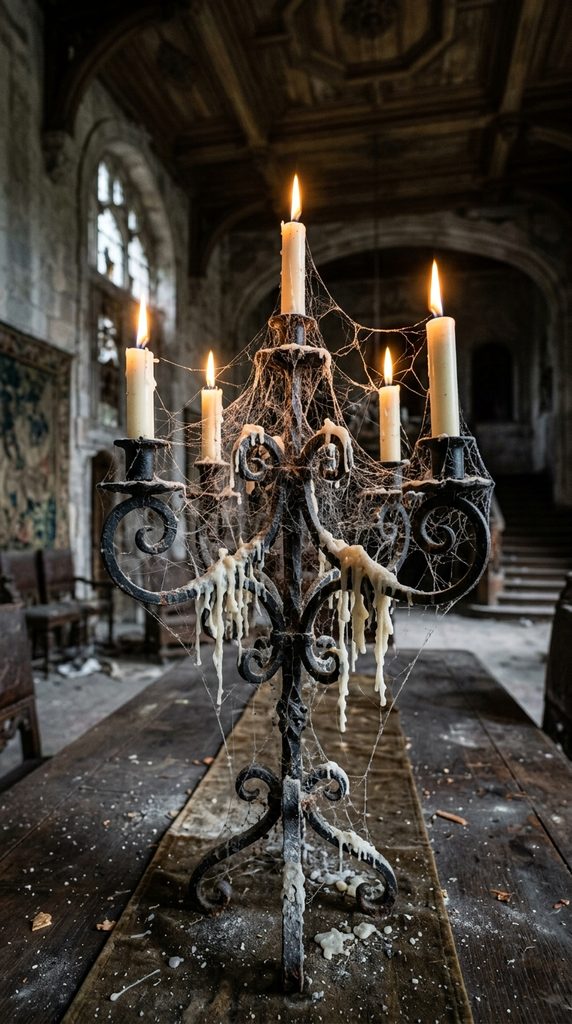
Forgotten Ballroom Candelabra Sconce
Subvert clean, pristine candelabras by spinning realistic, gossamer spiderwebs across blackened wrought-iron arms. Furthermore, allowing real dripping wax stalactites to fuse with gossamer web strands suggests decades of abandonment. Therefore, this dramatic build commands immediate attention as the premier gothic centerpiece in your dining hall. In fact, spinning glue-gun spiderwebs across metal scrollwork creates delicate, three-dimensional webs that never blow away. Similarly, tall, irregular ivory tapers burning down unevenly convey authentic nocturnal neglect. You project the spine-tingling majesty of an abandoned European ballroom across your personal dining table.
Spinning High-Velocity Glue Gun Webs
Moreover, using an air compressor or simple hairdryer behind a hot glue gun creates wispy, ultra-fine web filaments. First, secure unevenly burned ivory taper candles into a multi-arm black candelabra. Next, stretch fine hot-glue filaments across the candle shoulders and metal scrollwork using swift hand motions. Consequently, the candelabra appears preserved inside a sealed crypt undisturbed for a century. Afterward, dusting the synthetic webs with fine cornstarch or gray chalk powder adds realistic, dusty age.
Required Materials And Crafting Supplies
- Multi-arm black wrought-iron or heavy brass candelabra
- Set of varied-height ivory taper candles
- Hot glue gun with high-temperature clear glue sticks
- Handheld hairdryer or specialized glue web gun adapter
- Gray chalk dust or cornstarch for powdered dust aging
Step-By-Step Construction Guide
- First, mount ivory taper candles into candelabra cups, lighting them briefly to create uneven tops.
- Next, drip molten wax down the sides of the metal arms to build heavy drip foundations.
- In addition, pull hot glue strings across the candelabra arms using rapid, circular hand movements.
- Afterward, blow cool air across the glue filaments to freeze them into delicate, floating cobwebs.
- Finally, dust the finished webbed candelabra lightly with gray chalk powder to mimic ancient dust.
15. The Obsidian Geode Cracked Candle
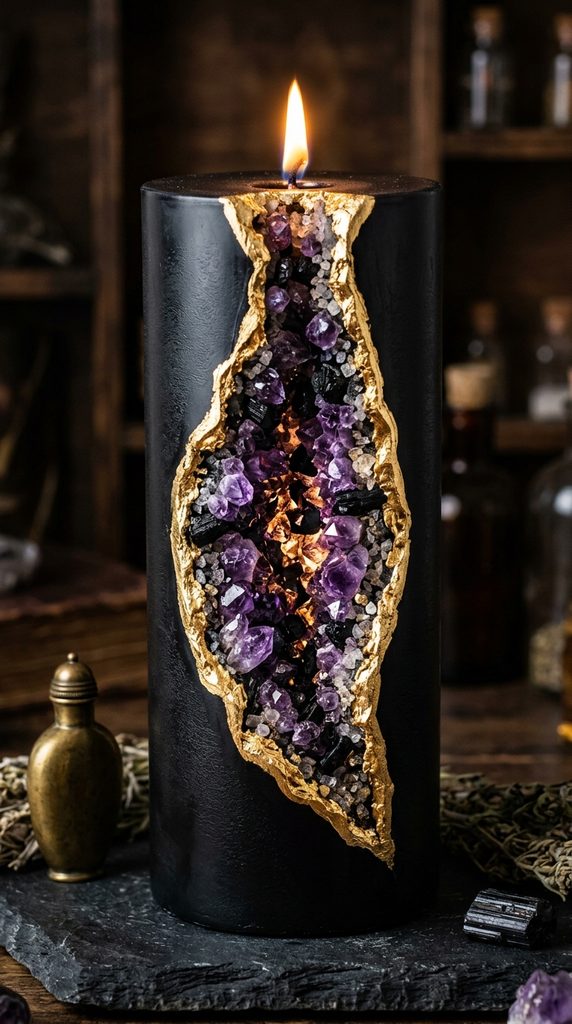
Raw Volcanic Mineral Pillar Sconce
Invoke mystical earth magic by hand-carving deep, jagged crystalline fissures into pitch-black wax pillars. In addition, lining the carved volcanic crevice with sparkling purple amethyst crystals and gold mica creates dazzling geode luxury. Consequently, the finished candle appears excavated from an enchanted subterranean vault deep beneath a mountain manor. Furthermore, the flickering center flame catches crystalline quartz facets, casting dancing gem reflections across walls. Thus, you merge fine mineral collecting with moody gothic candle craft seamlessly. You capture enchanting, volcanic earth energy through creative wax sculpting and raw gemstone placement.
Carving Faux Geode Caverns In Solid Wax
Additionally, using heated carving tools allows you to sculpt deep, organic fissures into smooth black pillars with ease. For instance, hollow out a jagged triangular canyon running down the front face of a large pillar. Next, press coarse crushed rock salt and real raw amethyst chips into warm, sticky wax inside the crevice. Therefore, the inner cavern sparkles like an authentic raw gemstone geode cracked open by miners. Meanwhile, dusting crevice borders with liquid gold leaf paint adds opulent, royal distinction to the volcanic stone.
Required Materials And Crafting Supplies
- Large, wide black paraffin pillar candle
- Craft utility knife and metal clay-carving ribbon tools
- Small raw amethyst crystals, black tourmaline chips, or coarse rock salt
- Liquid metallic gold leaf paint and fine detail brush
- Heat gun for softening interior wax during crystal setting
Step-By-Step Construction Guide
- First, sketch an irregular vertical fissure line down the front of a black pillar candle.
- Next, carve out a jagged crevice one inch deep into the wax using heated craft tools.
- In addition, soften the inner canyon wax with a heat gun, pressing amethyst crystals firmly into it.
- Afterward, fill tiny remaining gaps with coarse crushed rock salt dusted in purple mica.
- Finally, paint the jagged outer lip of the geode crevice with radiant liquid gold leaf.
16. Antiqued Transfer-Art Séance Pillar
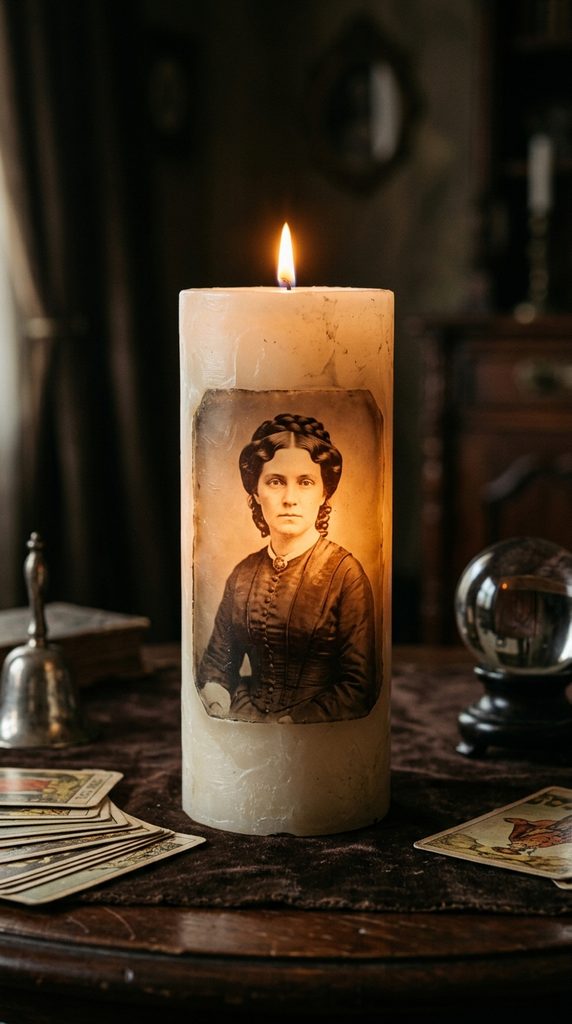
Victorian Spiritualist Portrait Candle
Celebrate the eerie parlor culture of Victorian spiritualism by transferring vintage sepia daguerreotype portraits directly onto wax. Furthermore, solemn gaze portraits of historical figures peering through cloudy, translucent wax evoke beloved ancestral spirits. Consequently, your bookcase or séance table acquires quiet historical dignity and haunting, poetic mystery. Additionally, burning down the wick creates a soft, backlit radiance that illuminates the vintage photograph from within. Hence, crafters adore this clever photo-transfer technique that turns family history into atmospheric autumn decor. It transforms plain household pillars into museum-quality spiritualist relics effortlessly.
Transferring Tissue Paper Images With Heat
Moreover, printing vintage public-domain portraits onto standard white gift tissue paper ensures invisible paper seams. First, wrap the printed tissue portrait snugly around an ivory pillar candle, covering it with wax paper. Next, glide a hot hairdryer slowly across the image until the wax paper turns shiny and translucent. Therefore, the melting candle wax saturates the thin tissue, absorbing the black ink directly into the pillar body. Consequently, the historical portrait looks hand-painted directly onto the wax surface with flawless clarity.
Required Materials And Crafting Supplies
- Smooth white or ivory pillar candles
- Standard white gift-wrapping tissue paper sheets
- Vintage sepia portraits or Victorian spirit photos printed with laser printers
- Roll of common household wax paper
- Handheld craft heat gun or standard household hairdryer
Step-By-Step Construction Guide
- First, tape a sheet of white tissue paper to printer paper and print a vintage Victorian portrait.
- Next, cut closely around the printed portrait, leaving only a tiny tissue border around edges.
- In addition, place the portrait flat against the pillar, wrapping a tight sheet of wax paper over it.
- Afterward, blast hot air across the paper with a heat gun until wax melts through the tissue.
- Finally, peel away the outer wax paper smoothly to reveal the permanently embedded image.
17. The Raven-Perched Twig Candelabra
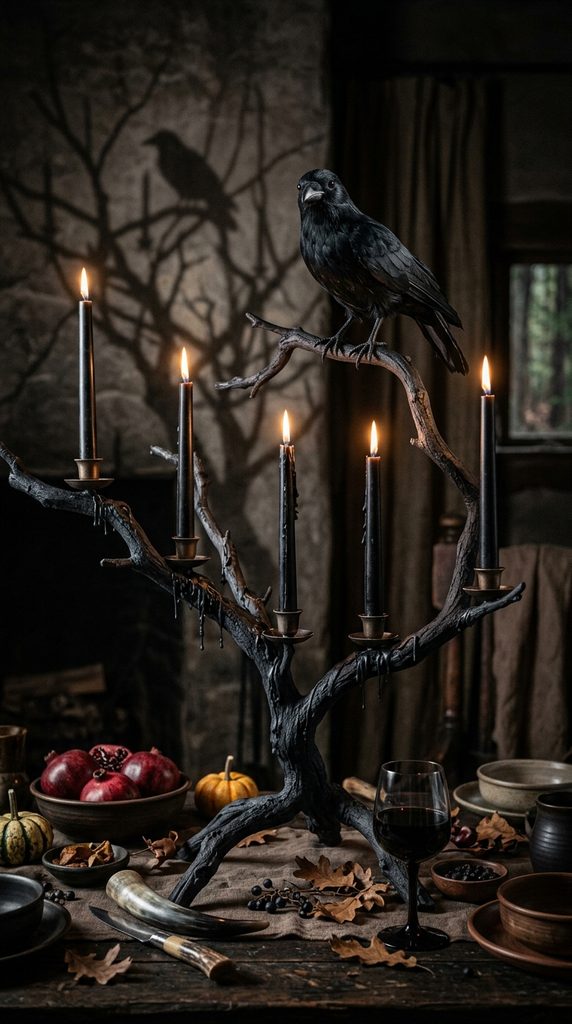
Gnarled Forest Sanctuary Candlestick
Celebrate chilling forest gothic romance by constructing an organic candelabra from real gnarled oak branches and dark wax. In addition, mounting an artificial feathered black raven perched vigilantly along the twisted branch adds Hitchcockian suspense. Consequently, the centerpiece feels deeply connected to misty autumn woods, midnight bogs, and ancient folklore. Furthermore, raw bark textures provide rich organic contrast against smooth, dripping black beeswax tapers. Thus, this design commands intense artistic admiration for its sculptural balance, natural materials, and theatrical impact. You turn fallen yard branches into an unforgettable, high-end gothic dining installation in an afternoon.
Anchoring Twisted Branches Safely
Furthermore, securing heavy, gnarled tree branches into a weighted wooden base ensures total stability during dinner service. First, drill shallow holes into horizontal branch forks to seat metal candle insert cups securely. Next, paint the entire branch assembly in matte charcoal and deep bark-brown tones for weathered age. In addition, perch a glossy black raven prop along an arched bough using dark florist wire around its talons. Therefore, the birds appear poised to take flight as black wax drips organically across rough oak bark. Afterward, light the black tapers to cast long, spindly twig shadows across your dining table.
Required Materials And Crafting Supplies
- Sturdy fallen hardwood tree branch with multiple flat horizontal forks
- Heavy wooden base board and screws for securing the branch upright
- Metal candle cup inserts to catch hot wax safely on wood
- Set of tall black beeswax or paraffin taper candles
- Realistic artificial feathered black raven prop with wire feet
Step-By-Step Construction Guide
- First, trim and screw a gnarled hardwood branch firmly into a weighted wooden base board.
- Next, drill flat holes into top branch forks, gluing metal candle insert cups inside for fire safety.
- In addition, spray-paint the branch and base in matte charcoal, dry-brushing with raw umber.
- Afterward, wire the black raven securely to a high branch fork, adjusting its posture.
- Finally, insert tall black tapers into the metal cups, letting melted drips run down the bark.