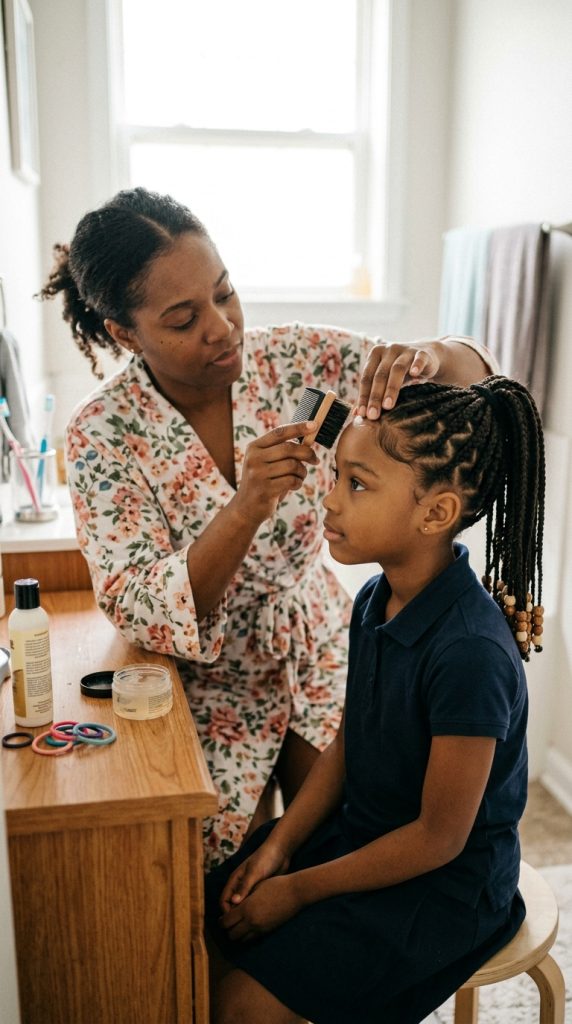
Braided hairstyles have always been one of the best styling options for kids with natural hair. They are beautiful, practical, protective, and incredibly versatile. For many parents, braids are more than just hairstyles — they are part of a weekly routine that helps keep natural hair healthy, manageable, and easier to maintain during busy school days and active playtime.
But while braids can make life easier, many parents quickly discover one common problem:
Kids do not always enjoy sitting for long hairstyling sessions.
Natural hair requires patience, moisture, and gentle care, especially for children whose scalps are still sensitive. Tight pulling, complicated sectioning, and long styling times can quickly turn hairstyling into a stressful experience for both parents and kids.

That is exactly why smart braid hacks are so helpful.
Braid hacks are simple techniques, shortcuts, and styling tricks that make braiding faster, easier, more comfortable, and longer lasting without sacrificing style. These hacks help parents save time while also protecting their child’s natural hair from unnecessary breakage and dryness.
The best part is that you do not need to be a professional hairstylist to use them.
Many easy braid hacks focus on improving everyday routines:
- Keeping braids neat longer
- Reducing frizz
- Making parting easier
- Preventing scalp tension
- Speeding up styling time
- Helping natural hair stay moisturized
- Creating cute styles with less effort
This is especially important for kids because their hairstyles need to survive real-life activities. Children run, jump, play, nap, and move constantly throughout the day. A hairstyle that looks perfect for five minutes but falls apart before lunchtime is not practical for family life.
That is why long-lasting and child-friendly braid techniques matter so much.
Another reason braid hacks are popular is because natural hair textures are incredibly diverse. Some children have soft loose curls, while others have tight coils or very thick textured hair. Different textures often need different styling approaches. Learning simple hacks helps parents work with the hair instead of fighting against it.
For example:
- If your child’s hair tangles easily, stretching methods before braiding can help reduce knots.
- If braids become frizzy quickly, nighttime wrapping techniques can extend the style longer.
- If your child complains about painful hairstyles, tension-free sectioning hacks can make styling much more comfortable.
These small adjustments can completely change the hairstyling experience.
Another major benefit of braided hairstyles is protection.
Natural hair can become dry and fragile if manipulated too often. Protective braid styles help reduce daily brushing and handling, which supports healthier growth and moisture retention over time.
However, protective styling only works when done correctly.
Braids that are too tight, too heavy, or left in too long can actually damage the hairline and scalp. That is why healthy braid habits are just as important as the hairstyle itself.
This works best when parents focus on:
- Gentle tension
- Proper scalp moisture
- Comfortable section sizes
- Lightweight accessories
- Regular nighttime care
Today, braided kids hairstyles have also become incredibly creative and stylish. Pinterest and social media are filled with beautiful ideas using:
- Beads
- Colorful elastics
- Heart-shaped parts
- Zig-zag sections
- Puff ponytails
- Bubble braids
- Twist combinations
- Fun accessories
These details allow kids to express their personality while still keeping hairstyles practical for everyday life.
At the same time, many families today are embracing natural hair textures more confidently than ever before. Instead of constantly trying to overly flatten or hide curls, parents are learning how to style natural hair in ways that celebrate texture and protect hair health.
This positive shift helps children build confidence in their natural beauty from a young age.
If you have busy weekday mornings, braid hacks can become lifesavers. A hairstyle that lasts several days with only small touch-ups can reduce stress dramatically for parents juggling work, school routines, and family responsibilities.
The goal is not perfection.
Kids’ hairstyles do not need to remain salon-perfect every second. The real goal is creating hairstyles that are:
- Comfortable
- Healthy
- Cute
- Easy to maintain
- Realistic for everyday life
This article is designed to help with exactly that.
In this guide, you will discover 12 braid hacks for kids with natural hair that are practical, beginner-friendly, protective, and stylish. These are not overly complicated salon techniques. Instead, they are smart real-life hacks parents can actually use during everyday hair routines.
You will learn:
- Time-saving braid tricks
- Ways to reduce pain during braiding
- Moisture hacks for natural hair
- How to make braids last longer
- Styling shortcuts for busy mornings
- Easy ways to keep kids comfortable during hairstyling
Whether your child has thick coils, soft curls, short natural hair, or long textured hair, these braid hacks can help make styling routines smoother, faster, and much less stressful.
Most importantly, these tips are designed for real families and real schedules.
Because when kids feel comfortable and confident in their hairstyles — and parents feel less overwhelmed during hair time — everyone wins.
Let’s explore the best braid hacks every parent should know for styling kids’ natural hair beautifully and gently.
1. The Pre-Stretching Hair Hack for Faster & Neater Braids
What it is
One of the biggest struggles parents face while braiding kids’ natural hair is shrinkage and tangling. Natural curls and coils are beautiful, but they can make sectioning and braiding more time-consuming when the hair is highly shrunk or tightly coiled.
That is where the pre-stretching hair hack becomes extremely helpful.
This hack involves gently stretching the hair before braiding so the sections become easier to manage, smoother to part, and faster to braid. Pre-stretched hair not only saves styling time but also helps braids look cleaner and last longer.

Many parents notice that braids become less frizzy and more uniform when the hair is stretched properly beforehand.
The best part is that stretching does not require damaging heat tools. There are several gentle heatless methods that work beautifully for kids’ natural hair while still protecting curl health.
This works especially well if your child has thick hair, tight coils, or hair that tangles quickly during styling sessions.
How to implement it (practical steps)
Start with freshly washed and moisturized hair.
Apply:
- Leave-in conditioner
- Moisturizing cream
- Lightweight oil for softness
Now choose a stretching method:
- Large twists
- Chunky braids
- Banding method
- African threading
- Heatless ponytail stretching
For beginners, chunky braids are easiest.
Divide the hair into 4–8 large sections and braid each section loosely before bedtime or a few hours before styling.
Once the hair dries in stretched form:
- Remove braids gently
- Finger detangle lightly
- Begin sectioning for braids
You will notice:
- Faster parting
- Less shrinkage
- Smoother braid appearance
- Reduced tangling during styling
If your child dislikes long hairstyling sessions, this single hack can dramatically reduce styling time.
Best for (who should use it)
This braid hack is perfect for:
- Thick natural hair
- Tight coils and curls
- Kids with tender scalps
- Parents wanting faster braid sessions
- Long-lasting braid styles
If braiding usually takes hours because of shrinkage and knots, this hack helps significantly.
Pro tip (expert advice)
Do not overstretch the hair until it becomes completely flat. Keeping slight texture helps braids grip better and prevents styles from slipping too quickly.
Mistakes to avoid
- Stretching dry hair without moisture
- Using excessive heat tools
- Pulling hair too tightly during stretching
- Skipping detangling before braiding
- Leaving stretched sections tangled overnight
2. The Parting Gel Hack for Cleaner Kid Braids
What it is
One of the biggest differences between messy braids and polished-looking braids is clean sectioning. Even simple braid styles instantly look more professional and long-lasting when the parts are neat and smooth.
The parting gel hack is a simple trick that helps create cleaner scalp sections while making the braiding process easier and faster.
Many parents struggle with frizzy sections, uneven lines, or loose hairs escaping while braiding natural hair. A small amount of parting gel or styling cream helps control the hair during sectioning without making it overly stiff.

This hack is especially useful for:
- School hairstyles
- Picture day braids
- Protective styles
- Beaded braid designs
- Scalp pattern styles
The key is using the right amount. Too much product can cause buildup and itching, while too little may not control the hair effectively.
How to implement it (practical steps)
Start with slightly damp or moisturized hair.
Use:
- Rat-tail comb
- Section clips
- Lightweight braid gel or edge cream
Part one section at a time and apply a tiny amount of gel near the roots only.
Now smooth the section gently using:
- Fingers
- Soft brush
- Comb edge
The product helps keep stray hairs controlled while making the braid pattern cleaner.
Continue sectioning slowly instead of rushing. Smaller clean sections create more polished results overall.
For kids with sensitive scalps:
- Choose alcohol-free products
- Avoid strong holding gels
- Focus on moisture-based styling creams
This hack works beautifully for styles with:
- Zig-zag parts
- Heart-shaped parts
- Criss-cross rubber band styles
- Straight-back braids
Best for (who should use it)
This braid hack is ideal for:
- Parents learning to braid
- Kids with fluffy or frizzy textures
- Detailed braid designs
- Protective school hairstyles
- Longer-lasting braid styles
If your braid sections usually look messy quickly, this technique improves neatness dramatically.
Pro tip (expert advice)
Dip the rat-tail comb lightly into water before sectioning stubborn curls. Slight moisture often creates cleaner part lines than using heavy gel alone.
Mistakes to avoid
- Using excessive gel buildup
- Applying product directly on entire scalp heavily
- Creating overly tight sections
- Using hard brushes aggressively
- Ignoring scalp moisture underneath styles
3. The “Snack Break” Braiding Hack for Kids with Tender Scalps
What it is
One of the most underrated but powerful braid hacks for kids is not actually about the hairstyle itself — it is about making the braiding experience more comfortable and stress-free for children.
Many kids dislike braiding because sitting still for long periods becomes tiring, uncomfortable, or even painful. This often leads to crying, frustration, and stressful hair sessions for both parents and children.
The “Snack Break” braiding hack focuses on breaking long hairstyling sessions into smaller, calmer moments to help children feel more relaxed and cooperative.

Instead of trying to finish an entire complicated hairstyle in one exhausting session, parents use short comfort breaks to reduce stress and scalp sensitivity.
This simple mindset shift can completely change the way kids experience natural hair care routines.
How to implement it (practical steps)
Before starting:
- Moisturize the scalp properly
- Detangle gently in sections
- Prepare snacks, toys, or cartoons nearby
Now braid in smaller time blocks.
For example:
- Finish front sections first
- Take short snack or stretch break
- Continue remaining braids afterward
During breaks:
- Massage scalp lightly
- Let child move around briefly
- Offer water or snacks
- Reduce scalp tension if needed
You can also:
- Braid over multiple sessions
- Complete half today and half tomorrow
- Alternate between braiding and playtime
For younger children:
- Use distraction methods
- Storytelling
- Educational cartoons
- Music or games
This hack helps children associate hair care with calmer and more positive experiences instead of pain or stress.
Best for (who should use it)
This braid hack is perfect for:
- Toddlers and young kids
- Children with tender scalps
- Long braid sessions
- Thick natural hair
- Parents struggling with hair-time resistance
If your child cries or becomes restless during hairstyling, this method can make a huge difference.
Pro tip (expert advice)
Always ask your child if a braid feels too tight while styling. Small adjustments immediately can prevent discomfort and protect the hairline long term.
Mistakes to avoid
- Rushing through painful tight braids
- Forcing children to sit too long without breaks
- Ignoring scalp redness or discomfort
- Using hairstyling as punishment time
- Prioritizing perfect appearance over comfort
4. The Satin Night Protection Hack for Longer-Lasting Braids
What it is
One of the biggest problems parents face after spending hours braiding their child’s natural hair is watching the hairstyle become frizzy and messy after only one or two nights. Cotton pillowcases, rough sleeping habits, and nighttime friction can quickly ruin even the neatest braids.

That is why the satin night protection hack is one of the most important braid hacks for kids with natural hair.
This simple trick helps braided hairstyles stay neat longer while also protecting natural hair from dryness, frizz, and breakage. Satin creates a smoother surface that reduces friction against the hair during sleep.
The difference can be dramatic.
Without nighttime protection:
- Braids become fuzzy faster
- Edges lose neatness
- Moisture disappears quickly
- Hair tangles more easily
With proper satin protection:
- Braids last longer
- Hair stays shinier
- Scalp remains healthier
- Morning styling becomes easier
This hack is especially helpful for busy parents because it reduces the need for daily touch-ups.
How to implement it (practical steps)
Before bedtime:
- Moisturize the scalp lightly if needed
- Gather longer braids gently together
- Avoid sleeping with very tight ponytail tension
Now use one of these satin protection methods:
- Satin bonnet
- Satin scarf
- Satin pillowcase
- Satin-lined sleep cap
For younger children who dislike bonnets:
- Satin pillowcases often work best
- Use soft comfortable bonnets with elastic-free edges
If the braids are long:
- Tie them loosely into one low braid or ponytail
- This prevents excessive pulling during sleep
In the morning:
- Remove the bonnet gently
- Shake braids loose softly
- Refresh edges with water spray if needed
This single habit can help braided hairstyles stay neat several extra days.
Best for (who should use it)
This braid hack is ideal for:
- Kids with protective braid styles
- Parents wanting longer-lasting hairstyles
- Dry or frizz-prone natural hair
- School braid routines
- Curly and coily textures
If your child’s braids become messy overnight quickly, satin protection helps tremendously.
Pro tip (expert advice)
Choose double-layer satin bonnets for kids who move a lot during sleep. They stay secure better while remaining gentle on natural hair.
Mistakes to avoid
- Using rough cotton scarves
- Tying bonnets too tightly around edges
- Sleeping with dry unmoisturized braids constantly
- Ignoring scalp care underneath protective styles
- Leaving braids completely loose while sleeping
5. The Scalp Oil Dropper Hack for Healthy Braids
What it is
One of the most overlooked braid hacks for kids’ natural hair is proper scalp care while the braids are installed. Many parents focus heavily on the hairstyle itself but forget that the scalp still needs moisture and attention during protective styling.
The scalp oil dropper hack is a simple technique that keeps the scalp healthy, hydrated, and comfortable without ruining the braids.
Instead of pouring heavy oils directly onto the scalp — which often causes greasy buildup — this hack uses a small applicator bottle or oil dropper to apply lightweight moisture precisely where needed.

This method helps:
- Reduce dryness
- Prevent itchy scalp
- Keep braids looking fresher longer
- Support healthy hair growth
- Avoid excessive product buildup
This works especially well for kids who wear braided styles for several days or weeks.
How to implement it (practical steps)
Choose a lightweight oil such as:
- Jojoba oil
- Grapeseed oil
- Lightweight scalp serum
- Tea tree blended oil for dryness
Avoid extremely heavy oils that clog the scalp.
Fill a small applicator bottle or dropper with the oil.
Now apply tiny amounts directly between braid parts:
- Focus on dry areas
- Massage gently with fingertips
- Avoid soaking the braids themselves
You only need small amounts.
For weekly maintenance:
- Moisturize scalp every few days
- Refresh edges lightly with water spray
- Keep braids clean and breathable
If your child has sensitive skin:
- Use fragrance-free products
- Patch test new oils first
This hack helps protective styles remain healthier and more comfortable over time.
Best for (who should use it)
This braid hack is perfect for:
- Long-lasting braid styles
- Kids with dry scalp
- Thick natural hair
- Protective school hairstyles
- Parents wanting healthier braid maintenance
If your child complains about itchy braids often, this technique can help significantly.
Pro tip (expert advice)
Warm the oil slightly between your hands before applying. Slight warmth helps distribute moisture more evenly across the scalp.
Mistakes to avoid
- Over-oiling the scalp heavily
- Using thick greasy products daily
- Ignoring itchiness or dryness
- Scratching the scalp aggressively
- Applying product buildup directly onto braids repeatedly
6. The Bead Weight Balance Hack for Comfortable Kids Braids
What it is
Beads are one of the most loved accessories for kids’ braided hairstyles because they add personality, color, movement, and fun. However, many parents accidentally overload braids with heavy beads that become uncomfortable for children over time.
The bead weight balance hack focuses on using beads strategically so the hairstyle remains cute without placing too much stress on the hair or scalp.

This is important because excessive bead weight can:
- Pull on braid ends
- Cause scalp discomfort
- Lead to breakage
- Make hairstyles feel heavy during school or play
The goal is balance — enough accessories to make the hairstyle fun while still protecting natural hair health.
This hack works especially well for younger children with finer or softer natural hair textures.
How to implement it (practical steps)
Start by choosing lightweight beads:
- Plastic beads
- Hollow beads
- Wooden lightweight beads
- Soft acrylic accessories
Avoid very large heavy beads on small braids.
Now balance the accessories carefully:
- Add beads mainly near braid ends
- Do not overload every single braid
- Alternate decorated braids with simpler braids
For younger children:
- Use fewer beads overall
- Keep braid lengths moderate
- Focus accessories near front sections only
Secure beads properly using:
- Bead stoppers
- Elastic bands
- Soft braid loops
This prevents beads from slipping or pulling unnecessarily.
If your child is highly active:
- Choose smoother rounded beads
- Avoid sharp or bulky accessories
- Keep hairstyles lightweight for sports and playtime
The result still looks playful and stylish without sacrificing comfort.
Best for (who should use it)
This braid hack is ideal for:
- Kids who love colorful hairstyles
- School braid styles
- Younger children with tender scalps
- Protective braided hairstyles
- Parents wanting healthier accessory habits
If your child often complains about heavy braids, this adjustment makes a noticeable difference.
Pro tip (expert advice)
Place the most decorative beads near the front or sides where they are visible instead of loading every braid equally. The hairstyle still looks detailed while remaining lighter overall.
Mistakes to avoid
- Using oversized heavy beads on tiny braids
- Decorating every braid excessively
- Ignoring signs of scalp pulling
- Using rough beads that snag hair
- Securing beads too tightly at braid ends
7. The Spray Bottle Moisture Hack for Softer Braids
What it is
One of the most common mistakes parents make with braided hairstyles is assuming that once the braids are finished, the hair no longer needs moisture. In reality, natural hair still requires hydration even while it is braided. Without proper moisture, braids can become dry, frizzy, brittle, and uncomfortable for kids after only a few days.
That is why the spray bottle moisture hack is so helpful.
This simple hack keeps kids’ braided natural hair soft, fresh, and hydrated without ruining the hairstyle. Instead of soaking the hair heavily, parents use a light moisture mist to refresh both the scalp and braid lengths gently.

The biggest advantage of this hack is balance. It prevents dryness while avoiding product buildup or overly wet braids that take too long to dry.
This works especially well for:
- Protective braid styles
- School hairstyles
- Dry climates
- Thick coily hair
- Multi-day braid styles
Even a small amount of consistent moisture can dramatically improve how healthy the braids look and feel.
How to implement it (practical steps)
Take a clean spray bottle and create a simple braid-refresh mix using:
- Water
- Small amount of leave-in conditioner
- Tiny amount of lightweight oil
Shake the mixture gently.
Now lightly mist:
- The scalp
- Braid lengths
- Ends of the hair
Do not soak the braids completely. The goal is light hydration only.
After spraying:
- Massage the scalp gently with fingertips
- Pat excess moisture lightly using microfiber towel if needed
- Allow hair to air dry naturally
For daily routines:
- Refresh every 1–3 days depending on dryness
- Focus mainly on dry sections or braid ends
This hack helps keep braids softer, shinier, and less frizzy throughout the week.
Best for (who should use it)
This braid hack is perfect for:
- Kids with dry natural hair
- Long-lasting protective styles
- Coily and curly textures
- Busy school schedules
- Parents wanting healthier braid maintenance
If your child’s braids often start looking dry after a few days, this trick helps restore softness quickly.
Pro tip (expert advice)
Store the spray bottle in a cool place and shake it before every use. Natural oils separate over time, and mixing keeps the moisture blend balanced.
Mistakes to avoid
- Oversaturating braids heavily
- Using thick greasy mixtures
- Spraying hair without allowing airflow to dry
- Ignoring braid ends during moisturizing
- Using products that leave white residue buildup
8. The Loose Edge Braiding Hack for Protecting Hairlines
What it is
One of the most important braid hacks for kids with natural hair is learning how to protect delicate edges and hairlines during styling. Many children experience unnecessary scalp tension because front braids are pulled too tightly in an attempt to make the style “last longer.”
Unfortunately, overly tight braiding can lead to:
- Scalp pain
- Small bumps
- Edge thinning
- Hairline damage
- Long-term breakage
The loose edge braiding hack focuses on keeping the front hairline softer and gentler while still maintaining neat-looking braids.

This small adjustment makes a huge difference in both comfort and hair health.
The reality is that hairstyles do not need painful tension to look neat. In fact, softer braids often appear more natural and child-friendly while allowing kids to move comfortably throughout the day.
This hack is especially important for younger children because their edges are more fragile than adult hairlines.
How to implement it (practical steps)
Before braiding:
- Detangle gently
- Moisturize edges lightly
- Avoid excessive pulling during sectioning
When starting front braids:
- Hold the hair softly instead of tightly stretching it
- Use moderate braid tension only
- Leave tiny soft baby hairs naturally if desired
You can also:
- Make front sections slightly larger
- Avoid very tiny tight braids near edges
- Use softer braid grips while braiding downward
If your child complains:
- Stop immediately and loosen the section
- Redness or bumps are warning signs
For long-lasting styles:
- Focus neatness on clean parting instead of tight pulling
- Use satin protection at night to preserve softness naturally
This approach keeps hairstyles healthier while still looking polished.
Best for (who should use it)
This braid hack is ideal for:
- Kids with sensitive scalps
- Younger children
- Thin or delicate edges
- Protective braid styles
- Parents wanting healthier hairline habits
If your child often says braids hurt near the front, this adjustment is extremely important.
Pro tip (expert advice)
Ask your child to raise their eyebrows after finishing front braids. If the forehead feels too tight or stiff, the braids likely need loosening.
Mistakes to avoid
- Prioritizing “super tight” braids for neatness
- Ignoring scalp pain complaints
- Pulling edges excessively during styling
- Keeping painful braids installed for days
- Using harsh edge brushes aggressively
9. The Color-Coded Sectioning Hack for Faster Braiding
What it is
One of the smartest braid hacks for busy parents is the color-coded sectioning hack. This simple organization method makes braiding faster, cleaner, and much less stressful — especially when creating detailed styles with multiple sections.
Instead of repeatedly re-parting and searching for braid sections, parents organize the hair beforehand using colorful clips, elastics, or section bands.

This technique is especially helpful for:
- Beginners learning to braid
- Kids with thick natural hair
- Complex braid patterns
- Multi-braid hairstyles
- Busy weekday routines
The biggest benefit is efficiency. Organized sections help reduce confusion and speed up the entire hairstyling process significantly.
This hack also helps children stay calmer because the styling session becomes smoother and less chaotic.
How to implement it (practical steps)
Start with fully detangled and moisturized hair.
Before braiding:
- Divide the hair into larger working zones
- Clip each section separately using colorful clips or bands
For example:
- Pink clips = front sections
- Yellow clips = side sections
- Blue clips = back sections
Now braid one section at a time systematically.
You can also pre-section:
- Bead placements
- Braid sizes
- Twist combinations
- Rubber band designs
For thick hair:
- Keep unused sections twisted away neatly
- Lightly mist dry sections if needed during styling
This organization method prevents:
- Tangling during braiding
- Uneven braid sizing
- Repeated parting mistakes
- Unnecessary styling delays
The process feels much more controlled and manageable overall.
Best for (who should use it)
This braid hack is perfect for:
- Beginner parents
- Thick natural hair textures
- Kids with long hair
- Detailed braid styles
- Faster school morning routines
If hairstyling often feels disorganized or overwhelming, this system makes the process much easier.
Pro tip (expert advice)
Use large butterfly clips for thick hair instead of tiny clips that slip out constantly. Stronger clips help sections stay separated neatly while working.
Mistakes to avoid
- Working without pre-sectioning thick hair
- Allowing loose sections to tangle together
- Using clips that snag natural hair
- Rushing through uneven section sizes
- Letting hair dry completely during long styling sessions
10. The Foam Mousse Finishing Hack for Frizz-Free Braids
What it is
One of the most frustrating parts of braiding kids’ natural hair is finishing a beautiful hairstyle only to notice frizz and loose hairs sticking out almost immediately. Natural textures are soft and full of movement, so some frizz is completely normal, but there is a simple hack that helps braids stay cleaner and smoother much longer.
The foam mousse finishing hack is a lightweight finishing technique used after braiding to help reduce frizz, smooth flyaways, and give braids a more polished appearance without making them stiff or greasy.
Unlike heavy gels, mousse feels light and airy on kids’ hair while still helping the braid pattern hold neatly.

This hack is especially useful because it:
- Softens fresh braids
- Reduces fuzzy braid texture
- Helps styles last longer
- Adds shine without heaviness
- Keeps braids looking photo-ready
It works beautifully for school hairstyles, birthday braids, bead styles, and protective braid looks.
How to implement it (practical steps)
After completing the braids:
- Choose a lightweight braid mousse or foam
- Pump a small amount into your hands
Now smooth the mousse gently over:
- The braid lengths
- Frizzy sections
- Flyaways near parts
Avoid soaking the scalp heavily with product.
Next:
- Tie a satin scarf lightly around the braids for 5–10 minutes
- This helps the mousse set smoothly
Once removed, the braids usually appear:
- Shinier
- Cleaner
- More defined
- Less frizzy
For younger children:
- Use kid-friendly lightweight formulas
- Avoid strong alcohol-heavy mousses
This hack is especially effective right after finishing new braids.
Best for (who should use it)
This braid hack is ideal for:
- Fresh braid styles
- School picture day hairstyles
- Protective braid routines
- Curly or fluffy natural textures
- Parents wanting neater long-lasting styles
If your child’s braids fuzz up very quickly, mousse can improve the overall finish significantly.
Pro tip (expert advice)
Use mousse mainly on the braid lengths instead of directly on the scalp. This reduces buildup while still smoothing the hairstyle effectively.
Mistakes to avoid
- Using excessive mousse product
- Applying heavy sticky foams
- Skipping satin wrapping afterward
- Saturating braids until wet
- Using adult products with strong chemicals on young kids
11. The “Big Section” Braiding Hack for Faster School Styles
What it is
Many parents accidentally make braiding harder than necessary by creating extremely tiny sections for everyday hairstyles. While small braids can look detailed, they also take much longer and often create unnecessary scalp tension for children.
The “Big Section” braiding hack focuses on using slightly larger braid sections to create faster, softer, and more child-friendly hairstyles.
This simple adjustment saves time dramatically while still looking stylish and neat for school or casual wear.

Larger braid sections offer several advantages:
- Faster styling time
- Less pulling on the scalp
- Easier braid removal
- Reduced tangling
- More comfortable for kids
This works especially well for:
- Busy weekday mornings
- Younger children
- Tender-headed kids
- Parents learning to braid
The goal is practicality over perfection.
Kids do not always need extremely detailed salon-sized braids for everyday life. Sometimes simple medium-sized braids are healthier and much more realistic for family routines.
How to implement it (practical steps)
Start with stretched or detangled hair.
Instead of creating many tiny sections:
- Divide the hair into medium or chunky sections
- Keep the parting clean and balanced
You can create:
- Chunky box braids
- Medium cornrows
- Large twist braids
- Bigger ponytail braids
For school styles:
- Focus on neat front sections
- Keep back sections larger for speed
If adding beads:
- Use fewer lightweight accessories
- Keep braid weight balanced
This method can cut styling time almost in half while still protecting natural hair effectively.
Best for (who should use it)
This braid hack is perfect for:
- Busy parents
- Younger children
- Tender-scalp kids
- Faster school hairstyles
- Thick natural hair textures
If braid day usually takes too many hours, larger sections can make routines much easier.
Pro tip (expert advice)
Combine large braids with creative parting designs like zig-zag or triangle sections. The hairstyle still looks detailed without needing tiny braids everywhere.
Mistakes to avoid
- Making sections unevenly sized
- Pulling large braids too tightly
- Overloading chunky braids with heavy beads
- Rushing the parting process
- Assuming smaller braids are always healthier
12. The “Refresh Edges Only” Hack for Busy School Mornings
What it is
One of the smartest braid maintenance hacks for kids’ natural hair is realizing that you do not always need to redo the entire hairstyle to make it look fresh again.
The “Refresh Edges Only” hack focuses on touching up only the front hairline and visible sections instead of completely re-braiding everything.
This saves:
- Time
- Energy
- Stress
- Hair manipulation
Most braid styles start looking messy near the front first because:
- Kids sweat during play
- Front hairs move more during sleep
- Edges experience more friction daily
The back of the hairstyle often still looks perfectly fine.
Instead of removing all the braids, parents simply refresh the front sections and edges to make the entire hairstyle appear newer again.
This works especially well for school weeks when mornings are already busy.
How to implement it (practical steps)
Start by examining the hairstyle carefully.
Usually only:
- Front braids
- Hairline sections
- Edges
need refreshing.
Lightly mist the front with water or leave-in conditioner.
Now:
- Re-braid loose front braids
- Smooth edges gently with edge cream
- Replace slipped beads if necessary
- Tighten only the visible front sections softly
For extra freshness:
- Apply mousse lightly
- Use satin scarf for 5 minutes
- Fluff puff sections or curls gently
This quick touch-up often makes the hairstyle look almost brand new without redoing the entire head.
Best for (who should use it)
This braid hack is ideal for:
- School braid styles
- Busy weekday mornings
- Parents wanting low-manipulation routines
- Protective hairstyles lasting multiple days
- Kids who dislike long styling sessions
If your child hates sitting through full re-braiding often, this trick becomes extremely helpful.
Pro tip (expert advice)
Take pictures of freshly finished hairstyles. Later, you can compare braid placement and recreate refreshed front sections more easily.
Mistakes to avoid
- Re-braiding the entire head unnecessarily
- Pulling refreshed edges too tightly
- Using excessive edge gel buildup daily
- Ignoring scalp moisture during touch-ups
- Waiting until the hairstyle becomes completely tangled before refreshing