A small garage can either feel like a chaotic storage cave or a highly efficient, organized extension of your home. The difference is never about square footage — it’s about structure, planning, and intentional storage design. When tools, hardware, ladders, and seasonal equipment compete for limited space, clutter quickly takes over. And once clutter builds up, productivity drops. Projects feel overwhelming. Finding even a simple screwdriver becomes frustrating.
But here’s the truth: a small garage can be one of the most functional spaces in your entire home when organized correctly. With the right tool organization strategies, you can create a garage that feels spacious, accessible, and visually calm — even if it’s compact. The key is to stop thinking horizontally and start thinking vertically. Stop storing randomly and start categorizing intentionally. Stop stacking and start systemizing.

Pinterest-worthy garages aren’t about perfection. They’re about smart layouts, defined zones, and storage systems that work long-term. The best small garage setups focus on five core principles: maximizing vertical space, protecting floor space, using modular systems, labeling everything clearly, and designing around workflow. When these principles are applied correctly, even the smallest single-car garage can feel structured and efficient.
In this guide, you’ll discover 10 highly detailed tool organization ideas specifically designed for small space garages. Each idea includes a clear explanation, step-by-step instructions, and a materials list so you can implement the system immediately. These are beginner-friendly solutions that don’t require professional renovation — just planning and intention.
Whether your garage is used for DIY projects, automotive repairs, gardening tools, or general storage, these ideas will help you:
- Eliminate clutter
- Increase storage capacity
- Improve safety
- Create easier access to tools
- Maintain long-term organization
A well-organized garage saves time, reduces stress, and makes home projects more enjoyable. Instead of dreading the mess, you’ll feel motivated to step inside and work efficiently.
Let’s transform your small garage into a streamlined, highly functional space — starting with Idea #1.
IDEA 1: Vertical Wall Tool Grid System
Introduction
In a small garage, wall space is your most valuable asset. When tools are left in drawers or piled on shelves, they consume space and create frustration. A vertical wall tool grid system transforms empty wall space into a functional command center. This system keeps tools visible, accessible, and organized without occupying precious floor area.
The idea behind a tool grid system is simple: mount a heavy-duty metal grid panel on the wall and use hooks, baskets, and brackets to hang tools vertically. This layout allows you to customize placement based on tool size and frequency of use. It’s ideal for hand tools, measuring tools, pliers, hammers, and even lightweight power tools.
Unlike traditional pegboards, metal grid systems are stronger and more flexible. They also allow easy rearrangement as your tool collection grows. For small garages, this solution instantly frees up drawers and shelves while creating a visually structured appearance.

Definition & Explanation
A vertical wall grid system is a mounted metal or steel panel designed to hold hooks and storage accessories. It functions as an adjustable wall organizer for tools and small equipment.
Step-by-Step How-To
- Measure available wall space above your workbench or side wall.
- Purchase a heavy-duty metal grid panel sized appropriately.
- Locate wall studs and mark drill points.
- Secure the grid panel using strong wall anchors or screws.
- Install assorted hooks, baskets, and holders.
- Arrange tools by category and weight.
- Leave small spacing between tools for easy removal.
Materials Needed
- Metal grid panel
- Wall anchors and screws
- Drill
- Assorted hooks
- Tool holders and baskets
- Level
IDEA 2: Ceiling-Mounted Overhead Storage
Introduction
Most small garages waste ceiling space entirely. Yet overhead areas provide valuable square footage for storage — especially for items not used daily. Ceiling-mounted racks allow you to lift bulky or seasonal tools off the floor without interfering with wall systems.
This solution is perfect for storing tool cases, rarely used power tools, camping equipment, and seasonal supplies. By relocating infrequently used items upward, you create breathing room at eye level and below.
Overhead storage is especially useful in single-car garages where floor walking space must remain clear. When installed correctly, these racks are safe, durable, and capable of supporting significant weight.

Definition & Explanation
Ceiling-mounted racks are heavy-duty platforms attached to ceiling joists designed to store bins and tool containers above head height.
Step-by-Step How-To
- Locate ceiling joists using a stud finder.
- Mark bracket installation points.
- Install heavy-duty mounting brackets securely into joists.
- Attach rack platform.
- Place labeled storage bins on top.
- Store only lightweight-to-moderate items overhead.
Materials Needed
- Overhead storage rack kit
- Stud finder
- Drill
- Screws and bolts
- Plastic storage bins
- Ladder
IDEA 3: Fold-Down Wall Workbench
Introduction
In small garages, permanent workbenches often take up too much space. A fold-down wall-mounted workbench provides functionality only when needed. When folded up, it frees up valuable walking space and keeps the garage flexible.
This idea is ideal for DIY enthusiasts who need occasional workspace but cannot sacrifice permanent square footage. The foldable design allows you to maintain open floor space while still having a sturdy workstation available for projects.
A well-built fold-down bench can hold heavy tools and equipment if properly supported. It’s one of the smartest upgrades for compact garages.

Definition & Explanation
A fold-down workbench is a hinged tabletop mounted to the wall that can be folded flat when not in use.
Step-by-Step How-To
- Measure wall width for bench placement.
- Install heavy-duty wall brackets anchored into studs.
- Attach hinged tabletop.
- Add foldable support legs or bracket arms.
- Test stability before use.
Materials Needed
- Solid wood tabletop
- Heavy-duty hinges
- Wall brackets
- Screws and anchors
- Drill
- Level
IDEA 4: Modular Slatwall Tool Panels
Introduction
Slatwall systems provide adjustable and expandable storage. Unlike fixed shelves, slatwalls allow you to rearrange hooks and accessories anytime. This flexibility makes them ideal for growing tool collections in small garages.
Slatwalls are perfect for storing hand tools, extension cords, safety gear, and lightweight power tools. Because accessories slide into horizontal grooves, customization is simple and clean-looking.
This system keeps tools off shelves and floors while maintaining a visually balanced wall layout.
Definition & Explanation
A slatwall panel is a wall-mounted board with horizontal grooves designed to hold hooks, baskets, and tool holders.

Step-by-Step How-To
- Measure wall area for panel coverage.
- Secure slatwall panels into studs.
- Install hooks and storage baskets.
- Arrange tools by category.
- Leave space for future additions.
Materials Needed
- Slatwall panels
- Hooks and baskets
- Screws
- Drill
- Stud finder
IDEA 5: Magnetic Tool Strip System
Introduction
Small metal tools often clutter drawers and waste time during projects. Magnetic tool strips provide instant visibility and accessibility. Mounted above a workbench, they keep frequently used tools within reach without taking up shelf space.
This system is compact, affordable, and highly efficient. It works especially well for screwdrivers, pliers, scissors, and small wrenches. In tight garages, reducing drawer dependency increases workflow efficiency significantly.

Definition & Explanation
A magnetic strip is a wall-mounted bar designed to hold metal tools securely using strong magnets.
Step-by-Step How-To
- Choose wall location near workspace.
- Mark mounting holes.
- Drill into studs or use anchors.
- Secure magnetic strip.
- Attach tools evenly spaced.
Materials Needed
- Magnetic strip
- Drill
- Screws
- Level
IDEA 6: Rolling Tool Cart for Mobility
Introduction
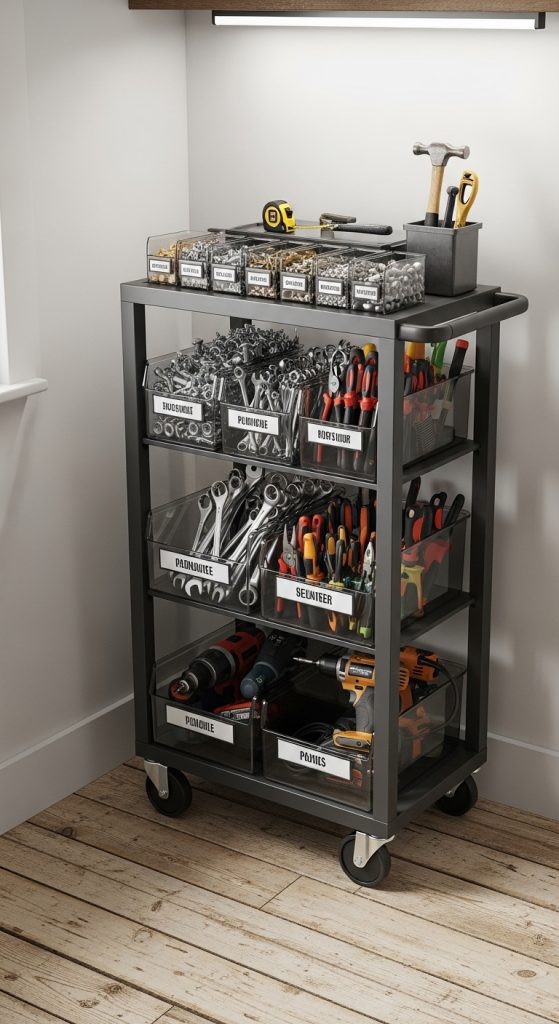
Mobility is crucial in small garages. A rolling tool cart allows you to move tools where needed instead of spreading storage across walls. This reduces clutter and increases flexibility.
Narrow carts fit beside walls when not in use. They’re perfect for active projects that require multiple tools at once. Instead of walking back and forth, everything moves with you.
Definition & Explanation
A rolling tool cart is a wheeled storage unit with shelves and drawers for transporting tools.
Step-by-Step How-To
- Choose a narrow multi-tier cart.
- Assign top shelf for active tools.
- Store backup tools below.
- Park cart against wall when finished.
Materials Needed
- Rolling tool cart
- Drawer organizers
- Labels
IDEA 7: Clear Labeled Bin System
Introduction
Visual clarity reduces mental clutter. Clear labeled bins help categorize tools and prevent overbuying duplicates. They work especially well for hardware, electrical supplies, and small accessories.
Matching bins create visual harmony and make shelves appear organized instead of chaotic. Labeling ensures long-term maintenance.

Definition & Explanation
A bin system organizes tools into transparent containers categorized by type and size.
Step-by-Step How-To
- Sort tools by category.
- Select uniform clear bins.
- Label front of each bin.
- Place heavier bins on lower shelves.
Materials Needed
- Clear bins
- Label maker
- Shelving unit
IDEA 8: Wall-Mounted Garden Tool Rack
Introduction
Long-handled tools waste space when leaned against walls. A wall-mounted rack keeps them upright and off the floor. This improves safety and frees up corners.
Ideal for shovels, rakes, and brooms, this system keeps similar tools grouped together for easier access.

Definition & Explanation
A mounted rack secures long tools vertically using clamps or slots.
Step-by-Step How-To
- Install rack into studs.
- Group similar tools.
- Hang tools securely.
Materials Needed
- Tool rack
- Drill
- Screws
IDEA 9: Tall Slim Storage Cabinets
Introduction
Closed storage instantly reduces visual clutter. Tall slim cabinets maximize vertical height while keeping the center open. They’re ideal for chemicals, paint, and rarely used tools.
Adjustable shelves allow customization. Lockable doors increase safety.

Definition & Explanation
A tall narrow cabinet provides vertical enclosed storage.
Step-by-Step How-To
- Measure height clearance.
- Secure cabinet to wall.
- Adjust shelves.
- Categorize contents.
Materials Needed
- Tall cabinet
- Anchoring brackets
- Shelf dividers
IDEA 10: Heavy-Duty Wall Hooks for Bulky Items
Introduction
Large items like ladders and hoses dominate floor space. Heavy-duty wall hooks lift bulky items vertically, protecting walking space.
This system works best along side walls and away from garage doors. By elevating oversized equipment, you create a cleaner layout.

Definition & Explanation
Wall hooks are reinforced mounts designed to hold heavy tools and equipment.
Step-by-Step How-To
- Locate studs.
- Install heavy-duty hooks securely.
- Hang bulky items evenly spaced.
Materials Needed
- Heavy-duty hooks
- Drill
- Stud finder
IDEA 11: Under-Workbench Drawer System
Introduction
In small garages, the area beneath your workbench is often underutilized or filled with random storage. Instead of leaving it messy or open, converting this space into an organized drawer system dramatically increases functionality. When tools are stored directly below your workspace, efficiency improves because everything remains within arm’s reach.
An under-workbench drawer system is ideal for frequently used hand tools, measuring devices, fasteners, and small accessories. It prevents clutter from spreading across the bench surface and reduces the need for additional bulky cabinets. Since the space already exists, you are not sacrificing new square footage — you are simply maximizing what you already have.
This system works particularly well in narrow garages where adding extra shelves along the walls might crowd movement. By building downward instead of outward, you preserve open pathways while increasing storage density.

Definition & Explanation
An under-workbench drawer system consists of installed pull-out drawers or sliding compartments fitted beneath a fixed or fold-down workbench to store tools efficiently.
Step-by-Step How-To
- Measure the height and width beneath your workbench.
- Install drawer slides along interior sides.
- Attach wooden or metal drawer boxes.
- Add dividers inside drawers for separation.
- Label each drawer clearly by category.
- Keep heavier tools in lower drawers for stability.
Materials Needed
- Drawer slide hardware
- Wood or metal drawer boxes
- Screws and drill
- Measuring tape
- Drawer dividers
- Label maker
IDEA 12: Vertical Power Tool Charging Station
Introduction
Power tools and their chargers often create tangled wire chaos. Cords overlap, batteries scatter, and outlets become overcrowded. A vertical power tool charging station centralizes all power tools in one organized zone.
Instead of placing chargers randomly around the garage, dedicate a single vertical wall section for charging. This keeps tools ready for use and prevents battery misplacement. In small garages, organization is not just about storage — it’s about workflow. Having a charging hub ensures tools are always in the same location.
Mounting the station vertically conserves counter space and prevents cords from running across surfaces. With proper cable management, this setup looks clean and intentional rather than cluttered.

Definition & Explanation
A vertical charging station is a wall-mounted shelf or cabinet section designed to store power tools and their charging bases in one organized area.
Step-by-Step How-To
- Select a wall area near electrical outlets.
- Install a sturdy floating shelf system.
- Mount a power strip securely.
- Attach cable clips to manage cords.
- Store chargers on the shelf.
- Label each charging slot for specific tools.
Materials Needed
- Floating shelves
- Power strip
- Cable clips
- Screws and anchors
- Drill
- Labels
IDEA 13: Corner Tool Tower
Introduction
Corners are often neglected in garage layouts. A corner tool tower transforms unused angles into highly efficient vertical storage. This solution is ideal for storing stacked toolboxes, small bins, and compact equipment.
In small garages, every corner matters. A vertical tower design allows you to build upward without interfering with central movement. Because corners do not interrupt pathways, you can increase storage capacity while maintaining accessibility.
Corner towers also help visually anchor the space, preventing random pile-ups. When storage has a defined boundary, clutter reduces naturally.
Definition & Explanation
A corner tool tower is a vertical shelving structure designed specifically to fit into a garage corner and maximize upward space.

Step-by-Step How-To
- Measure corner depth and height.
- Install triangular or L-shaped shelving units.
- Secure unit into wall studs.
- Assign each level a category.
- Place heavier items on bottom shelves.
Materials Needed
- Corner shelving unit
- Screws and anchors
- Drill
- Level
- Storage bins
IDEA 14: Over-the-Door Slim Organizer
Introduction
The interior side of the garage door is often completely unused. Installing a slim over-the-door organizer creates hidden storage without reducing wall space.
This system works best for lightweight items such as gloves, cleaning sprays, safety goggles, and small hand tools. In extremely tight garages, this extra storage can make a noticeable difference.
Because the system is mounted behind the door, it keeps tools out of sight yet accessible. It’s a smart solution for maximizing overlooked surfaces.

Definition & Explanation
An over-the-door organizer is a hanging storage unit mounted on the back of a door to hold small, lightweight items.
Step-by-Step How-To
- Measure door clearance.
- Install a slim metal rack or pocket organizer.
- Secure firmly to prevent shifting.
- Store lightweight tools evenly.
- Avoid overloading to maintain balance.
Materials Needed
- Slim door organizer
- Screws or hooks
- Drill
- Measuring tape
IDEA 15: Stackable Tool Crate System
Introduction
Stackable crates provide flexible, adaptable storage for small garages. Unlike fixed cabinets, crates can be rearranged, removed, or collapsed when not needed.
They are especially useful for temporary project tools or seasonal equipment. Because they stack vertically, they maximize storage while occupying minimal floor space.
Choosing uniform crates improves aesthetics and keeps shelves visually organized.

Definition & Explanation
A stackable crate system consists of modular containers designed to interlock vertically for efficient storage.
Step-by-Step How-To
- Sort tools into categories.
- Place heavier items in bottom crates.
- Stack crates securely.
- Label each crate clearly.
- Store against a side wall.
Materials Needed
- Stackable crates
- Labels
- Marker
- Shelving (optional)
IDEA 16: Foldable Ladder Wall Mount
Introduction
Ladders consume significant floor space when leaned against walls. Installing a foldable ladder wall mount lifts it vertically, freeing up movement areas.
In small garages, vertical hanging prevents obstruction and reduces accident risk. Mounting near the ceiling keeps large equipment out of daily pathways.
This solution is simple yet impactful.

Definition & Explanation
A ladder wall mount is a heavy-duty bracket designed to hold ladders securely against a wall.
Step-by-Step How-To
- Locate wall studs.
- Install heavy-duty brackets.
- Lift ladder into brackets.
- Ensure even weight distribution.
Materials Needed
- Heavy-duty wall brackets
- Drill
- Screws
- Stud finder
IDEA 17: Pegboard Drawer Inserts
Introduction
Drawers can quickly become chaotic without internal organization. Pegboard drawer inserts allow customizable tool placement within drawers.
Instead of tools shifting around, pegboard inserts hold them in fixed positions. This improves visibility and prevents damage.
For small garages, efficient drawer systems reduce the need for additional shelving.

Definition & Explanation
Pegboard inserts are perforated boards placed inside drawers to secure tools with adjustable pegs.
Step-by-Step How-To
- Measure drawer interior.
- Cut pegboard to size.
- Insert into drawer base.
- Place adjustable pegs around tools.
- Rearrange as needed.
Materials Needed
- Pegboard sheet
- Small pegs
- Saw
- Measuring tape
IDEA 18: Wall-Mounted Hose & Cord Reel
Introduction
Extension cords and hoses often tangle and pile up on floors. A mounted reel keeps them wound neatly and off the ground.
This improves safety and prevents cord damage. In compact garages, reducing floor clutter is essential for smooth movement.
Reels also allow easy extension and retraction during projects.
Definition & Explanation

A hose or cord reel is a rotating mount that allows cords to wind and unwind neatly.
Step-by-Step How-To
- Mount reel into studs.
- Secure hose or cord to reel.
- Test smooth rotation.
- Retract fully after use.
Materials Needed
- Hose/cord reel
- Drill
- Screws
- Stud finder
IDEA 19: Slim Wall-Mounted Hardware Bins
Introduction
Small hardware like screws and anchors often scatter across surfaces. Slim wall-mounted bin systems provide visible storage without consuming shelf space.
These systems keep small items sorted vertically, reducing drawer dependency. They are ideal for narrow garage walls.
Organized hardware increases project speed and reduces waste.
Definition & Explanation
Wall-mounted hardware bins are small containers attached to vertical panels for organizing fasteners and accessories.

Step-by-Step How-To
- Install mounting rail.
- Attach labeled bins.
- Sort hardware by size.
- Keep commonly used items at eye level.
Materials Needed
- Hardware bin system
- Drill
- Labels
- Screws
IDEA 20: Zoned Garage Layout System
Introduction
The most powerful organization strategy for small garages is zoning. Instead of placing tools randomly, divide the garage into defined zones such as:
- Power tool zone
- Hand tool zone
- Automotive zone
- Gardening zone
- Storage zone
Zoning prevents cross-clutter and maintains long-term order. It transforms the garage from chaotic storage into a structured workspace.
When each category has a designated area, cleanup becomes automatic.

Definition & Explanation
A zoned layout assigns specific wall sections and storage systems to different tool categories.
Step-by-Step How-To
- Empty the garage completely.
- Categorize tools.
- Assign wall areas to each category.
- Install appropriate storage systems.
- Label zones clearly.
Materials Needed
- Storage systems of choice
- Labels
- Floor tape (optional)
- Shelving units