
Autumn crafts bring enchanting warmth into modern homes during the cozy holiday months. Furthermore, miniature Halloween village Houses offer boundless creative joy for creative makers. Building miniature houses transforms simple tabletops into breathtaking storybook landscapes. You can craft magical, whimsical villages using everyday affordable crafting materials. In addition, miniature architecture sparks nostalgic holiday wonder for visiting family members. Handmade holiday villages capture charming folklore far better than plastic store novelties.

The Rise of Whimsical Halloween Miniatures
Modern holiday decorators increasingly adore whimsical fantasy aesthetics over gory horror elements. Consequently, cozy storybook cottages have become viral favorites across social media platforms. Miniature village displays let crafters explore intricate architectural details on small scales. Furthermore, designing miniature worlds allows endless artistic freedom and customized storytelling. You can easily build crooked rooflines, tiny mossy chimneys, and glowing windows. Each miniature building becomes a cherished heirloom displayed proudly every single October.
Selecting Affordable Base Materials for Miniature Houses
Crafting high-end miniature houses does not require costly specialized supplies or tools. In fact, inexpensive cardboard boxes and chipboard sheets form sturdy structural foundations. Upcycled shipping cartons provide lightweight walls that hold shapes reliably over time. Moreover, thick foam core boards cut cleanly using standard sharp craft knives. Heavy cardstock works wonders for layering whimsical shingles and delicate window frames. Therefore, resourceful material choices keep your holiday village project delightfully budget-friendly.
Mastering Whimsical Organic Architectural Silhouettes
Fairytale architecture thrives on deliberate asymmetry, exaggerated swoops, and crooked angles. Traditional straight lines often look too stiff, commercial, and completely uninspired. Instead, bend roof peaks outward into dramatic curved points using pliable cardstock. In addition, tilt stone chimneys slightly sideways to evoke ancient weathered charm. Adding curved window frames introduces lively, animated movement across flat miniature facades. These playful geometric choices instantly infuse miniature structures with magical storybook personality.
Layering Realistic Earthy Textures on Small Scales
Rich tactile textures elevate simple cardboard structures into breathtaking miniature masterworks. Specifically, egg carton pieces mimic rustic flagstone walls when glued down randomly. Furthermore, coarse sand mixed into acrylic craft paint simulates textured stucco masonry. Crinkled tissue paper soaked in diluted glue creates authentic peeling vintage wallpaper. Adding real dried moss along foundations grounds miniature houses in wild nature. Consequently, your tiny buildings appear weathered by decades of mystical woodland weather.
Designing Magical Ambient Interior Village Illumination
Lighting remains the secret ingredient that brings miniature villages to life nocturnal. Harsh direct bulbs destroy delicate shadows, exposing raw glue joints and seams. Instead, tuck warm battery-operated LED tea lights securely inside hollow building interiors. In addition, line window openings with frosted vellum to diffuse harsh glare. Golden light glowing through tiny mullioned windows creates irresistible, cozy twilight mystery. Your finished holiday village will look truly alive, magical, and deeply comforting.
Displaying Your Whimsical Village for Maximum Impact
Thoughtful styling transforms individual miniature houses into an expansive, cohesive holiday biome. Arrange your buildings across tiered wooden risers along mantlepieces or console tables. Next, weave rich black velvet runners beneath bases to anchor dark landscapes. Scatter preserved green sheet moss, dried twigs, and miniature heirloom pumpkins throughout. Finally, weave battery-powered copper fairy lights between cottages to simulate glowing fireflies. The resulting seasonal tablescape captures pure fairytale whimsy that guests will screenshot.
1. Whimsical Crooked Witch Cottage
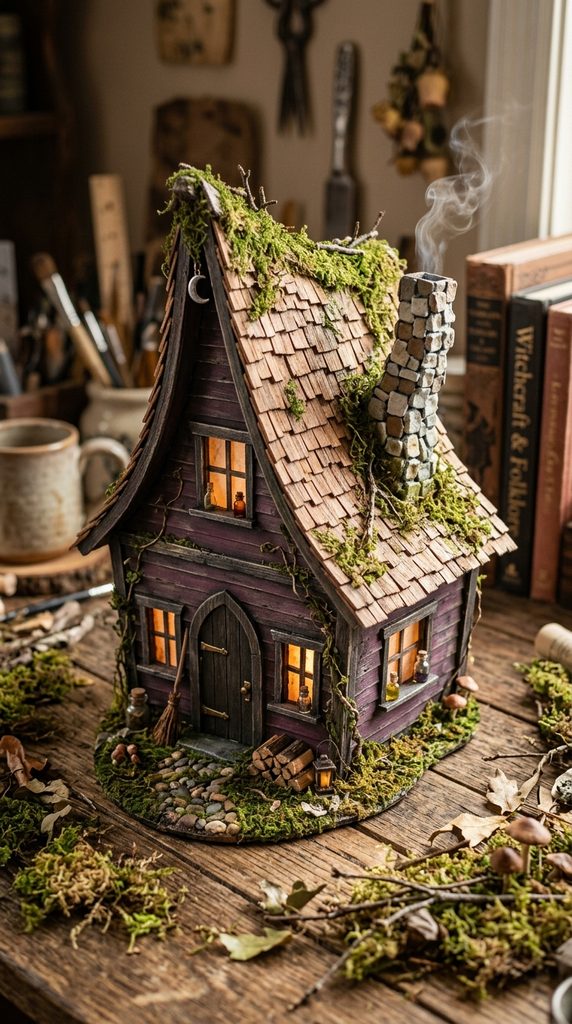
Curved storybook rooflines and crooked timber beams define this enchanting witch cottage. Furthermore, this design captures the nostalgic charm of ancient folklore bedtime stories. Deep plum siding paired with aged cedar shingles exudes moody autumn warmth. A tiny stone chimney bends playfully sideways over the steep, swooping eaves. In addition, glowing amber windows invite weary midnight travelers inside for warm tea. This miniature cottage brings delightful, eccentric witchy personality to your seasonal mantlepiece.
Engineering Sweeping Fairytale Rooflines
Crafting an exaggerated curved roof requires flexible, scored chipboard layered with care. First, cut asymmetrical cottage side walls with dramatic sloping roof angles. Next, curve roof panels over rolling pins to establish gentle organic bends. Hot glue securely bonds structural wall corners while maintaining whimsical crooked proportions. In addition, overlapping individual cardboard shingles creates magnificent historical visual depth. The resulting silhouette looks plucked straight from an enchanted, misty fairytale forest.
Crafting Charming Stone Chimneys and Trim
Authentic stonework details emerge quickly using torn bits of grey egg cartons. Glue irregular cardboard pieces up chimney shafts, leaving narrow crevices for grout. Furthermore, paint the chimney with dark charcoal washes before dry-brushing pale grey. Thin balsa wood strips frame doors and windows with charming rustic beams. Add a miniature broom crafted from yard twigs beside the front door. These tiny touches make your miniature cottage look completely lived-in and magical.
Materials Used for the Witch Cottage
- Heavy chipboard sheets or upcycled cereal box cardboard
- One paper pulp egg carton for torn stone masonry
- Lightweight balsa wood craft strips for crooked timber framing
- Matte acrylic craft paints in plum, charcoal, and ochre
- Translucent golden vellum paper for glowing interior window panes
- Battery-operated flickering warm LED tea light candle
- Real preserved forest moss and tiny dried tree twigs
Step-by-Step Construction Guide
- Draft crooked cottage wall templates onto scrap paper using rulers.
- Trace templates onto heavy chipboard, cutting shapes out with craft knives.
- Cut arched window openings and a narrow, crooked front doorway.
- Glue yellow vellum paper behind window cutouts to create glass.
- Assemble four walls together using hot glue along interior corner seams.
- Curve roof cardstock over cylinders, gluing panels atop wall peaks.
- Shingle the roof using hundreds of hand-cut tiny cardstock rectangles.
- Glue torn egg carton stones up the crooked chimney shaft.
- Paint exterior walls in deep plum, dry-brushing edges with charcoal.
- Adhere dried moss along roof eaves and foundation corners neatly.
2. Victorian Haunted Conservatory Manor
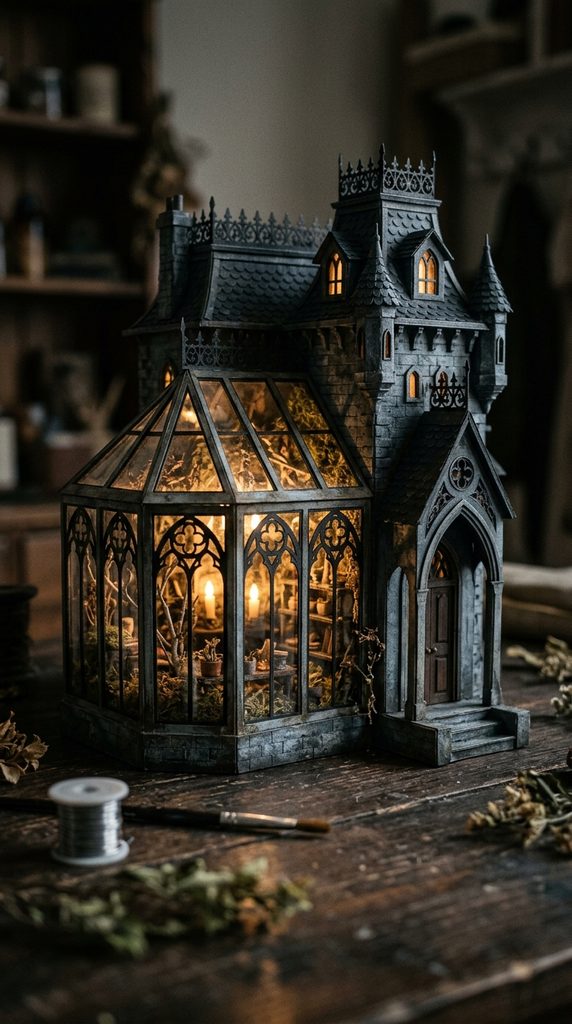
Arched greenhouse windows and distressed black mullions give this conservatory regal elegance. Furthermore, Victorian gothic architecture introduces aristocratic drama into whimsical miniature holiday displays. Towering glass pavilions house miniature overgrown ferns, black roses, and creeping vines. Weathered wrought-iron cresting lines the mansard roofline with striking, delicate silhouettes. Amber candlelight filters through cloudy conservatory panes, creating hauntingly beautiful shadows. This breathtaking miniature manor serves as an opulent centerpiece for luxury Halloween villages.
Framing Miniature Glass Conservatories
Building transparent conservatory rooms requires clear recycled plastic packaging or acetate sheets. First, construct a sturdy cardboard manor base featuring wide open wall cutouts. Next, score clear plastic sheets to fit behind open wall frames securely. Trace intricate gothic window tracery across clear plastic using fine black paint pens. In addition, framing plastic panels with thin basswood creates authentic Victorian architectural mullions. The transparent pavilion lets observers admire mysterious overgrown botanical wonders sheltered inside.
Adding Weathered Gothic Manor Finishes
Monochromatic palettes enhance the somber, aristocratic atmosphere of Victorian haunted estates. Basecoat exterior cardboard walls with matte slate grey paint for weathered stone. Next, sponge black acrylic washes into carved architectural crevices to simulate dampness. Craft delicate roof cresting by cutting decorative lace borders from stiffened black paper. Furthermore, glue faux dried tea leaves inside conservatory floors to represent dead foliage. This aristocratic design brings classic gothic literary romance straight into your home.
Materials Used for the Conservatory Manor
- High-density chipboard for constructing rigid multi-story manor walls
- Clear plastic acetate sheets from recycled household product packaging
- Ultra-fine black waterproof acrylic paint pen for window tracery
- Basswood hobby craft strips for window sills and cornices
- Matte acrylic paints in slate grey, soot black, and verdigris
- Preserved reindeer moss, tiny dried tea leaves, and twigs
- Battery-operated micro fairy light strand with hidden switch box
Step-by-Step Construction Guide
- Cut out four tall Victorian manor walls featuring large arched cutouts.
- Trace elegant gothic window arches onto clear plastic using paint pens.
- Glue patterned plastic acetate sheets behind wall window openings securely.
- Assemble manor walls into a rectangular tower using wood glue.
- Construct a steep mansard roof using scored black cardstock panels.
- Cut delicate decorative cresting borders from cardstock, attaching to roofs.
- Paint exterior wall surfaces in slate grey, stippling black shadows.
- Glue dried tea leaves and preserved moss inside the open conservatory.
- Route micro fairy lights into the interior through bottom access holes.
- Adhere miniature climbing ivy vines across exterior walls using craft glue.
3. Enchanted Spooky Toadstool House

Vibrant spotted mushroom caps replace standard gables in this delightful forest build. Furthermore, pairing whimsical woodland folklore with spooky Halloween elements creates irresistible charm. A bulbous, hollow stem crafted from paper mache forms the cozy living quarters. Meanwhile, a bright orange-red cap dotted with pale warts crowns the structure. Miniature arched wooden doors nestled into the stem welcome woodland fairy creatures. This cheerful, imaginative project adds delightful storybook color pops to dark autumn displays.
Sculpting Organic Mushroom Stem Foundations
Organic mushroom curves require flexible armature materials rather than rigid flat cardboard. First, shape a bulbous hollow cylinder using wire mesh or rolled cardboard. Next, wrap the armature in crumpled newspaper strips dipped in paper mache paste. Smooth the damp paper mache surface, carving subtle bark fissures using clay tools. In addition, allow the sculpted mushroom stem to dry fully for twenty-four hours. The finished base provides a rock-solid, organic foundation for the sprawling cap.
Detailing Spotted Mushroom Shingle Caps
A lightweight plastic bowl forms the smooth structural armature for mushroom caps. Invert the bowl, coating outer surfaces with red and orange acrylic paints. Furthermore, cut dozens of tiny cardstock scales, layering them across the dome. Glue small wooden beads randomly across the cap to mimic textured fungal warts. Inside the hollow stem, tuck warm yellow LED lights to illuminate windows. This sculptural woodland retreat brings delightful, earthy fairycore enchantment to holiday displays.
Materials Used for the Toadstool House
- Small plastic kitchen bowl to serve as the mushroom cap form
- Rolls of plaster cloth wrap or traditional paper mache paste
- Flexible wire mesh or sturdy cardboard tubes for stem armatures
- Acrylic paints in pumpkin orange, scarlet red, cream, and moss
- Polymer clay scraps for sculpting tiny arched front wooden doors
- Preserved flat sheet moss and miniature dried acorn caps
- Warm-white LED battery tea light for cozy interior lighting
Step-by-Step Construction Guide
- Shape a hollow bulbous stem cylinder using flexible wire craft mesh.
- Cut an arched doorway opening into the front lower stem wall.
- Apply two layers of plaster wrap over mesh, smoothing contours.
- Carve wood grain textures into damp plaster using wooden clay tools.
- Invert a plastic bowl, painting outer surfaces with vivid scarlet paint.
- Paint cream polka dots and warts across the red mushroom dome.
- Sculpt miniature plank doors from brown polymer clay, baking until firm.
- Hot glue the painted mushroom bowl cap securely atop the stem.
- Adhere the baked clay door inside the arched lower opening.
- Finish by gluing preserved sheet moss and acorn caps around bases.
4. Black Cat Midnight Bakery
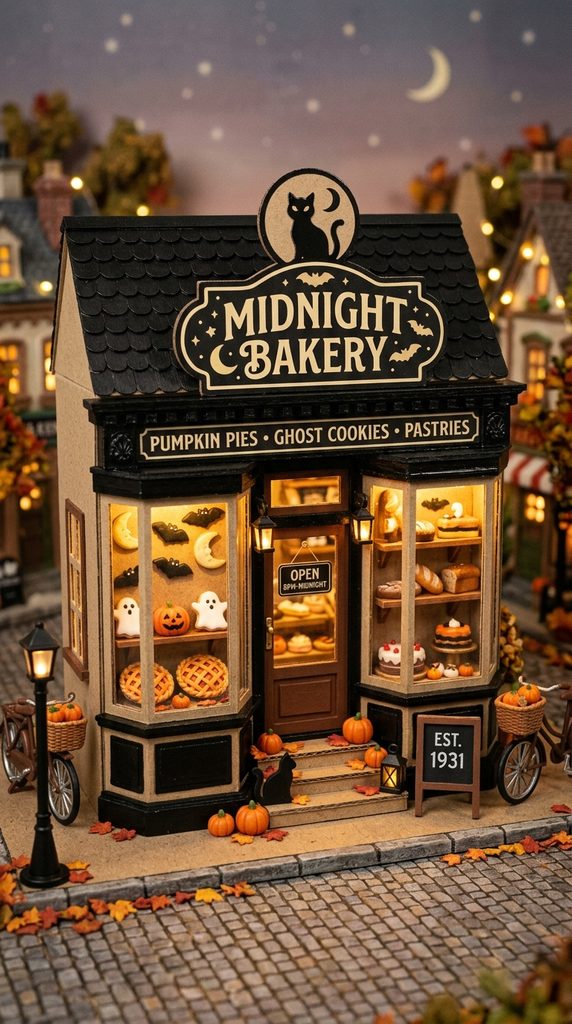
Whimsical feline motifs blend with vintage Parisian storefronts in this bakery design. Furthermore, chalkboard menus and tiny faux pastry displays invite hungry autumn spirits. A bold silhouette of an arched black cat frames the charming roofline. Glossy black trim contrasts cleanly against warm oatmeal-colored bakery storefront walls. Miniature display windows showcase tiny clay pumpkin pies and iced ghost cookies. Consequently, this playful village building radiates cozy domestic warmth and sweet October hospitality.
Building Miniature Vintage Bakery Storefronts
Storefront architecture requires wide display bay windows to show off interior scenes. Cut large rectangular display windows into front cardboard facade panels with care. Next, construct a projecting three-dimensional bay window box using clear plastic packaging. Paint storefront trim in glossy black, adding gold lettering spelling “Midnight Bakery.” In addition, hang a tiny wooden awning crafted from pleated striped cardstock. The resulting storefront looks delightfully professional, inviting, and full of vintage nostalgia.
Sculpting Miniature Halloween Confections
Polymer clay allows crafters to sculpt appetizing seasonal bakery treats on micro scales. Roll orange clay into miniature pumpkin pies, texturing crust edges using toothpicks. Furthermore, cut tiny ghost-shaped cookies from white clay, dotting chocolate eyes. Arrange these tiny baked goods inside clear plastic display cases behind windows. Tuck warm LED lights inside so pastries glow invitingly under bakery lights. This adorable design delights children and adults alike with sweet holiday wonder.
Materials Used for the Midnight Bakery
- Heavy cardboard gift boxes or architectural model basswood sheets
- Clear plastic packaging scraps for constructing bakery display bay windows
- Polymer clay blocks in orange, white, chocolate brown, and tan
- Glossy black acrylic paint and metallic gold calligraphy paint pens
- Black-and-white striped cardstock for constructing miniature store awnings
- Tiny wooden beads, toothpick dowels, and craft glue
- Battery-powered warm LED puck light with easy push-switch activation
Step-by-Step Construction Guide
- Cut a wide storefront facade featuring large rectangular display window cutouts.
- Build a projecting bay window frame utilizing scored clear plastic sheets.
- Paint storefront exterior walls in soft oatmeal, adding black wooden trims.
- Hand-letter “Midnight Bakery” above the door using gold paint pens.
- Pleat striped cardstock into a scalloped awning, gluing above bay windows.
- Sculpt miniature pumpkin pies and ghost cookies from colored polymer clay.
- Bake clay pastries on foil sheets following standard packaging manufacturer instructions.
- Glue baked miniature pastries onto tiny cardstock shelves inside bay windows.
- Assemble four exterior bakery walls into a sturdy rectangular building box.
- Install the black cat silhouette plaque centrally atop the front roofline.
5. Ghostly Apothecary Potion Shop

Mysterious glowing elixir bottles line the dusty shelves of this apothecary shop. Furthermore, weathered gothic signage and dried botanicals suggest centuries of alchemical brewing. Distressed mossy shingles swoop downward over crooked timber walls with dark elegance. A tiny stone stoop welcomes potion collectors seeking remedies for rare curses. Tiny glass vials filled with iridescent fluids catch interior LED light brilliantly. This fascinating miniature shop enriches your holiday village with rich, scholarly supernatural intrigue.
Constructing Multi-Level Potion Display Shelves
Intricate interior details make viewing through miniature apothecary windows deeply rewarding. Build tiny multi-tier wall shelving units using thin balsa wood craft strips. Next, fill miniature glass craft vials with colored water and iridescent mica. Seal cork stoppers firmly with drops of hot glue to prevent leaks. In addition, glue tiny paper labels onto vial fronts with handwritten runes. When backlit by LEDs, these tiny bottles radiate hypnotic jewel-toned glows outdoors.
Weathering Timber and Stone Facades
Aged apothecary exteriors require layered weathering washes to convey centuries of dampness. First, score wood grain patterns deeply into cardboard walls using coarse wire brushes. Paint walls with dark walnut stain, wiping surfaces quickly with cloth rags. Furthermore, apply cracked texture paste along foundation walls to mimic crumbling historical mortar. Hang tiny bundles of dried thyme from roof eaves to cure naturally. This scholarly haven brings authentic herbal magic into your whimsical Halloween village.
Materials Used for the Potion Shop
- Upcycled cardboard cartons and thin balsa wood craft hobby strips
- Miniature glass craft sample vials with tiny natural cork stoppers
- Food coloring, iridescent cosmetic mica powder, and water for potions
- Dark walnut wood stain and charcoal grey acrylic craft paint
- Crackle texture paste medium for simulating crumbling exterior plaster
- Dried kitchen thyme sprigs, twine, and miniature paper label scraps
- Warm-white LED battery-operated tea light candle with built-in timer
Step-by-Step Construction Guide
- Cut asymmetrical apothecary wall panels featuring tall, narrow display window openings.
- Assemble miniature three-tier balsa wood shelving units using wood glue.
- Fill tiny glass vials with dyed water mixed with shimmering mica.
- Seal cork stoppers securely into vials using clear fast-drying craft glue.
- Glue filled potion bottles permanently onto tiny wooden display shelves.
- Mount completed shelving units directly behind open apothecary window cutout frames.
- Glue four exterior walls together around the interior potion shelf displays.
- Shingle the sloping roof with overlapping, ragged-edge dark charcoal cardstock tiles.
- Apply crackle paste across exterior lower walls, painting with walnut washes.
- Suspend tiny dried thyme bundles from roof corners using jute twine.
6. Moody Gothic Clocktower Cottage

A towering central clock spire commands vertical visual attention across holiday villages. Furthermore, gothic arched louvered vents and peaked dormers evoke grand European cathedrals. An antique clock face stopped permanently at midnight adds chilling temporal drama. Below the spire, a cozy residential stone cottage provides grounded, welcoming balance. Ambient blue and amber lights interact within, casting theatrical shadows across surrounding streets. This impressive architectural centerpiece establishes magnificent historic presence in any miniature town.
Engineering Multi-Tiered Clocktower Spires
Achieving dramatic height without structural wobbling requires rigid internal cardboard framing. First, construct a tall, four-sided square tower box from sturdy heavy chipboard. Next, taper the upper spire walls inward to form an octagonal needle-point. Cut four round clock face openings evenly spaced across upper tower panels. In addition, frame clock cutouts with raised cardstock rings to create layered depth. This soaring vertical tower draws viewer eyes upward across sprawling village displays.
Crafting Antique Clockwork Faces
Printed vintage clock graphics provide authentic, intricate timekeeping details on micro scales. Print weathered nineteenth-century clock faces onto cardstock, cutting circles out precisely. Next, glaze paper clock faces with clear gloss medium to mimic crystal glass. Secure tiny black cardstock clock hands pointing dramatically toward the twelve mark. Backlighting clock faces with white LEDs makes dials glow brightly through the night. This sophisticated timepiece infuses your village with unforgettable, timeless gothic folklore romance.
Materials Used for the Clocktower
- Heavy-duty chipboard or structural architectural corrugated modeling board
- Printed vintage clock face graphics scaled down to one-inch circles
- Clear dimensional glass craft glaze or clear UV resin drops
- Thin cardboard cereal box scraps for cutting architectural gothic moldings
- Matte spray paints in stone grey, cast-iron black, and slate
- Translucent blue and warm-white miniature LED fairy light diodes
- Preserved dark reindeer moss and dried natural lichen flakes
Step-by-Step Construction Guide
- Cut four identical tall cardboard tower panels with tapered upper peaks.
- Cut circular clock openings near the top of all four panels.
- Assemble tower panels into a rigid square column using hot glue.
- Construct a steep four-sided pyramid spire roof from black cardstock.
- Glaze printed paper clock graphics with clear resin, letting them dry.
- Mount illuminated clock dials behind circular tower openings from inside.
- Attach the clocktower assembly centrally atop a broader single-story cottage base.
- Spray the entire exterior with stone-textured grey acrylic paint evenly.
- Dry-brush charcoal black across raised gothic cornices and arched window louvers.
- Install blue interior LEDs to cast eerie midnight glows through vents.
7. Twilight Pumpkin Patch Barn
Rustic agricultural architecture brings cozy autumn harvest warmth to spooky holiday displays. Furthermore, weathered board-and-batten siding and gambrel rooflines evoke classic countryside farms. A miniature barn loft door stands slightly ajar, revealing golden hay inside. Surrounding the foundation, dozens of handmade clay pumpkins carpet rich dark soil. A whimsical bat weather vane spins gently atop the rustic roof cupola. This charming design celebrates traditional harvest folklore, rural mystery, and cozy October evenings.
Building Authentic Gambrel Barn Rooflines
The classic double-angled gambrel roofline requires precise scoring along flexible cardboard sheets. Cut barn gable walls with distinctive shallow upper slopes and steep lower flanks. Next, score roof cardstock lengthwise, bending planes to match gable wall angles. Hot glue roof panels securely over timber wall frames, reinforcing interior joints. In addition, gluing thin vertical balsa strips replicates authentic board-and-batten wooden siding. This agrarian silhouette grounds your whimsical village in warm, nostalgic countryside heritage.
Sculpting Miniature Pumpkin Harvest Fields
Clay modeling lets you populate surrounding barnyard grounds with diverse miniature squashes. Roll polymer clay into varied marble-sized balls in orange, slate-blue, and white. Next, press deep vertical rib creases into clay balls using dull butter knives. Twist tiny bits of brown floral wire to form realistic curled pumpkin stems. Bake clay pumpkins, scattering them abundantly across real dried garden dirt bases. This rich agricultural scene adds delightful harvest color pops to your display.
Materials Used for the Pumpkin Barn
- Sturdy corrugated cardboard sheets for constructing barn wall structures
- Thin basswood strips or flat wooden coffee stirrers for siding
- Polymer clay blocks in pumpkin orange, sage green, and cream
- Brown paper-wrapped floral craft wire for making curled pumpkin stems
- Fine garden potting soil, dried coffee grounds, and craft glue
- Matte acrylic paints in barn red, weathered white, and umber
- Miniature battery-operated amber LED micro light strand with switch
Step-by-Step Construction Guide
- Cut front and back barn walls with iconic two-slope gambrel profiles.
- Cut side walls, adding a wide double barn doorway opening.
- Glue vertical wooden stirrers across walls to create board-and-batten siding.
- Assemble four barn walls together using wood glue along corners.
- Score and fold cardboard roof sheets to fit the gambrel roofline.
- Paint wooden barn walls in distressed, chipped colonial barn red.
- Construct a miniature square cupola roof vent topped with a weather vane.
- Sculpt and bake dozens of miniature polymer clay pumpkins and gourds.
- Spread glue and dried coffee grounds around bases for rich soil.
- Cluster baked pumpkins abundantly across the faux dirt barnyard grounds.
8. Spellbound Moonlit Crystal Observatory

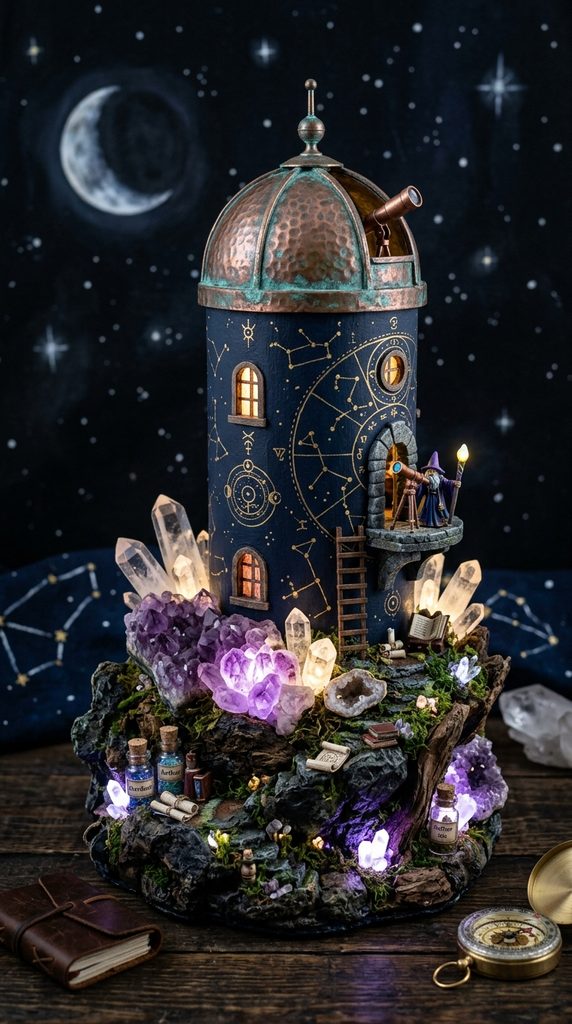
Stargazing towers celebrate the mystical intersections of ancient astronomy and seasonal magic. Furthermore, celestial copper domes and arched skylights catch ambient room lighting beautifully. An elevated circular observation deck features a tiny brass telescope pointed toward skies. Walls painted in deep midnight blue shimmer with hand-painted golden constellations. Glowing crystal clusters emerge naturally from foundation rocks, catching interior LED light. This breathtaking scientific structure brings intellectual wonder, elegance, and cosmic mystery into villages.
Sculpting Celestial Observatory Domes
Spherical observation domes require smooth round armatures that hold metallic paints flawlessly. Cut a hollow plastic holiday ornament ball in half to form the dome. Next, paint the dome surface in shimmering hammered copper and oxidized verdigris. Cut arched skylight openings into the dome, backing them with yellow vellum. In addition, mount the dome atop a sturdy cylindrical cardboard oatmeal container. This circular architectural form provides refreshing geometric contrast against standard peaked village rooflines.
Illuminating Crystalline Rock Foundations
Integrating real raw mineral crystals introduces natural geological brilliance into handcrafted architecture. Glue raw amethyst and quartz crystal points around the lower cardboard tower foundation. Furthermore, position micro-LED lights directly behind translucent crystals before sealing walls permanently. When activated, the crystals radiate soft purple and white light into surrounding streets. Paint the outer tower walls with navy blue, mapping golden constellation lines across. This cosmic haven enchants observers with celestial magic and dazzling crystalline sparkle.
Materials Used for the Crystal Observatory
- Round cardboard oatmeal container or heavy cardboard mailing tube
- Clear plastic hollow split-sphere craft ornament for dome roofs
- Metallic copper, brass, and antique verdigris acrylic craft paints
- Raw clear quartz crystal points and purple amethyst gemstone chips
- Fine-tip metallic gold calligraphy paint pen for charting constellations
- Translucent gold vellum paper for backing observatory window slits
- High-output violet and warm-white LED battery-operated micro fairy lights
Step-by-Step Construction Guide
- Cut a cylindrical oatmeal container down to an eight-inch tower height.
- Cut narrow arched observation window slits around the upper tower cylinder.
- Paint the cylinder in deep midnight navy blue using acrylics.
- Draw intricate astrological constellations across the blue walls using gold pens.
- Invert half a plastic craft ornament ball to create observation domes.
- Paint the plastic dome in hammered copper, dry-brushing verdigris green accents.
- Mount the copper dome securely atop the blue cylindrical tower.
- Hot glue raw quartz crystals around the bottom cardboard foundation base.
- Route internal violet LEDs to shine directly through translucent raw crystals.
- Install warm-white LEDs inside the dome to illuminate window slits.
9. Whimsical Cobweb Lace Manor
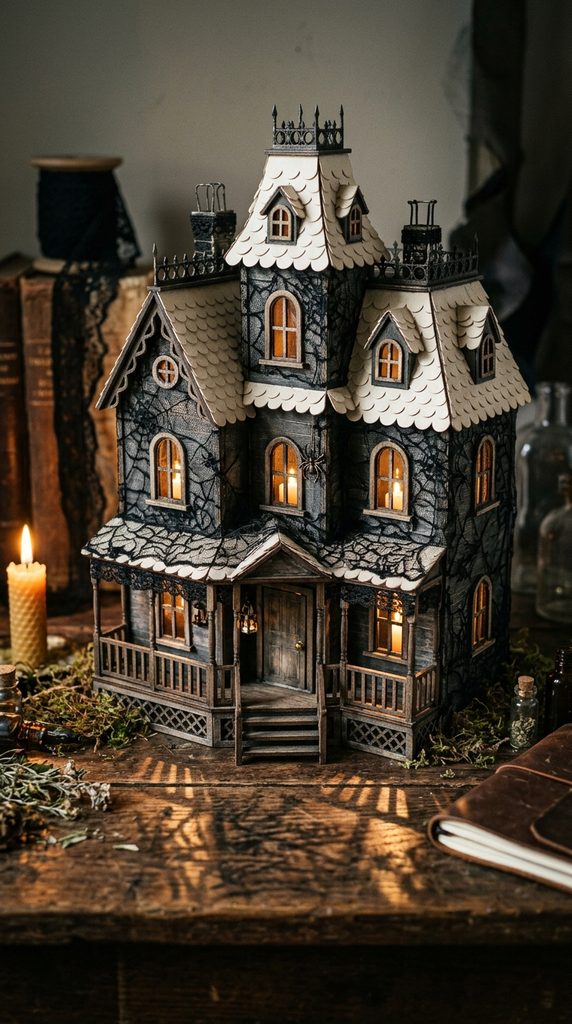
Intricate lace overlays transform a spooky haunted manor into a delicate fairytale. Furthermore, sheer cobweb patterns cast intricate, lace-like geometric shadows across surrounding tabletops. Soft charcoal walls paired with crisp bone-white lace trim look extraordinarily refined. A grand wrap-around front porch invites viewers to inspect tiny rocking chairs. In addition, roof peaks feature delicate gingerbread fretwork cut from sturdy cardstock. This enchanting design proves that haunted houses can look breathtakingly delicate and artistic.
Applying Textile Lace to Miniature Architecture
Using real textured fabrics introduces delicate Victorian architectural fretwork with zero woodcarving. First, paint flat cardboard manor walls in matte charcoal or soft slate. Next, stretch black floral lace or spiderweb tulle tautly across wall faces. Coat the lace with diluted decoupage glue, sealing it directly onto cardboard. Trim excess fabric flush along wall borders using razor-sharp embroidery scissors. The resulting textured wallpaper looks like expensive, hand-carved gothic Victorian filigree relief.
Framing Whimsical Wrap-Around Porches
A delicate front veranda adds inviting domestic depth to flat architectural building facades. Construct a raised porch floor platform using flat wooden craft popsicle sticks. Furthermore, use thin wooden dowels or decorative toothpicks as slender porch railings. Cut intricate gingerbread brackets from cardstock, gluing them under porch roof eaves. Dust roof shingles with white acrylic dry-brushing to mimic silvery autumn frost. This graceful manor radiates cozy romanticism, vintage textile charm, and ghostly elegance.
Materials Used for the Lace Manor
- Heavy chipboard sheets for constructing the multi-story manor body
- One yard of fine black spiderweb lace or floral craft tulle
- Matte decoupage glue medium and flat synthetic application brushes
- Flat wooden craft popsicle sticks for assembling porch decking floors
- Round wooden toothpicks and balsa wood strips for railings
- Matte acrylic craft paints in charcoal grey, bone white, and silver
- Warm-white LED battery tea light candle with flickering flame effect
Step-by-Step Construction Guide
- Cut manor wall panels featuring asymmetrical bays and steep gabled peaks.
- Cut rectangular window openings, framing them with thin cardstock sills.
- Paint exterior cardboard walls with matte charcoal grey acrylic paint.
- Adhere sheer black spiderweb lace smoothly across walls using decoupage glue.
- Assemble four manor walls into a multi-tiered house structure securely.
- Build a wrap-around porch floor platform utilizing flat wooden craft sticks.
- Install toothpick porch posts supporting a sloping lower cardstock porch roof.
- Cut delicate cardstock gingerbread brackets, gluing them beneath porch eaves.
- Shingle the steep gables using scalloped bone-white cardstock paper strips.
- Tuck a warm flickering LED candle inside to backlight lace windows.
10. Haunted Hollow Tree Stump Cabin

Woodland folklore meets cozy miniature living within an enchanted hollowed-out tree stump. Furthermore, sprawling roots and bark textures make this cottage feel completely alive. A crooked wooden door fitted with a brass bead handle nestles between roots. Peeking out from upper bark hollows, tiny glowing windows illuminate wild ferns. Shelf mushrooms growing along the trunk serve as tiny, whimsical outdoor spiral stairs. This earthy, sculpted retreat brings organic forest wonder straight into your home.
Sculpting Realistic Bark and Root Armatures
Cardboard tubes combined with air-dry clay produce lifelike, rugged woodland bark textures. First, wrap a wide cardboard mailing tube with wire mesh to sculpt roots. Next, press generous layers of terracotta air-dry clay over the entire structure. Carve deep, craggy bark ridges and knot holes using coarse modeling tools. In addition, mold protruding clay roots that spread outward across your display table. Once cured, the clay provides remarkable organic realism that flat cardboard cannot match.
Crafting Mushroom Step Spiral Staircases
Adding miniature architectural fantasy details turns a simple tree into livable housing. Sculpt small semi-circular shelf mushrooms using scraps of baked polymer craft clay. Next, cut horizontal slits spiraling up the tree trunk using hobby saws. Glue clay mushrooms securely into slits, creating a whimsical outdoor climbing staircase. Paint the bark with dark umber washes, dry-brushing moss green into crevices. This magical woodland dwelling looks like an ancient fairytale forest home.
Materials Used for the Tree Stump Cabin
- Heavy cardboard mailing tube measuring five inches in diameter
- Air-dry modeling clay or terracotta paper clay compound
- Polymer clay scraps in terracotta and cream for shelf mushrooms
- Real dried garden twigs, preserved green moss, and lichens
- Acrylic craft paints in raw umber, burnt sienna, and olive
- Small brass jewelry craft bead to serve as doorknob hardware
- Battery-operated amber LED micro fairy light string with timer
Step-by-Step Construction Guide
- Cut a cardboard mailing tube to a seven-inch height cleanly.
- Cut an arched doorway opening into the lower front cylinder wall.
- Flare wire mesh around the tube bottom to establish spreading roots.
- Coat the tube and mesh with air-dry clay, carving bark grooves.
- Carve knot-hole window openings through the clay and cardboard walls.
- Sculpt half-round shelf mushrooms from polymer clay, baking until firm.
- Insert baked clay mushrooms into spiraling trunk slits using hot glue.
- Paint cured bark with dark umber, highlighting ridges with warm tan.
- Build a miniature plank door from balsa wood, adding brass beads.
- Pack preserved moss into bark crevices and around foundation root bases.
11. Eerie Pastel Ghostly Parlor

Pastel holiday styling proves that Halloween decor can look delightfully sweet and chic. Furthermore, soft lilac, mint, and blush pink replace traditional dark, somber tones. Crisp white gingerbread trims frame the gentle pastel walls with sweet elegance. Friendly little ghost cutouts peek playfully out from behind shiny, frosted pastel windows. A dusting of iridescent glitter makes the entire miniature structure sparkle under lights. This charming design appeals strongly to cottagecore enthusiasts, pastel lovers, and modern decorators.
Styling Modern Pastel Holiday Architecture
Balancing playful pastel hues with classic Victorian silhouettes prevents designs from looking childish. First, choose a cohesive, sophisticated pastel palette like dusty lavender and vintage mint. Construct a classic two-story Victorian dollhouse cottage featuring symmetrical gables and porches. Next, paint exterior walls with matte chalk paint for velvety, smooth coverage. In addition, adding crisp white architectural trim keeps pastel colors feeling tailored and crisp. This fresh aesthetic brings bright, cheerful holiday magic to sunny daytime rooms.
Adding Whimsical Ghost Cutouts and Shimmer
Delicate ghost silhouettes bring friendly seasonal storytelling to pastel dollhouse windows. Cut miniature floating ghost shapes from heavy white cardstock using detail scissors. Paint tiny black smiling faces onto ghosts before gluing them behind window vellum. Furthermore, coat the steep roof shingles with fine, iridescent sugar-sparkle craft glitter. When backlit by soft white LEDs, the entire parlor radiates gentle, enchanting warmth. This cheerful masterpiece captures modern, design-forward holiday aesthetics with irresistible artistic charm.
Materials Used for the Pastel Parlor
- High-density chipboard or pre-cut unfinished wooden craft birdhouse
- Ultra-matte chalk craft paints in dusty lavender, soft mint, and blush
- Crisp white cardstock for architectural fretwork and ghost cutouts
- Translucent frosted drafting vellum paper for glowing interior windows
- Fine iridescent cosmetic or craft glitter and decoupage glue
- Battery-operated cool-white LED tea light with built-in timer circuit
- Small artificial pastel pink bottle brush trees for landscaping
Step-by-Step Construction Guide
- Cut out Victorian cottage walls featuring decorative peaked roofline gables.
- Cut rectangular windows and an arched front door opening with care.
- Paint exterior wall surfaces in smooth, matte dusty lavender chalk paint.
- Cut intricate gingerbread trim borders from white cardstock using precision shears.
- Glue white decorative trim along roof eaves, corners, and window frames.
- Cut friendly ghost silhouettes from white cardstock, drawing black eyes.
- Mount ghost cutouts behind window openings over frosted vellum paper backings.
- Assemble four cottage walls together securely using fast-drying wood glue.
- Brush decoupage glue across roof shingles, dusting with iridescent glitter.
- Place pastel bottle brush trees flanking the front entrance on tables.
12. Rustic Raven Woodland Roost

Moody woodland materials capture the rugged spirit of Edgar Allan Poe’s writings. Furthermore, weathered cedar shake shingles and dark timber beams exude rustic wilderness charm. A tall, narrow silhouette mimics historic forest fire-watch towers tucked deep in mountains. Perched upon the gabled peak, a tiny carved black raven stands guard. Tattered burlap awnings and dangling rusted chains add aged, weathered maritime texture. This atmospheric outpost grounds your holiday village in dramatic, windswept autumn forest lore.
Engineering Tall Wilderness Watchtower Frames
Vertical tower proportions create dramatic architectural height variations across miniature village layouts. First, build an elongated four-sided cardboard tower that tapers slightly toward peaks. Next, construct a projecting wooden observation deck supported by angled balsa diagonal brackets. Shingle the steep pitched roof using real weathered cedar wood shavings or bark. In addition, staining bare wood with vinegar and steel-wool solutions creates authentic grey patina. The towering roost evokes lonely mountain lookouts surrounded by sweeping autumn winds.
Weathering Details with Rusted Iron Textures
Distressed metal hardware adds industrial, historic realism to rustic miniature wooden architecture. Coat tiny plastic jewelry chains with textured rust-effect craft paint before mounting. Furthermore, hang an extinguished miniature brass lantern beside the elevated lookout door. Craft realistic ravens by sculpting tiny black polymer clay birds perched on roofs. Tucking dried twigs and pinecones around bases roots the roost in nature. This captivating wilderness sanctuary brings brooding, literary gothic romance straight into displays.
Materials Used for the Woodland Roost
- Heavy corrugated cardboard for constructing the tall tower structural core
- Thin balsa wood strips and sheets for assembling the observation deck
- Natural cedar wood shavings or thin tree bark chips for shingles
- Coarse natural jute burlap scraps for crafting weather-worn window awnings
- Miniature plastic jewelry craft chain and rust texture paint medium
- Black polymer clay for sculpting perched miniature raven bird figures
- Battery-operated amber micro fairy lights with concealed battery storage pack
Step-by-Step Construction Guide
- Cut four tall cardboard panels that taper inward toward the top.
- Cut narrow slit windows and an upper observation deck access doorway.
- Glue panels together into a tall, rigid watchtower box column.
- Build an overhanging four-sided wooden balcony platform using balsa strips.
- Anchor the balcony around the upper tower using diagonal wooden support struts.
- Shingle the steep pitched roof using natural cedar shavings layered sequentially.
- Paint walls in weathered charcoal and umber, wiping grain with rags.
- Sculpt a tiny perched raven from black polymer clay, baking until firm.
- Mount the baked raven figure permanently atop the primary roof peak.
- Weave micro fairy lights inside to illuminate the high lookout windows.
13. Celestial Velvet Astrologer Dome

Rich midnight textiles bring luxurious tactile softness to handcrafted miniature holiday villages. Furthermore, deep navy blue crushed velvet wraps exterior walls in opulent, shadowy depth. Shimmering metallic gold trims trace geometric window arches and soaring celestial domes. An intricate brass astrolabe prop rests upon an open-air rooftop observation terrace. Inside, fiber-optic light strands pierce dark ceilings, mimicking glittering constellations in night skies. This breathtaking structure combines opulent runway textiles with ancient celestial stargazing wonder.
Wrapping Architectural Miniatures in Crushed Velvet
Applying velvet fabric to flat cardboard structures requires precision adhesives and patience. First, cut chipboard wall panels, sanding cut edges smooth with fine-grit sandpaper. Next, coat wall faces smoothly with spray adhesive before pressing velvet flat. Wrap excess fabric neatly around rear edges, securing corners with hot glue. In addition, cutting window openings through velvet demands razor-sharp fabric shears to prevent fraying. The resulting velvet walls absorb daylight, creating extraordinary shadow depth under indoor lamps.
Engineering Glowing Fiber-Optic Constellations
Starlight ceilings inside miniature buildings create unforgettable viewing experiences through open windows. First, drill microscopic pin-holes through the ceiling board in authentic astrological patterns. Next, thread individual plastic fiber-optic strands through holes, sealing them with glue. Gather rear fiber ends together, mounting them directly against white LEDs. When illuminated, tiny pinpoint stars sparkle brilliantly across the interior ceiling dome. This opulent celestial sanctuary turns simple holiday crafting into an extraordinary artisan masterwork.
Materials Used for the Astrologer Dome
- Heavy chipboard sheets for assembling the primary dome base walls
- Half a yard of deep midnight navy blue crushed velvet fabric
- Fast-drying aerosol spray adhesive and heavy-duty hot glue sticks
- Metallic gold braid trim ribbon and metallic gold calligraphy pens
- Clear plastic craft sphere half for creating rooftop observation domes
- End-glow plastic fiber-optic lighting strands and bright white LED bulb
- Tiny brass jewelry gears, clockwork watch parts, and miniature crystals
Step-by-Step Construction Guide
- Cut architectural chipboard wall panels featuring elegant arched window openings cleanly.
- Coat wall faces with spray adhesive, smoothing midnight navy velvet overtop.
- Slice window openings through velvet using fresh razor hobby knife blades.
- Wrap velvet margins securely around back edges, gluing them down flat.
- Glue gold braid trim ribbon around window arches to frame openings.
- Assemble velvet-wrapped panels into a sturdy octagonal astrological tower base.
- Drill tiny pin-holes through ceilings, threading fiber-optic strands to form stars.
- Invert a clear plastic hemisphere, painting gold zodiac rings across surfaces.
- Mount the gilded dome atop the velvet tower over the star ceiling.
- Connect fiber-optic strands to internal LEDs to make the dome constellations sparkle.
14. Fairytale Bat Wing Steeple Mill

Whimsical kinetic movement elevates holiday villages from static displays into living worlds. Furthermore, replacing traditional mill sails with stylized bat wings introduces delightful spooky whimsy. Weathered timber walls taper upward toward a steep, crooked alpine windmill cap. As room air currents blow, the balanced bat-wing blades spin slowly overhead. Below, warm light floods through round porthole windows, welcoming weary nocturnal creatures. This unforgettable centerpiece combines historical milling engineering with playful, storybook Halloween folklore.
Constructing Rotating Bat Wing Sail Mechanisms
Building spinning aerodynamic sails requires lightweight wire armatures and delicate cardstock skins. First, bend four identical bat wing silhouettes using thin floral craft wire. Next, glue black tissue paper across wire frames, trimming excess along edges. Anchor the four wing arms into a central wooden craft spool hub. In addition, insert a smooth metal axle pin through hubs into tower walls. The resulting mechanism spins freely whenever gentle breezes drift across your village.
Weathering Alpine Windmill Timber Walls
Traditional octagonal windmill architecture introduces grand historic scale to miniature tabletop scenes. First, cut eight tapering cardboard wall panels, beveling long edges for tight joints. Glue panels together around circular wooden base rings to form octagonal towers. Next, score horizontal plank lines across walls before painting with weathered driftwood grey. Adhere tiny laser-cut wooden gears around outside walls to suggest milling mechanics. This whimsical windmill will capture endless compliments across your entire holiday season.
Materials Used for the Bat Wing Mill
- Heavy chipboard sheets for cutting the eight tapering tower walls
- 20-gauge flexible black floral craft wire for bending wing armatures
- Translucent black gift-wrapping tissue paper and decoupage glue medium
- Small wooden craft spool to serve as the rotating sail hub
- Sturdy steel dressmaker sewing pin or thin wire nail for axles
- Acrylic craft paints in weathered driftwood grey, charcoal, and soot
- Battery-powered warm-white flickering LED candle with built-in daily timer
Step-by-Step Construction Guide
- Cut eight identical tapering cardboard panels to build an octagonal tower.
- Cut circular porthole windows into alternating wall panels using detail cutters.
- Bevel panel edges slightly, gluing them together into an octagonal column.
- Paint tower walls with weathered grey acrylic, dry-brushing black plank lines.
- Construct a steep crooked cone roof cap from flexible scored black cardstock.
- Bend four bat wing silhouettes from black craft wire using needle-nose pliers.
- Glue black tissue paper over wire wings, trimming edges when dry.
- Insert wire wing stems into a wooden craft spool, spacing them evenly.
- Pin the wooden wing hub through the tower wall using steel axle pins.
- Insert warm flickering LEDs inside to illuminate spinning bat-wing shadows beautifully.