
There is something inherently magical about attracting birds into your backyard, balcony, or garden. Watching them flit from branch to branch, hearing their cheerful chirps, and observing their colorful feathers can bring a sense of calm, joy, and connection to nature that is difficult to replicate indoors. Birdwatching, however, doesn’t have to be reserved for those with vast outdoor spaces or expensive equipment. With a bit of creativity, you can design DIY bird feeders using simple cardboard, providing food for your feathered friends while transforming ordinary materials into a fun and engaging craft project. Cardboard bird feeders are environmentally friendly, budget-conscious, and beginner-friendly, making them an excellent project for children, families, and anyone who enjoys hands-on, nature-inspired activities. By creating your own bird feeders, you also contribute to supporting local bird populations, especially in areas where natural food sources may be scarce.
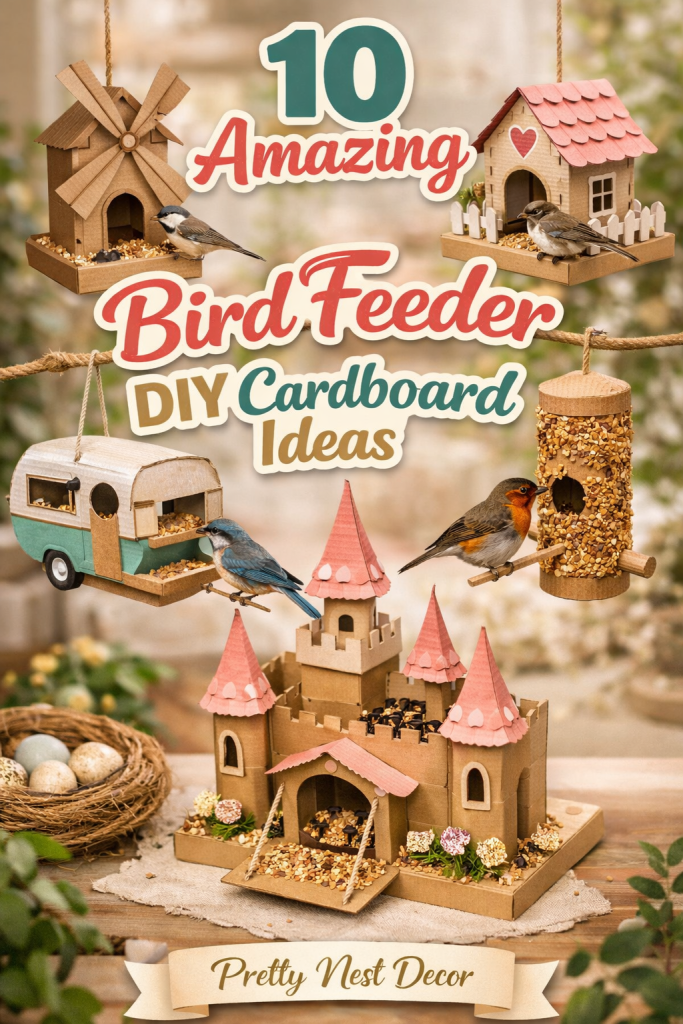
A cardboard bird feeder is essentially a structure made primarily from recycled cardboard, designed to hold bird food while allowing birds to perch and feed safely. These feeders come in endless shapes and designs, from simple flat trays to hanging boxes and even creatively themed constructions like houses, cars, or rockets. The beauty of cardboard is its versatility—it is lightweight, easy to cut, and adaptable to almost any design you can imagine. Additionally, cardboard is eco-friendly and biodegradable, which aligns perfectly with nature-focused projects. Using everyday items such as cereal boxes, toilet paper rolls, or shipping cartons, you can craft feeders that are not only functional but visually appealing, providing both a feeding station and a decorative element for your outdoor space.
One of the most rewarding aspects of cardboard bird feeders is the opportunity for creative expression. You can customize feeders with paint, markers, or eco-safe coatings, making each creation unique. Adding decorative touches like natural twine, leaves, or even small recycled embellishments transforms a simple feeding station into a miniature work of art that complements your garden or balcony. For children, crafting cardboard feeders is an excellent way to teach basic principles of ecology, recycling, and responsibility. Kids can learn about local bird species, what they eat, and how different feeder designs attract different types of birds. This hands-on project can spark curiosity, encourage observation, and foster a deeper appreciation for wildlife.
Practicality is just as important as creativity when it comes to cardboard bird feeders. Since cardboard is not naturally waterproof, adding protective coatings, or placing feeders in sheltered locations ensures they last longer and continue to attract birds safely. You can experiment with designs that hang from trees, sit on flat surfaces, or attach to railings. Each design offers its own set of advantages: hanging feeders reduce interference from pets, tray feeders are easy to refill, and enclosed feeders protect seeds from wind or rain. Moreover, DIY cardboard feeders are lightweight and portable, which allows you to relocate them as needed to different areas of your garden or balcony.
Cardboard bird feeders are also highly versatile in terms of materials and techniques. You can combine cardboard with other household items like string, glue, cloth, or popsicle sticks to enhance durability and add design elements. By experimenting with different types of cardboard, such as corrugated shipping boxes for sturdiness or cereal boxes for lightweight designs, you can create feeders suited to specific bird species and feeding needs. Some DIYers even incorporate recycled paper or natural fibers to further enhance the environmental friendliness of the project. This adaptability makes cardboard feeders an ideal choice for beginners and experienced crafters alike.
Another significant advantage of making your own bird feeders is the cost-effectiveness. Commercial bird feeders can be expensive, particularly for specialized designs or materials. Using cardboard and other common household items keeps costs minimal while still allowing you to create visually appealing, functional feeders. Additionally, the DIY process is rewarding in itself. Cutting, folding, gluing, and decorating the feeder provides a satisfying creative outlet and a sense of accomplishment. It also allows for experimentation—try multiple designs, observe which birds are attracted, and refine your feeder to meet your garden’s needs.
Beyond feeding birds, cardboard feeders also encourage a mindful and intentional approach to observing nature. By spending a few minutes each day watching which birds visit, noticing feeding habits, and identifying species, you cultivate patience, mindfulness, and environmental awareness. This combination of crafting and nature observation creates a meaningful hobby that is both relaxing and educational. Families can make it a weekly or seasonal activity, adjusting designs, colors, and types of seeds depending on the bird species in the area and the time of year.
In this article, we will explore 10 amazing cardboard bird feeder DIY ideas that are creative, functional, and beginner-friendly. Each idea includes step-by-step instructions, a materials list, and tips for customizing your feeder for different types of birds and locations. Whether your goal is to attract small songbirds, provide a fun craft project for kids, or simply add a touch of creativity to your outdoor space, these ideas offer inspiration and practical guidance. By following these projects, you can turn everyday cardboard into something beautiful and purposeful, supporting local wildlife while engaging in a fun and fulfilling activity.
Making DIY cardboard bird feeders is about more than just feeding birds—it’s about connecting with nature, reusing materials, fostering creativity, and creating lasting memories with your family. These projects can be done almost anywhere, require minimal supplies, and produce meaningful results that enhance your outdoor space. With thoughtful design, attention to durability, and a sprinkle of creativity, cardboard feeders can bring your garden to life, attract a variety of birds, and provide endless opportunities for observation, learning, and enjoyment.
Now, let’s dive into these 10 amazing cardboard bird feeder DIY ideas, each carefully designed to be fun, functional, and perfect for attracting a variety of birds. From simple trays and rolls to elaborate hanging boxes and imaginative structures, these DIY projects will inspire you to create unique feeders while making a positive impact on the local environment.
Idea 1: Simple Cereal Box Bird Feeder
Introduction:
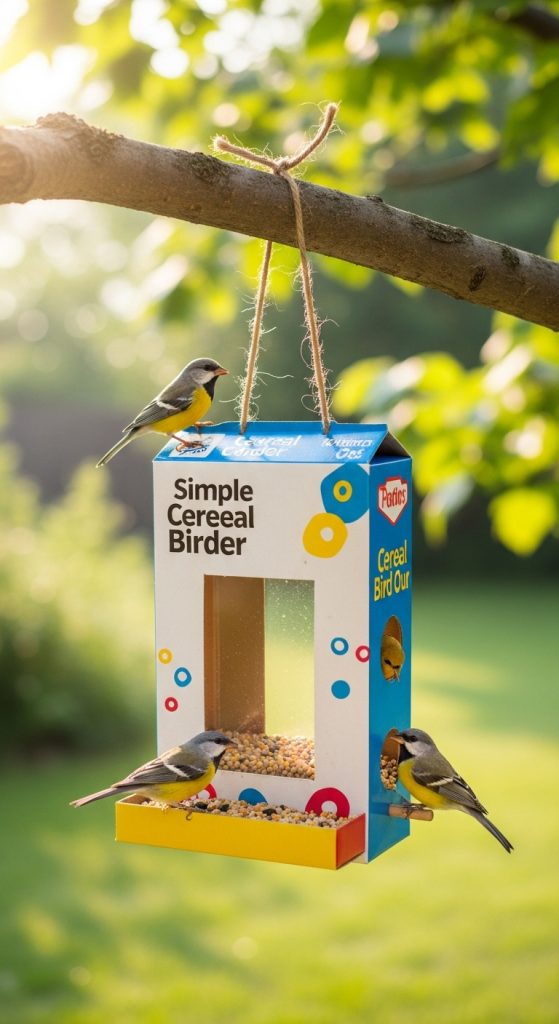
A simple cereal box bird feeder is one of the easiest and most beginner-friendly cardboard feeder projects. This design is perfect for children and families who are new to DIY crafting, as it uses everyday materials that are easy to find and handle. Despite its simplicity, it’s highly effective at attracting small songbirds such as sparrows, finches, and chickadees. The beauty of using a cereal box is that it is lightweight, easy to cut, and already provides a basic rectangular structure that can hold birdseed securely. With a little creativity, you can transform an ordinary cereal box into a charming, functional bird feeder that adds a touch of whimsy to your garden, balcony, or backyard. Decorating the feeder with bright colors, markers, or stickers also makes it a fun, artistic activity for kids. This project not only fosters creativity but also introduces children to principles of recycling and sustainability, showing how everyday items can be repurposed for a meaningful, eco-friendly purpose.
Step-by-Step How-to:
- Gather an empty cereal box and remove any plastic liners.
- Cut an opening on one side of the box to create the feeding window. Ensure the opening is large enough for birds to perch and access the seeds.
- Reinforce the box with tape along the edges and corners for durability, particularly if the box is thin.
- Optionally, decorate the exterior with non-toxic paint, markers, or stickers to make it visually appealing.
- Fill the box with birdseed, ensuring it’s level to prevent spillage.
- Attach string, twine, or yarn to the top of the box to hang it from a tree branch, hook, or balcony railing.
- Position the feeder in a safe location away from predators, ideally with some shade and a clear line of sight for birds.
- Monitor the feeder regularly, refill as needed, and ensure seeds stay dry by adding a small roof or overhang if desired.
Materials Needed:
- Empty cereal box
- Scissors or craft knife
- Tape (masking or clear)
- String, twine, or yarn
- Non-toxic paint, markers, or stickers (optional)
- Birdseed
Idea 2: Toilet Paper Roll Peanut Butter Feeder
Introduction:
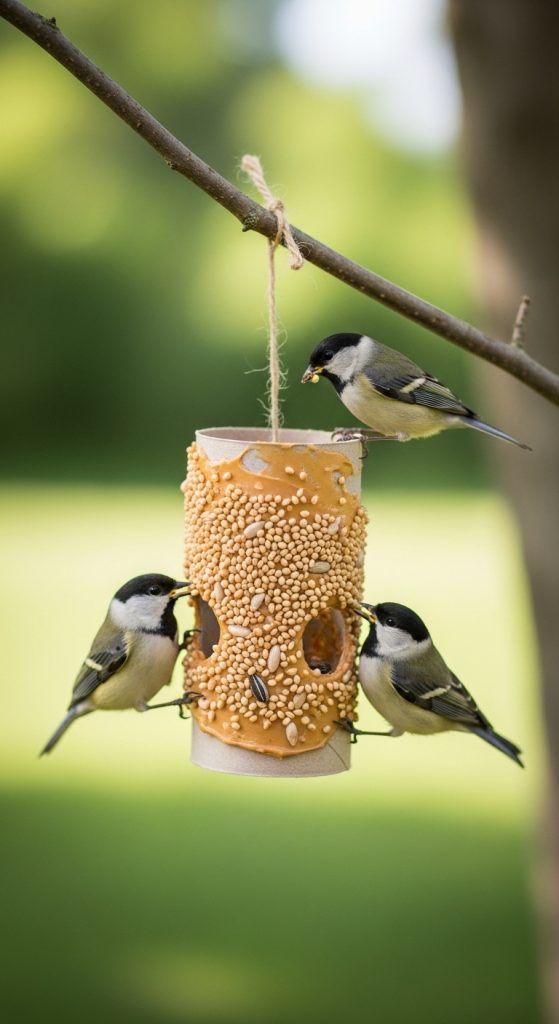
Toilet paper roll feeders are a fun and interactive way to reuse small cardboard items while providing a high-energy food source for birds. By coating the cardboard tube in peanut butter and rolling it in birdseed, you create a sticky, nutritious snack that attracts finches, chickadees, and other small birds. This project is perfect for kids, as it requires minimal cutting, and the tactile process of spreading peanut butter and rolling in seeds is hands-on and engaging. Beyond being a simple feeder, this DIY project also introduces children to wildlife care, helping them understand which foods are safe for birds and how feeders help sustain local bird populations. The project can be completed in under 15 minutes, making it ideal for quick crafting sessions while teaching responsibility, creativity, and a connection to nature.
Step-by-Step How-to:
- Take an empty toilet paper roll and gently remove any leftover paper.
- Spread a layer of peanut butter evenly around the outside of the roll. Use a butter knife or spatula for easy application.
- Pour birdseed onto a plate or shallow tray. Roll the peanut butter-coated tube in the birdseed until fully covered.
- Insert a piece of string or twine through the center of the tube and tie a knot to create a hanging loop.
- Hang the feeder from a tree branch, balcony railing, or hook, ensuring it’s at a safe height from predators.
- Observe birds enjoying the feeder and refill or replace when peanut butter or seeds are depleted.
- Consider creating multiple rolls in different locations to attract a variety of bird species.
Materials Needed:
- Empty toilet paper roll
- Peanut butter (unsalted, natural preferred)
- Birdseed
- String or twine
- Butter knife or spatula
Idea 3: Hanging Milk Carton Bird Feeder
Introduction:
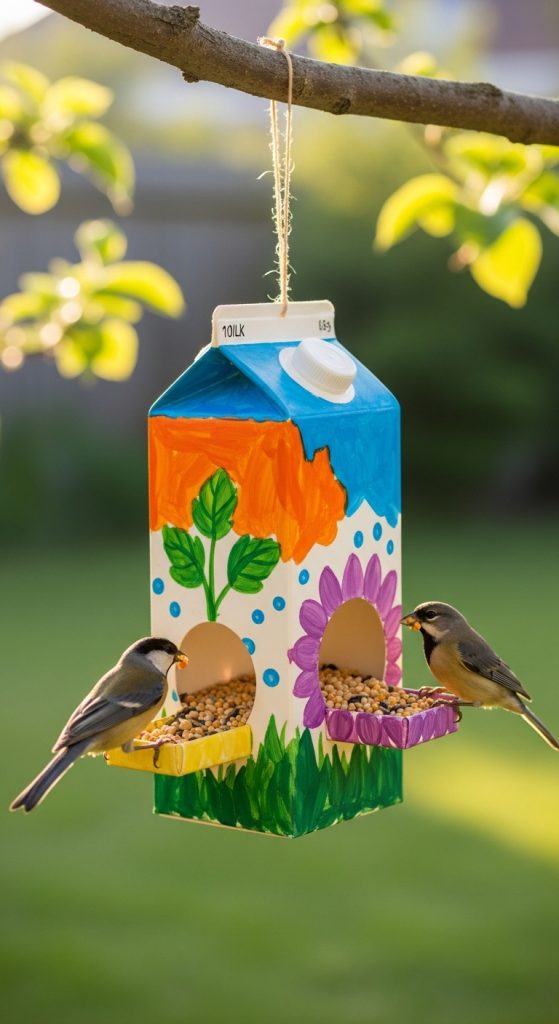
Using a recycled milk carton for a bird feeder is a creative way to combine sturdiness with easy access for birds. Milk cartons provide a taller, more enclosed structure that protects birdseed from wind and light rain, while still allowing small birds to perch comfortably. This feeder is ideal for beginners and families because it requires minimal crafting, uses household materials, and creates a functional feeder that can last several seasons with proper care. Decorating the exterior can turn the carton into a playful project for kids, incorporating bright colors, stickers, or fun designs. The enclosed design also allows you to experiment with hanging placement and offers a safe space for birds to feed, minimizing mess and seed spillage. Milk carton feeders are versatile and can be adapted to various birdseed types or additional features like small perches or drainage holes to improve functionality.
Step-by-Step How-to:
- Clean and dry an empty milk carton, removing any milk residue.
- Cut out two openings on opposite sides to create feeding windows large enough for birds to perch and access seeds.
- Reinforce edges with tape to prevent tearing.
- Optionally, decorate the carton with non-toxic paint, markers, or stickers for a creative touch.
- Punch holes at the top of the carton and thread a string or twine through to create a hanging loop.
- Fill the carton with birdseed, ensuring the base has drainage holes if rain is likely.
- Hang the feeder from a sturdy branch, hook, or balcony, ideally sheltered from strong wind and direct rain.
- Refill birdseed as needed and monitor for signs of wear or damage to the cardboard.
Materials Needed:
- Empty milk carton
- Scissors or craft knife
- Tape (optional reinforcement)
- Non-toxic paint, markers, or stickers (optional)
- Birdseed
- String or twine
Idea 4: Window Bird Feeder with Cardboard Base
Introduction:
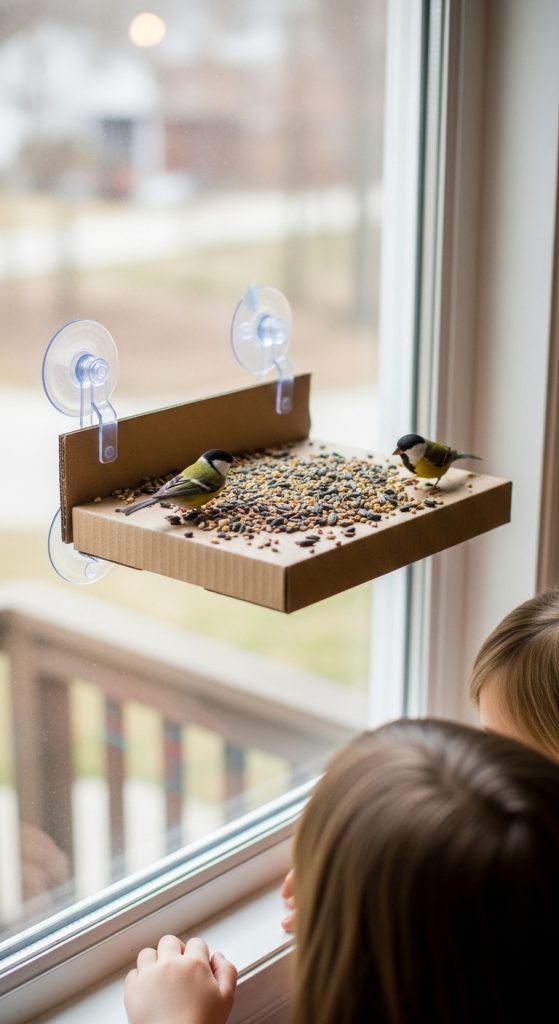
Window bird feeders allow you to observe birds up close while providing a safe, elevated feeding area. By combining a small cardboard base with suction cups or adhesive hooks, you can create a mini feeder that attaches directly to your window. This type of feeder is ideal for children and beginners because it provides an interactive experience—watching birds feed just inches away adds excitement and educational value. The cardboard base serves as a lightweight, eco-friendly platform that can hold seeds, and you can easily decorate or customize it for added charm. These feeders are perfect for urban or balcony settings where outdoor space is limited but bird observation is desired. The tactile nature of arranging seeds and positioning the feeder also offers a hands-on, engaging craft experience for families.
Step-by-Step How-to:
- Cut a sturdy piece of cardboard into a small rectangular or circular base.
- Reinforce the edges with tape or folded cardboard to create raised sides.
- Attach suction cups, adhesive hooks, or double-sided tape to the base for window attachment.
- Optionally, decorate the base with non-toxic paint, markers, or stickers.
- Spread birdseed evenly on the base.
- Attach the feeder to a clean window, ensuring stability and safety.
- Monitor birds and refill seeds as needed.
- Periodically check for moisture or damage to the cardboard, replacing or reinforcing as needed.
Materials Needed:
- Cardboard (sturdy)
- Tape for reinforcement
- Suction cups, adhesive hooks, or double-sided tape
- Birdseed
- Non-toxic paint, markers, or stickers (optional)
Idea 5: Pineapple or Fruit-Themed Cardboard Feeder
Introduction:
Fruit-themed cardboard bird feeders, shaped like pineapples, apples, or oranges, add a fun, whimsical element to backyard birdfeeding. These feeders are particularly engaging for children because they combine crafting, painting, and creative design with wildlife observation. Using recycled cardboard as the main structure, you can cut, fold, and assemble a fun shape, then fill it with birdseed or bird-friendly fruits like apple slices or berries. This approach not only makes feeding birds more fun but also encourages kids to think creatively and sustainably by reusing materials. The bright, playful designs attract birds and make the feeders visually appealing in any outdoor or balcony space. Fruit-themed feeders are also versatile, allowing you to experiment with hanging or standing designs, depending on available space and bird species in your area.

Step-by-Step How-to:
- Cut cardboard into shapes resembling fruits such as pineapples, apples, or oranges.
- Fold or assemble the cardboard into a box or holder that can contain seeds or fruit pieces.
- Reinforce edges with tape or glue for sturdiness.
- Optionally, decorate the feeder with bright colors, paint, or markers to resemble the chosen fruit.
- Fill the feeder with birdseed, fruit slices, or a combination.
- Attach string, twine, or hooks to hang the feeder from a branch or balcony.
- Place in a safe, visible location and observe the birds enjoying the colorful feeder.
- Refill or rotate fruits and seeds as needed to keep birds engaged.
Materials Needed:
- Cardboard
- Scissors or craft knife
- Tape or glue for reinforcement
- Paint, markers, or stickers (optional)
- Birdseed and/or fruit slices
- String, twine, or hooks for hanging
Idea 6: Hanging Tube Feeder with Cardboard and Rope
Introduction:
Hanging tube feeders made from cardboard and rope are a clever and versatile solution for feeding small birds. By creating a cylindrical cardboard tube with openings for perching and feeding, you can provide a fun and interactive feeding station. This type of feeder is lightweight, eco-friendly, and easy to customize, making it ideal for beginners, families, and children’s DIY projects. One of the benefits of a hanging tube design is that it can sway gently in the breeze, which can attract curious birds while keeping the feeder out of reach of ground predators like cats or squirrels. The project combines crafting, problem-solving, and observation skills, making it both educational and practical. Using rope or string to hang the feeder allows flexibility in placement, whether from a tree branch, balcony railing, or pergola. It also provides an opportunity for children to learn about balance, measurement, and structural stability while creating a safe feeding station for wildlife.

Step-by-Step How-to:
- Take a sturdy piece of cardboard and roll it into a cylindrical shape, securing the edges with tape or glue.
- Cut small feeding windows along the side, just large enough for birds to access the seeds.
- Reinforce edges of the windows with tape to prevent tearing.
- Optionally, decorate the outside of the tube with non-toxic paint, markers, or stickers.
- Punch two holes near the top edge and thread a piece of rope or string through to create a hanging loop.
- Fill the tube with birdseed, using a funnel or spoon to prevent spillage.
- Hang the feeder from a tree branch, balcony, or hook, making sure it’s secure and at a safe height.
- Check regularly to refill seeds and ensure the cardboard remains intact, replacing or reinforcing as needed.
Materials Needed:
- Sturdy cardboard
- Tape or glue
- Scissors or craft knife
- Rope, twine, or string
- Birdseed
- Non-toxic paint, markers, or stickers (optional)
Idea 7: Cardboard Platform Feeder with Perches
Introduction:
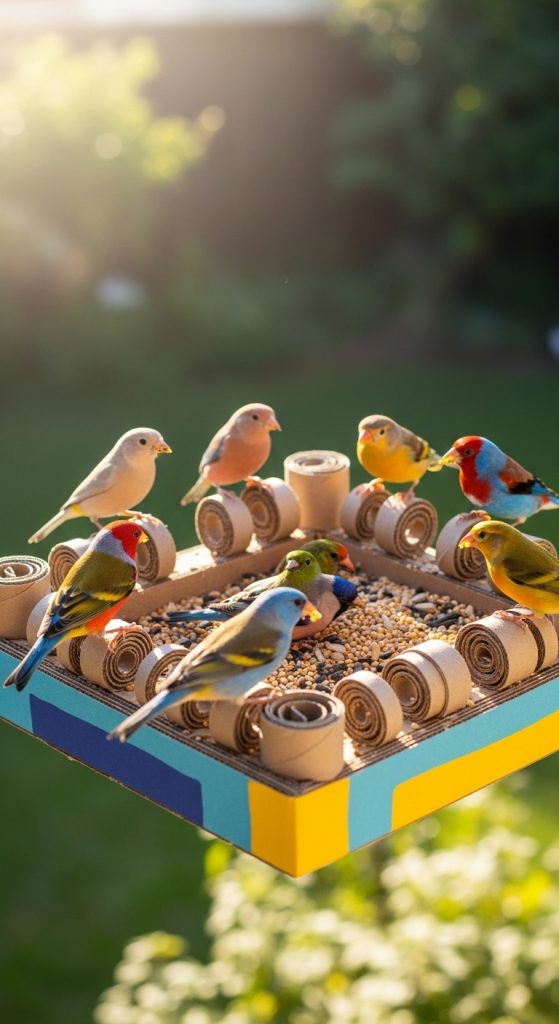
Platform feeders are excellent for providing a simple and accessible feeding area for a variety of birds. By using a cardboard base and adding small perches, you can create a feeder that accommodates multiple birds at once, allowing them to feed safely and comfortably. This design is particularly effective for attracting birds like sparrows, finches, and doves. Creating a platform feeder from cardboard is a practical and eco-friendly option, as it repurposes household materials while still being lightweight and easy to manage. The addition of perches encourages longer visits from birds, providing opportunities for observation and photography. For families, this project is perfect for teaching children about bird species, feeding habits, and habitat requirements. It also offers a creative outlet for decorating the feeder, experimenting with shapes, colors, and textures to make it visually appealing while functional.
Step-by-Step How-to:
- Cut a square or rectangular piece of cardboard to serve as the base of the feeder.
- Fold or tape edges upward to create shallow sides, preventing seeds from spilling.
- Create small cardboard perches by rolling or folding strips and attaching them to the base with glue or tape.
- Optionally, decorate the base with non-toxic paint, markers, or stickers.
- Fill the platform with birdseed, ensuring perches are accessible.
- Place the feeder on a flat surface, tree branch, or balcony railing.
- Check the feeder daily, refill seeds, and replace any damaged cardboard pieces.
- Observe the birds and adjust the feeder design or placement to attract different species.
Materials Needed:
- Cardboard for base and perches
- Tape or glue
- Scissors or craft knife
- Non-toxic paint, markers, or stickers (optional)
- Birdseed
Idea 8: Mini Cardboard House Feeder
Introduction:
Mini cardboard house feeders are charming, decorative, and functional, combining the appeal of a birdhouse with the practicality of a seed feeder. This design provides a sheltered feeding area, protecting seeds from light rain and wind while giving birds a safe and cozy spot to perch. Creating a mini house out of cardboard is perfect for families and children because it involves multiple crafting skills—cutting, folding, assembling, and decorating. These feeders can be customized in countless ways, from roof shapes and window designs to colorful exterior finishes. The process also introduces children to basic architectural concepts and spatial awareness, making it both educational and engaging. Placing these mini houses in trees, on balconies, or in gardens allows for a whimsical addition to outdoor spaces while providing a sustainable, eco-friendly solution for feeding local bird populations.

Step-by-Step How-to:
- Cut cardboard pieces for the base, walls, and roof of the house.
- Assemble the walls using tape or glue, ensuring stability and balance.
- Attach the roof, leaving a small overhang to protect seeds from rain.
- Cut small openings or “windows” for birds to access seeds.
- Optionally, decorate the house with non-toxic paints, stickers, or markers.
- Fill the interior with birdseed, making sure seeds are secure and accessible.
- Attach string, twine, or hooks to hang the house from a branch, or place it on a stable surface.
- Check regularly for seed levels and structural integrity, repairing or reinforcing as needed.
Materials Needed:
- Cardboard for base, walls, and roof
- Tape or glue
- Scissors or craft knife
- Non-toxic paint, markers, or stickers (optional)
- Birdseed
- Rope, twine, or hook for hanging (optional)
Idea 9: Tube-and-Platform Combo Feeder
Introduction:
Combining a tube feeder with a small platform creates a versatile feeder that accommodates different bird species. The tube section holds seeds securely, while the platform provides space for birds to land and perch. This hybrid design is particularly useful for attracting both small and medium-sized birds and offers a fun DIY challenge for families and children. Using cardboard for both components makes the project eco-friendly, lightweight, and easy to assemble. Kids can explore concepts like balance, stability, and weight distribution while creating a functional feeder. Decorating the combo feeder with colors, stickers, or patterns adds a playful and whimsical element, making it visually appealing and perfect for Pinterest-worthy outdoor décor. The hybrid design also allows for experimentation with seed types, feeder placement, and structural adjustments to optimize bird visits.

Step-by-Step How-to:
- Roll a piece of cardboard into a tube and secure it with tape or glue.
- Cut small openings in the tube for birds to access the seeds.
- Create a small cardboard platform and attach it at the base of the tube with tape or glue.
- Optionally, decorate both tube and platform with non-toxic paints, markers, or stickers.
- Fill the tube with birdseed and place additional seeds on the platform.
- Attach string or twine to hang the feeder, or place it on a stable flat surface.
- Observe birds visiting and adjust placement or seed quantity as needed.
- Refill seeds regularly and reinforce cardboard if signs of wear appear.
Materials Needed:
- Cardboard for tube and platform
- Tape or glue
- Scissors or craft knife
- Non-toxic paint, markers, or stickers (optional)
- Birdseed
- Rope, twine, or hook (optional)
Idea 10: Themed Cardboard Feeder (Rocket, Car, or Animal Shapes)
Introduction:
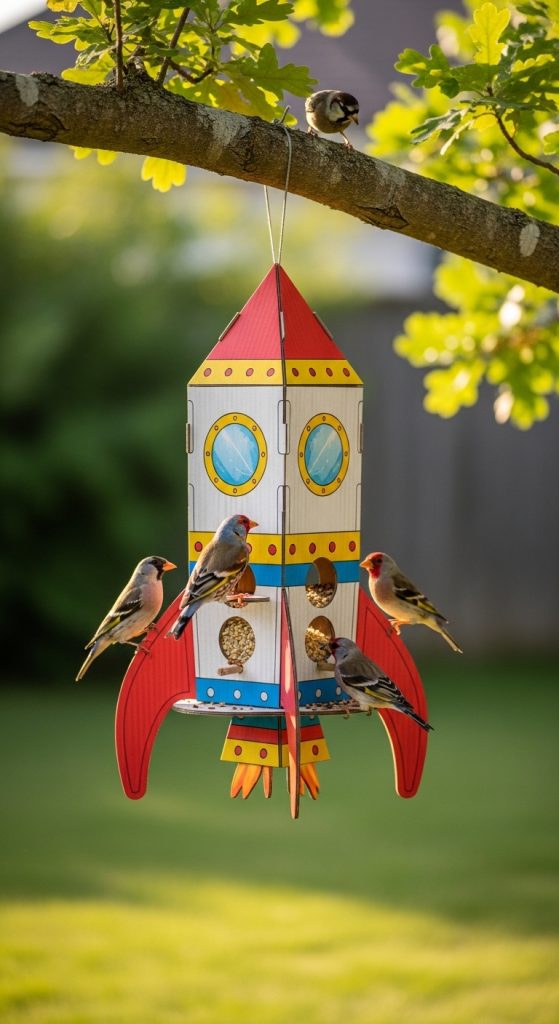
Themed cardboard feeders shaped like rockets, cars, or animals take DIY birdfeeding to a fun, imaginative level. These creative feeders attract children’s attention, inspire imaginative play, and make feeding birds a visually engaging experience. Themed feeders are also educational—they encourage kids to experiment with shapes, structures, and decorations while observing how birds interact with the feeder. By combining cardboard, tape, and decorative elements, you can craft a functional feeding station that doubles as whimsical décor for your garden, balcony, or backyard. This project is perfect for families who want a hands-on, artistic, and eco-friendly craft that contributes to local wildlife. Themed feeders also offer versatility in placement and design, making them a standout addition to any outdoor space.
Step-by-Step How-to:
- Sketch the shape of your themed feeder (rocket, car, animal, etc.) on cardboard.
- Cut and assemble cardboard pieces to create the 3D structure using tape or glue.
- Decorate the exterior with non-toxic paints, markers, or stickers to match the theme.
- Cut openings or attach trays for birds to access seeds.
- Fill the feeder with birdseed, ensuring accessibility and stability.
- Attach rope, twine, or hooks if hanging is desired.
- Place the feeder in a safe, visible location and monitor bird visits.
- Refill seeds and maintain the feeder regularly, repairing as needed.
Materials Needed:
- Cardboard
- Tape or glue
- Scissors or craft knife
- Non-toxic paints, markers, or stickers
- Birdseed
- Rope, twine, or hooks (optional)