
Gardening is one of the most rewarding ways to enhance your home, bring nature closer, and create a relaxing, visually appealing outdoor space. However, many people assume that designing a beautiful garden requires a large budget, expensive plants, or professional landscaping. The truth is, with creativity, smart planning, and strategic choices, you can transform any outdoor area into a stunning, functional, and Pinterest-worthy garden without spending a fortune. From small balcony gardens to spacious backyards, there are countless ways to maximize aesthetics and practicality while keeping costs low.
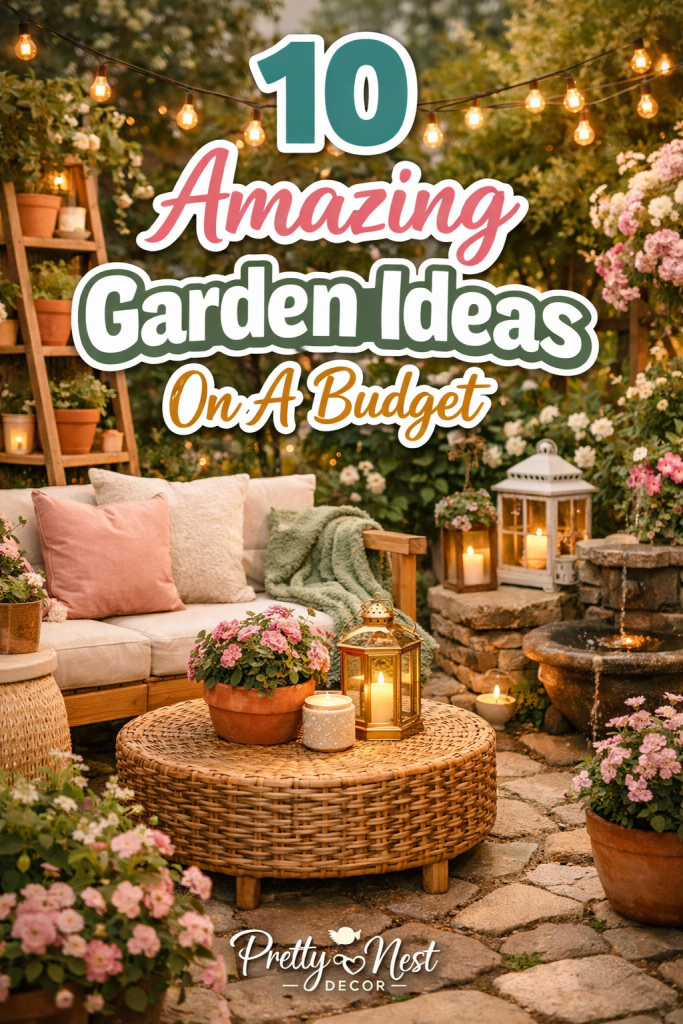
Budget-friendly gardening focuses on ingenuity, resourcefulness, and prioritization. It’s about selecting the right plants, materials, and décor that give maximum impact for minimum expense. For example, repurposing old containers as planters, using seeds instead of mature plants, or building DIY garden structures can significantly reduce costs while adding charm and originality. Even small changes like rearranging existing plants, adding mulch, or painting pots creatively can dramatically improve the overall look. The goal is to create a cohesive, visually pleasing space that reflects your personal style while being mindful of your wallet.
One of the key aspects of budget gardening is planning and design strategy. Before buying anything, assess your outdoor space: identify areas with the best sunlight, consider the soil quality, and note existing structures or features that can be incorporated. Decide on a theme or color palette for your garden—whether modern minimalist, cottage-inspired, tropical, or whimsical—and plan plant placement and décor elements accordingly. This approach prevents unnecessary purchases, reduces waste, and ensures that every item in your garden contributes meaningfully to the design.
Another essential factor is plant selection. Choosing hardy, low-maintenance, and seasonal plants can save money and effort. Seeds, cuttings, and starter plants are often far less expensive than mature specimens but can grow into stunning focal points over time. Perennials are another cost-effective choice because they return each year, reducing the need for annual replanting. Mixing greenery with budget-friendly flowers like marigolds, petunias, or pansies can bring vibrant color without high costs. Even simple herbs or vegetables can serve a dual purpose: beauty and utility.
Budget-friendly gardens aren’t just about plants—they also rely on clever use of materials and DIY creativity. Old wooden pallets can become vertical planters, mason jars can serve as hanging herb gardens, and repurposed containers like buckets or crates can be painted and reused as unique pots. Mulch, stones, and gravel are inexpensive ways to define pathways, protect soil, and add texture. Incorporating upcycled or recycled décor gives the garden a personal, charming character while staying eco-friendly and affordable.
Another advantage of designing a garden on a budget is that it encourages creativity and hands-on involvement. Rather than hiring professionals or buying expensive pre-made features, you can experiment, learn gardening skills, and customize every detail to your taste. Small adjustments over time—like planting additional blooms, painting fences, or adding DIY ornaments—allow your garden to evolve organically. With patience, a little effort, and careful planning, even the simplest outdoor spaces can feel like a luxurious retreat.
In this guide, we will explore 10 amazing garden ideas on a budget, each chosen to maximize visual appeal, creativity, and functionality without straining your finances. Each idea focuses on practical techniques, cost-effective materials, and easy-to-follow steps, making them perfect for beginners and experienced gardeners alike. Whether you want to create a cozy backyard haven, a vibrant front yard, a productive vegetable patch, or a whimsical garden nook, these ideas provide inspiration and guidance to make it happen.
These garden concepts are designed to be Pinterest-worthy, with clear attention to color, texture, and composition. They emphasize how thoughtful design, creative reuse, and smart planting choices can transform any space, proving that a gorgeous garden does not have to come with a high price tag. From DIY planters to clever landscaping, from layered planting arrangements to budget-conscious décor, each idea provides actionable steps to enhance your outdoor space effectively.
Finally, this guide empowers homeowners to approach gardening with confidence, creativity, and budget awareness. You don’t need expensive tools, rare plants, or professional help to create a stunning garden. Instead, with resourcefulness, imagination, and strategic choices, you can design an outdoor space that brings joy, beauty, and relaxation to your home. Prepare to explore 10 amazing garden ideas on a budget that will inspire, inform, and guide you toward creating your dream garden without overspending, ensuring a practical, beautiful, and Instagram-worthy result.
Idea 1: DIY Container Gardens
Introduction
Container gardens are one of the easiest and most budget-friendly ways to create a lush outdoor space. They are perfect for small yards, balconies, patios, or even indoor areas with sunlight. The beauty of container gardening is its versatility—almost anything can serve as a planter, from old buckets and crates to teapots and mason jars. With a little creativity, you can transform everyday items into charming containers that reflect your personal style. Container gardens allow you to grow flowers, herbs, vegetables, or even small shrubs, making them both decorative and functional.
This approach is particularly advantageous for those on a budget because it eliminates the need for expensive landscaping or permanent garden beds. Additionally, container gardens are portable, allowing you to experiment with different arrangements, sunlight exposure, and plant combinations without committing to a permanent design. They are also easier to maintain, as watering and soil amendments can be controlled more efficiently. With careful planning, inexpensive materials, and thoughtful plant selection, container gardens can create a visually striking, Pinterest-worthy outdoor space. This guide provides step-by-step instructions, materials needed, and creative tips to help you build your own beautiful container garden without breaking the bank.
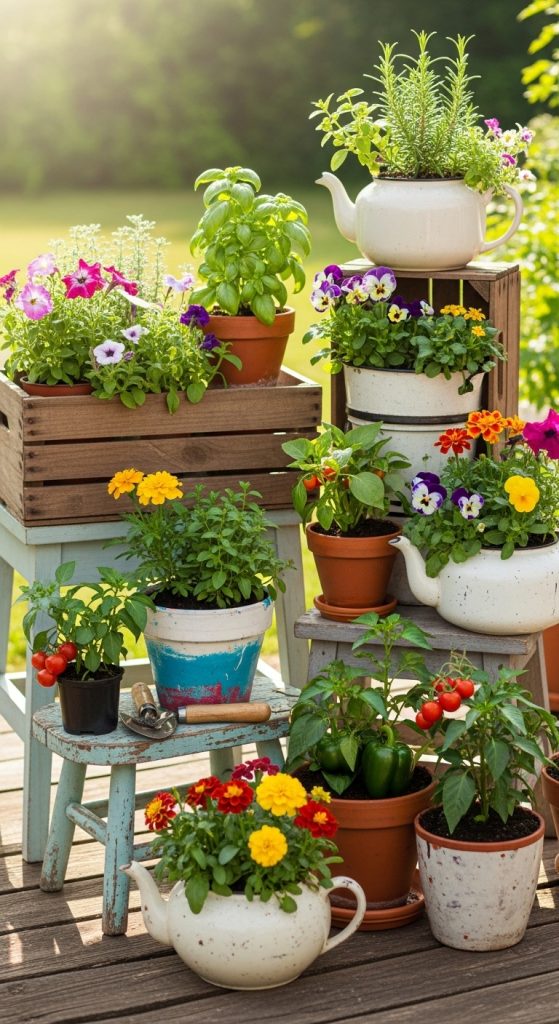
Definition/Explanation:
Container gardening involves growing plants in pots or other portable containers instead of planting directly in the ground, making it flexible, space-efficient, and budget-friendly.
Step-by-Step How-To:
- Select containers: Use inexpensive or repurposed items like buckets, crates, or old bowls.
- Prepare drainage: Drill holes if necessary to prevent waterlogging.
- Choose soil: Use quality potting mix or a mix of compost and garden soil.
- Select plants: Opt for affordable herbs, flowers, or vegetables suitable for your climate.
- Arrange containers: Group pots by size, color, or plant type for visual harmony.
- Planting: Fill containers with soil, plant seeds or seedlings, and water thoroughly.
- Maintenance: Water regularly, add fertilizer if needed, prune, and rotate for sunlight.
Materials Needed:
- Repurposed containers or inexpensive pots
- Potting soil or compost
- Seeds or starter plants
- Watering can
- Optional: decorative stones or moss for aesthetic appeal
Idea 2: Upcycled Pallet Garden
Introduction
Upcycled pallet gardens are an eco-friendly and cost-effective way to create vertical garden space. Wooden pallets, often discarded or available for free, can be transformed into plant displays, herb racks, or even full garden walls. This approach is ideal for small spaces or urban gardens where horizontal space is limited. The vertical design not only saves space but also creates visual interest, turning ordinary walls or fences into eye-catching garden features.
Upcycling materials also keeps costs low while giving your garden a personalized, rustic aesthetic. Pallets can be sanded, painted, or stained to match your outdoor décor. With careful planning, you can grow a variety of plants, from trailing flowers and herbs to small vegetables, all arranged neatly on a vertical plane. This idea maximizes utility, creativity, and charm while remaining budget-conscious. By following a step-by-step process, even beginners can construct a sturdy, functional, and beautiful pallet garden. The result is a Pinterest-worthy, eco-friendly outdoor space that feels modern, cozy, and sustainable.
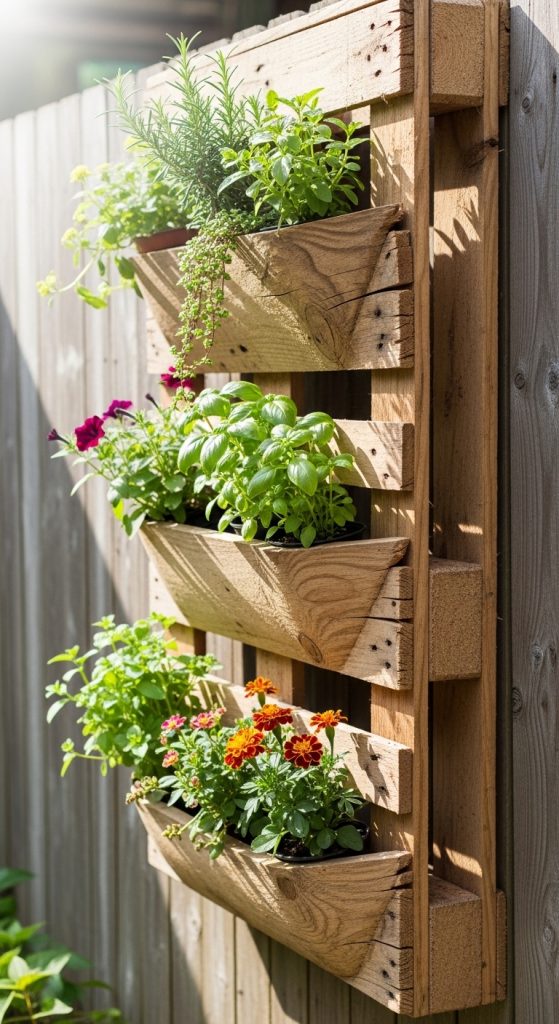
Definition/Explanation:
A pallet garden is a vertical garden created by repurposing wooden pallets to hold plants, maximizing space and style while being extremely budget-friendly.
Step-by-Step How-To:
- Select a pallet: Choose a sturdy wooden pallet and sand rough edges.
- Prepare for planting: Line the back with landscape fabric to hold soil.
- Secure the pallet: Attach it vertically to a wall, fence, or standalone support.
- Add soil: Fill each pallet section with potting soil.
- Plant selection: Use flowers, herbs, or small vegetables suitable for vertical growth.
- Planting: Insert plants into soil pockets or sections.
- Maintenance: Water carefully, check soil moisture, and trim as needed.
Materials Needed:
- Wooden pallet
- Landscape fabric or plastic liner
- Potting soil
- Seeds or starter plants
- Screws, brackets, or hooks for mounting
- Optional: paint or stain for aesthetics
Idea 3: DIY Pathways with Stones or Gravel
Introduction
Creating garden pathways adds structure, accessibility, and visual appeal without requiring a large budget. Paths guide visitors, define spaces, and create movement through your garden. Using inexpensive materials like gravel, stones, or pebbles, you can design attractive walkways that complement your plants and outdoor décor. Paths also prevent soil compaction and muddy areas, making your garden cleaner and more functional.
DIY pathways are highly customizable. You can mix textures, shapes, and colors to reflect your garden’s theme. Curved paths create a natural, whimsical feel, while straight lines offer modern minimalism. Additionally, sourcing local stones or repurposing broken concrete can drastically reduce costs. With proper planning, installation, and finishing touches, these pathways can transform your garden into a Pinterest-worthy, serene retreat while staying budget-conscious. This guide provides detailed steps, materials, and tips for creating durable, aesthetic, and inexpensive garden pathways.
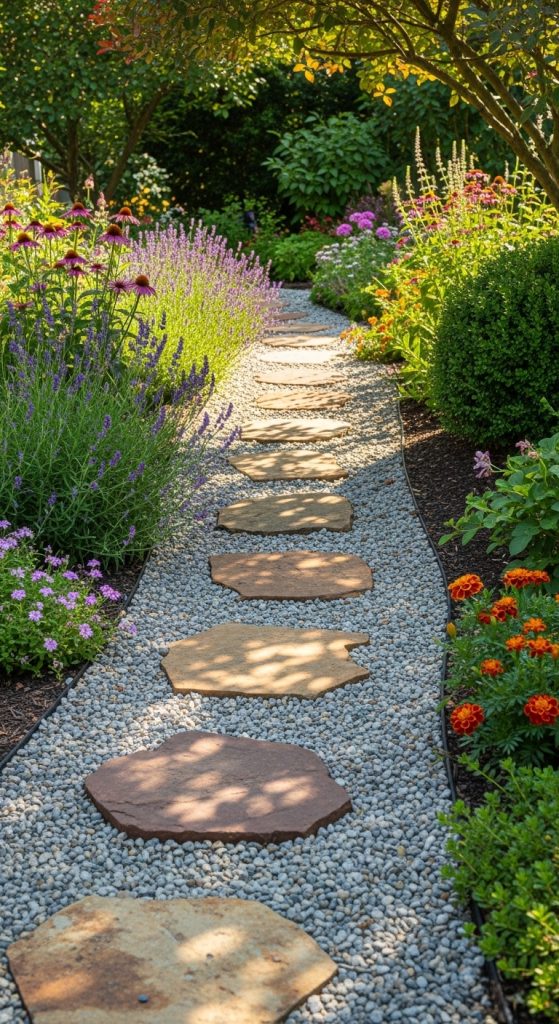
Definition/Explanation:
A DIY garden pathway uses affordable materials like gravel or stones to create walkways that enhance aesthetics and functionality while defining outdoor spaces.
Step-by-Step How-To:
- Plan the path: Determine the layout, width, and shape.
- Prepare the ground: Clear grass, weeds, and level the soil.
- Lay base: Add sand or crushed stone to stabilize the path.
- Place stones or gravel: Arrange materials according to the design.
- Secure edges: Use bricks, wood, or metal edging to hold materials in place.
- Fill gaps: Add sand or small pebbles to fill spaces.
- Maintenance: Remove weeds and replenish stones periodically.
Materials Needed:
- Gravel, pebbles, or flat stones
- Sand or crushed stone for base
- Edging materials (wood, brick, or metal)
- Garden tools: shovel, rake, level
- Optional: stepping stones for design accents
Idea 4: Raised Garden Beds with Recycled Materials
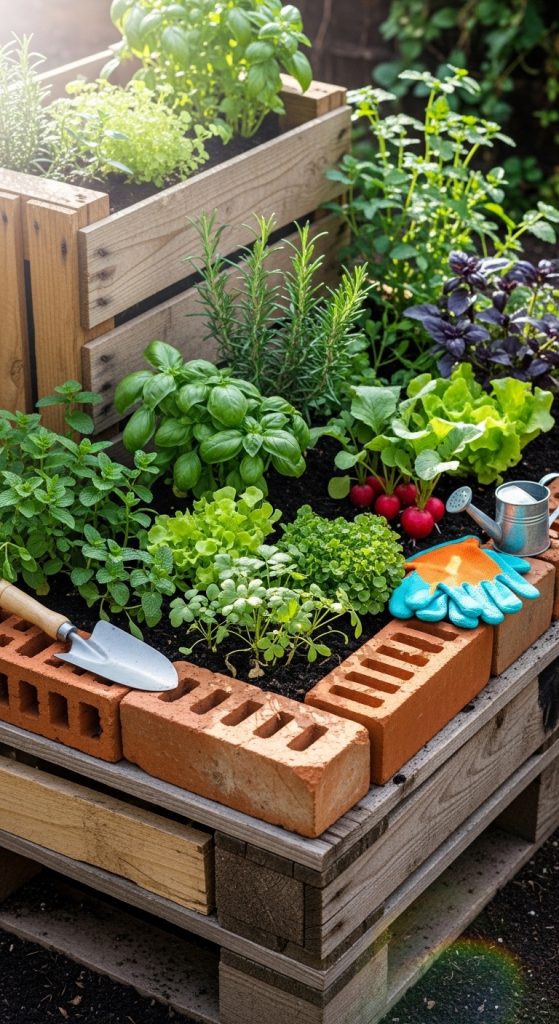
Raised garden beds are a practical and affordable way to create organized planting spaces. By using recycled materials such as wooden crates, bricks, or old pallets, you can build elevated beds that improve soil quality, drainage, and accessibility. Raised beds are ideal for vegetables, herbs, and flowers, especially in areas with poor soil or uneven terrain.
Creating raised beds using recycled materials reduces costs while offering endless customization options. You can adjust size, shape, and height according to your space. Additionally, painting or staining materials adds personality and enhances aesthetic appeal. Raised beds also simplify maintenance, reduce weed growth, and make harvesting easier. This budget-friendly approach combines functionality, creativity, and visual charm, turning any garden into a well-structured, productive, and Pinterest-worthy space. Step-by-step instructions make it accessible even to beginners.
Definition/Explanation:
Raised garden beds are elevated planting areas constructed from inexpensive or recycled materials, improving soil, drainage, and accessibility while being cost-effective.
Step-by-Step How-To:
- Select materials: Recycled wood, crates, bricks, or pallets.
- Prepare site: Clear ground, level soil, and mark bed dimensions.
- Assemble frame: Secure corners and sides using nails, screws, or brackets.
- Add soil: Fill with a mix of compost, garden soil, and organic matter.
- Plant selection: Use vegetables, herbs, or flowers suited to your climate.
- Planting: Space plants according to growth needs, water thoroughly.
- Maintenance: Mulch, water regularly, and check for pests.
Materials Needed:
- Recycled wood, crates, or bricks
- Screws, nails, or brackets
- Garden soil and compost
- Seeds or starter plants
- Mulch for soil protection
Idea 5: Vertical Herb Garden with Wall-Mounted Planters
Introduction
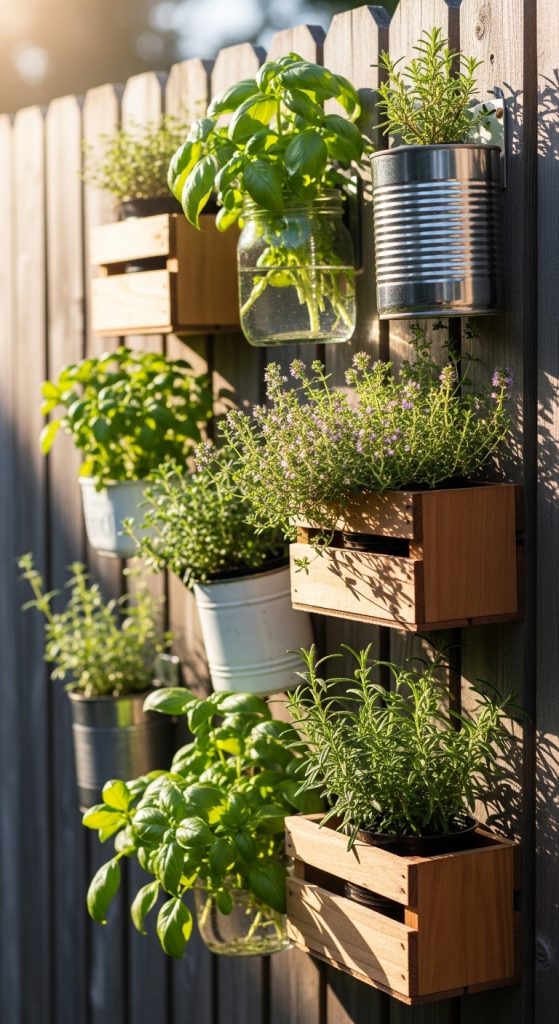
Vertical herb gardens are perfect for adding greenery and flavor to your garden or balcony without using much space or money. By mounting planters on walls, fences, or railings, you can create a lush, functional, and visually appealing herb display. This technique is especially ideal for small spaces, apartments, or urban gardens, where horizontal planting areas are limited.
A vertical herb garden is practical and aesthetic. Herbs like basil, thyme, rosemary, and mint grow quickly, are inexpensive to start from seeds or cuttings, and provide fresh ingredients for cooking. Using budget-friendly wall-mounted planters such as recycled containers, jars, or pockets allows you to arrange plants creatively and efficiently. Vertical gardens also add dimension to flat surfaces, making your outdoor space feel fuller and more vibrant. This guide provides a step-by-step method to construct a vertical herb garden, select plants, and maintain it for maximum growth and visual appeal, all on a budget.
Definition/Explanation:
A vertical herb garden is a space-saving gardening method using wall-mounted planters to grow herbs efficiently while enhancing aesthetics.
Step-by-Step How-To:
- Choose location: Select a sunny wall, fence, or railing.
- Select containers: Repurpose jars, tins, or small pots.
- Mount planters: Use hooks, brackets, or wall-mounted shelves.
- Prepare soil: Use potting mix suitable for herbs.
- Plant herbs: Start from seeds or seedlings, spacing appropriately.
- Watering and care: Maintain soil moisture, prune regularly.
- Optional decor: Paint planters or add labels for charm.
Materials Needed:
- Recycled containers or pots
- Wall hooks, brackets, or shelves
- Potting soil
- Herb seeds or seedlings
- Watering can
- Optional: plant markers or decorative paint
Idea 6: Fairy Garden Corners
Introduction
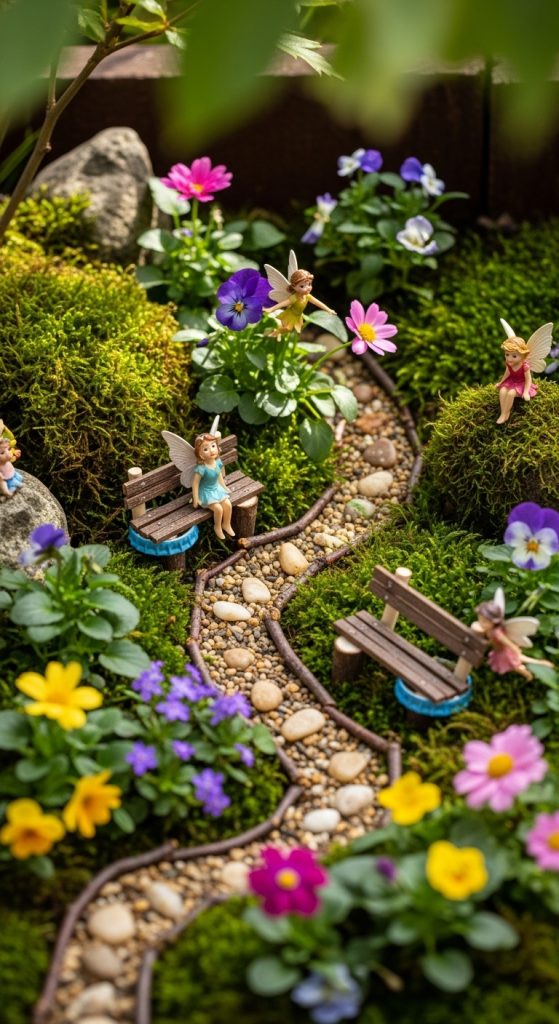
Fairy gardens are whimsical miniature landscapes that bring magic and charm to any outdoor space. They are perfect for budget-friendly gardening because they rely on small-scale elements, DIY creativity, and inexpensive materials. Fairy gardens allow you to transform a simple corner of your garden into a visually enchanting space full of tiny plants, pathways, furniture, and decorative accents. This type of gardening encourages creativity, storytelling, and personal expression, making it enjoyable for both adults and children.
These miniature landscapes are highly customizable. You can use small containers, planters, or even repurposed trays to create different scenes. Adding inexpensive decorative items such as pebbles, sticks, shells, or tiny figurines brings the garden to life. Fairy gardens also pair beautifully with vertical gardens, container gardens, or small flower beds, adding depth and visual interest to your outdoor space. They are ideal for corners, patios, or windowsills, proving that even the tiniest areas can become Pinterest-worthy, magical retreats. This guide provides step-by-step instructions for creating a charming fairy garden, including materials, design ideas, and maintenance tips to ensure longevity and visual appeal.
Definition/Explanation:
A fairy garden is a miniature outdoor landscape designed with small plants, decorative elements, and imaginative structures to create a whimsical, magical aesthetic.
Step-by-Step How-To:
- Select a container or area: Choose a planter, tray, or garden corner.
- Prepare soil: Fill the container with potting soil suitable for miniature plants.
- Choose plants: Use small, slow-growing plants like moss, succulents, or tiny flowers.
- Add pathways: Use pebbles, gravel, or sand to create miniature walkways.
- Place decorative elements: Add DIY figurines, tiny benches, or natural objects like twigs and shells.
- Arrange creatively: Layer elements for depth and balance.
- Maintenance: Water carefully, trim plants as needed, and replace seasonal decorations.
Materials Needed:
- Container, tray, or small garden corner
- Potting soil
- Miniature plants (moss, succulents, small flowers)
- Pebbles, gravel, or sand
- Decorative elements (figurines, twigs, shells)
- Optional: miniature lights or DIY ornaments
Idea 7: Vertical Succulent Wall
Introduction
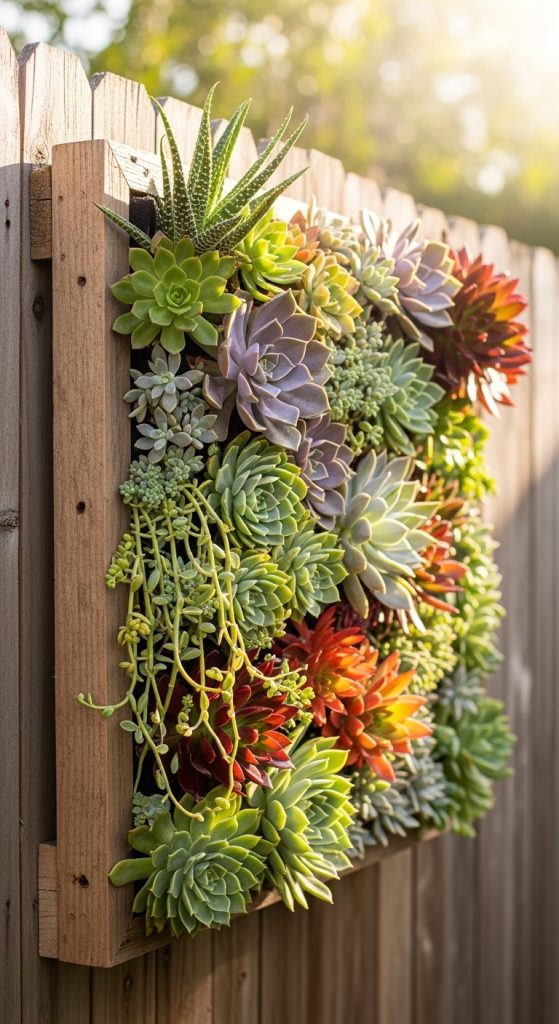
Vertical succulent walls are a modern, budget-friendly way to create greenery while saving space. Succulents are hardy, low-maintenance plants that thrive in containers, making them perfect for vertical gardens. By mounting a frame or structure on a wall or fence, you can craft a striking garden feature that doubles as functional décor. Vertical succulent gardens add texture, color, and dimension, transforming bland walls or fences into Pinterest-worthy living art.
This idea is cost-effective because succulents are inexpensive, grow quickly, and require minimal water and soil. Using recycled materials like old picture frames, wooden pallets, or grid panels further reduces costs. Succulent walls are highly customizable; you can experiment with patterns, color combinations, and sizes to create a unique visual impact. Whether for small patios, balconies, or larger backyard walls, vertical succulent gardens maximize greenery, reduce maintenance, and add a stylish, contemporary element to your garden. Step-by-step instructions guide you through plant selection, wall preparation, planting techniques, and ongoing care.
Definition/Explanation:
A vertical succulent wall is a mounted or wall-attached garden that showcases low-maintenance succulent plants in a compact, visually appealing arrangement.
Step-by-Step How-To:
- Choose frame or structure: Use recycled pallet, mesh frame, or wall-mounted planter.
- Prepare backing: Line frame with landscape fabric to hold soil.
- Add soil: Use succulent or cactus potting mix for drainage.
- Select succulents: Choose small varieties with varying colors and textures.
- Plant carefully: Insert succulents into soil pockets, securing roots.
- Mount securely: Attach frame to wall or fence using brackets or hooks.
- Maintenance: Water sparingly, rotate for sunlight exposure, remove dead leaves.
Materials Needed:
- Recycled frame or wooden pallet
- Landscape fabric or plastic liner
- Succulent/cactus soil mix
- Succulent plants
- Hooks or brackets for mounting
- Optional: small decorative stones
Idea 8: DIY Raised Vegetable Patch
Introduction
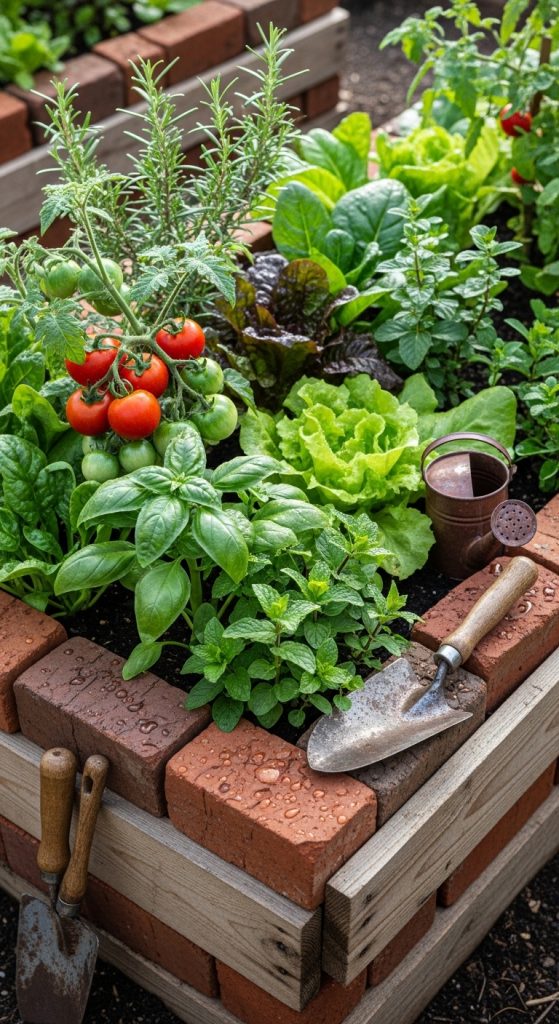
A raised vegetable patch allows you to grow your own fresh produce while staying on budget. Using inexpensive or repurposed materials, you can build a defined, elevated planting area that maximizes space and improves soil quality. Growing vegetables at home is both practical and cost-effective, providing fresh, organic ingredients while reducing grocery bills. Raised beds also improve drainage, soil aeration, and accessibility, making gardening easier and more enjoyable.
Budget-friendly raised vegetable patches can be constructed with recycled wood, old crates, or bricks. You can tailor the size and shape to fit your space, whether it’s a small backyard, balcony, or community garden plot. Combining companion planting techniques, seasonal crops, and budget-conscious materials creates a productive, sustainable, and visually appealing garden area. This idea allows gardeners to experiment, learn, and enjoy the satisfaction of growing food at home, all while maintaining Pinterest-worthy aesthetics. This guide provides step-by-step instructions, material lists, and planting advice to help you create a thriving raised vegetable patch on a budget.
Definition/Explanation:
A raised vegetable patch is an elevated garden bed designed to grow vegetables efficiently while improving soil, drainage, and accessibility, using cost-effective materials.
Step-by-Step How-To:
- Select materials: Recycled wood, crates, bricks, or cinder blocks.
- Choose location: Sunny spot with good soil drainage.
- Assemble raised bed: Construct frame using selected materials.
- Add soil: Mix compost, garden soil, and organic matter.
- Plant vegetables: Choose seasonal, easy-to-grow crops.
- Care and maintenance: Water regularly, mulch, and monitor for pests.
- Harvest and rotate: Replant crops seasonally for continuous yield.
Materials Needed:
- Recycled wood, crates, bricks, or blocks
- Garden soil and compost
- Seeds or seedlings
- Mulch for protection
- Watering can or irrigation system
Idea 9: Budget-Friendly Garden Lighting
Introduction
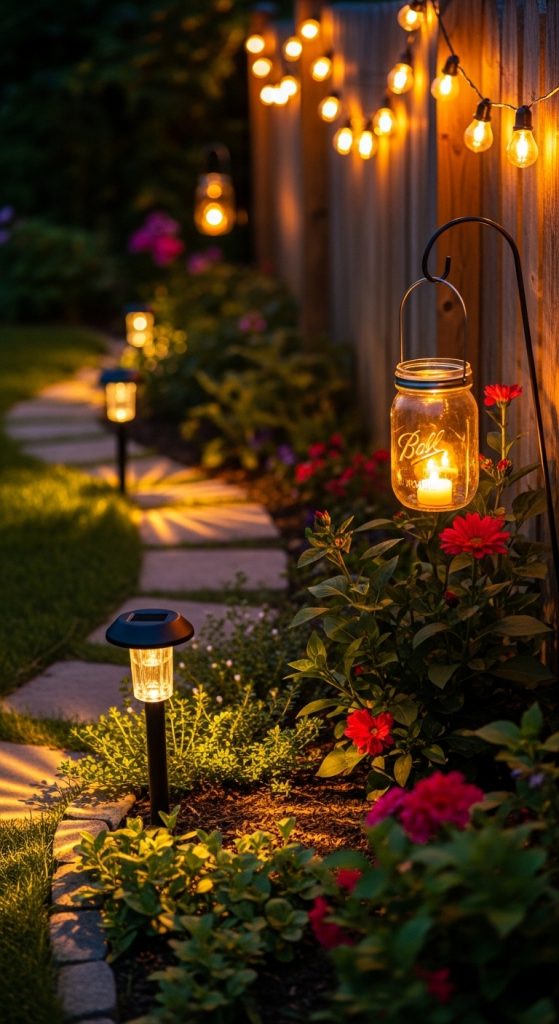
Adding lighting to your garden enhances ambiance, safety, and aesthetic appeal, and it doesn’t have to be expensive. Budget-friendly garden lighting options include solar lights, string lights, and DIY lanterns, which require minimal wiring and installation. Properly placed lights can highlight pathways, garden features, and plants, creating a cozy, inviting atmosphere perfect for evening enjoyment or entertaining guests.
Lighting elevates the visual appeal of any garden, making it look more expansive and professionally designed, even on a tight budget. DIY lanterns can be made from mason jars, tin cans, or recycled glass bottles, adding charm and a personal touch. Solar-powered lights eliminate electricity costs, and string lights can be draped along fences, pergolas, or trees to create whimsical effects. With thoughtful placement, garden lighting becomes a focal point that transforms your outdoor space into a Pinterest-worthy nighttime oasis. This guide provides step-by-step tips for installing cost-effective garden lighting and maintaining it for long-lasting effect.
Definition/Explanation:
Budget-friendly garden lighting uses affordable or DIY solutions like solar lights, string lights, or lanterns to enhance the beauty, safety, and ambiance of outdoor spaces.
Step-by-Step How-To:
- Select lighting type: Solar, string, or DIY lanterns.
- Choose placement: Highlight paths, plants, or seating areas.
- Install fixtures: Place solar lights directly in sunlight; hang string lights securely.
- DIY lanterns: Repurpose jars or bottles, insert candles or LED lights.
- Test lighting: Ensure coverage and adjust angles as needed.
- Safety check: Avoid water contact and secure fixtures properly.
- Maintenance: Replace bulbs or batteries and clean lenses periodically.
Materials Needed:
- Solar lights, string lights, or jars/bottles for DIY lanterns
- LED lights or candles
- Hooks, zip ties, or stakes
- Batteries if needed
- Optional: paint or decorations for DIY lanterns
Idea 10: Layered Planting for Texture and Interest
Introduction
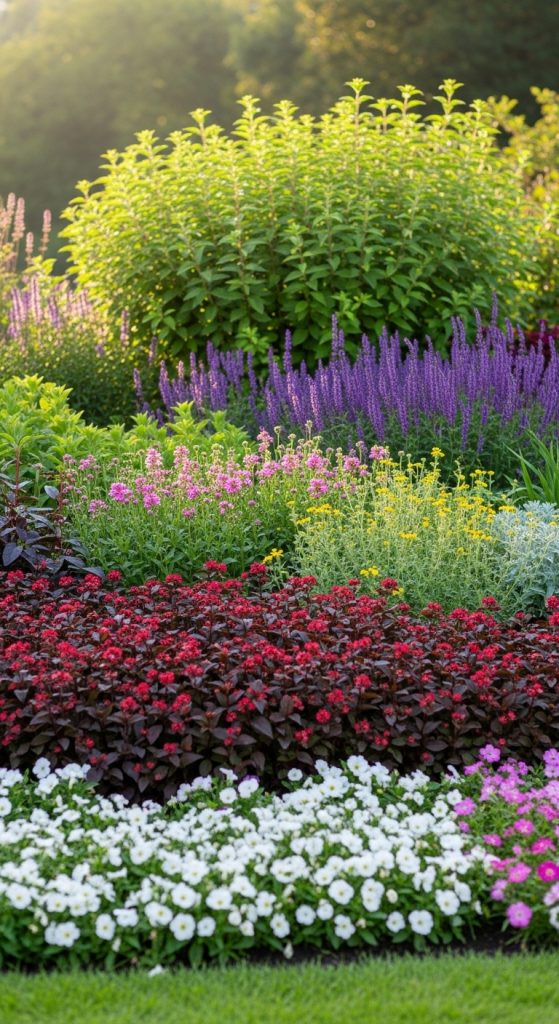
Layered planting is an effective and affordable way to add depth, texture, and visual interest to any garden. By arranging plants of varying heights, colors, and textures, you can create a dynamic, lush outdoor space that feels full and professionally designed without overspending. Layered gardens maximize space, allowing you to combine flowers, shrubs, and groundcovers in a harmonious arrangement.
This technique works for both large and small gardens. Taller plants in the back, mid-height shrubs or flowers in the middle, and low-growing groundcovers at the front create a natural gradient. Combining different leaf shapes, flower colors, and plant textures adds richness without needing expensive décor. Layered planting also encourages biodiversity, attracting pollinators and beneficial insects. With thoughtful selection of affordable plants and easy-to-follow planning, this method can turn any garden into a Pinterest-worthy masterpiece while staying budget-conscious. Step-by-step guidance ensures successful layering for aesthetic appeal and plant health.
Definition/Explanation:
Layered planting arranges plants of different heights, textures, and colors in a visually appealing gradient to create depth and interest in the garden.
Step-by-Step How-To:
- Plan layout: Sketch garden space and designate zones for plant height.
- Select plants: Choose budget-friendly flowers, shrubs, and groundcovers.
- Prepare soil: Amend garden soil with compost or organic matter.
- Plant tallest first: Position trees or tall shrubs at the back.
- Add mid-height plants: Fill middle layers with flowering or foliage plants.
- Plant groundcovers: Place low-growing plants at the front for texture.
- Maintenance: Water, mulch, and prune as needed for growth and visual balance.
Materials Needed:
- Affordable plants of varying heights
- Compost or organic soil
- Mulch for moisture retention
- Gardening tools: trowel, gloves, watering can
- Optional: stakes for taller plants