
When it comes to home design, staircases are often overlooked as purely functional elements. However, in modern interior styling, staircases have evolved into powerful design features that can completely transform the look and feel of your home. Whether you live in a cozy apartment or a spacious multi-level house, upgrading your staircase can add elegance, personality, and even increase your property’s value. If you’ve been thinking about refreshing your space, exploring staircase remodel ideas is one of the most impactful ways to achieve a dramatic change without a full home renovation.

A staircase sits at the heart of your home’s structure—connecting spaces, guiding movement, and naturally drawing attention. Because of this central role, even small updates can create a big visual impact. From sleek modern railings to rustic wooden steps, or from minimalist floating stairs to bold statement designs, there are countless ways to reimagine your staircase to match your personal style. The best part? You don’t always need a massive budget or professional construction to get started. Many staircase remodel ideas are beginner-friendly and can be completed with simple tools, creativity, and a bit of planning.
In today’s Pinterest-driven design world, homeowners are increasingly looking for aesthetic, functional, and “save-worthy” ideas that feel both trendy and timeless. Staircase remodels perfectly fit into this category because they offer a blend of practicality and visual appeal. Whether your goal is to create a cozy farmhouse vibe, a clean minimalist look, or a luxurious modern statement, your staircase can become a centerpiece that reflects your taste.
Another reason staircase makeovers are gaining popularity is their versatility. You can focus on different elements such as stair treads, risers, railings, balusters, lighting, or even the wall alongside the staircase. Each component offers an opportunity to experiment with textures, colors, and materials. For example, painting stair risers with patterns can add a playful touch, while replacing bulky railings with glass panels can instantly create an open and airy feel. Even something as simple as adding LED lighting under each step can elevate the entire ambiance of your home.
Functionality is also a key factor in staircase remodeling. Beyond aesthetics, many homeowners are now integrating smart storage solutions, safety features, and improved durability into their designs. For families with kids or elderly members, non-slip surfaces and sturdy railings are essential. For smaller homes, under-stair storage can maximize space efficiently while still looking stylish. This balance between beauty and practicality is what makes staircase remodeling such a rewarding project.
It’s also important to consider how your staircase connects with the rest of your home’s interior. A well-designed staircase should feel cohesive with surrounding elements like flooring, wall colors, and furniture. Think of it as an extension of your overall design theme rather than a separate feature. This approach ensures that your remodel doesn’t just stand out—but fits in perfectly with your home’s aesthetic.
Planning your staircase remodel begins with understanding your space, budget, and desired outcome. Are you aiming for a subtle upgrade or a complete transformation? Do you prefer DIY-friendly projects or professional installations? Answering these questions will help you narrow down the ideas that suit your needs best. Additionally, researching trends and saving inspiration (especially from platforms like Pinterest) can give you a clearer vision of what you want to achieve.
In this guide, you’ll discover 10 amazing staircase remodel ideas that are not only visually stunning but also practical and achievable. Each idea is carefully selected to inspire creativity while remaining beginner-friendly. Whether you’re looking to make a bold statement or simply refresh your existing staircase, these ideas will help you turn an ordinary feature into something truly extraordinary.
Get ready to transform your staircase into a design highlight that elevates your entire home. ✨
Idea 1: Floating Staircase with Glass Railings
Introduction:
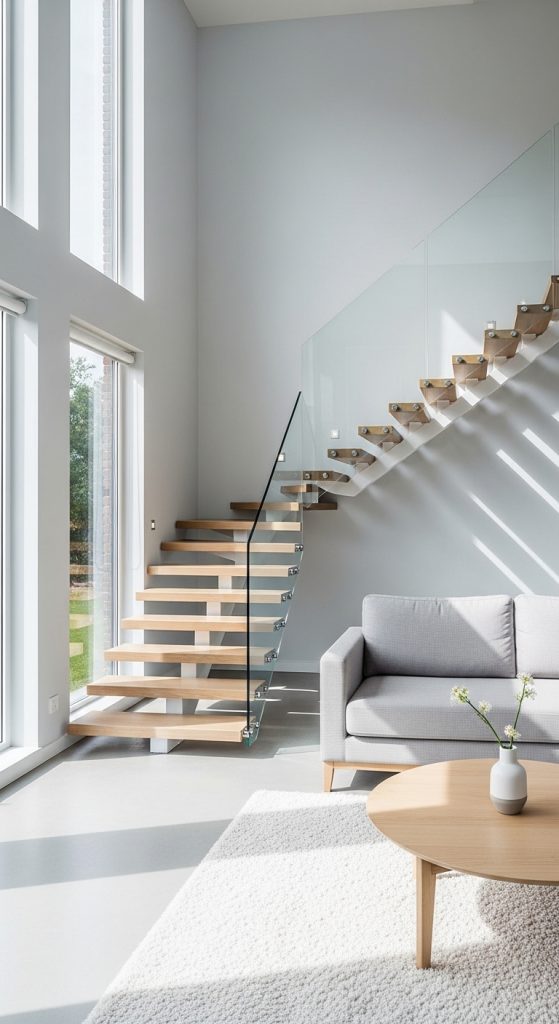
Floating staircases have become a hallmark of modern interior design, creating an airy, open feel in any home. Unlike traditional staircases with visible risers, floating stairs appear as if each step is suspended in mid-air, giving your home a sleek and contemporary look. When paired with glass railings, the effect is amplified: transparency allows light to flow freely, visually expanding your space while maintaining safety. This style works especially well in modern minimalist homes, lofts, and open-plan areas where maintaining light and openness is essential. Not only is this design visually stunning, but it also makes your staircase a true focal point, often photographed and shared across Pinterest boards as an inspiration for clean, elegant interiors.
Definition / Explanation:
A floating staircase typically uses hidden structural supports, usually embedded in the wall or supported by a central stringer, so that treads “float” without visible risers. Glass railings enhance safety while maintaining the minimal aesthetic. This combination creates a feeling of sophistication and spaciousness that traditional wooden or metal staircases cannot replicate.
Step-by-Step How-To:
- Measure your space: Determine the total rise and run of your staircase.
- Choose materials: Select hardwood treads or engineered wood and tempered glass panels for railings.
- Install hidden supports: Secure metal brackets or wall-mounted stringers to hold each tread.
- Attach treads: Place each wooden tread onto the support brackets. Ensure level alignment.
- Install glass panels: Secure glass panels using clamps or a channel system along the side of the stairs.
- Add finishing touches: Seal wood surfaces, polish glass edges, and ensure the staircase is sturdy and safe.
Materials / Tools Used:
- Hardwood or engineered wood treads
- Tempered glass panels
- Metal brackets or hidden stringers
- Screws, bolts, and clamps
- Level and measuring tape
- Wood sealant and polish
Pinterest-Optimized Tip: Highlight the staircase in a light-filled environment with minimal decor to showcase the floating design. Include close-up shots of glass-to-tread connections for a save-worthy tutorial aesthetic.
Idea 2: Rustic Wooden Staircase Remodel
Introduction:
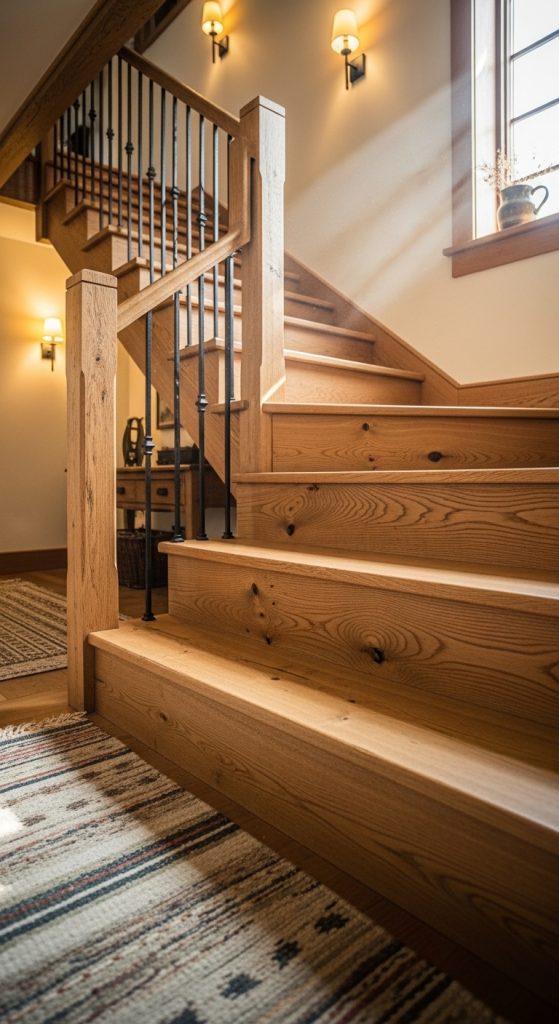
Rustic staircases are perfect for homeowners looking to bring warmth, character, and a touch of nature into their interiors. Using natural or reclaimed wood, these staircases convey a cozy, welcoming feel that contrasts beautifully with modern furniture or industrial decor. This design works well in cottages, country-style homes, or even urban lofts that want a touch of organic charm. Rustic staircases are versatile: they can be left raw for an authentic look, stained for added depth, or combined with iron railings to blend modern and rustic elements. A well-executed rustic staircase can turn an ordinary passage into a statement piece that adds personality and visual interest to your home.
Definition / Explanation:
Rustic staircases emphasize natural textures, knots, and imperfections in the wood, celebrating organic beauty rather than uniformity. This approach creates a tactile, inviting feel that transforms your staircase from a functional element into a design feature that feels timeless and approachable.
Step-by-Step How-To:
- Select wood: Choose reclaimed oak, pine, or cedar for authentic rustic charm.
- Prepare treads and risers: Sand surfaces lightly and remove splinters while maintaining natural texture.
- Construct staircase frame: Build or replace the staircase frame using sturdy wood or metal supports.
- Install treads and risers: Fit the wooden boards securely, leaving slight gaps or imperfections for a natural effect.
- Add railing: Use wrought iron or wooden railings with simple, rustic design elements.
- Finish: Apply a matte or satin wood stain and sealant to protect the surface while preserving texture.
Materials / Tools Used:
- Reclaimed or natural wood treads and risers
- Sandpaper or electric sander
- Screws and wood glue
- Wrought iron or wooden railing
- Wood stain and protective sealant
- Drill, level, and measuring tools
Pinterest-Optimized Tip: Emphasize warm tones, textures, and natural imperfections. Highlight close-ups of grain patterns or unique wood knots to inspire DIY enthusiasts.
Idea 3: Staircase with Built-In Storage Drawers
Introduction:
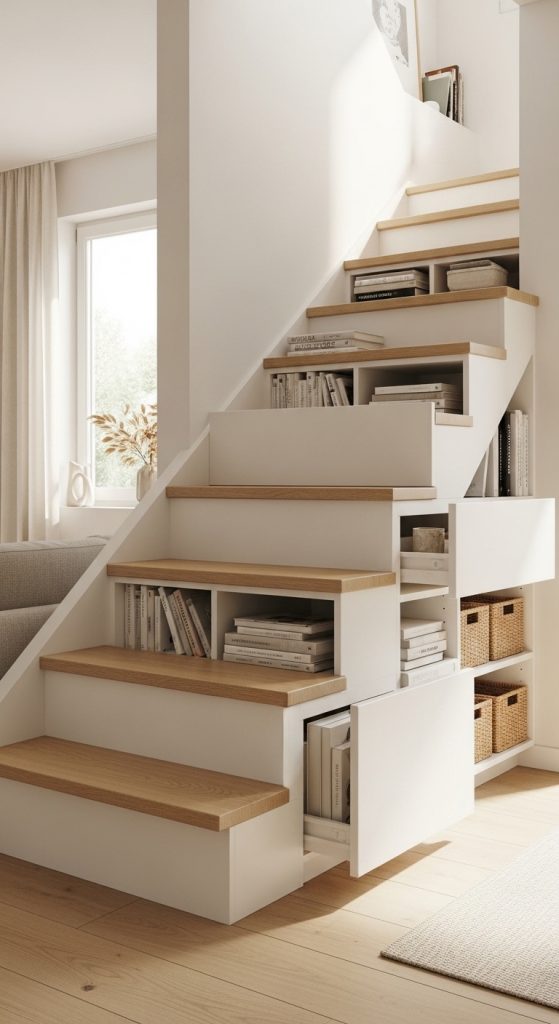
Space is always a premium in modern homes, and integrating storage into staircases is a clever and stylish solution. Staircases with built-in drawers or cabinets transform underutilized areas into functional storage without sacrificing design. Perfect for apartments, small houses, or anyone looking to reduce clutter, this idea blends practicality and aesthetics. You can customize storage compartments for shoes, books, or seasonal items. Beyond functionality, these staircases often become Pinterest favorites because they combine organization with creative design, making your home feel tidy and thoughtfully designed.
Definition / Explanation:
A staircase with built-in storage incorporates drawers or cabinets into the risers or underneath steps. Each step can serve as a drawer, or open compartments can be designed beneath the staircase. This approach maximizes vertical space while maintaining a visually appealing staircase structure.
Step-by-Step How-To:
- Plan storage needs: Determine what items will be stored to size drawers appropriately.
- Measure staircase: Ensure dimensions of risers and treads allow functional storage.
- Construct drawer compartments: Build sturdy wooden boxes that fit within the staircase structure.
- Install drawers: Attach sliders for smooth movement and ensure stability.
- Finish exterior: Paint, stain, or apply veneer to match staircase aesthetic.
- Optional handles: Add minimal or decorative handles to enhance style.
Materials / Tools Used:
- Plywood or hardwood boards for drawers
- Drawer slides and handles
- Screws, nails, and wood glue
- Paint, stain, or veneer
- Drill, saw, and measuring tools
Pinterest-Optimized Tip: Show the storage in action—like drawers partially open with neatly organized items. Overhead or angled shots work well to capture the clever design.
Idea 4: Black Metal Industrial Staircase
Introduction:
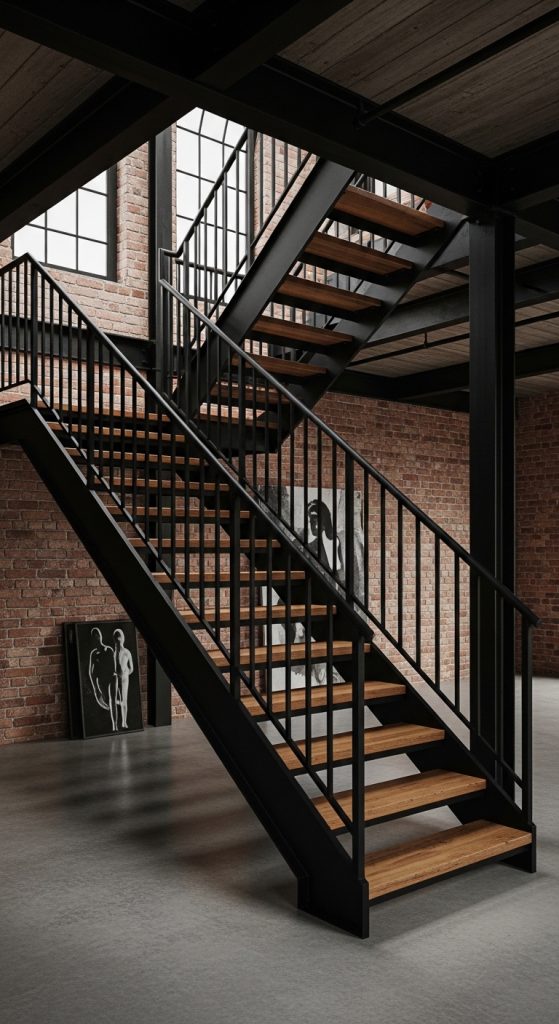
Industrial design has become a leading trend in modern home interiors, and black metal staircases are a bold way to embrace this style. These staircases are characterized by strong, geometric lines, exposed metal frameworks, and minimal ornamentation. Perfect for lofts, urban apartments, or homes with open-concept layouts, black metal staircases create a striking visual contrast against lighter walls or wooden floors. They also convey durability and sophistication, making them both a functional and aesthetic choice. This design is ideal for homeowners who want an edgy, modern look without overwhelming the space with excessive details.
Definition / Explanation:
Industrial staircases often combine raw materials such as metal and wood with functional, minimalist design. Black metal frameworks provide a strong architectural statement, while wooden treads soften the look and add warmth. The overall effect is both contemporary and timeless.
Step-by-Step How-To:
- Measure space: Confirm total rise and run to ensure accurate fabrication.
- Design metal frame: Work with a professional or follow a DIY blueprint for a black metal frame.
- Prepare treads: Select contrasting wood or metal for steps.
- Assemble frame: Weld or bolt metal components securely.
- Install treads: Attach wooden or metal treads to the frame.
- Optional railing: Add a matching metal railing for safety and aesthetic coherence.
Materials / Tools Used:
- Black metal sheets or tubes
- Wood planks for treads
- Welding equipment or metal bolts
- Paint or powder coating for finishing
- Measuring tools and level
Pinterest-Optimized Tip: Focus on strong contrast shots—metal against light walls or wood against dark frames. Highlight angles and structural details to emphasize the industrial aesthetic.
Idea 5: Colorful Painted Stair Risers
Introduction:
For homeowners who love bold and creative statements, painting stair risers in vibrant colors or patterns is an easy and affordable way to transform a staircase. This idea is perfect for families, apartments, or anyone wanting to add personality to a neutral space. You can use stripes, geometric designs, floral motifs, or even custom stencils to make your stairs pop. Colorful risers draw attention without a full-scale remodel and can be refreshed anytime to suit changing tastes. This approach turns an everyday element into a centerpiece and is highly shareable on Pinterest for its playful and DIY-friendly appeal.
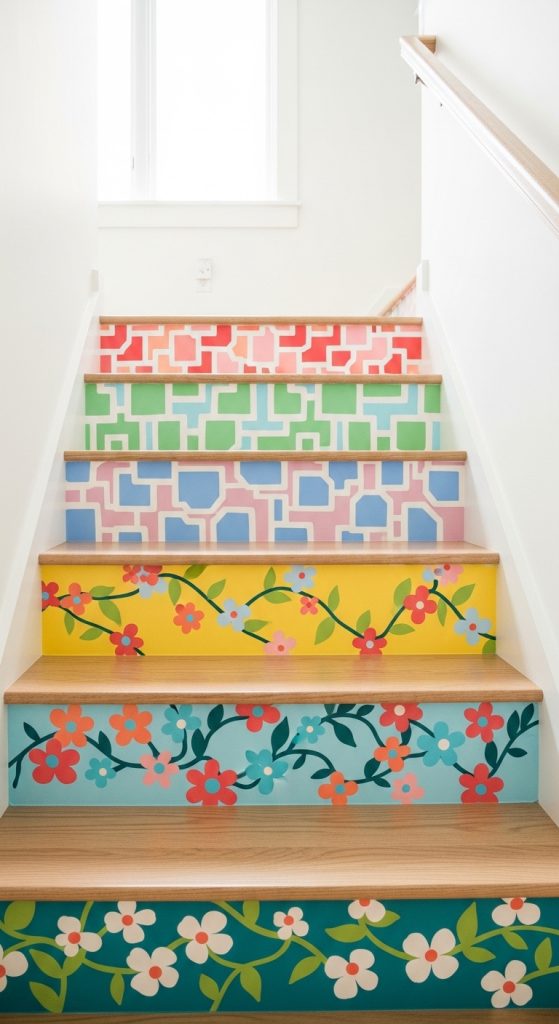
Definition / Explanation:
Painting stair risers involves applying paint, wallpaper, or decals to the vertical portion of each step. This creates a visual focal point while keeping treads functional and safe. It’s a highly customizable approach, from subtle color gradients to bold statement patterns.
Step-by-Step How-To:
- Select paint/colors: Choose complementary or contrasting colors that match your interior.
- Prep surfaces: Sand risers lightly and apply primer for smooth application.
- Tape edges: Use painter’s tape for clean lines and pattern separation.
- Paint risers: Apply 2–3 coats depending on opacity and color intensity.
- Optional sealant: Add a protective layer for durability.
- Remove tape and touch-up: Ensure crisp, professional-looking edges.
Materials / Tools Used:
- Interior paint in chosen colors
- Paintbrushes and small rollers
- Painter’s tape
- Sandpaper and primer
- Clear sealant for protection
- Drop cloth to protect floors
Pinterest-Optimized Tip: Capture before-and-after shots, close-ups of patterns, and full staircase perspectives. Vibrant colors naturally attract “save-worthy” attention.
Idea 6: Floating Wooden Stairs with LED Lighting
Introduction:
For homeowners who love a modern, luxurious, and ambient feel, integrating LED lighting into floating wooden stairs is a game-changer. This design not only elevates your staircase visually but also improves safety by illuminating each step, making it perfect for homes with dim lighting or for evening use. Floating wooden stairs already create an airy, elegant effect, and adding LEDs takes it a step further—literally. LED strips can be installed under treads or along the railing, creating a soft glow that enhances the staircase’s architectural beauty. This combination is both functional and Instagram-worthy, making it one of the most popular trends for interior remodels on Pinterest.

Definition / Explanation:
Floating wooden stairs consist of individual wooden treads supported by hidden wall brackets or a central spine, giving the impression that they float in mid-air. LED lighting is integrated discreetly under each tread or along the side, providing a modern, minimalist look that is energy-efficient and visually striking. This approach blends warm natural textures with sleek lighting to create a sophisticated staircase centerpiece.
Step-by-Step How-To:
- Measure staircase and lighting path: Determine where LEDs will be installed—under each tread or along the railing.
- Select materials: Choose high-quality hardwood for treads and flexible, dimmable LED strips with controllers.
- Install hidden supports: Secure metal brackets or central stringers for floating steps.
- Attach wooden treads: Place each tread on supports, ensuring alignment and level.
- Install LED strips: Attach LED strips beneath treads or along the railing using adhesive clips or channels.
- Connect power supply: Run wiring discreetly through the wall or under stair structure, connecting to a switch or remote controller.
- Test and finish: Ensure lights function properly and adjust brightness. Seal wooden treads for durability.
Materials / Tools Used:
- Hardwood treads (oak, maple, or walnut)
- Metal support brackets or central stringer
- LED strips (dimmable, adhesive-backed)
- Power supply and controllers
- Screws, drill, and level
- Wood sealant and polish
Pinterest-Optimized Tip: Capture dramatic evening shots with lights on, showing the floating effect and soft glow. Highlight LED placement for a practical, tutorial-friendly perspective.
Idea 7: Spiral Staircase with Wrought Iron Railing
Introduction:
Spiral staircases are a perfect combination of space-saving functionality and elegant design. Ideal for homes with limited floor area, attics, lofts, or even outdoor spaces, spiral staircases create a visual focal point while remaining compact and practical. Wrought iron railings add a touch of sophistication, making the staircase feel both timeless and ornamental. Whether you prefer a Victorian-inspired aesthetic or a modern minimalist design, spiral staircases can be customized to suit your interior theme. Their artistic curves and unique shape often become the centerpiece of a home, making them highly “save-worthy” for Pinterest enthusiasts and home decorators looking for inspirational ideas.
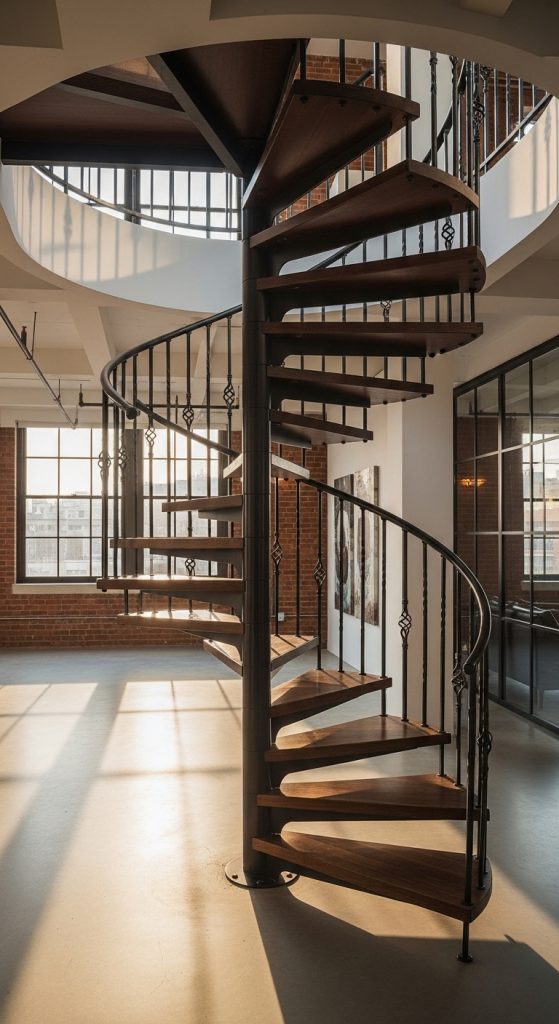
Definition / Explanation:
A spiral staircase winds around a central pole, with treads radiating outward in a circular pattern. Wrought iron railings provide structural support while adding intricate visual detail, often featuring scrollwork, geometric patterns, or minimalist vertical bars. This design is both functional and decorative, offering a dramatic architectural statement.
Step-by-Step How-To:
- Measure available space: Ensure there is enough height and diameter for safe movement.
- Choose materials: Select metal for railing, central pole, and optional wood or metal treads.
- Install central pole: Secure a strong central pole to floor and ceiling for stability.
- Attach treads: Secure treads evenly around the pole, checking alignment and spacing.
- Install railing: Attach wrought iron railing around the curve, ensuring safe grip.
- Optional finishing touches: Paint or powder-coat metal for protection and aesthetic appeal.
Materials / Tools Used:
- Wrought iron for railings
- Central pole (steel or iron)
- Wood or metal treads
- Screws, bolts, and welding equipment
- Paint or powder coating
- Measuring tape and level
Pinterest-Optimized Tip: Highlight the spiral’s curve from above or a side angle, emphasizing space-saving and ornamental design. Include close-ups of wrought iron details for added inspiration.
Idea 8: Minimalist White Staircase Remodel
Introduction:
For homeowners seeking a clean, airy, and timeless aesthetic, a minimalist white staircase is a perfect choice. White staircases create a sense of openness and brightness, especially in compact or naturally light-filled interiors. Minimalist design emphasizes simplicity, straight lines, and functionality, making the staircase appear as an elegant extension of your home’s overall decor. This design works exceptionally well with modern, Scandinavian, or contemporary interiors. A white staircase can be enhanced with subtle accents like wooden treads, glass railings, or floating steps, allowing you to maintain the minimalist look while adding personal touches.

Definition / Explanation:
A minimalist white staircase focuses on simplicity, clean lines, and neutral tones. The design avoids unnecessary decoration and emphasizes functional beauty. Painted white risers and treads, sometimes complemented by sleek handrails, achieve a light, uncluttered feel. This approach highlights the architecture rather than ornate elements, giving your home a spacious, serene atmosphere.
Step-by-Step How-To:
- Prep existing staircase: Sand and clean surface, removing old paint or finish.
- Prime the surface: Apply primer to ensure even coverage and long-lasting paint adherence.
- Paint risers and treads: Apply high-quality white paint using brushes or small rollers.
- Optional accents: Add light wooden treads or minimalist glass/metal railing for contrast.
- Seal for durability: Apply protective polyurethane coating to prevent scratches and wear.
- Final inspection: Ensure even finish and clean edges for a professional look.
Materials / Tools Used:
- High-quality interior white paint
- Primer and sealant
- Sandpaper or electric sander
- Paintbrushes and rollers
- Measuring tape and level
- Optional wood treads or glass panels
Pinterest-Optimized Tip: Showcase wide shots of the staircase with natural light to highlight the airy aesthetic. Include close-ups of clean lines and minimalist detailing for a sophisticated, save-worthy appeal.
Idea 9: Staircase with Patterned Tiles on Risers
Introduction:
Adding patterned tiles to staircase risers is a creative way to infuse color, personality, and artistic flair into your home. This DIY-friendly remodel is perfect for those who love bold designs or eclectic aesthetics. Tiles can feature Moroccan motifs, geometric patterns, or even custom designs that complement your interior palette. This design is not only visually striking but also durable and easy to clean. It transforms an ordinary staircase into a work of art, making it highly shareable and “save-worthy” on Pinterest. Whether your home is modern, bohemian, or traditional, tiled risers provide a unique, playful, and customizable design element.
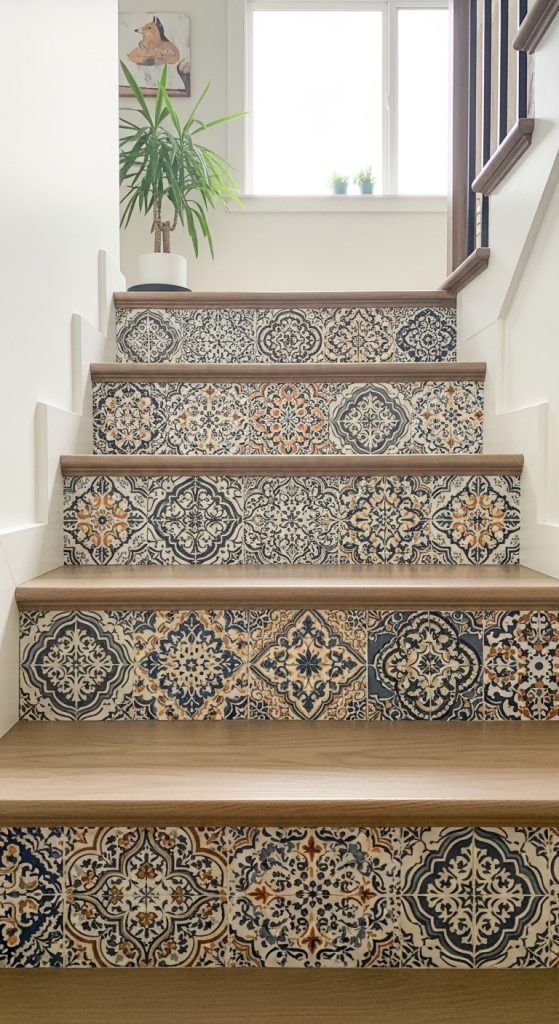
Definition / Explanation:
Patterned stair risers involve applying decorative tiles to the vertical portion of each step. This approach allows for creative combinations of color, texture, and pattern, transforming your staircase into a bold visual statement. It’s also practical, as tiles are easy to clean and long-lasting.
Step-by-Step How-To:
- Choose tiles: Pick tiles that complement your interior color palette.
- Prep risers: Sand and clean surfaces for proper adhesion.
- Apply adhesive: Use tile adhesive or thinset mortar on each riser.
- Place tiles: Carefully position tiles, using spacers for uniform gaps.
- Grout: Apply grout between tiles, removing excess with a damp sponge.
- Seal tiles: Apply sealant for durability and protection.
Materials / Tools Used:
- Decorative ceramic or cement tiles
- Tile adhesive or thinset mortar
- Grout and sponge
- Tile spacers
- Sealant for protection
- Measuring tape and level
Pinterest-Optimized Tip: Feature close-ups of intricate tile patterns and full staircase shots showing the repetition and vibrancy. Showcase before-and-after transformation for dramatic impact.
Idea 10: Curved Floating Stairs with Wooden Treads
Introduction:
Curved floating stairs combine the elegance of floating treads with the softness of curved lines, creating a visually stunning staircase centerpiece. Unlike straight floating stairs, curved designs bring organic movement into your home, breaking geometric rigidity and adding sophistication. These staircases are ideal for homes with large open spaces or foyers that demand a design statement. When paired with wooden treads, they bring warmth and texture while maintaining a minimalist, airy effect. Curved floating stairs are functional, safe, and visually dramatic, making them a favorite for Pinterest-worthy interior remodels and high-end design inspiration.
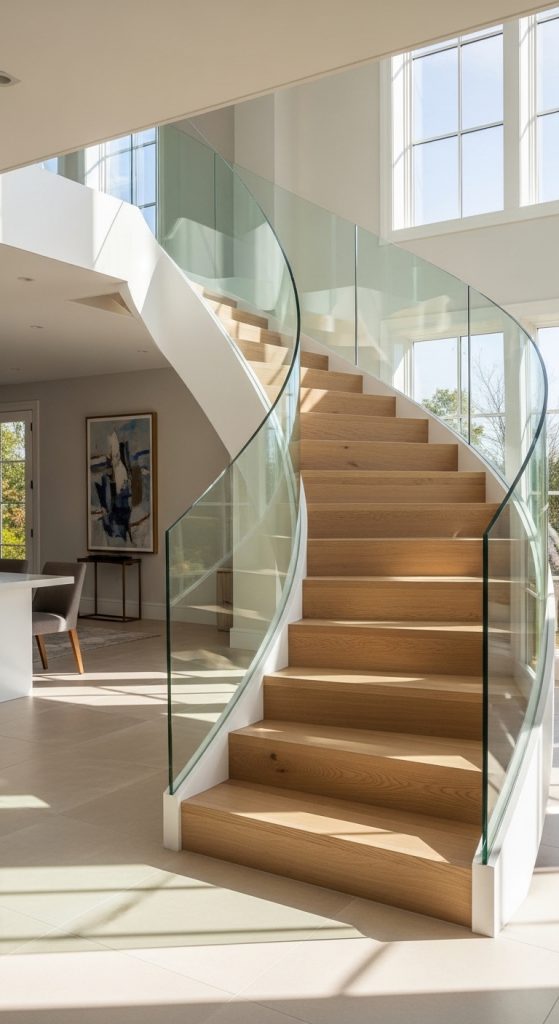
Definition / Explanation:
Curved floating stairs are constructed with a hidden support structure that follows a gentle curve, creating the illusion of floating steps. Wooden treads add warmth and contrast, enhancing the staircase’s sculptural quality. This design balances form and function while providing a visually striking focal point.
Step-by-Step How-To:
- Plan curve and measurements: Ensure correct radius and rise/run for each tread.
- Build hidden support structure: Use steel or reinforced wood to create the curved spine.
- Install wooden treads: Place each tread securely on supports, checking alignment and spacing.
- Optional railing: Add a minimalist railing or glass panel for safety.
- Finish wood: Sand, stain, and seal treads to protect and highlight natural grain.
- Inspect: Test stability and smooth edges for safety.
Materials / Tools Used:
- Hardwood treads
- Steel or wood support structure
- Screws, bolts, and adhesive
- Sandpaper, stain, and sealant
- Optional glass or wooden railing
- Measuring tools and level
Pinterest-Optimized Tip: Showcase the curve from multiple angles, emphasizing the floating effect and organic shape. Highlight wood grain and natural light for a cozy yet modern aesthetic.