
Minecraft has long been celebrated as the ultimate sandbox game for creativity, imagination, and architectural exprssion. Among its many opportunities for creativity, village building and remodeling stands out as a project that combines both aesthetic design and functional gameplay. Villages in Minecraft are often the bustling hubs of life in a world—home to villagers, farms, and essential resources—but in their default state, they frequently lack personality, charm, and cohesive design. This is where village makeovers with aesthetic streets come into play, transforming a simple collection of houses and paths into a picturesque, immersive environment that’s both functional and visually stunning.
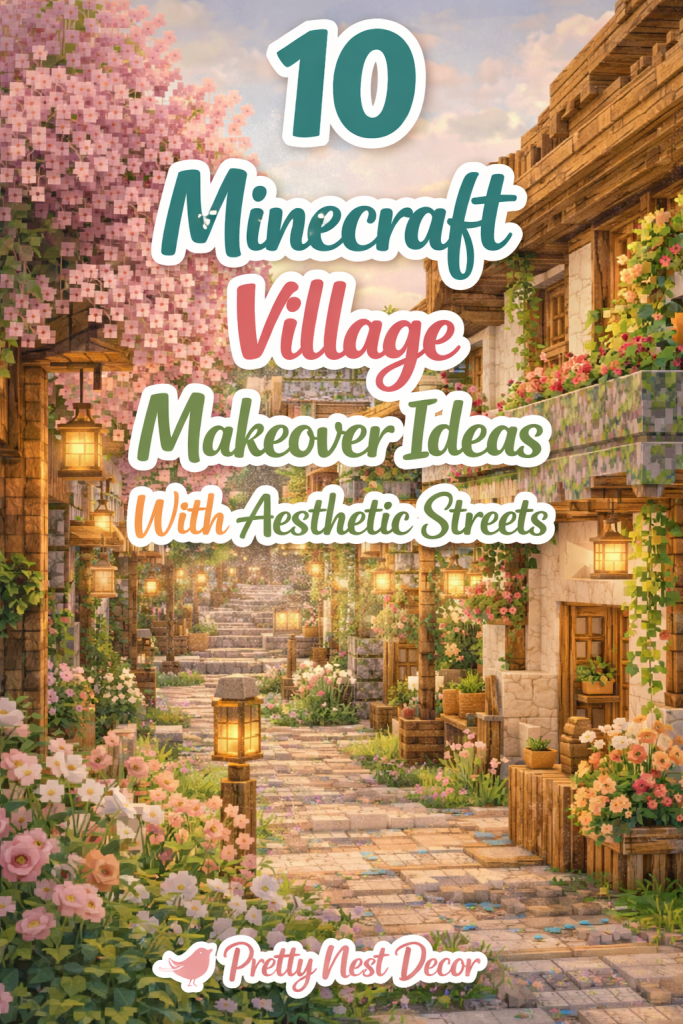
A well-planned aesthetic makeover involves more than simply decorating buildings. It’s about creating streets that feel alive, cohesive, and inviting, weaving together homes, shops, gardens, and community spaces. Streets in Minecraft are the backbone of any village—they guide villagers, players, and visitors through the environment while framing the aesthetic story you want your village to tell. By designing streets thoughtfully, you can turn an ordinary village into a visually appealing, storybook-like settlement that feels dynamic and lived-in.
The key to an aesthetic village street lies in materials, textures, and color palettes. Traditional village paths in Minecraft are often made of plain dirt or gravel, which can appear monotonous. By mixing blocks like stone bricks, cobblestone, and smooth sandstone with accent materials such as slabs, stairs, and wood planks, you can create roads that have depth and texture. Adding decorative elements along the streets, like lanterns, fences, flower beds, bushes, and custom gardens, enhances the atmosphere and makes the streets feel cared-for and cozy. Even small details like benches, signage, and fountains can drastically improve the aesthetic quality of a village street.
Another important aspect is layout and functionality. Aesthetic streets shouldn’t just look good—they should make sense for the villagers and gameplay mechanics. Consider traffic flow, accessibility, and connections between key areas like farms, blacksmiths, libraries, and residential zones. Curved or irregular streets can add organic charm, breaking away from rigid grid patterns and creating a more natural village flow. This approach also allows for the integration of open spaces, plazas, or communal areas, which are ideal for outdoor decorations like fountains, flower patches, or benches.
Landscaping plays a crucial role in village street aesthetics. Adding trees, bushes, hedges, and flower beds alongside streets brings life, color, and variation to the environment. Strategically placed street lighting using lanterns, glowstone, or sea lanterns not only improves functionality at night but also enhances the warm and inviting atmosphere of the village. Small details, such as market stalls, wells, or decorative bridges over ponds and streams, can create focal points along the streets, giving each pathway its own story and charm.
Villager interaction is also a critical component of the makeover. Streets should feel alive with villagers walking between homes, tending farms, or interacting at communal areas. Incorporating functional spaces like farms, animal pens, and trading stalls adds purpose and realism, making the streets more immersive. By combining functionality with visual appeal, each street becomes a living, breathing environment that players can explore and enjoy.
Additionally, creating thematic consistency across your village streets will greatly improve the overall aesthetic. Choose a style for your village—such as rustic medieval, quaint cottagecore, or modern minimalist—and carry that style through street layouts, materials, and decorations. Consistency in color, block textures, and street widths creates cohesion, while small variations in street features, lighting, and landscaping keep the environment dynamic and visually interesting.
Outdoor elements like water features, pathways with arches, and bridges connecting different areas add both beauty and playability. You can also experiment with elevation changes—slight hills, stairs, and slopes make streets feel more dynamic and natural. Attention to small details, like patterned block designs for crosswalks, flower-lined lanes, or decorative lamp posts, can transform even the simplest path into a show-stopping, Pinterest-worthy Minecraft street.
In short, Minecraft village street makeovers are an art form in themselves. They allow players to express creativity while enhancing both functionality and visual appeal. Each street tells a story, showcases attention to detail, and provides endless opportunities for customization. From selecting materials and colors to arranging decorations, plants, lighting, and furniture, every element contributes to a cohesive and captivating village environment. The goal is to create streets that are not only aesthetically pleasing but also immersive, interactive, and reflective of a unique design vision.
Whether you’re building for survival, creative mode, or sharing designs on platforms like Pinterest, YouTube, or Minecraft communities, a well-designed village street makeover can inspire, delight, and provide practical gameplay benefits. It’s about combining artistry, storytelling, and functionality, turning a plain village into a charming, eye-catching destination that feels lived-in and magical.
In this guide, we will explore 10 detailed Minecraft village makeover ideas focused on aesthetic streets, providing step-by-step instructions, block/material suggestions, and styling tips. Each idea is designed to be beginner-friendly yet visually impressive, perfect for players who want to transform their villages into Pinterest-ready Minecraft worlds.
1. Cobblestone and Flower Lined Street
Introduction
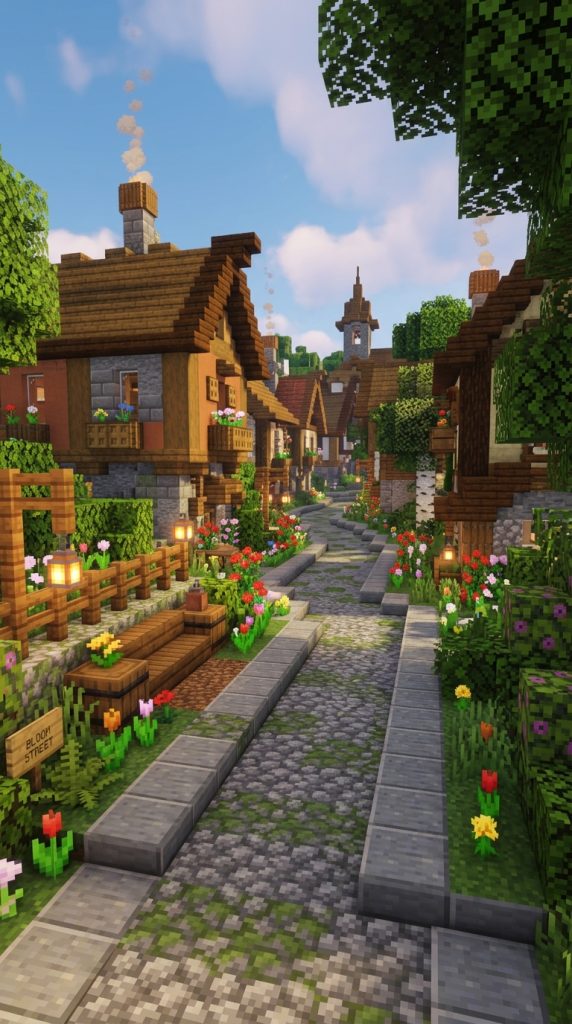
Transforming a plain village street into a cobblestone and flower-lined avenue instantly elevates the aesthetic of any Minecraft village. This makeover idea focuses on blending texture and color, using cobblestone as the main pathway material and lining the street with vibrant flowers, bushes, and decorative elements. The combination of natural greenery and structured cobblestone creates a quaint, charming look reminiscent of storybook villages.
The key to this makeover is creating a harmonious balance between structure and nature. Cobblestone paths provide a realistic, rustic feel while the flowers and bushes add pops of color. Lanterns or glowstone lighting along the street not only enhances nighttime aesthetics but also creates a warm, inviting vibe. This street works well for connecting village homes, markets, or plazas and encourages villager movement along visually appealing routes.
This concept is perfect for beginner to intermediate builders because it requires basic materials but produces a polished, Pinterest-worthy effect. By adding small details like fences, benches, and decorative blocks, you can create an environment that feels alive and welcoming.
Materials Needed
- Cobblestone blocks
- Stone brick slabs or stairs (for edging)
- Flowers: tulips, poppies, dandelions, or any colorful blocks
- Bushes: leaves blocks
- Lanterns, glowstone, or torches
- Wooden fences for borders
- Optional benches (stairs + slabs)
Step-by-Step Setup
- Clear and level the street area in your village.
- Lay a cobblestone path as the main street.
- Add stone brick slabs or stairs along edges for a finished look.
- Place flowers in alternating patterns along both sides.
- Add leaf blocks to create bushes and natural borders.
- Install lanterns or glowstone at regular intervals for lighting.
- Add wooden fences or benches along the path for extra detail.
2. Rustic Wooden Pathway with Planters
Introduction
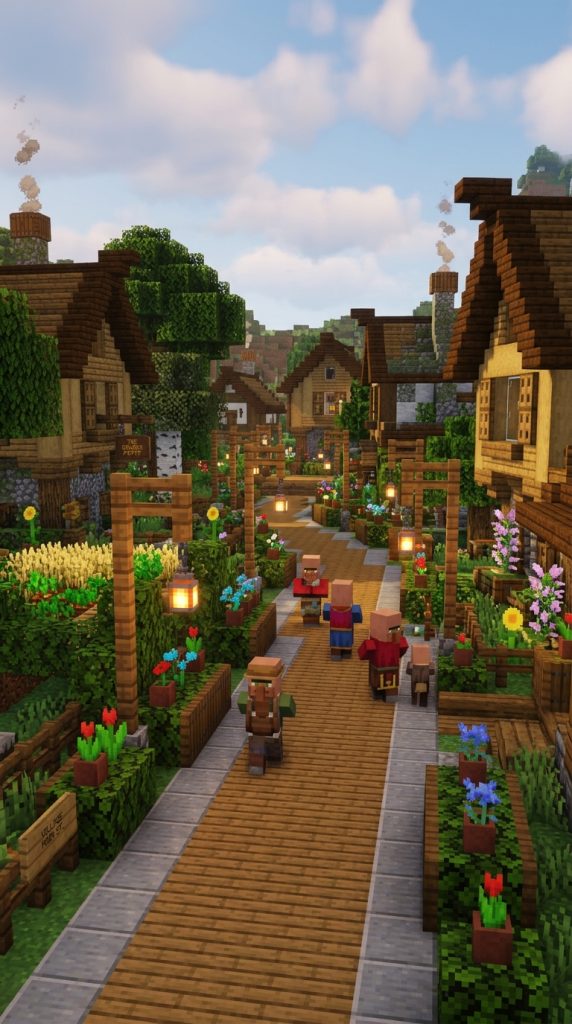
The Rustic Wooden Pathway offers a cozy, cottagecore-style village street. By using wooden planks, slabs, and fences, combined with decorative flower planters, you can create a street that feels warm and inviting. This idea is particularly effective in villages with wooden houses or medieval-style buildings, as it complements the architecture while adding personality to streets.
Adding planters and flower boxes along the pathway not only enhances the aesthetic but also creates depth and color contrast. Incorporating small lanterns or torches further adds a functional and charming atmosphere for night-time village activity. This street is perfect for residential areas or pathways connecting shops and plazas.
The rustic wooden street is also highly customizable. You can mix different wood types like oak, spruce, or dark oak for more texture and variation. Combining it with natural greenery and flower blocks elevates the street to a Pinterest-worthy village pathway.
Materials Needed
- Wooden planks (oak, spruce, or mixed)
- Wooden slabs for layered edges
- Wooden fences
- Flower pots and various flowers
- Lanterns or glowstone
- Leaf blocks for small planters
- Optional trapdoors or slabs for decorative planters
Step-by-Step Setup
- Clear the street area and level the ground.
- Lay wooden planks for the main pathway.
- Add wooden slabs along edges for depth and variation.
- Place flower pots or leaf blocks along the edges to create planters.
- Position lanterns or glowstone for lighting.
- Optionally, add small fences or trapdoors to frame the planters.
- Encourage villagers or NPCs to walk along the street for a lively effect.
3. Brick Road with Decorative Lamps
Introduction
A Brick Road with Decorative Lamps brings elegance and sophistication to a Minecraft village. Using brick blocks for the main pathway gives streets a structured, urban feel, while lanterns or glowstone on lamp posts add a charming glow. This idea is ideal for market streets or central village squares, where streets need to look organized yet visually appealing.
The key to this design is symmetry and spacing. Brick paths naturally create a clean, polished look, and lamps placed at regular intervals add rhythm to the street. Adding small flower beds or benches alongside the brick path introduces playful, aesthetic touches without overwhelming the space.
This street style works for both medieval and modern village aesthetics. Using brick as the main path material sets it apart from default dirt or cobblestone paths, making it highly Instagram- and Pinterest-worthy for Minecraft creators.

Materials Needed
- Brick blocks
- Stone brick slabs for edging
- Lanterns, glowstone, or torches
- Flower blocks: tulips, poppies, or roses
- Wooden or stone fence posts for lamp supports
- Optional slabs or stairs for benches
Step-by-Step Setup
- Clear and level the street area.
- Lay a brick block path for the main street.
- Add stone brick slabs along edges for detailing.
- Install lanterns on fence posts at regular intervals.
- Place flower blocks along sides of the street.
- Add benches or decorative slabs/stairs for extra charm.
- Walk along the path to ensure spacing and proportions feel balanced.
4. Cobblestone Path with Fountain Focal Point
Introduction
A Cobblestone Path with a Fountain Focal Point creates a village centerpiece that draws attention while maintaining functional streets. In this setup, the main street is cobblestone, but at a key intersection or plaza, a fountain serves as a decorative and functional centerpiece. This idea adds dimension, flow, and sophistication to the village layout.
The fountain can be built with stone bricks, slabs, and water, with flower beds and lanterns surrounding it. Cobblestone streets leading to the fountain can be lined with bushes or small trees for visual interest. This setup encourages villagers and players to interact with the space, making it feel alive.
Aesthetic details like patterned stone, benches, and decorative lighting turn the intersection into a Pinterest-ready village scene that feels vibrant and immersive.

Materials Needed
- Cobblestone blocks
- Stone bricks and slabs for fountain construction
- Water bucket
- Flower blocks and bushes
- Lanterns or glowstone
- Wooden benches (stairs + slabs)
- Optional decorative stairs or trapdoors for fountain edges
Step-by-Step Setup
- Lay a cobblestone path for the main street.
- Identify a central intersection for the fountain.
- Build a stone brick fountain with slabs for depth and water flow.
- Surround the fountain with flowers and bushes.
- Place lanterns around for nighttime illumination.
- Add benches for villagers or players to sit.
- Ensure streets leading to the fountain are aligned and visually balanced.
5. Mixed Stone and Grass Street
Introduction
The Mixed Stone and Grass Street creates a natural, organic village path that blends seamlessly with outdoor spaces. Using a combination of cobblestone, stone bricks, gravel, and grass blocks, this street design mimics real-world paths with worn, lived-in appeal. The mix of materials adds texture, depth, and visual interest, making it perfect for aesthetic Minecraft villages.
Adding small flowers, shrubs, and lanterns along the path enhances the charm and ensures the street feels cozy and inviting. This style works well for villages near forests, rivers, or meadows, creating a storybook feel that’s perfect for Pinterest content. It’s also flexible, allowing for curved streets, intersections, and small bridges to create dynamic layouts.
This concept is beginner-friendly but highly effective, producing natural-looking streets that feel lively and well-integrated into the environment.

Materials Needed
- Cobblestone blocks
- Stone bricks
- Gravel
- Grass blocks
- Flowers and shrubs
- Lanterns, torches, or glowstone
- Wooden slabs for optional seating or borders
- Optional fences or hedges for borders
Step-by-Step Setup
- Clear and level the street area.
- Lay a mixed pattern of cobblestone, stone bricks, gravel, and grass for the path.
- Scatter flowers and shrubs along edges.
- Add lanterns or glowstone at intervals for lighting.
- Place wooden slabs or benches for decoration.
- Include optional fences or hedges for street borders.
- Check for natural flow and adjust blocks for realistic irregularity.
6. Lantern-Lit Cobblestone Alley
Introduction
The Lantern-Lit Cobblestone Alley transforms a plain village street into a magical nighttime pathway. Cobblestone provides a rustic base, while lanterns or glowstone lamps line the street, creating warm, inviting illumination. This setup is perfect for narrow alleys between houses or secondary streets in your village.
The glowing lanterns cast soft light on surrounding houses and flowerbeds, creating a cozy, storybook-like atmosphere. Cobblestone streets, combined with small fences or hedges, add texture and depth. Incorporating benches or small decorative barrels along the alley enhances the lived-in feeling.
This concept works beautifully for both survival and creative mode, providing functionality and aesthetics. It’s ideal for photography and content creation, producing Pinterest-worthy imagery with natural lighting during the day and lantern-lit charm at night.

Materials Needed
- Cobblestone blocks
- Stone brick slabs or stairs for edges
- Lanterns or glowstone on fence posts
- Flowers or shrubs for lining
- Wooden fences or hedges for borders
- Optional barrels, benches, or crates
Step-by-Step Setup
- Clear a narrow alley between village buildings.
- Lay cobblestone blocks for the main street.
- Add stone brick slabs/stairs along edges for depth.
- Position lanterns on fence posts evenly along both sides.
- Place flowers or shrubs for a natural touch.
- Add benches or barrels for detail and realism.
- Ensure the alley feels cozy and balanced, with even lighting.
7. Arched Stone Street with Vine Details
Introduction
An Arched Stone Street with Vine Details combines architectural elegance with natural elements. Stone bricks form the main street, while stone arches along the path create a sense of structure and grandeur. Adding vines, leaves, and flower pots gives the street a lush, overgrown, and lived-in appearance.
This idea works well for main avenues or streets leading to important village buildings like libraries or town halls. The arches serve as eye-catching focal points, while vines add natural charm and softness. This combination of stone and greenery creates a visually balanced street that feels immersive and Pinterest-ready.

Materials Needed
- Stone bricks and slabs
- Cobblestone for variation
- Vine blocks and leaf blocks
- Flowers in pots or directly on ground
- Lanterns or torches
- Optional wooden fences for arches or supports
Step-by-Step Setup
- Lay a stone brick street as the main pathway.
- Build stone brick arches at regular intervals along the street.
- Add vines and leaf blocks to arches and nearby walls.
- Place flowers in pots or flower blocks along edges.
- Install lanterns or torches under arches for lighting.
- Add optional wooden fences for extra architectural detail.
- Adjust spacing and layering to create depth and a natural feel.
8. Waterway Street with Bridges
Introduction
The Waterway Street with Bridges adds a dynamic, scenic element to your village. Incorporating small canals or water streams along the street gives the village a picturesque, European-style aesthetic. Bridges allow villagers to cross naturally while adding architectural interest.
This setup is perfect for villages near rivers, lakes, or ponds, but it can also be created artificially. Adding greenery, flowers, and lanterns along the banks enhances the charm, making it Pinterest-ready. Curved paths and irregular waterways create a natural, lived-in feel, while bridges serve as visual focal points.

Materials Needed
- Cobblestone or stone bricks for streets and bridge supports
- Planks or slabs for bridges
- Water buckets for canals
- Flowers, leaf blocks, and shrubs for landscaping
- Lanterns or torches for lighting
- Optional fences or arches for bridge decoration
Step-by-Step Setup
- Dig shallow trenches along the street for water streams.
- Fill trenches with water buckets to create flowing canals.
- Lay the street path on either side using cobblestone or stone bricks.
- Build small bridges at crossing points using planks or slabs.
- Add flowers, bushes, and leaf blocks along water edges.
- Install lanterns or torches for nighttime glow.
- Check water flow and street continuity for a natural, cohesive look.
9. Curved Mixed Material Avenue
Introduction
A Curved Mixed Material Avenue adds a natural, organic feel to your village. Instead of straight, rigid streets, this idea uses a combination of cobblestone, stone bricks, gravel, and grass blocks in curved patterns, mimicking real-world village paths. The result is a lively, visually interesting street that feels less structured and more charming.
Adding benches, lamp posts, flower beds, and trees along the curves further enhances the realism. This street style works for both medieval and modern villages, offering versatility in design. Curved avenues also improve villager movement patterns, making gameplay feel natural.

Materials Needed
- Cobblestone, stone bricks, and gravel
- Grass blocks for natural patches
- Flowers, shrubs, and leaf blocks
- Lanterns, glowstone, or torches
- Wooden slabs and stairs for benches
- Optional fences or hedges
Step-by-Step Setup
- Plan a curved street layout in the village area.
- Lay mixed materials in irregular patterns to form the street.
- Add grass blocks intermittently for natural effect.
- Place flowers, shrubs, and small trees along edges.
- Install lanterns or glowstone for lighting.
- Add benches or fences for detail and character.
- Walk the path to ensure curves feel smooth and visually appealing.
10. Market Street with Stalls and Path Lighting
Introduction
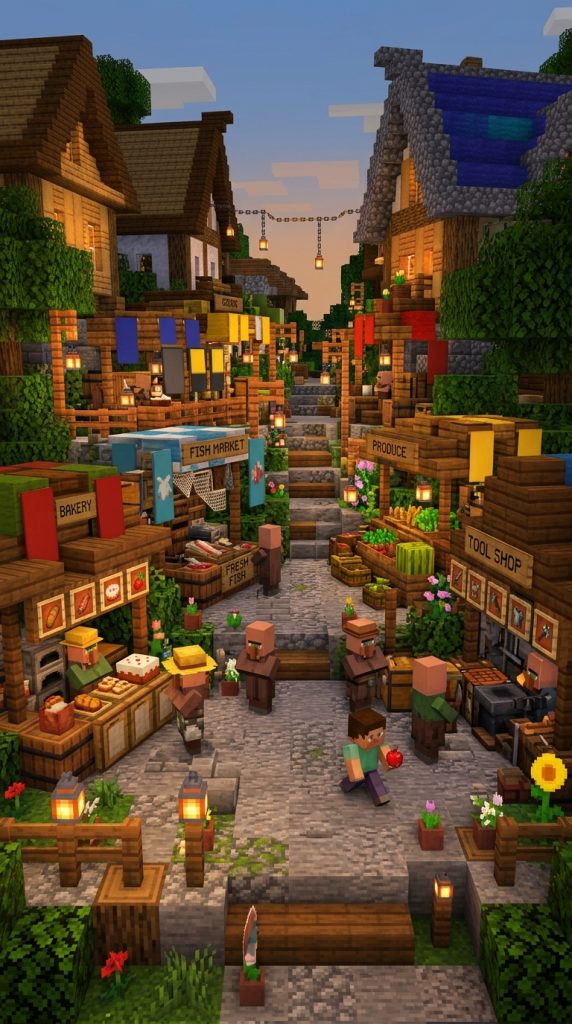
A Market Street with Stalls and Path Lighting creates a vibrant, interactive village street. The main path is made of cobblestone or stone bricks, while small wooden market stalls line the edges. Adding hanging lanterns, flowers, and banners gives the street a festive, lively look.
This makeover works for villages with trading areas or near communal spaces. The stalls create a sense of community and activity, while the combination of street materials, lighting, and decorations enhances visual appeal. Players and villagers naturally interact along the street, creating a dynamic, storybook-like environment.
Materials Needed
- Cobblestone or stone bricks for main path
- Wooden planks, slabs, and fences for market stalls
- Lanterns or torches for lighting
- Banners, trapdoors, and signs for decoration
- Flowers, leaf blocks, and shrubs for color
- Optional crates, barrels, or small tables
Step-by-Step Setup
- Lay the main street path using cobblestone or stone bricks.
- Build small wooden market stalls along the street edges.
- Add lanterns or torches to each stall and along the path.
- Decorate stalls with banners, trapdoors, and signs.
- Place flowers, shrubs, and leaf blocks for vibrancy.
- Add crates, barrels, or tables for realism.
- Check street flow and spacing to ensure villagers and players can interact freely.