
Your garage is no longer just a place to park your car or store forgotten boxes—today, it’s becoming a functional, visually appealing space that can reflect your personality, improve organization, and even increase your home’s value. An aesthetic garage isn’t just about adding a pop of color or hanging a few shelves—it’s about transforming what was once a utilitarian area into a space that is both practical and Instagram-worthy. Whether you’re someone who enjoys DIY projects or simply wants a clean, organized garage, taking the time to style your garage floor and walls can dramatically elevate the space. From bold epoxy coatings to textured wall panels, and from modular storage systems to minimalistic décor, there are countless ways to make your garage functional, stylish, and cohesive with the rest of your home.

Before diving into ideas, it’s essential to understand the core components of garage styling. The floor and walls are your canvas. The garage floor, which is often overlooked, can be upgraded with durable, long-lasting finishes like epoxy coatings, interlocking tiles, or even polished concrete. Each option has its own aesthetic appeal and maintenance level: epoxy creates a glossy, professional finish that resists stains; interlocking tiles offer flexibility and a playful design potential; polished concrete gives a sleek, industrial vibe. Meanwhile, the walls can be transformed with paint, wall panels, pegboards, or decorative accents that not only make the space visually appealing but also improve organization. Strategic use of colors, patterns, and textures can turn a dull, gray garage into a bright, inviting, and functional area.
Aesthetic garage styling also extends beyond mere visuals—it’s about creating zones and functionality. Think about how you use your garage: parking, storage, workshop, or even a multi-purpose recreational area. Clear zoning can help guide your floor and wall choices. For instance, a glossy epoxy finish might be ideal for a car zone, while a section with heavy-duty interlocking tiles may be better for a workshop. Similarly, walls can have dual purposes: painted areas for a clean look, pegboards for tool organization, and floating shelves for decorative items or storage bins. By combining aesthetics with function, you ensure that your garage is not only a joy to look at but also highly practical for everyday use.
Another important aspect of aesthetic styling is color coordination and theme selection. Your garage can complement your home’s overall style, whether modern, industrial, minimalist, or rustic. Light-colored floors can brighten a space, making it feel larger, while darker tones add sophistication. Accent walls or contrasting stripes can create depth and visual interest. You can also incorporate themed décor elements, such as automotive-inspired art for car enthusiasts or vintage signage for a retro vibe. Lighting plays a significant role too—well-placed LED strips or overhead fixtures can highlight textures, patterns, and zones, enhancing both appearance and functionality.
Materials and finishes are equally critical. Durable materials that resist oil stains, heavy foot traffic, and moisture are essential for long-term beauty and performance. For walls, moisture-resistant panels or washable paint can prevent wear and tear. Consider adding easy-to-clean surfaces or protective coatings for walls in areas prone to splashes or dirt. Incorporating natural elements, like wooden accents or stone textures, can soften the industrial look of a garage, making it more welcoming. Moreover, integrating smart storage solutions—cabinets, overhead racks, hooks, and bins—not only keeps the space organized but adds a polished, curated aesthetic.
Finally, garage styling should reflect your personality and lifestyle. Some homeowners may prefer a clean, minimalist garage with monochromatic tones and sleek lines. Others may enjoy bold, playful patterns on the floor combined with colorful wall accents. Whatever your approach, the key is to balance form and function: create a visually pleasing environment while ensuring easy maintenance and practicality. Remember, a well-styled garage can also serve as an extension of your home, doubling as a hobby space, workshop, or even a secondary entertainment area. It’s a place where creativity meets utility, where bold design choices can coexist with smart organizational solutions.
By combining the right flooring, wall finishes, color schemes, lighting, and storage, you can turn a neglected garage into an aesthetically stunning and highly functional space. In this article, we will explore detailed ideas for aesthetic garage floor and wall styling, complete with step-by-step guidance, materials needed, and beginner-friendly instructions. These ideas are designed to inspire, help you plan, and make your garage a save-worthy Pinterest space that is both beautiful and functional. From modern epoxy finishes to creative wall accents and organized storage solutions, each concept is tailored to enhance the appeal, usability, and overall atmosphere of your garage. Whether you’re starting from scratch or giving your existing garage a facelift, these ideas will guide you through practical transformations that are achievable, affordable, and visually captivating.
Idea 1: Sleek Epoxy Garage Floor Coating
Introduction:
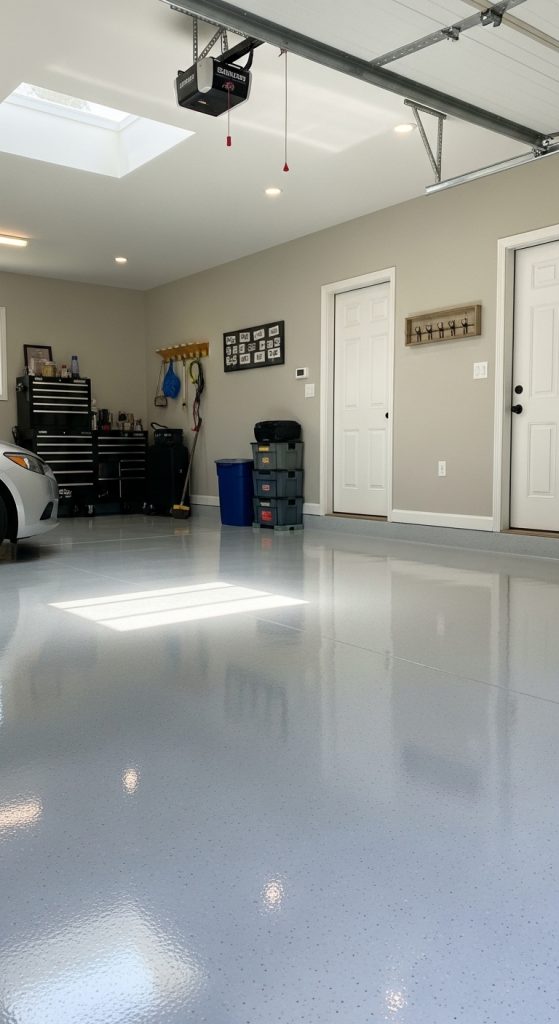
Transforming your garage floor with a glossy epoxy coating is one of the most popular and visually impactful methods to achieve an aesthetic finish. Epoxy floors provide a sleek, modern appearance, and are highly durable against stains, spills, and daily wear. Beyond practicality, the reflective surface adds light and depth to the garage, making the space feel larger and cleaner. Homeowners often choose epoxy floors because they offer endless customization options: solid colors, metallic finishes, or chips for a textured look. It’s an excellent option for both car zones and multi-purpose garages, creating a seamless, professional finish that looks expensive but is achievable with the right preparation.
Definition / Explanation:
Epoxy flooring involves applying a two-part resin system to a prepared concrete surface. The result is a smooth, glossy, durable coating that bonds tightly to the concrete. It is resistant to chemicals, water, and abrasion, making it perfect for garages. Available in a variety of colors and finishes, epoxy allows for creative styling, from minimalistic grays to bold patterns that make a statement.
Step-by-Step How-To:
- Clear the garage and remove all items.
- Clean the floor thoroughly, removing oil stains, dust, and debris.
- Etch the concrete using a concrete etcher to improve epoxy adhesion.
- Repair cracks or holes with concrete filler.
- Apply a primer coat and allow it to dry completely.
- Mix the epoxy resin and hardener as per instructions.
- Pour and spread epoxy using a roller or squeegee.
- Add decorative chips or flakes if desired.
- Allow the floor to cure for 24–72 hours.
- Apply a clear topcoat for added durability and shine.
Materials / Tools Used:
- Epoxy resin and hardener
- Concrete etcher
- Concrete filler
- Paint roller and squeegee
- Decorative chips (optional)
- Clear topcoat
Idea 2: Interlocking Garage Floor Tiles
Introduction:
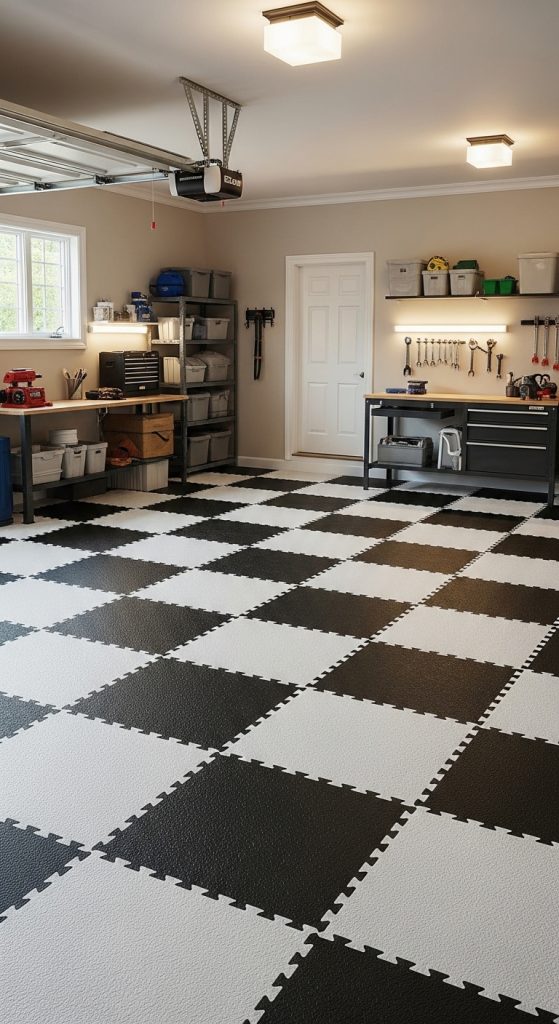
Interlocking floor tiles are a flexible, beginner-friendly way to upgrade your garage floor. Unlike permanent epoxy coatings, these tiles can be installed without professional help and easily replaced if damaged. Available in rubber, vinyl, or polypropylene, tiles come in a variety of colors and patterns, allowing homeowners to create checkerboard designs, stripes, or custom mosaics. They provide a comfortable surface for standing, are resistant to spills, and significantly improve the visual appeal of the space. Tiles also make it easier to define zones within the garage, separating work areas from storage or parking spaces.
Definition / Explanation:
Interlocking garage floor tiles are modular pieces that snap together to create a continuous surface. They are designed for heavy-duty use and provide a non-slip, cushioned finish that is resistant to oil, water, and chemicals. Tiles can be arranged in patterns, giving homeowners creative freedom to style their garage according to their aesthetic preferences.
Step-by-Step How-To:
- Clean and sweep the garage floor.
- Measure the area to calculate how many tiles are needed.
- Begin installation in one corner, snapping tiles together.
- Use a utility knife to cut tiles to fit edges and corners.
- Ensure all tiles are level and properly connected.
- Add edging strips for a finished, professional look.
- Clean tiles with a damp mop to remove installation dust.
Materials / Tools Used:
- Interlocking garage tiles
- Utility knife
- Measuring tape
- Mop and cleaning solution
- Edging strips
Idea 3: Painted Garage Walls with Accent Stripes
Introduction:
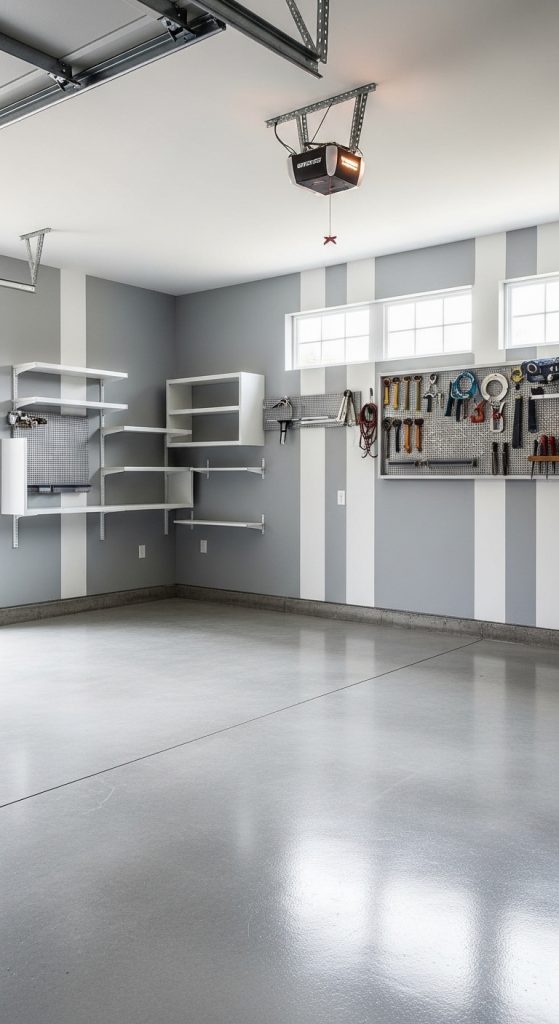
Adding painted walls with accent stripes can instantly elevate a garage’s aesthetic. Whether you prefer a monochrome color scheme or bold contrasts, stripes add dimension and visual interest to otherwise plain concrete walls. Painting walls is also a cost-effective method to brighten a garage and tie the overall color palette together with flooring, storage units, and décor. Vertical stripes can make the space appear taller, while horizontal stripes add a contemporary, wide-open feel.
Definition / Explanation:
Wall painting involves selecting a durable, washable paint suitable for garage environments, often semi-gloss or satin finishes. Accent stripes can be painted using painter’s tape to create clean, precise lines. The result is a fresh, modern aesthetic that adds personality to the space while maintaining practicality.
Step-by-Step How-To:
- Clear garage walls of items and dust.
- Patch any holes or cracks with wall filler.
- Apply a primer coat and let it dry.
- Mark stripe locations using a pencil and measuring tape.
- Apply painter’s tape along the edges for clean lines.
- Paint base color and let it dry.
- Paint stripes using chosen accent color.
- Remove painter’s tape and touch up edges if needed.
- Allow paint to dry completely before rehanging items.
Materials / Tools Used:
- Semi-gloss or satin paint
- Painter’s tape
- Paint rollers and brushes
- Primer
- Wall filler
Idea 4: Industrial-Style Pegboard Walls
Introduction:
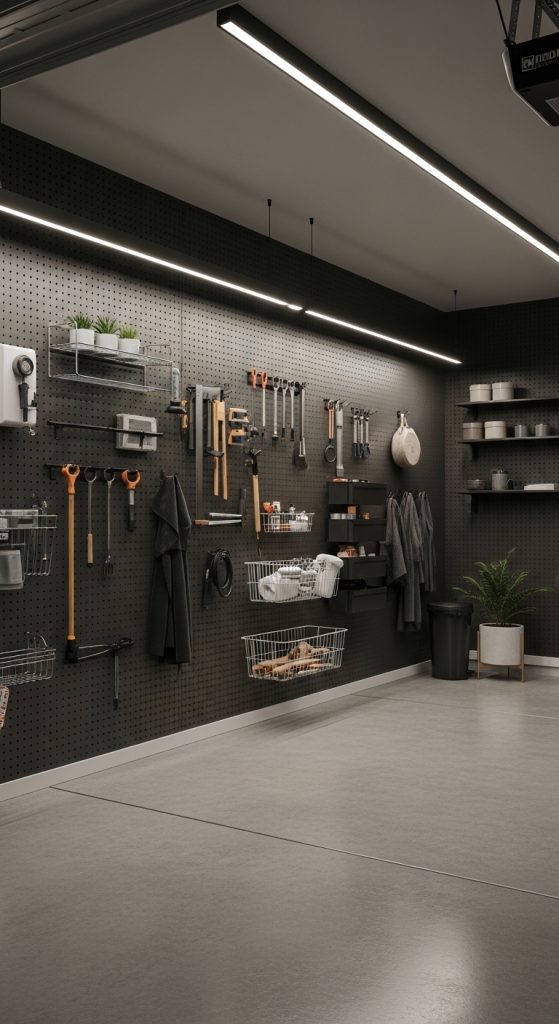
Industrial-style pegboard walls are a practical and stylish solution to garage organization, combining aesthetics with functionality. Pegboards allow you to hang tools, sports equipment, and other essentials in a visually clean and accessible way. By choosing a sleek black, gray, or natural wood finish, you can give your garage a modern industrial vibe that complements polished floors or bold wall paint. Beyond functionality, pegboards create a structured, Pinterest-worthy backdrop that transforms clutter into visually pleasing, organized displays. They are also highly customizable, allowing you to add hooks, baskets, or shelves in any arrangement that suits your needs.
Definition / Explanation:
A pegboard wall is a perforated panel system mounted on your garage walls that provides flexible storage solutions. The holes allow for adjustable hooks and brackets, so items can be rearranged as your storage needs change. Industrial-style pegboards often use metal, MDF, or plywood materials, which can be finished with matte or metallic paint to achieve a modern aesthetic.
Step-by-Step How-To:
- Clear the wall and measure the space.
- Choose the pegboard material and cut it to size if needed.
- Attach furring strips to the wall for mounting.
- Secure the pegboard to the furring strips using screws.
- Paint or stain the pegboard for a polished industrial look.
- Install hooks, shelves, and baskets according to your storage plan.
- Arrange tools and items neatly, grouping by type or function.
Materials / Tools Used:
- Pegboard panels (metal, MDF, or plywood)
- Screws and wall anchors
- Furring strips
- Hooks, baskets, and brackets
- Paint or stain
- Drill and screwdriver
Idea 5: Garage Wall Panels with Texture
Introduction:
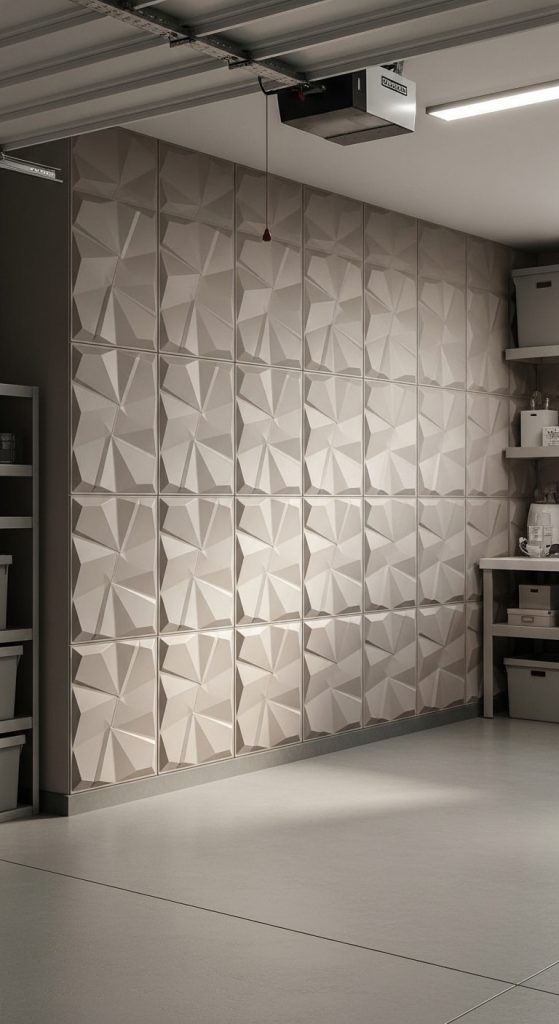
Textured wall panels add depth, elegance, and character to a garage space. While plain concrete walls can feel cold and uninviting, installing panels with patterns like 3D geometric designs, faux brick, or shiplap transforms the walls into a statement feature. Textured panels are not only decorative but can also help with acoustics and conceal imperfections. Pairing these walls with a complementary floor—like epoxy or interlocking tiles—creates a cohesive, stylish look. Textured wall panels are perfect for those who want a sophisticated, Pinterest-worthy garage without compromising on practicality or maintenance.
Definition / Explanation:
Textured wall panels are pre-made boards or sheets installed over existing walls to create visual interest. They can mimic materials like wood, brick, or concrete and are typically made from lightweight, durable materials suitable for garages. Panels can be painted or stained to match your preferred color scheme, making them versatile and highly customizable.
Step-by-Step How-To:
- Measure your garage walls to determine the number of panels needed.
- Clean walls and repair any damage.
- Apply construction adhesive or screws to mount panels.
- Start at the bottom corner, aligning panels carefully.
- Cut panels to fit edges using a saw or utility knife.
- Fill gaps or seams with caulk for a seamless finish.
- Paint or stain panels as desired to match your aesthetic.
Materials / Tools Used:
- Textured wall panels (3D, faux brick, wood, or shiplap)
- Construction adhesive or screws
- Saw or utility knife
- Caulk
- Paint or stain
Idea 6: Metallic Epoxy Floors
Introduction:
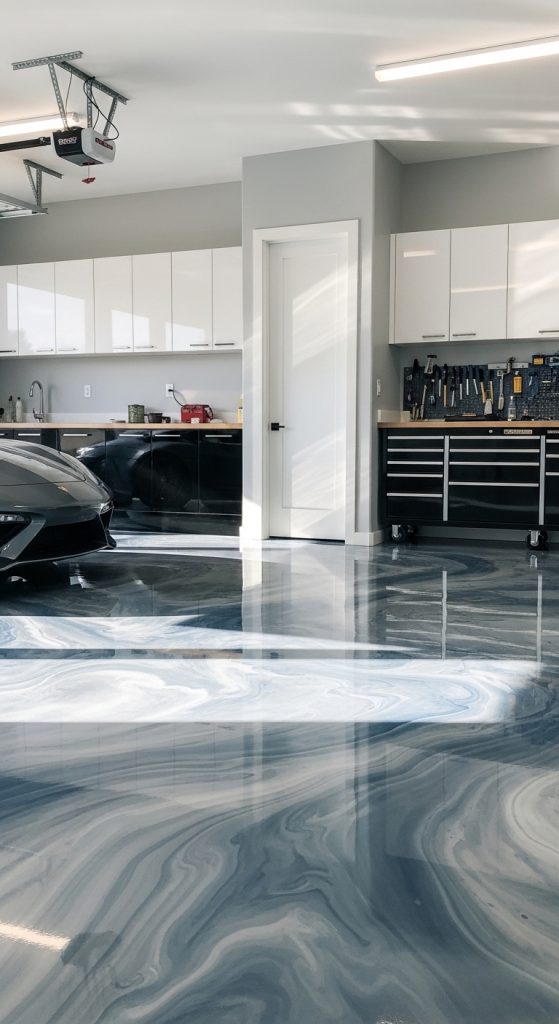
Metallic epoxy floors bring a luxurious, high-end feel to your garage. These floors feature shimmering metallic pigments suspended in epoxy, creating a dynamic, fluid effect that looks like liquid marble. Metallic epoxy not only protects the floor from stains, oil, and abrasion but also turns it into a visually stunning focal point. The reflective finish enhances light and space, making your garage feel brighter and more open. This type of flooring works well with modern, industrial, or contemporary styles and is perfect for homeowners who want a showroom-like aesthetic in their garage.
Definition / Explanation:
Metallic epoxy flooring uses a blend of epoxy resin and metallic powders to create a three-dimensional, flowing design. When applied, the metallic pigments create swirls and patterns that reflect light in unique ways. Unlike standard epoxy, metallic epoxy is more decorative, creating a statement floor that is durable and visually captivating.
Step-by-Step How-To:
- Remove all items from the garage and clean the floor thoroughly.
- Etch the concrete to ensure proper adhesion.
- Repair cracks or holes using concrete filler.
- Apply a primer coat and let it dry.
- Mix epoxy resin and metallic pigments thoroughly.
- Pour and spread the epoxy evenly across the floor.
- Use a brush or trowel to create metallic swirls and patterns.
- Allow the floor to cure for 48–72 hours.
- Apply a clear topcoat for shine and durability.
Materials / Tools Used:
- Metallic epoxy kit
- Concrete etcher
- Concrete filler
- Primer
- Paint roller and trowel
- Clear topcoat
Idea 7: Minimalist White Walls with Floating Shelves
Introduction:
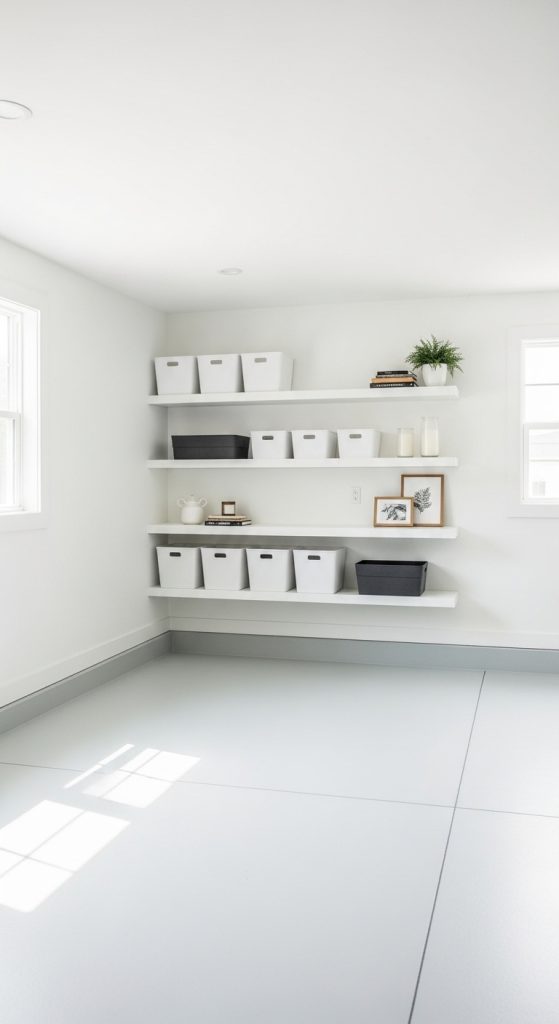
Minimalist white walls create a clean, bright, and timeless garage aesthetic. Pairing white walls with floating shelves not only improves storage but also maintains an airy and organized look. Floating shelves allow for versatile storage options without taking up floor space, making them ideal for smaller garages or multi-purpose areas. This design style emphasizes simplicity, organization, and functional beauty, appealing to homeowners who prefer a clutter-free environment. A minimalist garage is Pinterest-friendly and can complement any floor finish, from epoxy to interlocking tiles.
Definition / Explanation:
Floating shelves are wall-mounted shelves with no visible brackets, giving the illusion that they are “floating.” This sleek design maintains a clean aesthetic while providing practical storage space for bins, tools, and decorative items. Minimalist white walls enhance natural light and create a visually expansive environment.
Step-by-Step How-To:
- Measure and mark shelf locations on the wall.
- Install wall anchors and brackets for stability.
- Mount shelves securely on brackets.
- Paint walls a bright, clean white to maximize light reflection.
- Organize storage bins, tools, and décor on the shelves.
- Keep the arrangement tidy to maintain a minimalist look.
Materials / Tools Used:
- Floating shelves and brackets
- Wall anchors and screws
- Drill and screwdriver
- White paint and roller
- Storage bins or decorative organizers
Idea 8: Two-Tone Wall Painting
Introduction:
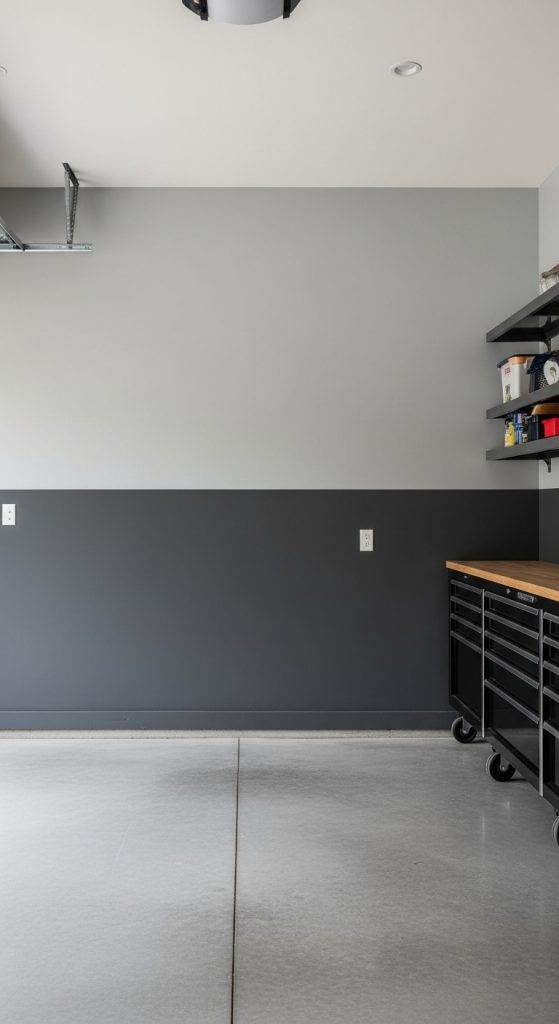
Two-tone wall painting is an effective technique to add depth, dimension, and visual interest to garage walls. Combining a darker lower half with a lighter upper half not only improves aesthetics but also helps hide scuffs and dirt near the floor. Two-tone walls can be horizontal or vertical, depending on the visual effect you want. They work exceptionally well in large garages, adding a dynamic, modern vibe while remaining practical and easy to maintain. Choosing complementary colors allows you to match flooring, storage units, and décor for a cohesive Pinterest-ready space.
Definition / Explanation:
Two-tone painting involves dividing the wall into two sections and painting each with a different color. This technique can be purely decorative or functional—darker shades on the lower wall can reduce the visibility of marks, while lighter shades on the upper wall reflect light and make the space appear larger.
Step-by-Step How-To:
- Measure and mark the dividing line on the wall using a pencil and level.
- Apply painter’s tape along the dividing line to ensure clean edges.
- Paint the lower section with the chosen darker color.
- Let it dry completely before painting the upper section with a lighter color.
- Remove painter’s tape carefully and touch up edges as needed.
- Allow paint to cure before rehanging tools or décor.
Materials / Tools Used:
- Two complementary paint colors
- Painter’s tape
- Paint rollers and brushes
- Level and measuring tape
- Drop cloths
Idea 9: Garage Floor Mats for Zoning
Introduction:
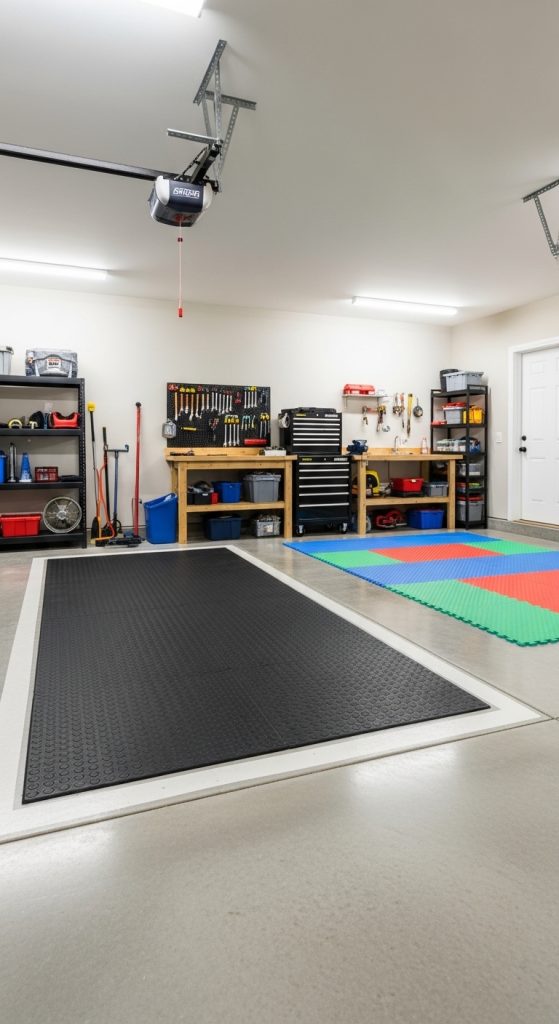
Using garage floor mats is an easy way to create visual zones and define functional areas. Mats are particularly useful in garages that serve multiple purposes, such as parking, workshops, or recreational areas. Floor mats can add color, texture, and a layered look to your garage design, improving both safety and aesthetics. They are also easy to clean, replace, or rearrange, making them a flexible solution for homeowners who want style without permanent commitment.
Definition / Explanation:
Garage floor mats are modular or standalone surfaces made from rubber, PVC, or foam, designed to protect the floor while adding visual interest. Mats can indicate specific areas for parking, exercise, or workspace. They help prevent slips, reduce noise, and protect floors from damage.
Step-by-Step How-To:
- Clear and clean the garage floor.
- Determine zones for parking, work, and storage.
- Select mats according to size, color, and material.
- Lay mats in each zone, ensuring they are aligned and secure.
- Add furniture, workbenches, or vehicles on top as needed.
- Maintain mats by wiping clean and repositioning if required.
Materials / Tools Used:
- Rubber, PVC, or foam mats
- Measuring tape
- Mop for cleaning
- Optional: Velcro strips or adhesive for stability
Idea 10: Rustic Wood Accent Walls
Introduction:
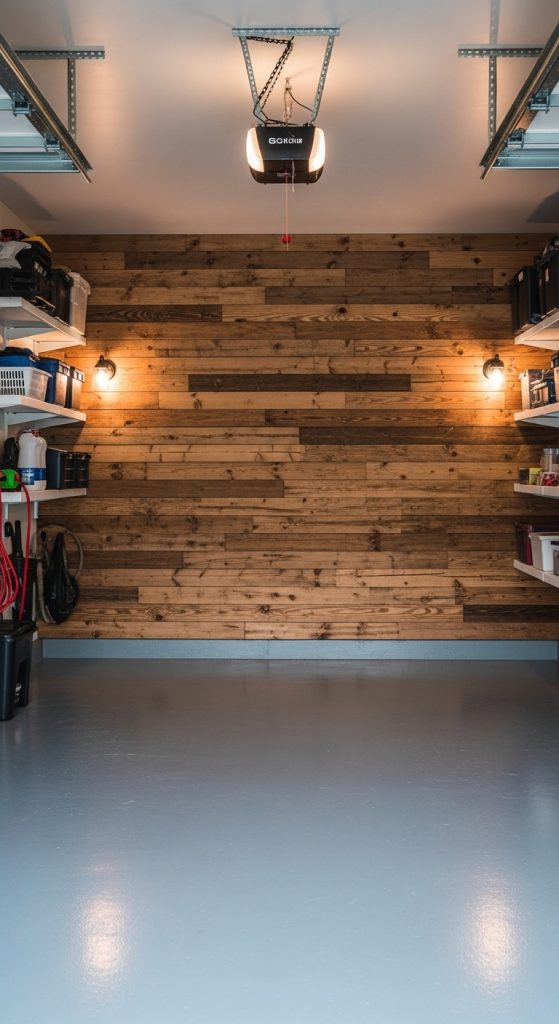
Rustic wood accent walls add warmth, texture, and a charming, natural feel to garages. Whether using reclaimed wood planks, shiplap, or timber panels, these walls instantly create a cozy and Pinterest-worthy look. Pairing rustic wood with polished floors or neutral wall paint enhances contrast and creates a balanced, aesthetic environment. Wood accent walls are ideal for garages that double as workshops or hobby spaces, offering a stylish backdrop for storage, tool displays, or decorative elements.
Definition / Explanation:
A rustic wood accent wall consists of natural or reclaimed wood panels installed on a section of the garage wall. The wood may be left natural, stained, or lightly painted to achieve the desired rustic aesthetic. This approach brings texture, depth, and character, transforming a plain garage into a visually captivating space.
Step-by-Step How-To:
- Measure and prepare the wall space for installation.
- Clean the wall and repair imperfections.
- Cut wood panels to fit the desired area.
- Attach panels using nails, screws, or construction adhesive.
- Stain or seal wood for protection and visual appeal.
- Arrange storage or decorative elements against the wall to enhance aesthetics.
Materials / Tools Used:
- Reclaimed wood or timber panels
- Nails, screws, or adhesive
- Saw for cutting panels
- Wood stain or sealant
- Hammer, drill, and measuring tape