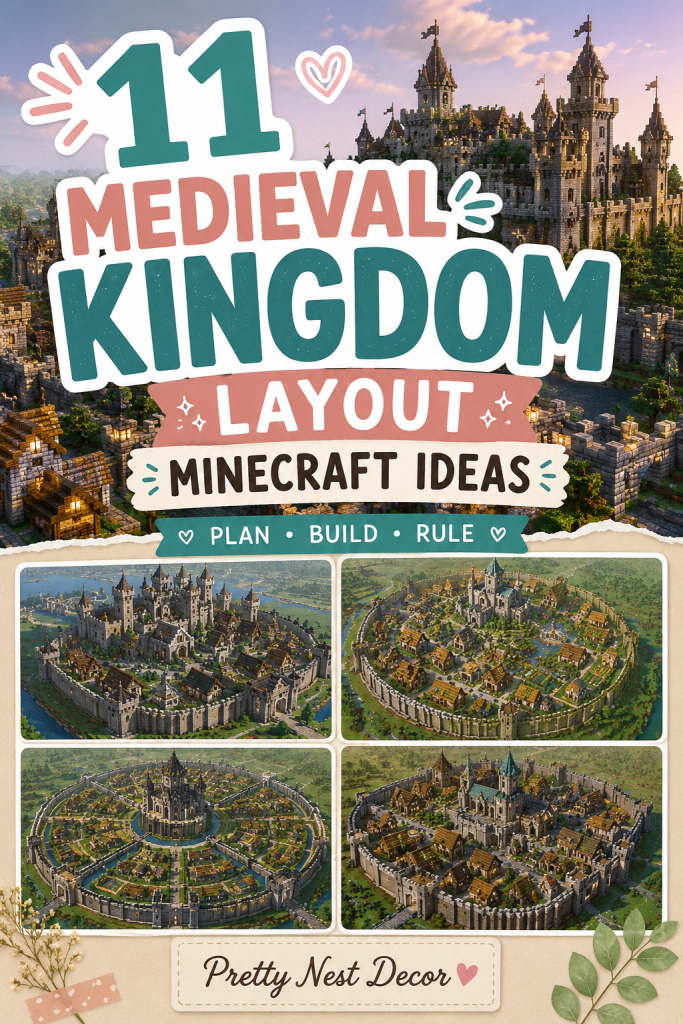
Minecraft has become one of the most creative building games ever made, allowing players to transform simple blocks into breathtaking worlds filled with castles, villages, cities, and entire kingdoms. Among the countless building styles available, medieval kingdom layouts remain one of the most popular and timeless choices. Their combination of grand castles, fortified walls, bustling villages, watchtowers, markets, and scenic landscapes creates an immersive world that feels alive and rich with history.
A medieval kingdom in Minecraft is much more than a collection of buildings. It is a carefully planned settlement where every structure serves a purpose. The castle acts as the heart of the kingdom, while surrounding districts provide housing, commerce, defense, farming, and religious functions. When designed thoughtfully, a medieval kingdom feels realistic and believable, giving players the impression that thousands of people could actually live and work within its walls.
One of the biggest challenges players face when building a kingdom is layout planning. Many builders start with a castle and then randomly place structures around it. While this can work, the result often feels cluttered and disconnected. A strong kingdom layout creates flow and organization, ensuring every area connects naturally to the next. Roads, bridges, walls, gates, farms, and districts should all work together to tell the story of a thriving medieval civilization.
Historically, medieval kingdoms were designed with defense in mind. Castles were often built on hills, cliffs, or elevated terrain to provide strategic advantages. Thick stone walls protected citizens from attacks, while watchtowers allowed guards to monitor approaching threats. Villages and markets developed around these defensive structures, creating communities that depended on the kingdom for protection and stability.
Minecraft builders often draw inspiration from real medieval architecture found throughout Europe. Stone fortresses, timber-framed houses, cathedral towers, fortified gates, and cobblestone streets are common features that help create an authentic atmosphere. Combining these architectural elements with thoughtful planning can turn a simple build into a stunning kingdom worthy of exploration.
A successful kingdom layout also considers terrain. Mountains, rivers, forests, plains, and coastlines all influence how medieval settlements develop. A kingdom built on a mountain ridge will look dramatically different from one constructed beside a river or ocean. Using the natural landscape effectively helps make a kingdom feel realistic while adding visual variety and depth.
Another important aspect of kingdom building is district planning. Most medieval settlements consisted of multiple specialized areas. Residential districts housed villagers and workers. Market districts provided trade and economic activity. Military zones contained barracks, armories, and training grounds. Religious districts featured churches, monasteries, or temples. Agricultural districts supplied food through farms, windmills, and animal pens.
When these districts are organized properly, the kingdom becomes easier to navigate and more enjoyable to explore. Visitors can move naturally from one area to another, discovering new landmarks and stories along the way.
Medieval kingdom layouts are also excellent for survival gameplay. Well-planned kingdoms provide space for storage systems, villager trading halls, farms, workshops, enchantment areas, and transportation networks. This allows players to combine aesthetics with functionality, creating worlds that are both beautiful and practical.
One reason medieval kingdoms remain so popular on Pinterest and Minecraft building communities is their incredible visual impact. Massive castle walls, towering keeps, stone bridges, bustling marketplaces, and scenic landscapes create dramatic screenshots that inspire other builders. These builds often become centerpieces of entire Minecraft worlds because they offer endless opportunities for expansion and creativity.
Whether you prefer a realistic historical approach or a fantasy-inspired interpretation, medieval kingdom layouts provide a strong foundation for large-scale building projects. From compact fortified towns to sprawling royal capitals, every kingdom tells a unique story through its architecture and design choices.
In this guide, we will explore 11 Medieval Kingdom Layout Minecraft Ideas that showcase different approaches to planning and building an impressive kingdom. These layouts will include strategic castle placements, organized districts, defensive systems, transportation routes, farming zones, and community spaces. Each idea is designed to help builders create kingdoms that feel immersive, functional, and visually stunning while providing endless inspiration for their next Minecraft mega-build.
Idea 1: Hilltop Castle Kingdom Layout (The Classic Medieval Capital)
The Hilltop Castle Kingdom is one of the most iconic and realistic medieval kingdom layouts in Minecraft. This design places a massive castle at the highest point of the terrain, allowing it to overlook the entire settlement below. The elevated position creates a powerful visual centerpiece while also reflecting how real medieval kingdoms prioritized defense and visibility.

Introduction (Concept & Why This Layout Works)
In medieval times, castles were often built on hills because height provided a natural defensive advantage. Enemies had to climb uphill while defenders could monitor the surrounding landscape from towers and walls. In Minecraft, this layout creates a kingdom that feels authentic and impressive from every angle.
The castle acts as the political and military heart of the kingdom. Around it, districts expand outward in layers. Wealthier citizens and nobles live closer to the castle, while markets, workshops, farms, and worker housing occupy lower elevations.
This layout works exceptionally well because it creates a natural hierarchy. Every road eventually leads toward the castle, making navigation intuitive and visually satisfying.
Layout Breakdown
At the top of the hill:
- Royal Castle
- Main Keep
- Throne Hall
- Royal Gardens
- Watchtowers
Middle district:
- Noble Houses
- Church or Cathedral
- Barracks
- Armory
- Town Square
Lower district:
- Villager Homes
- Blacksmith Shops
- Market Stalls
- Inns
- Storage Buildings
Outer zone:
- Farms
- Windmills
- Animal Pens
- Lumber Areas
Step-by-Step Building Plan
Choose a large hill or mountain.
Build a stone castle at the summit.
Create a winding road leading to the castle gate.
Design a middle ring district with noble buildings.
Expand outward with worker housing and commercial structures.
Add outer walls surrounding the entire settlement.
Finish with farms and countryside details.
Essential Materials
- Stone Bricks
- Cobblestone
- Andesite
- Oak Logs
- Spruce Wood
- Lanterns
- Mossy Stone Bricks
- Dark Oak Planks
Why This Layout Works
This kingdom layout creates strong visual storytelling. The castle dominates the skyline while lower districts naturally support the kingdom’s economy and population.
The elevation differences also make the kingdom feel larger and more realistic without requiring an enormous amount of land.
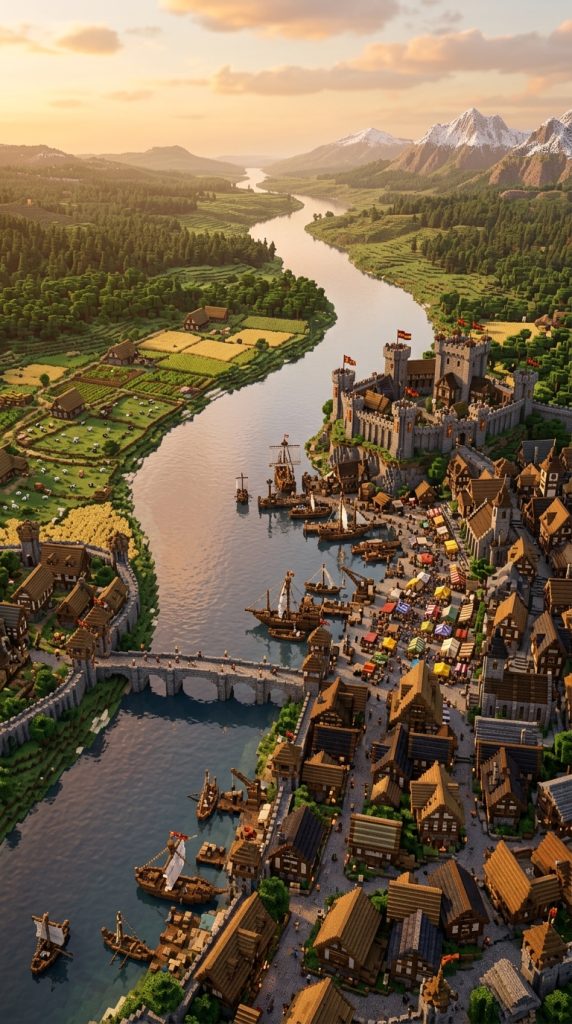
Idea 2: River Kingdom Layout (Trade and Prosperity Focus)
The River Kingdom Layout is centered around a major river that flows through or beside the settlement. Historically, rivers were essential for trade, transportation, agriculture, and defense. This layout creates a thriving kingdom built around commerce and economic growth.
Introduction (Concept & Why This Layout Works)
Most successful medieval cities developed near rivers because they provided fresh water, fishing opportunities, transportation routes, and fertile farmland. In Minecraft, rivers naturally divide districts and create beautiful scenery while giving builders opportunities for bridges, docks, and waterfront architecture.
The river becomes the kingdom’s lifeline. Ships transport goods, merchants travel between regions, and waterfront markets become bustling centers of activity.
This design feels alive because every district connects to the river in some way.
Layout Breakdown
Central river:
- Merchant Docks
- Cargo Loading Areas
- Fishing Boats
- Harbor Buildings
Castle district:
- Riverside Castle
- Watchtowers
- Defensive Walls
- Noble Gardens
Commercial district:
- Marketplace
- Blacksmith Quarter
- Trading Halls
- Inns
Residential district:
- Villager Housing
- Workshops
- Bakeries
- Small Farms
Outer farmland:
- Wheat Fields
- Windmills
- Animal Farms
- Water Mills
Step-by-Step Building Plan
Find a wide river location.
Build the castle overlooking the river.
Construct a large stone bridge connecting both sides.
Create docks and harbor infrastructure.
Develop markets near the waterfront.
Expand residential areas behind commercial districts.
Add farmland beyond the city walls.
Essential Materials
- Stone Bricks
- Spruce Logs
- Oak Planks
- Barrels
- Lanterns
- Chains
- Cobblestone
- Dark Oak Wood
Why This Layout Works
The river naturally organizes the kingdom while providing stunning visual variety. Bridges, docks, ships, and waterfront buildings create endless opportunities for detail.
The kingdom feels economically successful and realistic because every district benefits from access to the river.
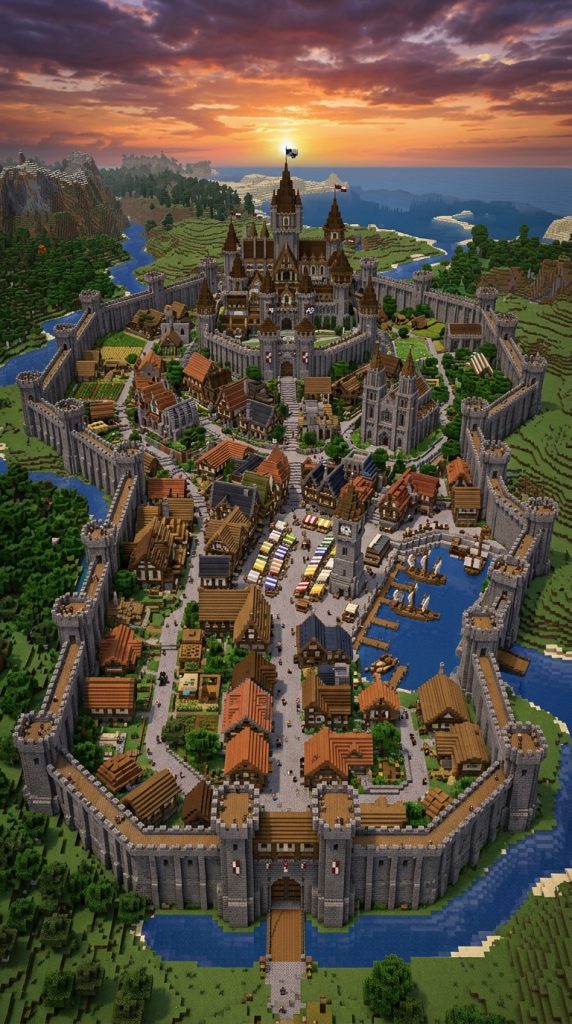
Idea 3: Walled Kingdom Layout (Fortress City Design)
The Walled Kingdom Layout focuses on defense above everything else. Massive stone walls surround the entire city, creating a fortress-like settlement capable of withstanding invasions and protecting its citizens.
Introduction (Concept & Why This Layout Works)
Many medieval cities relied on thick defensive walls to protect themselves from enemy armies. These walls often included towers, gates, battlements, and guard posts. In Minecraft, defensive walls immediately make a kingdom look powerful and organized.
This layout creates a strong sense of security and structure. Everything important remains inside the walls, while farms and resource gathering areas exist beyond the city limits.
The design also makes the kingdom feel like a true capital city with clear boundaries and controlled access points.
Layout Breakdown
Central district:
- Royal Castle
- Cathedral
- Main Plaza
- Government Buildings
Military district:
- Barracks
- Training Grounds
- Armories
- Guard Towers
Commercial district:
- Market Square
- Merchant Shops
- Inns
- Blacksmiths
Residential district:
- Villager Housing
- Workshops
- Bakeries
- Storage Buildings
Defensive perimeter:
- Massive Stone Walls
- Gatehouses
- Towers
- Archer Platforms
Outside the walls:
- Farms
- Windmills
- Quarries
- Logging Camps
Step-by-Step Building Plan
Mark the city perimeter first.
Construct outer defensive walls.
Build major gatehouses at entry points.
Place the castle in the center.
Design organized districts around the castle.
Connect districts with cobblestone roads.
Add military towers and wall defenses.
Finish with farmland beyond the city walls.
Essential Materials
- Stone Bricks
- Mossy Stone Bricks
- Cobblestone
- Spruce Logs
- Dark Oak Planks
- Iron Bars
- Lanterns
- Stone Slabs
Why This Layout Works
The giant walls instantly establish the kingdom’s identity and purpose. Every structure feels protected and connected within a secure environment.
The organized district system makes expansion easier while maintaining the realistic feel of a powerful medieval fortress city.
Idea 4: Mountain Fortress Kingdom Layout (The Unbreakable Stronghold)
The Mountain Fortress Kingdom is built directly into a mountain range, creating one of the most dramatic and defensive medieval layouts possible in Minecraft. Instead of relying only on walls, the kingdom uses towering cliffs, rocky terrain, and natural elevation as part of its defenses.

Introduction (Concept & Why This Layout Works)
Throughout history, many kingdoms and fortresses were built in mountainous regions because steep terrain naturally slowed invading armies. In Minecraft, mountains provide breathtaking views, impressive skylines, and powerful defensive advantages.
This kingdom layout feels grand because the castle becomes part of the mountain itself. Towers rise from cliffs, bridges connect rocky peaks, and roads wind through stone pathways. The terrain does much of the visual work, making the kingdom feel larger and more impressive.
The layered design also creates opportunities for multiple districts positioned at different elevations. Every level of the mountain can serve a unique purpose, making exploration exciting and rewarding.
Layout Breakdown
Mountain peak:
- Royal Castle
- King’s Tower
- Throne Hall
- Observation Deck
Upper mountain district:
- Noble Houses
- Chapel
- Military Headquarters
- Royal Gardens
Middle mountain district:
- Marketplace
- Blacksmith Area
- Merchant Quarter
- Inns
Lower district:
- Villager Homes
- Workshops
- Storage Facilities
- Stables
Mountain base:
- Farms
- Lumber Camps
- Animal Pens
- Trade Roads
Step-by-Step Building Plan
Locate a large mountain or mountain range.
Build the castle directly into the highest point.
Create stairways, bridges, and pathways connecting levels.
Design separate districts on natural plateaus.
Use retaining walls and terraces for stability.
Add defensive towers along cliff edges.
Connect everything with stone roads and lanterns.
Essential Materials
- Stone Bricks
- Cobblestone
- Andesite
- Spruce Logs
- Dark Oak Wood
- Lanterns
- Mossy Stone Bricks
- Stone Slabs
Why This Layout Works
The mountain provides natural beauty and defense simultaneously. The vertical design makes the kingdom feel enormous without requiring a massive horizontal footprint.
The dramatic elevation changes also create unforgettable views from every district.
Idea 5: Island Kingdom Layout (The Royal Coastal Empire)
The Island Kingdom Layout transforms a small or large island into a self-contained medieval kingdom surrounded by water. This layout combines strong defenses, beautiful scenery, and maritime trade opportunities.

Introduction (Concept & Why This Layout Works)
Water has always been one of the most effective natural defenses. Medieval kingdoms located on islands were difficult to invade because attackers needed ships and naval superiority to reach them.
In Minecraft, island kingdoms instantly feel unique because they are separated from the mainland. The surrounding ocean creates clear boundaries while allowing builders to focus on creating a highly detailed and organized settlement.
The island environment also opens opportunities for harbors, lighthouses, fishing districts, and naval fleets that make the kingdom feel alive.
Layout Breakdown
Central district:
- Royal Castle
- Main Keep
- Throne Room
- Courtyard
Harbor district:
- Docks
- Shipyards
- Warehouses
- Fishing Market
Residential district:
- Villager Homes
- Inns
- Shops
- Bakeries
Military district:
- Barracks
- Guard Towers
- Naval Headquarters
- Armory
Outer perimeter:
- Lighthouse
- Defensive Walls
- Watchtowers
- Coastal Roads
Step-by-Step Building Plan
Find or create an island large enough for expansion.
Place the castle near the center on elevated terrain.
Construct docks and shipping facilities first.
Build residential and commercial districts around the harbor.
Create defensive walls facing the sea.
Add coastal pathways and scenic overlooks.
Finish with ships, fishing boats, and harbor decorations.
Essential Materials
- Stone Bricks
- Spruce Wood
- Dark Oak Wood
- Cobblestone
- Barrels
- Lanterns
- Chains
- Oak Planks
Why This Layout Works
The ocean naturally frames the kingdom and creates beautiful views from every angle. Water also provides transportation opportunities and realistic economic activity.
The result feels like a powerful maritime kingdom controlling important trade routes.
Idea 6: Cathedral Kingdom Layout (Religion-Centered Medieval City)
The Cathedral Kingdom Layout focuses on a massive cathedral or grand church as the primary landmark of the kingdom. While the castle remains important, the cathedral becomes the visual and cultural centerpiece.

Introduction (Concept & Why This Layout Works)
Many medieval cities were heavily influenced by religion. Large cathedrals often dominated skylines and served as gathering places for citizens. In Minecraft, a giant cathedral adds height, beauty, and architectural variety to a kingdom.
This layout creates a unique atmosphere because the kingdom feels focused on culture, education, and faith rather than pure military strength. The towering cathedral becomes visible from almost every district, helping orient visitors throughout the city.
The surrounding districts naturally develop around the religious center, creating a realistic urban structure.
Layout Breakdown
Central district:
- Grand Cathedral
- Cathedral Square
- Religious Gardens
- Bell Towers
Castle district:
- Royal Castle
- Noble Residences
- Royal Courtyard
- Treasury
Commercial district:
- Market Square
- Merchant Shops
- Blacksmith Area
- Inns
Residential district:
- Villager Housing
- Workshops
- Schools
- Community Buildings
Outer district:
- Farms
- Windmills
- Animal Pens
- Monasteries
Step-by-Step Building Plan
Choose a large flat area or gentle hill.
Build the cathedral first as the central landmark.
Create a large public square around it.
Position the castle nearby but slightly separate.
Develop commercial districts around the square.
Expand residential neighborhoods outward.
Connect everything using wide stone roads.
Essential Materials
- Stone Bricks
- Quartz
- Cobblestone
- Spruce Wood
- Lanterns
- Glass Panes
- Stone Slabs
- Mossy Stone Bricks
Why This Layout Works
The cathedral creates an instantly recognizable focal point that gives the kingdom identity and character.
The large public square encourages natural movement between districts, making the city feel realistic, organized, and full of life.
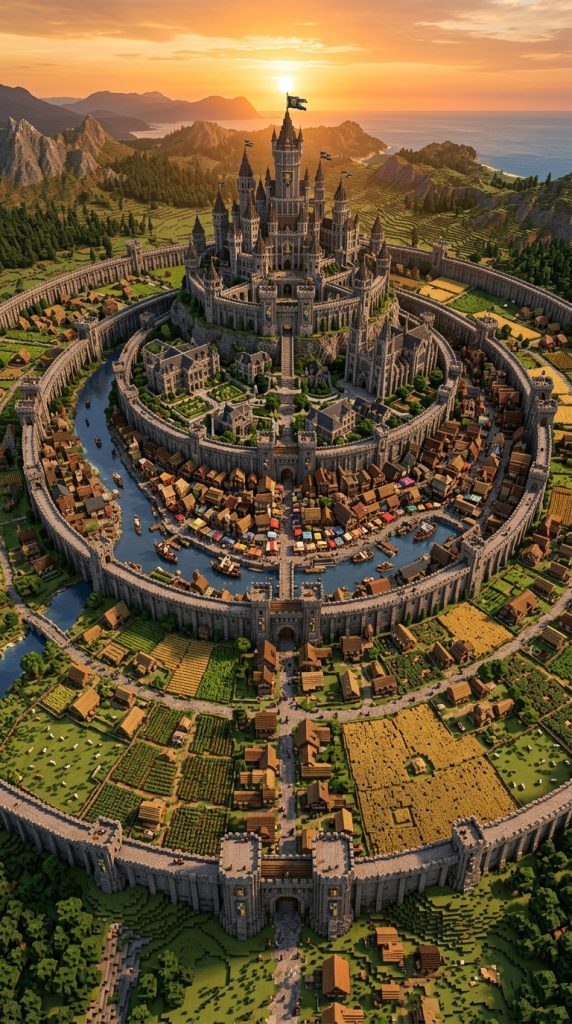
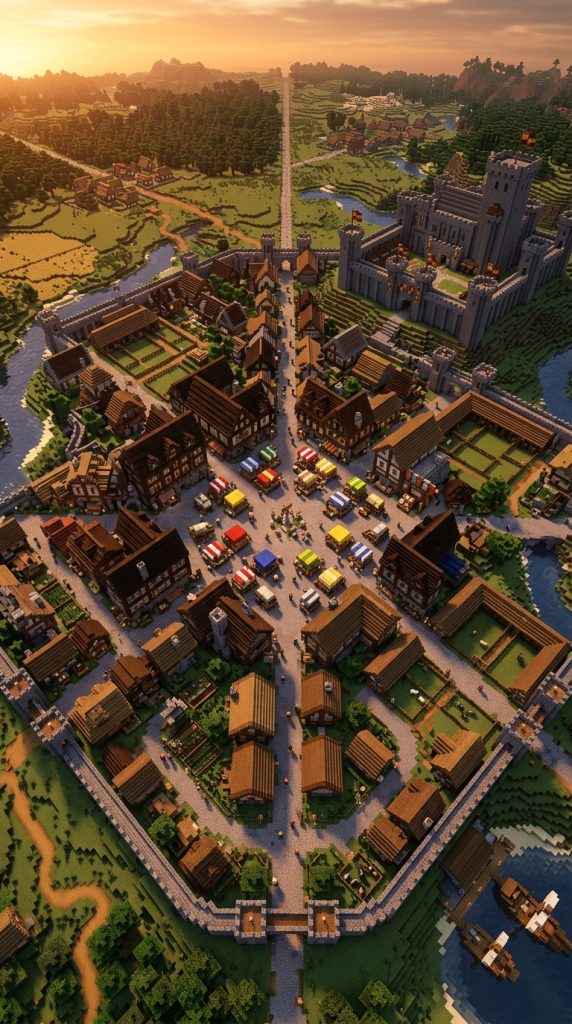
Idea 7: Triple-Wall Royal Kingdom Layout (The Ultimate Capital City)
The Triple-Wall Royal Kingdom is one of the most ambitious and realistic medieval kingdom layouts you can build in Minecraft. Instead of relying on a single defensive wall, the kingdom is protected by three separate layers of fortifications, creating a massive capital city that feels wealthy, powerful, and nearly impossible to conquer.
Introduction (Concept & Why This Layout Works)
Historically, some of the most important medieval cities expanded over centuries, resulting in multiple rings of defensive walls. As populations grew, new districts were added outside older walls, creating layered cities with increasingly important structures toward the center.
In Minecraft, this design creates incredible depth and realism. Each wall protects a different social and economic zone. The outer district houses workers and farms, the middle district contains markets and merchants, while the inner district protects nobles and the royal castle.
This layout feels enormous because every layer tells a different part of the kingdom’s story.
Layout Breakdown
Outer Ring:
- Farms
- Animal Pens
- Lumber Yards
- Worker Housing
- Windmills
Middle Ring:
- Market Square
- Merchant District
- Inns
- Blacksmiths
- Warehouses
Inner Ring:
- Noble Homes
- Cathedral
- Barracks
- Government Buildings
Central Core:
- Royal Castle
- Throne Hall
- Treasury
- Royal Gardens
- Main Keep
Step-by-Step Building Plan
Choose a large flat plain.
Mark three circular or oval wall rings.
Build the outer defensive wall first.
Create gates connecting each layer.
Develop districts according to importance.
Place the castle exactly in the center.
Add roads leading through every gate toward the castle.
Decorate with banners, statues, and fountains.
Essential Materials
- Stone Bricks
- Mossy Stone Bricks
- Cobblestone
- Spruce Logs
- Dark Oak Wood
- Lanterns
- Iron Bars
- Stone Slabs
Why This Layout Works
The layered design creates incredible visual progression. As players move inward, buildings become richer, larger, and more detailed.
This makes exploration feel rewarding while giving the kingdom a realistic social hierarchy.
Idea 8: Lakeside Medieval Kingdom Layout (Scenic and Peaceful Realm)
The Lakeside Kingdom Layout is built around a large lake that acts as both a natural landmark and a source of life for the settlement. This design focuses on beauty, trade, and peaceful living while still maintaining strong medieval character.

Introduction (Concept & Why This Layout Works)
Water has always attracted settlements because it provides drinking water, fishing opportunities, transportation routes, and fertile land. A large lake creates a calm atmosphere that feels very different from fortress-style kingdoms.
In Minecraft, lakeside kingdoms are visually stunning because water reflects castles, towers, and houses, creating beautiful screenshots from every angle. The shoreline naturally shapes roads and districts, helping the city feel organic rather than artificially planned.
The lake also becomes the kingdom’s centerpiece, making the entire layout feel unified.
Layout Breakdown
Lakefront District:
- Harbor
- Fishing Village
- Market Docks
- Boat Storage
Central District:
- Town Square
- Marketplace
- Blacksmith Area
- Inns
Royal District:
- Lakeside Castle
- Noble Houses
- Royal Gardens
- Watchtowers
Agricultural Zone:
- Wheat Fields
- Windmills
- Animal Farms
- Orchards
Outer Areas:
- Forest Camps
- Hunting Lodges
- Small Villages
- Trade Roads
Step-by-Step Building Plan
Find a large lake or create one manually.
Position the castle overlooking the water.
Build docks and fishing infrastructure first.
Develop the marketplace near the harbor.
Expand housing along the shoreline.
Create scenic roads following the lake’s edge.
Add bridges, boats, and lakeside gardens.
Essential Materials
- Stone Bricks
- Cobblestone
- Spruce Wood
- Oak Logs
- Lanterns
- Barrels
- Dark Oak Planks
- Stone Slabs
Why This Layout Works
The lake creates a natural focal point while providing endless opportunities for landscaping and decoration.
The peaceful setting makes the kingdom feel prosperous, welcoming, and highly realistic.
Idea 9: Crossroads Kingdom Layout (The Great Trade Hub)
The Crossroads Kingdom is built at the intersection of several major roads, making it the economic heart of an entire region. This layout focuses on trade, travel, and commerce, creating a busy medieval city filled with merchants, travelers, and activity.
Introduction (Concept & Why This Layout Works)
Many real medieval cities became wealthy because they controlled important trade routes. Merchants traveling between regions would stop to buy supplies, sell goods, and spend money, helping the city grow into a powerful commercial center.
In Minecraft, crossroads layouts naturally encourage movement. Roads stretch outward in multiple directions, connecting the kingdom to villages, mines, forests, ports, and neighboring settlements.
The city feels alive because people constantly appear to be arriving and departing from different gates.
Layout Breakdown
Central Square:
- Grand Marketplace
- Fountain
- Merchant Hall
- Public Gathering Area
Trade District:
- Shops
- Warehouses
- Inns
- Blacksmiths
- Stables
Royal District:
- Castle
- Noble Quarter
- Barracks
- Government Buildings
Residential District:
- Villager Housing
- Workshops
- Community Buildings
- Bakeries
Road Network:
- North Trade Route
- South Trade Route
- East Trade Route
- West Trade Route
Step-by-Step Building Plan
Choose a large open plain.
Mark a giant central square.
Create four major roads extending in different directions.
Build markets around the central crossroads.
Place the castle slightly elevated nearby.
Develop residential and commercial districts around the roads.
Add gates, bridges, and trade checkpoints.
Essential Materials
- Stone Bricks
- Cobblestone
- Oak Logs
- Spruce Wood
- Barrels
- Lanterns
- Hay Bales
- Stone Slabs
Why This Layout Works
The road network naturally organizes the kingdom and makes navigation extremely easy.
Because trade routes connect every district, the kingdom feels economically active and full of life, making it one of the most realistic medieval city layouts you can build in Minecraft.
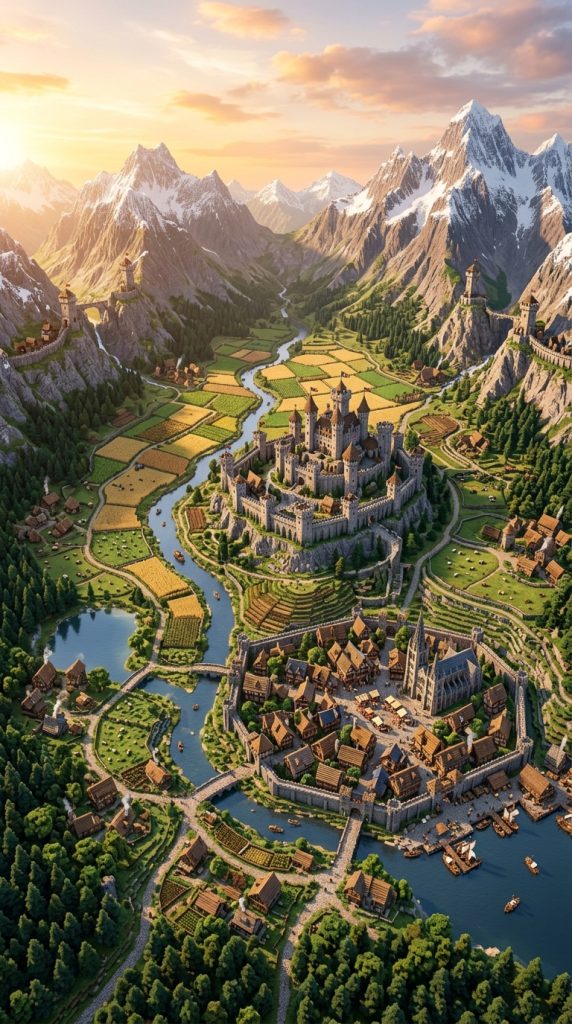
Idea 10: Valley Kingdom Layout (The Hidden Medieval Realm)
The Valley Kingdom Layout is built within a large valley surrounded by mountains, cliffs, or rolling hills. This design creates a naturally protected kingdom that feels secluded, prosperous, and visually breathtaking. Instead of dominating the landscape from above, the kingdom nestles into the terrain, using the surrounding geography as both defense and scenery.
Introduction (Concept & Why This Layout Works)
Throughout history, valleys provided ideal locations for settlements because they offered fertile farmland, access to fresh water, and natural protection from invading forces. In Minecraft, valleys create a perfect foundation for a realistic medieval kingdom because the surrounding terrain naturally defines the kingdom’s borders.
This layout feels immersive because the kingdom gradually reveals itself as players enter through mountain passes or forest roads. The valley becomes a hidden world filled with farms, villages, markets, and a grand castle rising from the center.
The surrounding hills and mountains also help frame the build, making screenshots and views from elevated locations look spectacular.
Layout Breakdown
Central District:
- Royal Castle
- Throne Hall
- Castle Courtyard
- Noble Residences
Town District:
- Marketplace
- Blacksmith Quarter
- Inns
- Storage Buildings
Residential District:
- Villager Homes
- Workshops
- Bakeries
- Community Square
Agricultural Zone:
- Wheat Fields
- Animal Farms
- Windmills
- Orchards
Outer Valley Edge:
- Watchtowers
- Guard Posts
- Hunting Cabins
- Mountain Roads
Step-by-Step Building Plan
Find a large valley surrounded by hills or mountains.
Build the castle near the center on slightly elevated terrain.
Create a main road connecting all major districts.
Place markets and shops near the kingdom center.
Develop residential neighborhoods around the marketplace.
Dedicate flat areas to farming and food production.
Build watchtowers overlooking mountain entrances.
Decorate with bridges, streams, and natural landscaping.
Essential Materials
- Stone Bricks
- Cobblestone
- Spruce Logs
- Oak Wood
- Lanterns
- Mossy Stone Bricks
- Dark Oak Planks
- Stone Slabs
Why This Layout Works
The surrounding terrain naturally protects and frames the kingdom. The valley setting makes the build feel realistic, organized, and connected to nature.
It also provides endless opportunities for landscaping, allowing builders to blend architecture and terrain seamlessly.
Idea 11: Grand Fantasy-Medieval Kingdom Layout (The Ultimate Mega Kingdom)
The Grand Fantasy-Medieval Kingdom Layout combines realistic medieval planning with fantasy-scale architecture. This is the type of kingdom often seen in epic fantasy stories, featuring enormous castles, towering walls, giant bridges, majestic gates, and multiple districts spread across a vast area.

Introduction (Concept & Why This Layout Works)
While traditional medieval kingdoms focus on realism, fantasy kingdoms emphasize scale, wonder, and visual impact. In Minecraft, this layout allows builders to create a truly unforgettable kingdom that feels like the capital of an entire world.
The castle is not just a fortress—it becomes a massive landmark visible from miles away. Towers reach into the clouds, giant gates welcome visitors, and sprawling districts stretch across the landscape. Every structure is designed to inspire awe.
This layout is perfect for players who enjoy large-scale building projects and want to create a kingdom that becomes the centerpiece of their Minecraft world.
Layout Breakdown
Royal Core:
- Giant Castle
- Throne Hall
- Royal Courtyard
- Grand Towers
- Royal Gardens
Noble District:
- Mansions
- Libraries
- Government Buildings
- Cathedral
Commercial District:
- Massive Marketplace
- Merchant Streets
- Guild Halls
- Trading Centers
Military District:
- Barracks
- Training Grounds
- Armories
- Watchtowers
Outer Kingdom:
- Villages
- Farms
- Windmills
- Stable Complexes
- Resource Centers
Fantasy Features:
- Giant Bridges
- Castle Walls
- Decorative Statues
- Magical Towers
- Monument Squares
Step-by-Step Building Plan
Choose a massive area with varied terrain.
Build the main castle first as the kingdom centerpiece.
Create giant roads radiating from the castle.
Design multiple districts with distinct purposes.
Surround the kingdom with impressive walls and gates.
Add fantasy-inspired landmarks and monuments.
Connect distant districts using bridges and grand avenues.
Finish with extensive landscaping and decorative details.
Essential Materials
- Stone Bricks
- Polished Andesite
- Cobblestone
- Spruce Logs
- Dark Oak Wood
- Deepslate Bricks
- Lanterns
- Mossy Stone Bricks
Why This Layout Works
This kingdom feels like a true capital city capable of ruling an entire continent. The combination of realistic district planning and fantasy-scale architecture creates a build that is both believable and breathtaking.
It also offers unlimited expansion potential, allowing builders to continue adding districts, villages, castles, and landmarks for months while maintaining a cohesive kingdom design.