Curly hair is one of the most beautiful and unique hair textures, but it is also one of the most misunderstood and difficult to manage. Many people with curly hair struggle with frizz, dryness, uneven curl patterns, and lack of definition, even when they are using multiple products. The truth is, curly hair does not behave like straight hair, and it requires a completely different care routine, mindset, and technique.
The biggest challenge with curly hair is that it is naturally more prone to dryness. Because of its shape, the natural oils from the scalp have a harder time traveling down the hair strand. This means curls often need more moisture, more gentle handling, and more structured routines to look defined and healthy. Without the right care, curls can quickly become frizzy, undefined, or weighed down.
Another common issue is product overload. Many people with curly hair try too many creams, gels, or oils at once, thinking more product will fix the problem. In reality, curly hair responds best to balance—too little moisture causes dryness, but too much product can cause buildup and make curls lose their natural bounce.
The goal of a proper curly hair routine is not to force curls into a shape, but to enhance their natural pattern. Every curl type—from loose waves to tight coils—has its own structure, and when treated correctly, it can form beautiful, defined, and long-lasting curls without excessive heat styling or damage.
In recent years, curly hair care has become a major trend on Pinterest, TikTok, and Instagram, often referred to as the “curly hair journey.” This movement encourages people to embrace their natural texture instead of constantly straightening or altering it. As a result, more people are now learning how to properly care for curls instead of trying to change them.
A well-structured curly hair routine focuses on three main pillars: moisture, definition, and protection. Moisture ensures the hair stays hydrated and soft. Definition helps curls maintain their shape and structure. Protection prevents frizz, breakage, and environmental damage.
What makes curly hair routines different from regular hair routines is the technique. It is not just about what products you use, but how you apply them. Methods like scrunching, plopping, diffusing, and finger-coiling can completely change how curls form and last throughout the day.
Another important factor is consistency. Curly hair does not transform overnight. It requires patience, observation, and adjustments based on how your hair responds. What works for one curl type may not work for another, which is why understanding your own hair pattern is essential.
Many people also underestimate the role of nighttime care. How you protect your curls while sleeping can determine whether you wake up with defined curls or frizz. Simple techniques like silk pillowcases, pineappling, or protective wrapping can make a huge difference in curl retention.
The beauty of curly hair is its versatility. Defined curls can look soft and romantic for everyday wear, bold and voluminous for special occasions, or controlled and sleek depending on styling choices. Once you understand the right routine, curly hair becomes incredibly expressive and easy to manage.
This guide, “12 Curly Hair Routine Step by Step for Defined Curls,” is designed to simplify the entire process into a clear, practical system. Instead of confusion and trial-and-error, you will learn a structured routine that focuses on real results.
Each step will explain:
- What the step does
- Why it is important for curls
- How to apply it correctly
- Who benefits most from it
- Expert tips for better definition
- Common mistakes to avoid
By following a proper routine, you can reduce frizz, improve curl definition, increase shine, and make your natural curls look more consistent and healthy every day.
Whether you have loose waves, defined ringlets, or tight coils, the right routine can completely change how your hair behaves and looks. The goal is not perfection—it is definition, hydration, and natural beauty that works with your texture instead of against it.
Now let’s begin building a step-by-step curly hair routine that actually works and helps you achieve soft, defined, and long-lasting curls effortlessly.
1. Pre-Wash Detangling for Healthy Curl Foundation
Explanation (What it is)
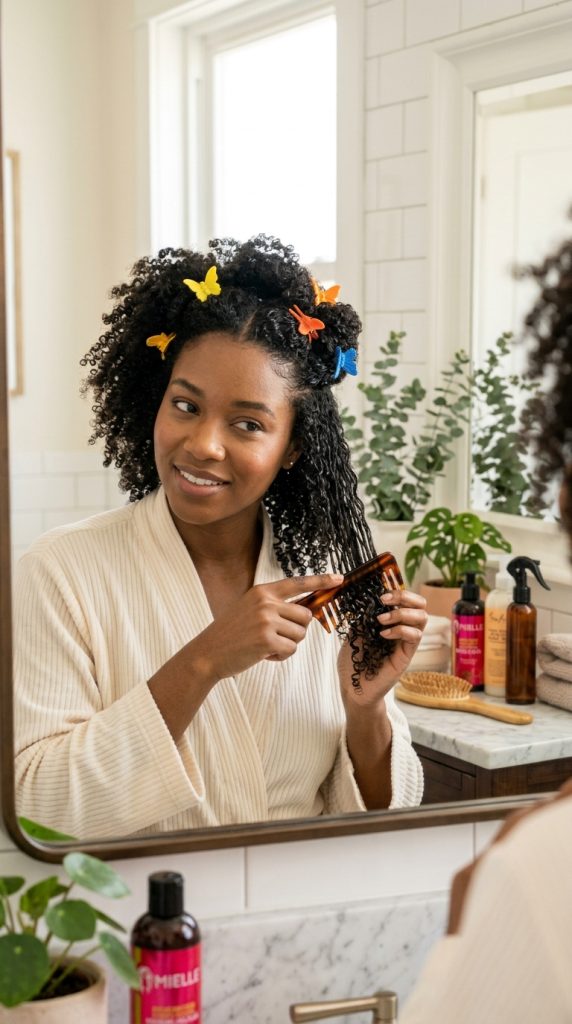
Pre-wash detangling is the first and one of the most important steps in any curly hair routine. It means gently removing knots and tangles before your hair comes into contact with water and shampoo. For curly hair, this step is crucial because curls naturally tangle more easily due to their spiral structure.
When curly hair is washed without detangling first, the strands can tighten into knots, leading to breakage, frizz, and uneven curl formation. Pre-wash detangling creates a smooth foundation so curls can form more evenly during washing and styling.
What makes this step powerful is that it reduces stress on wet hair. Wet curly hair is at its most fragile state, so preparing it beforehand helps maintain strength, length, and curl definition.
This step is especially important for people with thick, long, or tightly coiled curls because those hair types are more prone to tangling and shrinkage during washing.
How to implement (Step-by-step)
Start with dry or slightly damp hair:
- Never detangle soaking wet curls at this stage
Section your hair:
- Divide into 2–4 sections depending on thickness
Apply slip product:
- Use leave-in conditioner or detangling spray
- This helps reduce friction
Detangle gently:
- Use fingers first to separate knots
- Then use a wide-tooth comb or curl brush
Work from ends to roots:
- Always start at the ends and slowly move upward
Best for (Who should use it)
- Curly, coily, or wavy hair types
- Thick or long hair
- Hair prone to tangling or breakage
- People growing out their curls
Pro tip (Expert advice)
Always detangle in sections—this gives more control and reduces unnecessary hair loss.
Mistake to avoid
Avoid rushing or brushing from roots downward—it causes breakage and destroys curl pattern before washing even begins.
2. Moisture-Rich Gentle Cleansing for Defined Curl Base
Explanation (What it is)
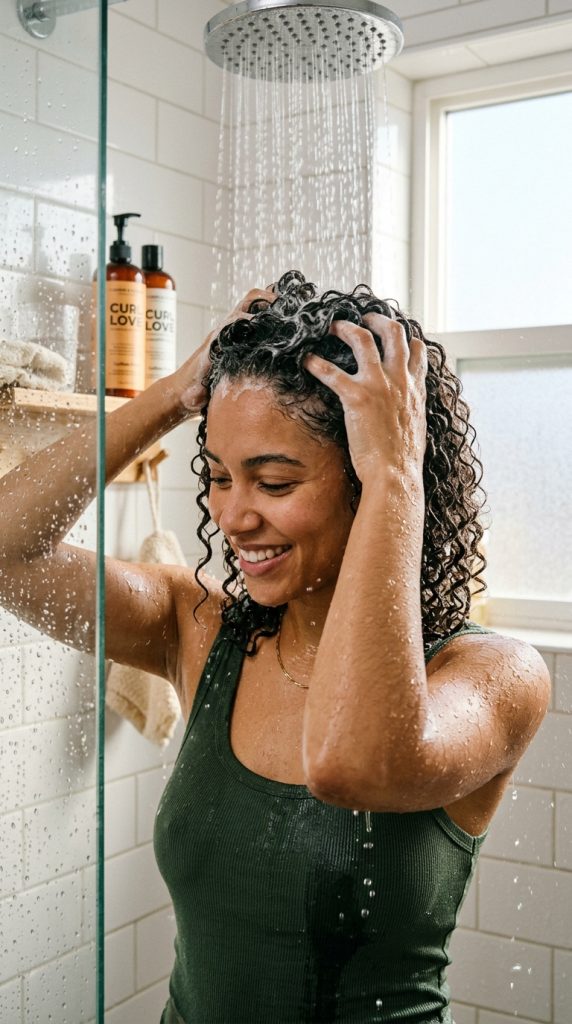
Moisture-rich gentle cleansing is the step where you wash your curly hair using a sulfate-free or low-cleansing shampoo that removes buildup without stripping natural oils. This is essential because curly hair is naturally dry and needs its moisture barrier preserved to maintain healthy curl definition.
Unlike straight hair, curls depend heavily on moisture to keep their shape. Harsh shampoos can make curls frizzy, rough, and undefined. A gentle cleansing approach keeps the scalp clean while maintaining hydration in the hair strands.
What makes this step important is balance. It removes dirt, sweat, and product buildup while still keeping enough natural oils to protect curl structure and softness.
This step is often the difference between dull, frizzy curls and soft, defined curls that hold shape.
How to implement (Step-by-step)
Choose the right cleanser:
- Sulfate-free shampoo or co-wash
- Hydrating formulas with natural oils or aloe
Wash scalp first:
- Focus shampoo on scalp, not ends
- Massage gently using fingertips
Let water rinse through lengths:
- Avoid rough scrubbing on ends
Repeat only if necessary:
- One wash is usually enough for curly hair
Follow with conditioner immediately:
- Always restore moisture after cleansing
Best for (Who should use it)
- Dry or frizz-prone curls
- Chemically treated or colored curly hair
- Medium to tight curl patterns
- People with product buildup issues
Pro tip (Expert advice)
Focus shampoo on the scalp only—the lengths of curly hair get cleansed naturally when rinsing.
Mistake to avoid
Avoid over-washing curls—it removes essential oils and leads to dryness and frizz.
3. Deep Conditioning for Long-Lasting Curl Definition
Explanation (What it is)
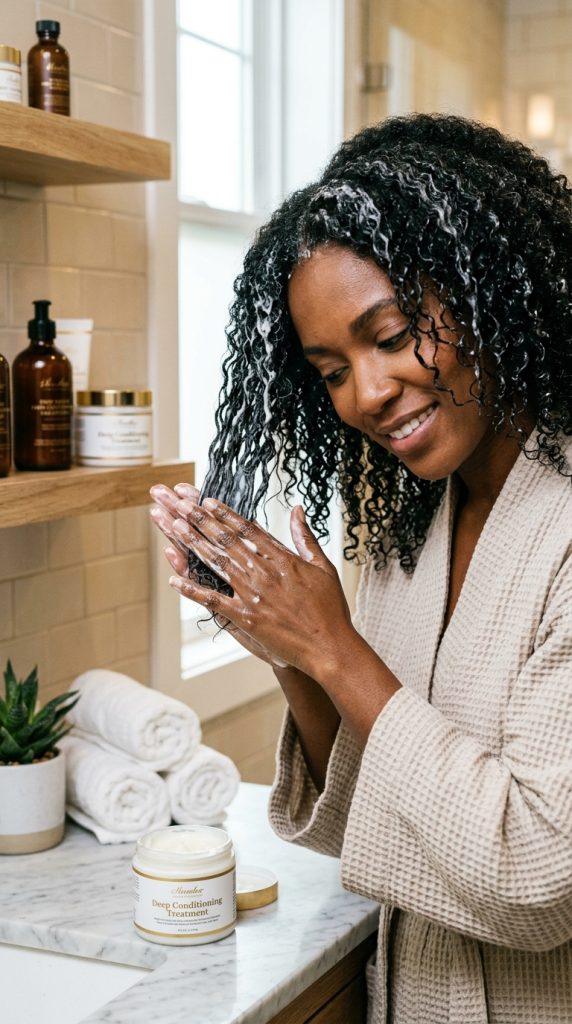
Deep conditioning is a hydration treatment designed to restore moisture, softness, and elasticity to curly hair. It is one of the most essential steps for achieving defined, bouncy curls because hydrated hair naturally forms better curl patterns.
Curly hair tends to be dry by nature, so regular conditioner is often not enough. Deep conditioning penetrates the hair shaft more deeply, improving strength, reducing frizz, and enhancing curl definition.
This step is especially important for maintaining curl health over time. Without it, curls can become weak, rough, and lose their natural bounce. With it, curls appear more elastic, shiny, and structured.
What makes deep conditioning so powerful is its long-term effect. It doesn’t just improve how curls look on wash day—it improves how they behave for days after.
How to implement (Step-by-step)
Apply on clean, damp hair:
- After shampooing, remove excess water
Section hair:
- Divide into manageable parts
Apply mask generously:
- Focus on mid-lengths and ends
- Avoid heavy buildup on scalp
Let it sit:
- Leave for 10–30 minutes depending on product
- Use shower cap for better absorption
Rinse with cool water:
- Helps seal cuticle and lock moisture
Best for (Who should use it)
- All curly hair types
- Dry, damaged, or colored curls
- Frizz-prone hair
- People wanting stronger curl definition
Pro tip (Expert advice)
Use heat (like a warm towel) while deep conditioning to help the product absorb better into the hair.
Mistake to avoid
Avoid skipping this step regularly—curly hair without deep moisture will always struggle with definition.
4. Leave-In Conditioner Layering for Lasting Curl Hydration
Explanation (What it is)
Leave-in conditioner layering is the step where you apply a lightweight moisturizing product to damp hair after washing and conditioning, but before styling. For curly hair, this step is essential because it locks in moisture and keeps curls soft, flexible, and defined for longer periods.
Curly hair loses moisture quickly due to its structure, so without a leave-in product, curls can become dry, frizzy, and undefined within hours. A good leave-in conditioner acts like a hydration shield, helping curls maintain shape and bounce throughout the day.
What makes this step powerful is that it prepares the hair for styling. It creates a smooth base so gels, creams, or curl enhancers can distribute evenly without causing buildup or stiffness.
This step is especially important for people who struggle with dry ends, uneven curl patterns, or frizz in humid weather.
How to implement (Step-by-step)
Start on damp hair:
- Hair should not be dripping wet or fully dry
Apply section by section:
- Divide hair into 2–4 sections
- Use a small amount of product per section
Focus on mid-lengths and ends:
- Avoid heavy application on scalp
Distribute evenly:
- Use fingers or a wide-tooth comb
Layer if needed:
- Add a second light layer for extra dryness areas
Best for (Who should use it)
- Dry or frizz-prone curls
- Medium to thick curly hair
- High porosity hair types
- People in humid climates
Pro tip (Expert advice)
Less is more—thin, even layers work better than heavy product application.
Mistake to avoid
Avoid overloading hair with leave-in product—it can weigh curls down and reduce bounce.
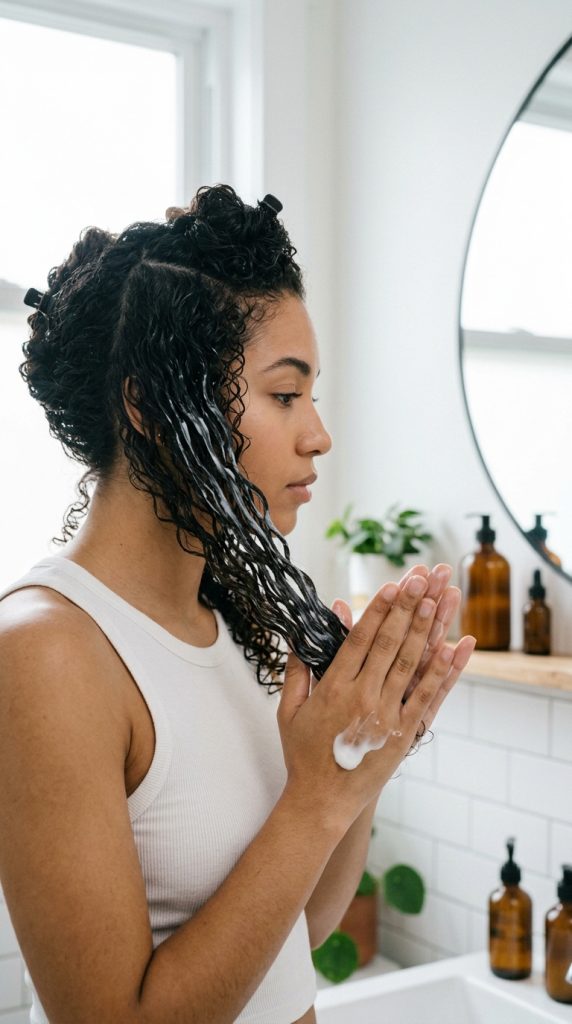
5. Curl Cream or Styling Cream for Shape Definition
Explanation (What it is)
Curl cream is a styling product designed to enhance the natural shape of curls while keeping them soft, defined, and touchable. It helps curls clump together into uniform patterns instead of separating into frizz.
What makes curl cream important is that it defines curls without making them stiff. Unlike gels that create stronger hold, curl creams focus on softness, hydration, and natural movement.
This step plays a major role in shaping curl pattern visibility. Without curl cream, curls may appear loose or undefined, even if they are naturally curly. With it, curls look more structured, smooth, and consistent.
Curl cream is especially useful for people who want a natural, “effortless curl” look rather than a heavily styled or crunchy finish.

How to implement (Step-by-step)
Apply on damp, moisturized hair:
- After leave-in conditioner
Section hair:
- Work in small sections for even coverage
Use praying hands method:
- Smooth product down each section
Scrunch gently:
- Push curls upward to encourage formation
Adjust amount:
- Use more for thick hair, less for fine curls
Best for (Who should use it)
- Wavy to curly hair types
- Natural everyday curl styling
- People wanting soft, touchable curls
- Medium porosity hair
Pro tip (Expert advice)
Combine curl cream with a small amount of gel for both softness and hold.
Mistake to avoid
Avoid applying too much product near roots—it can flatten volume and make curls look greasy.
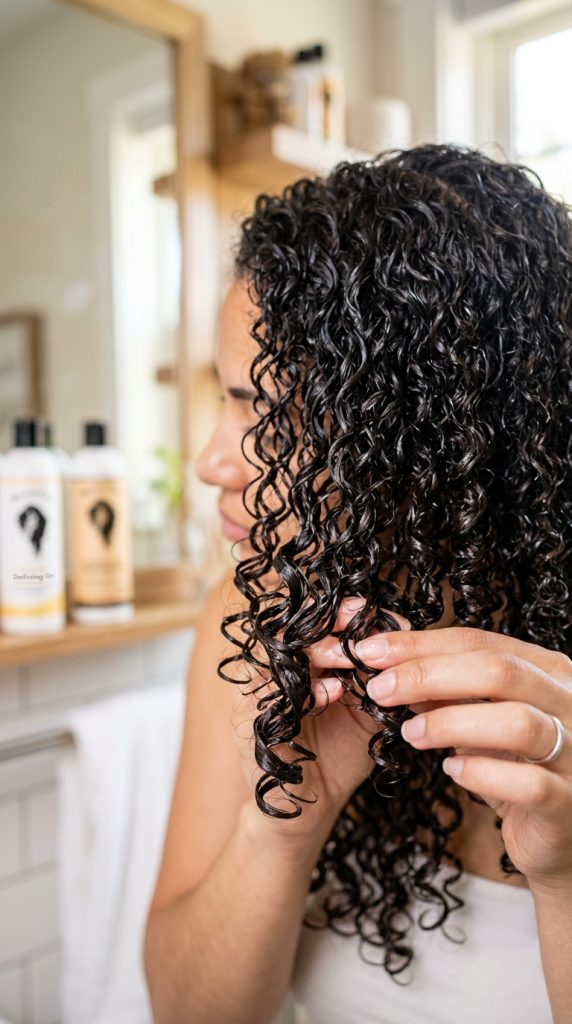
6. Curl Clumping Technique for Defined Curl Formation
Explanation (What it is)
Curl clumping is a styling technique where you encourage individual curl strands to group together into defined “clumps” or sections. Instead of hair separating into frizz, it forms smooth, well-defined curl patterns.
What makes this technique so important is that curl definition is not only about products—it is also about how you handle the hair. Clumping helps curls naturally form stronger shapes, which leads to more uniform, polished results.
This step is essential for achieving that Pinterest-perfect curl definition where curls look separated but still full and bouncy.
Curl clumping works especially well when hair is wet or damp and already has leave-in and styling products applied.
How to implement (Step-by-step)
Start on fully conditioned hair:
- Ensure leave-in and curl cream are applied
Use finger styling:
- Slide fingers through sections and gently shake
Encourage grouping:
- Let curls naturally stick together
Scrunch upward:
- Helps curls lock into shape
Avoid over-separating:
- Do not comb or brush after this step
Best for (Who should use it)
- All curl types (wavy to coily)
- People struggling with frizz
- Anyone wanting more defined curl patterns
- Medium to thick hair types
Pro tip (Expert advice)
The less you disturb the hair after clumping, the more defined and long-lasting the curls will be.
Mistake to avoid
Avoid brushing or touching curls too much after clumping—it breaks curl formation and increases frizz.
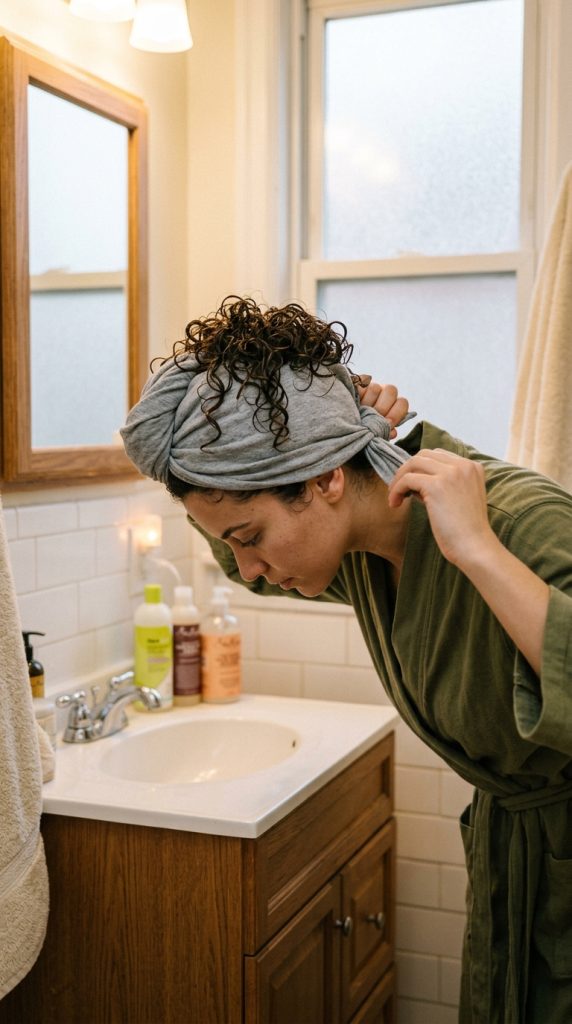
7. Plopping Technique for Enhanced Curl Definition
Explanation (What it is)
Plopping is a curly hair drying technique where wet curls are gently wrapped in a soft cotton T-shirt or microfiber towel to encourage curl formation while reducing frizz. Instead of letting curls air-dry freely (which can cause uneven drying and frizz), plopping helps curls “set” into their natural pattern.
What makes this step so powerful is that it supports curl shape from the very beginning of the drying process. When curls are scrunched into a soft fabric, they are held in a compact position that encourages tighter, more defined curl formation. At the same time, it absorbs excess water without rough friction, which is one of the main causes of frizz.
Plopping is especially popular in curly hair communities because it enhances definition without heat, making curls look more structured, bouncy, and consistent.
How to implement (Step-by-step)
Prepare your fabric:
- Use a cotton T-shirt or microfiber towel
- Lay it flat on a surface
Position hair:
- Flip head forward
- Gently lower curls onto the center of the fabric
Wrap carefully:
- Fold fabric around head securely
- Tie or tuck ends to hold position
Drying time:
- Leave for 10–30 minutes (or longer for more definition)
Release gently:
- Unwrap without pulling or disturbing curls
Best for (Who should use it)
- Wavy to curly hair types
- Frizz-prone hair
- People wanting more curl definition
- Heatless styling routines
Pro tip (Expert advice)
The longer you plop (within reason), the more defined and springy your curls will appear.
Mistake to avoid
Avoid using rough towels—regular towels create friction and increase frizz instead of definition.
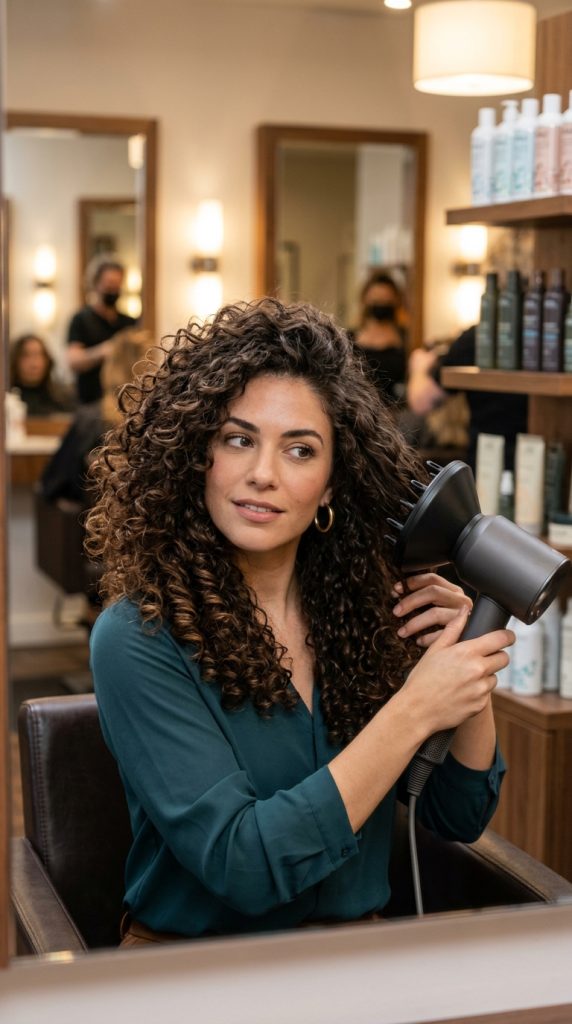
8. Diffusing for Fast Volume and Defined Curls
Explanation (What it is)
Diffusing is a blow-drying technique that uses a special diffuser attachment on a hairdryer to dry curly hair gently while maintaining curl shape. Instead of blowing curls around and creating frizz, a diffuser spreads airflow evenly, helping curls dry in their natural pattern.
What makes diffusing so effective is its ability to combine speed and definition. Air-drying can take hours and sometimes leads to flat roots or uneven curl patterns. Diffusing gives controlled volume, lift at the roots, and more structured curls in a shorter time.
This technique is widely used in professional curly hair styling because it enhances curl shape without disrupting the natural texture.
How to implement (Step-by-step)
Prepare hair:
- Apply heat protectant
- Ensure curls are already clumped and styled
Attach diffuser:
- Use low heat and low speed settings
Dry in sections:
- Place curls into diffuser bowl
- Hold gently at roots for volume
Move slowly:
- Avoid disturbing curl pattern
- Focus on lifting roots first
Finish drying:
- Stop when hair is about 80–90% dry
- Let air dry for final setting
Best for (Who should use it)
- Curly and wavy hair types
- People wanting volume and definition
- Busy routines needing faster drying
- Flat-root curly hair
Pro tip (Expert advice)
Flip head upside down while diffusing for maximum root lift and volume.
Mistake to avoid
Avoid high heat settings—it can cause frizz and damage curl structure.
9. Gel Casting for Long-Lasting Curl Hold
Explanation (What it is)
Gel casting is a styling technique where a gel is applied to wet curls to create a firm outer “cast” around the hair as it dries. This cast helps lock curls into their defined shape, preventing frizz and maintaining structure for longer periods.
What makes this step so important is the balance it creates. While the gel feels stiff at first, it actually protects curl formation during drying. Once the hair is fully dry, the cast is gently scrunched out, revealing soft, defined, and frizz-free curls underneath.
This technique is especially popular in curly hair routines because it provides long-lasting definition and shine without heavy styling or heat.
How to implement (Step-by-step)
Apply gel on wet curls:
- After leave-in and curl cream
- Use even distribution
Scrunch thoroughly:
- Encourage curl clumping and shape
Allow drying:
- Air dry or use diffuser
- Do not touch hair while drying
Break the cast:
- Once fully dry, gently scrunch curls
- Use light oil if needed for softness
Best for (Who should use it)
- Frizz-prone curly hair
- Long-lasting curl definition needs
- Humid environments
- Medium to tight curl patterns
Pro tip (Expert advice)
Don’t panic about stiffness—that “crunchy stage” is exactly what creates defined, long-lasting curls.
Mistake to avoid
Avoid touching curls before they are fully dry—it breaks the gel cast and creates frizz.
10. Scrunch Out the Crunch (SOTC) for Soft Defined Curls
Explanation (What it is)
“Scrunch Out the Crunch” (often called SOTC) is the final finishing step in a curly hair routine where you break the hardened gel cast created during styling to reveal soft, defined, frizz-free curls underneath. After gel casting, curls may feel stiff or crunchy, but this is actually a protective layer that preserved curl shape while drying.
What makes this step so important is the transformation moment. The curls go from stiff and structured to soft, bouncy, and natural-looking. It is one of the most satisfying parts of a curly routine because the final curl definition is revealed here.
This step also determines the final texture of the hair—whether it looks soft and touchable or dry and crunchy. Done correctly, it creates that perfect balance of hold and softness that defines healthy curly hair styling.
How to implement (Step-by-step)
Ensure hair is fully dry:
- Do not start until 100% dry
Check gel cast:
- Hair should feel slightly hard or crunchy
Add lightweight oil (optional):
- Use a drop of argan or jojoba oil
Scrunch gently:
- Cup curls and squeeze upward
- Work section by section
Fluff roots:
- Lift roots gently for volume
Best for (Who should use it)
- All curly hair types
- People using gel styling
- Frizz-prone curls needing definition
- Long-lasting curl routines
Pro tip (Expert advice)
Use only a tiny amount of oil—too much can weigh curls down and ruin volume.
Mistake to avoid
Avoid skipping this step—leaving the gel cast untouched makes curls look stiff and unnatural.
11. Curl Refresh Routine for Next-Day Definition
Explanation (What it is)
The curl refresh routine is used to revive curls on the second or third day after wash day without fully rewashing the hair. Curly hair naturally loses definition over time due to sleep friction, humidity, and product breakdown. Refreshing helps bring curls back to life, restoring bounce, shape, and softness.
What makes this step powerful is that it extends the lifespan of your curl style. Instead of redoing the entire wash day routine, you can quickly reactivate curls with moisture and light styling. This saves time while keeping hair looking fresh and defined.
A good refresh routine can make curls look almost as good as day one when done correctly.
How to implement (Step-by-step)
Lightly rehydrate hair:
- Use water spray bottle or curl mist
- Focus on dry or frizzy areas
Add lightweight product:
- Leave-in conditioner or curl refresher spray
- Apply in small amounts
Reform curls:
- Scrunch curls upward gently
- Use fingers to reshape sections
Fix frizz areas:
- Smooth outer layer lightly
Optional volume boost:
- Flip hair upside down and shake roots
Best for (Who should use it)
- Second or third-day curls
- Busy routines without daily wash
- Frizz-prone hair
- Long-lasting curly styles
Pro tip (Expert advice)
Only refresh the sections that need it—over-wetting the whole head can flatten curls.
Mistake to avoid
Avoid using heavy styling products during refresh—it can cause buildup and make curls look weighed down.
12. Night Protection Routine for Long-Lasting Curl Definition
Explanation (What it is)
The night protection routine is the final and most important step in maintaining defined curls while you sleep. Since curly hair is highly sensitive to friction, movement, and dryness during the night, proper protection ensures curls stay intact, defined, and frizz-free for the next day.
What makes this step essential is that even a perfect wash day routine can be ruined overnight without protection. Cotton pillowcases, tossing during sleep, and loose hair can all cause frizz and disrupt curl patterns. A proper nighttime routine preserves all the effort from previous styling steps.
This step is what separates short-lived curls from long-lasting, well-defined curls that stay consistent for days.
How to implement (Step-by-step)
Choose protection method:
- Pineapple method (high loose ponytail)
- Silk or satin bonnet
- Silk/satin pillowcase
Secure curls:
- Gather hair gently on top of head
- Use soft scrunchie (not tight elastic)
Reduce friction:
- Sleep on satin or silk surface
Morning release:
- Shake curls gently
- Refresh if needed with light mist
Best for (Who should use it)
- All curly hair types
- People wanting long-lasting curls
- Frizz-prone hair
- Busy routines needing multi-day styles
Pro tip (Expert advice)
Satin or silk is the biggest game changer—switching pillowcases alone can dramatically reduce frizz.
Mistake to avoid
Avoid sleeping with loose hair on cotton pillowcases—it causes friction and destroys curl definition overnight.