
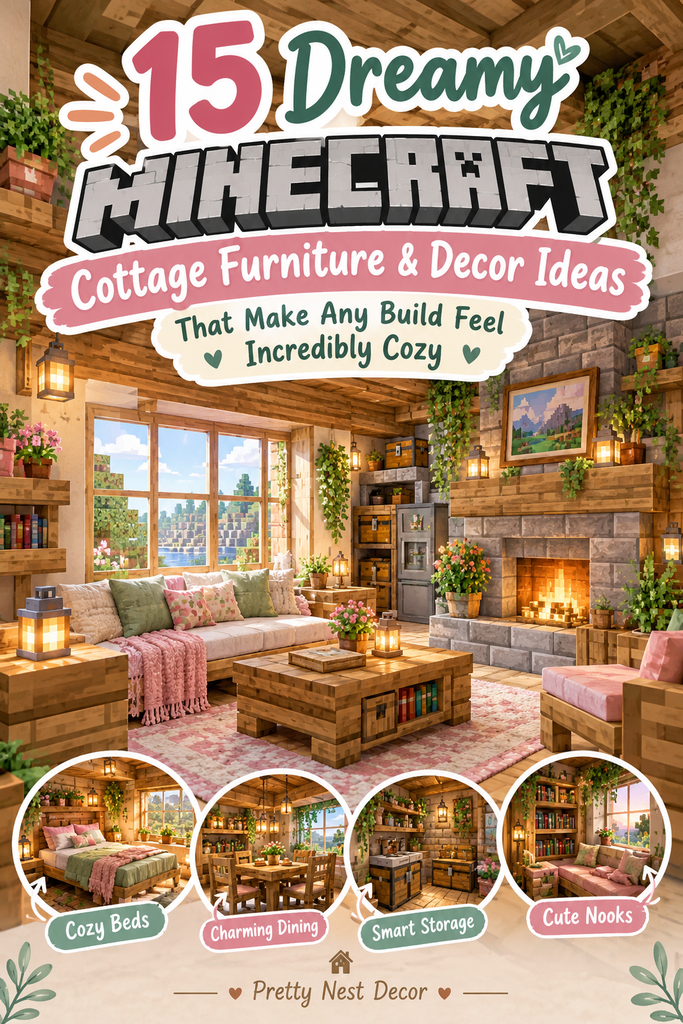
Designing an intimate interior layout turns a simple wooden shelter into a lived-in fairytale sanctuary. Therefore, mastering the subtle art of custom furniture and organic micro-detailing brings emotional warmth to your Minecraft worlds. Moreover, thoughtful block scaling and clever functional tricks prevent tight cottage rooms from feeling cramped or claustrophobic. Consequently, passionate survival builders constantly seek creative ways to repurpose everyday utility blocks into charming interior decor. Furthermore, handcrafted nooks look breathtaking when illuminated by soft lantern light and flickering hearth fires during twilight hours. Every sunken inglenook, suspended loft bed, and cluttered herb workbench elevates simple voxel blocks into pure cottagecore bliss.
Why Bespoke Cottage Interiors Elevate Survival Bases
First impressions truly depend on domestic scale, layered textures, and clever functional zoning. In addition, cottage interiors require a delicate balance where cozy charm never compromises essential survival utility. For example, concealing crafting tables, brewing stands, and storage barrels inside custom cabinetry blends beauty with practicality effortlessly. As a result, standard survival living quarters evolve into immersive, storybook retreats that celebrate quiet domestic rituals. Meanwhile, using micro-furniture designs breaks away from rigid default block shapes, introducing soft silhouettes to angular rooms. Investing build hours into cozy interior detailing delivers immense aesthetic satisfaction every time you return from long mining expeditions. Ultimately, thoughtful interior storytelling infuses your survival haven with heartwarming comfort and gentle tranquility.
Selecting Your Signature Cottagecore Wood Story
However, curating an authentic cottage aesthetic requires thoughtful pairing of timber species and complementary masonry. Indeed, mixing too many clashing wood tones can make compact rooms feel chaotic rather than cohesive. Furthermore, pairing rich stripped spruce posts with warm oak flooring and dark oak trim creates a grounded, timeless woodland foundation. Subsequently, introducing soft accents like birch trapdoors, mangrove shelves, or pale bamboo woven matting adds subtle, handcrafted lightness. Hence, establishing a balanced three-to-four-wood palette remains your primary objective before placing furniture frames. Never rely on monochrome spruce boxes that cause decorative items to blend into background walls. Instead, contrast warm golden planks with weathered stone foundations and leafy greenery to craft a rich, dimensional home.
Modern Cottage Interior Trends For 2026
Modern survival building communities emphasize functional block integration, multi-layered vertical storage, and immersive botanical clutter. Additionally, decorative additions like copper grates, decorated pots, flower pots, and armor-stand staging pair gorgeously with classic wooden trapdoors. For instance, using submerged waterlogged slabs behind trapdoors lets you grow living potted spore blossoms and weeping vines indoors safely. Consequently, your cottage aesthetic remains remarkably fresh, sophisticated, and visually arresting on social media feeds. In contrast, outdated builds relying solely on basic stair-and-sign chairs feel stiff, blocky, and uninspired. Embracing tailored sunken seating, open-air pantry shelves, and custom grandfather clocks ensures a museum-worthy finish. Truly, these artistic modeling techniques elevate humble village houses into breathtaking, storybook-ready masterworks.
Budget-Friendly Survival Blocks That Maximize Hygge
Fortunately, creating magazine-worthy cottage decor does not require end-game Netherite blocks or rare ocean monument treasures. In fact, common forest trees, clay deposits, and roadside wildflowers supply all the raw materials needed for cozy furniture. Similarly, shearing sheep for soft wool carpets and crafting simple banner pillows adds tangible softness to hard stone walls. Afterward, utility blocks like barrels, composters, and cauldrons double as rustic pantry furniture while holding essential game items. Thus, ambitious, boutique-level interior decorating becomes wonderfully accessible for early-game survival players right from day one. You avoid trekking across thousands of dangerous coordinates just to acquire decorative luxury. Instead, humble overworld forestry and simple garden harvests anchor your creative home-decorating journey with dependable ease.
Mastering Micro-Scale Detailing And Ambient Lighting
Additionally, capturing that dreamy, hygge ambiance demands deliberate lighting placement and gentle vertical gradients. First, banish glaring ceiling torches to crawl spaces and rely instead on concealed floor lights, copper lanterns, and glowing candles. Next, tuck light-emitting blocks beneath brown wool carpets, open trapdoor shelves, or stone cooking hearths. Therefore, cottage rooms fill with soft, warm golden pools of light that cast gentle, sleepy shadows into wall crevices. Finally, scale furniture down by combining slabs, banners, and trapdoors rather than bulky full-sized blocks. Proper micro-scale detailing gives compact rooms an airy, spacious flow while packing every square foot with visual delight. Thus, your completed cottage interior stands as a cozy, welcoming sanctuary ready for peaceful evenings.
Essential Pro Tips For Pinterest Virality
Creating shareable pins requires aesthetic cinematic shaders, warm field-of-view framing, and cozy twilight staging. Therefore, always capture in-game interior screenshots with a warm, low-exposure shader during sunset or rainy weather. In addition, staging your shots with gentle campfire smoke curling up from a hearth or floating spore particles adds irresistible life. Furthermore, short looping video clips showing a character sitting in a cozy window seat with rain pattering against glass panes generate tremendous digital saves. Consequently, your clever interior designs will inspire thousands of cozy gamers and builders worldwide. Always document clean before-and-after perspective shots showing empty wooden boxes transforming into fully furnished, cluttered cottage sanctuaries.
1. The Sunken Inglenook Hearth & Settee
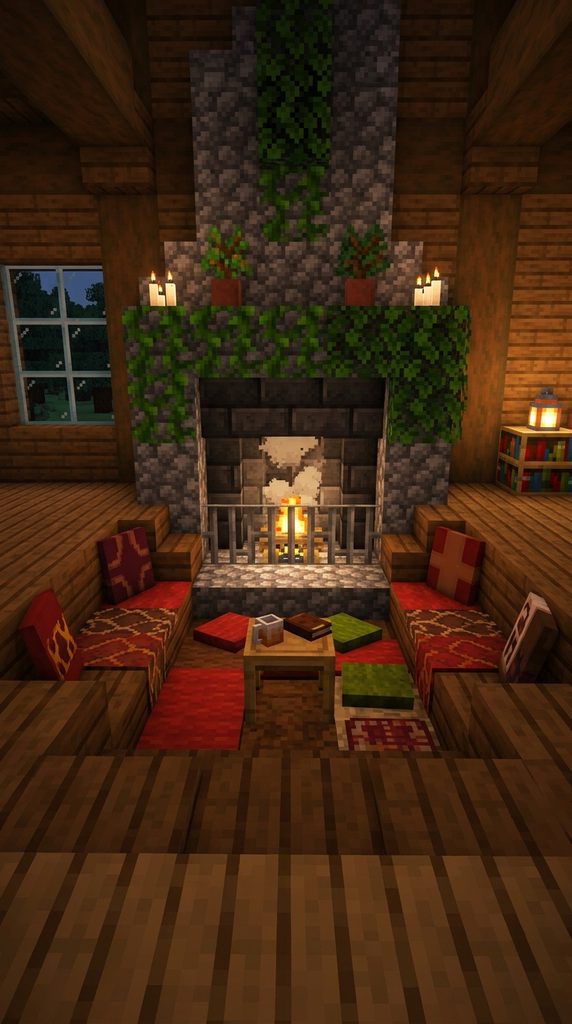
Cozy Recessed Fireplace Living Nook
This charming fireside retreat lowers the living room floor by one block, creating an intimate, recessed gathering space around a crackling stone hearth. Furthermore, flanking the warm fireplace with built-in wooden benches lined with soft cushions offers the ultimate spot to wait out stormy nights. Consequently, your cottage interior gains a grand focal point that instantly establishes a welcoming, hospitable atmosphere. Additionally, an elevated stone mantelpiece lined with flower pots, candles, and dangling ivy softens the rugged masonry with botanical beauty. Hence, survival builders adore this sunken design for central living rooms and library corners alike. It transforms simple cobblestone and campfires into an iconic hearthside sanctuary.
Crafting The Sunken Bench Foundation
Moreover, stepping down into the hearth area using spruce stairs creates clean, natural bench seating automatically. In fact, concealing a campfire beneath an iron trapdoor grate keeps smoke rising up the chimney safely without burning wooden floors. Meanwhile, placing colorful carpets over the floor and topping seating slabs with matching cushions adds tactile softness. Therefore, the sunken nook feels naturally sheltered, warm, and deeply insulated against harsh winter weather outside. As a result, this atmospheric fireplace nook photographs with breathtaking warmth against rainy evening windows.
Required Materials And Building Blocks
- Spruce stairs, spruce slabs, and spruce trapdoors
- Cobblestone, stone bricks, and polished andesite
- Campfire and iron bars or iron trapdoor for the grate
- Red and brown wool carpets for plush floor rugs
- Flower pots, saplings, and white candles for mantel styling
Step-By-Step Construction Guide
- First, excavate a five-by-five-block area one block deep into your cottage floor.
- Next, line the perimeter with spruce stairs facing inward to form built-in wraparound seating.
- In addition, construct a stone-brick fireplace along the back wall, recessing a campfire in the floor.
- Afterward, place iron bars across the hearth opening to vent smoke upward into a chimney.
- Finally, carpet the sunken floor in warm wool and style the stone mantel with candles and potted ferns.
2. The Suspended Timber Loft Bed
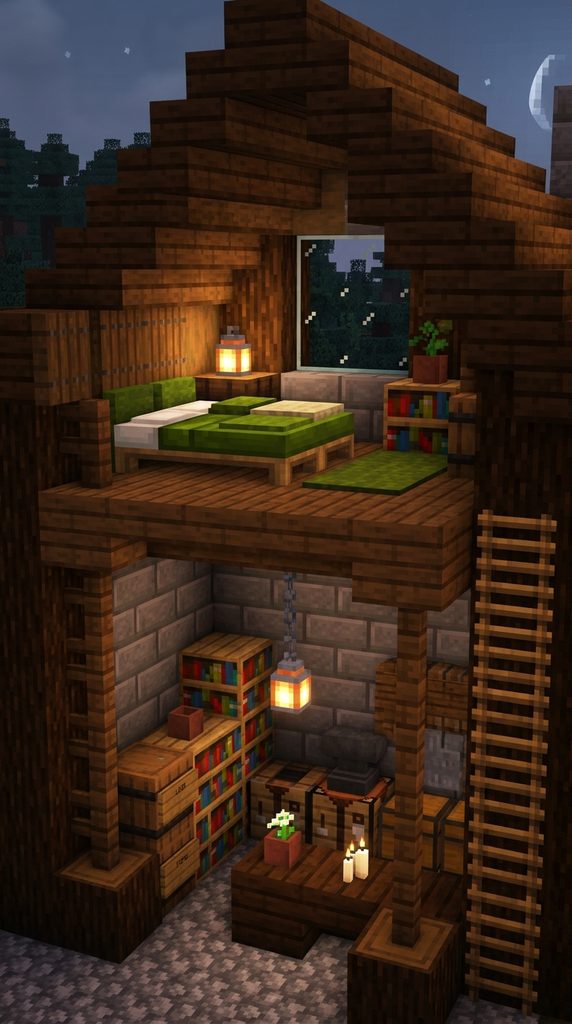
Rustic Mezzanine Sleeping Platform
Embrace cozy vertical living by elevating your sleeping quarters onto an airy wooden mezzanine tucked beneath sloping roof eaves. Furthermore, freeing up precious ground-floor space allows you to tuck workstations, armor stands, or brewing stations neatly underneath. Therefore, your compact cottage feels remarkably spacious while retaining the snug intimacy of an attic bedroom. In fact, framing the bed with stripped spruce posts and dark oak fences provides authentic post-and-beam architectural realism. Similarly, stringing warm lanterns and hanging ivy beneath the loft platform casts a dreamy, protective glow over the ground floor. You immediately maximize small footprints with clever, multi-tiered structural design.
Anchoring The Timber Loft Trusses
Moreover, using spruce slabs and open trapdoors creates a slender, lightweight platform that does not visually crowd low ceilings. In addition, climbing up to bed via a customized wooden ladder flanked by bookshelves adds delightful dark academia charm. Meanwhile, dressing the elevated bed with layered wool carpets, banner pillows, and bedside nightstands makes the loft deeply inviting. Therefore, resting beneath exposed roof beams feels like curling up in a secret treehouse aerie. Consequently, this loft arrangement remains an absolute favorite for cozy survival starter cabins.
Required Materials And Building Blocks
- Stripped spruce logs and spruce wood planks
- Spruce slabs, trapdoors, and wooden ladders
- Red or green bed of choice with matching wool carpets
- Bookshelves, oak barrels, and flower pots
- Lanterns and iron chains for hanging ambient lighting
Step-By-Step Construction Guide
- First, erect two vertical stripped spruce posts extending from floor to roof trusses.
- Next, span spruce slabs between the posts and back wall to form an elevated bed platform.
- In addition, install a wooden ladder along one support post for easy mezzanine access.
- Afterward, place a bed on the platform, topping the foot with wool carpet to mimic folded duvets.
- Finally, hang an iron lantern beneath the loft floor to illuminate the functional desk space below.
3. The Bay Window Cushioned Daybed
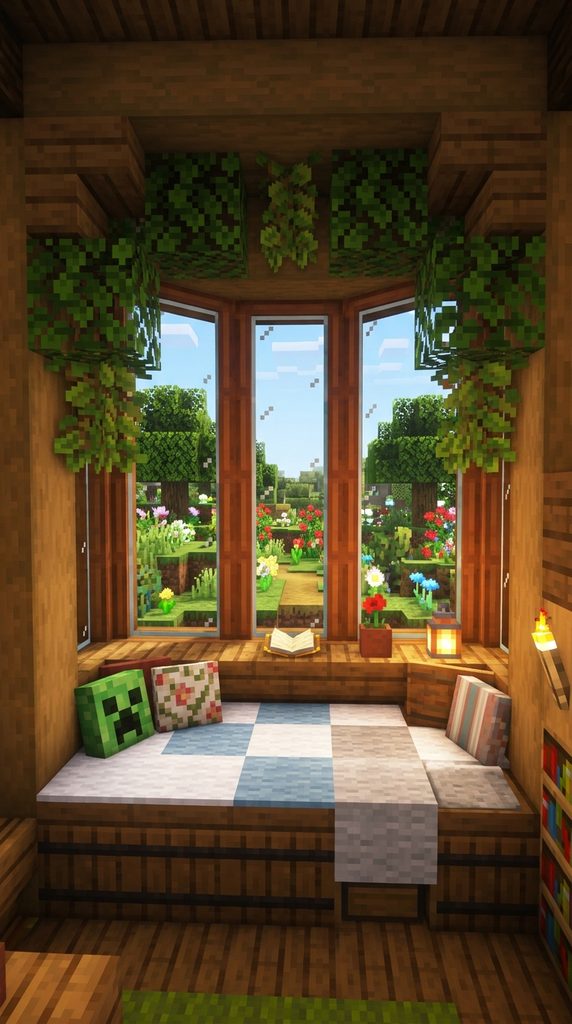
Scenic Reading Bench With Garden Views
Celebrate peaceful afternoon daydreams by building a deeply recessed window seat framed by multi-pane bay glass. Furthermore, soft natural sunlight streaming through glass panes illuminates a cushioned bench lined with colorful banner pillows. Consequently, your cottage gains an idyllic reading corner where you can watch outdoor crops grow and rain patter against glass. Additionally, tucking functional storage barrels beneath the bench cushions supplies discreet inventory space for spare gear. Indeed, window daybeds introduce timeless storybook romance into bedroom corners and library halls effortlessly. This design celebrates quiet pastoral moments with simple, accessible block combinations.
Framing The Protruding Bay Alcove
Moreover, pushing your cottage exterior wall outward by one block creates a natural, three-sided bay enclosure. In fact, framing the nook with stripped oak pillars and hanging leaf garlands softens the transition into the main room. Meanwhile, placing wall banners horizontally against the back wall before placing stair benches creates the illusion of plump throw pillows. Therefore, the daybed looks genuinely upholstered, plush, and ready for an afternoon nap with a book. As a result, this charming window vignette becomes the coziest photo spot in your entire house.
Required Materials And Building Blocks
- Glass panes and spruce trapdoors
- Spruce stairs, spruce slabs, and storage barrels
- Wool banners and matching carpets for cushions and pillows
- Oak leaves or flowering azalea leaves for indoor trailing vines
- Lanterns or candles for evening windowsill lighting
Step-By-Step Construction Guide
- First, bump an exterior wall outward by one block along a three-block-wide section.
- Next, install clear glass panes along all three sides to form an expansive panoramic bay window.
- In addition, place two storage barrels in the floor, capping them with upside-down spruce stairs for a bench.
- Afterward, place two wool banners behind the seating to serve as soft, angled decorative pillows.
- Finally, cover the wooden seat with soft carpet cushions and decorate side frames with leafy vines.
4. The Herbalist’s Apothecary Workbench
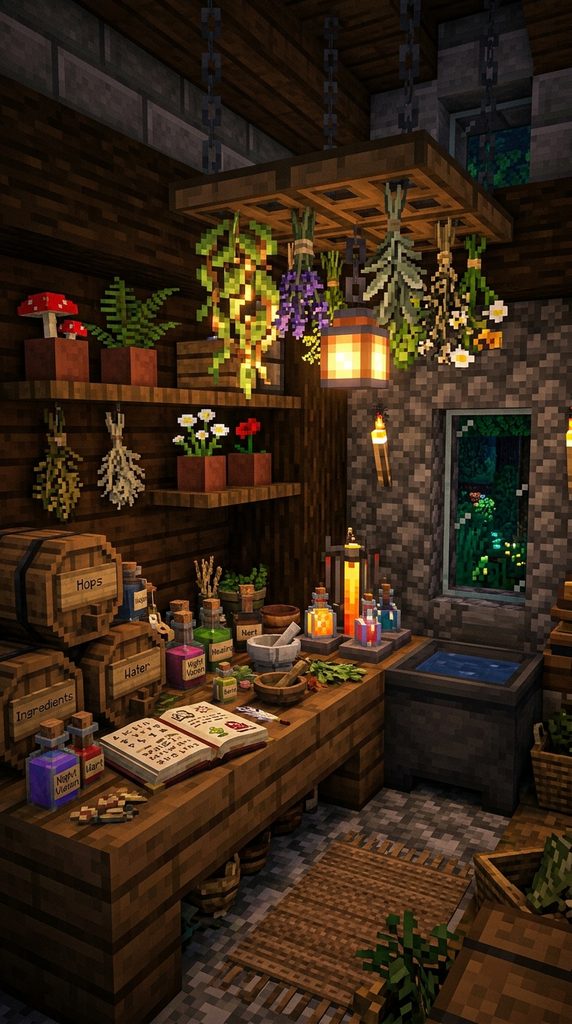
Witchy Potion Prep Table With Dried Flora
Step into the shoes of a village herbalist with a cluttered, atmospheric alchemy counter packed with botanical specimens. Furthermore, suspending dried lavender, wheat, and twisting vines from ceiling racks overhead introduces rich vertical texture. In contrast to sterile alchemy rooms, this botanical workbench looks like an authentic, centuries-old natural pharmacy. Therefore, your brewing station becomes an enchanting visual showcase that celebrates wilderness foraging and potion-making lore. As a result, preparing potions for survival adventures feels like performing authentic hedge-witch magic in a cozy kitchen. You infuse raw survival utility with rich, organic storytelling through creative block placement.
Dressing Shelves With Botanical Jars
Moreover, placing flower pots holding varied saplings, ferns, and mushrooms across wall shelves mimics preserved specimen jars. In fact, nesting a functional brewing stand between stacked oak barrels and cauldrons creates a seamless, built-in apothecary aesthetic. Meanwhile, using dark oak trapdoors as hanging drying racks suspended on chains catches ambient light beautifully. Therefore, the entire workstation radiates aromatic woodland charm and ancient alchemical wisdom. Consequently, this herbalist nook stands out as a breathtaking feature in cottage kitchens and wizard towers alike.
Required Materials And Building Blocks
- Brewing stand, cauldron, and water bucket
- Oak barrels, crafting table, and composters
- Dark oak trapdoors, iron chains, and spruce fences
- Flower pots, ferns, red mushrooms, and cornflowers
- Oak leaves, glow lichen, and hanging weeping vines
Step-By-Step Construction Guide
- First, build a three-block-long countertop using barrels, a crafting table, and a water cauldron.
- Next, place a functional brewing stand centered atop the counter, flanked by potted woodland herbs.
- In addition, suspend dark oak trapdoors from the ceiling above the bench using iron chains.
- Afterward, place flower pots and hanging vines along the suspended rack to simulate drying botanicals.
- Finally, tuck a glowing lantern behind the barrels to cast warm shadows across the potion bench.
5. The Grandfather Clock & Display Shelf
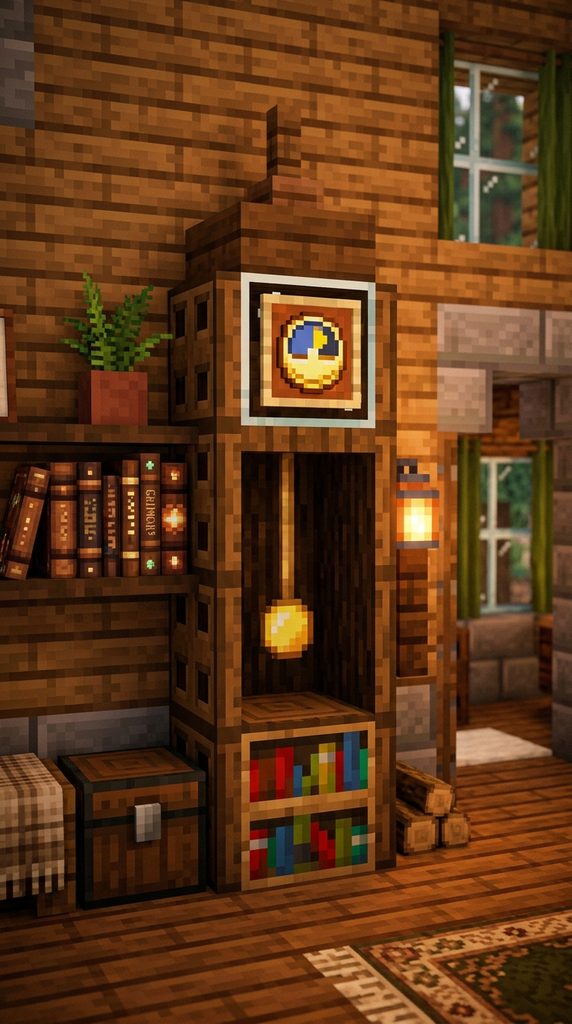
Tall Antique Pendulum Timepiece
Invoke nostalgic 19th-century parlor elegance by constructing a freestanding grandfather clock with a visible ticking pendulum. In addition, housing a functional game clock item inside an illuminated display case keeps real-time track of day and night cycles. Consequently, you always know when dusk is falling without having to step outside into dangerous monster territory. Furthermore, flanking the tall wooden clock case with narrow floating bookshelves creates a dignified, scholarly wall composition. Thus, this design commands intense admiration for its authentic antique engineering and compact footprint. It merges vintage horology with practical survival timekeeping seamlessly.
Engineering The Wooden Clock Casing
Moreover, using a combination of spruce trapdoors, a dark oak door, and a chiseled bookshelf forms a sturdy antique cabinet. First, mount an item frame containing an in-game clock on an upper wall block to serve as the illuminated face. Next, enclose the sides with folded spruce trapdoors, placing a hanging golden nugget or bell below for the pendulum. In addition, topping the clock with a carved spruce slab pediment provides authentic historical silhouette lines. Therefore, the stately timepiece looks like an expensive family heirloom passed down through generations. Consequently, this compact build adds instant aristocratic charm to bare cottage walls.
Required Materials And Building Blocks
- Dark oak door and spruce trapdoors
- In-game clock item and item frame
- Gold nugget, bell, or gold pressure plate for the pendulum
- Chiseled bookshelf or stripped spruce log for the clock base
- Spruce slab or stairs for the decorative crowning pediment
Step-By-Step Construction Guide
- First, place a chiseled bookshelf flat on the floor against your cottage wall for the clock plinth.
- Next, place an item frame directly above it on the wall, inserting an active game clock.
- In addition, place an open trapdoor or bell below the clock face to represent the swinging pendulum.
- Afterward, close spruce trapdoors along both outer sides to enclose the clockwork cabinet.
- Finally, cap the top of the clock with a dark oak door behind and a carved spruce slab on top.
6. The Rustic Kitchen Cooking Hearth & Range
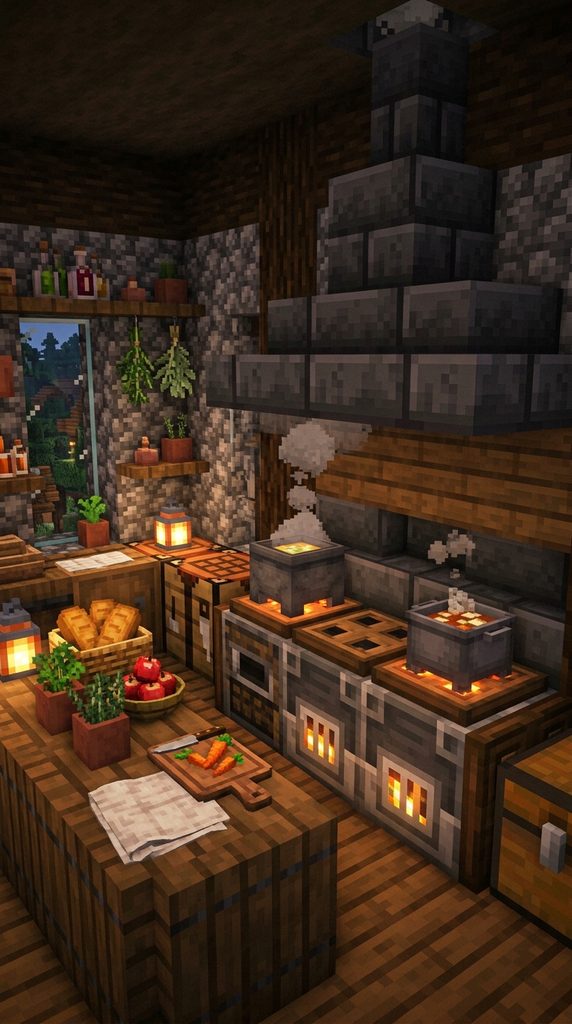
Farmhouse Cast-Iron Stove & Chimney Hood
Celebrate hearty farmhouse feasts by styling a multi-functional cooking range complete with a cast-iron stove and stone exhaust hood. In addition, integrating functional smokers and blast furnaces behind decorative trapdoors keeps cooking fast and efficient. Consequently, your cottage kitchen serves as an active, bustling culinary hub ready to roast meats and bake pies after farming. Furthermore, a wide stone chimney hood curving outward over the stove vents realistic smoke particles up through the ceiling. Thus, this design commands intense admiration for its authentic, cozy farmhouse practicality. It turns mundane food smelting into a heartwarming centerpiece of cottage life.
Styling The Cast-Iron Cooktop
Moreover, placing active campfires beneath polished deepslate or smokers allows gentle embers to flicker through iron grates. For instance, using heavy iron trapdoors as the stove burners provides authentic cast-iron stovetop realism. Meanwhile, flanking the stove with barrels, hanging pots, and display shelves holding bread and apples completes the feast atmosphere. Therefore, the kitchen looks actively used, fragrant, and bursting with domestic abundance. As a result, cooking survival rations becomes a joyful, roleplay-ready ritual in a charming farmhouse setting.
Required Materials And Building Blocks
- Smoker, campfire, and blast furnace
- Polished deepslate stairs and cobbled deepslate walls
- Iron trapdoors, heavy weighted pressure plates, and item frames
- Barrels, composters, and spruce shelves
- Raw meats, bread, apples, and cake for counter staging
Step-By-Step Construction Guide
- First, recess two smokers into the kitchen wall, placing extinguished campfires beneath for grates.
- Next, place iron trapdoors flat atop the smokers to simulate heavy cast-iron cooking burners.
- In addition, build an overhanging stone exhaust hood above the cooktop using polished deepslate stairs.
- Afterward, flank both sides of the range with wooden prep counters made of barrels and smooth stone slabs.
- Finally, place item frames on the wall holding pans and food ingredients, lighting an ambient candle.
7. The Cluttered Scholar’s Corner Desk
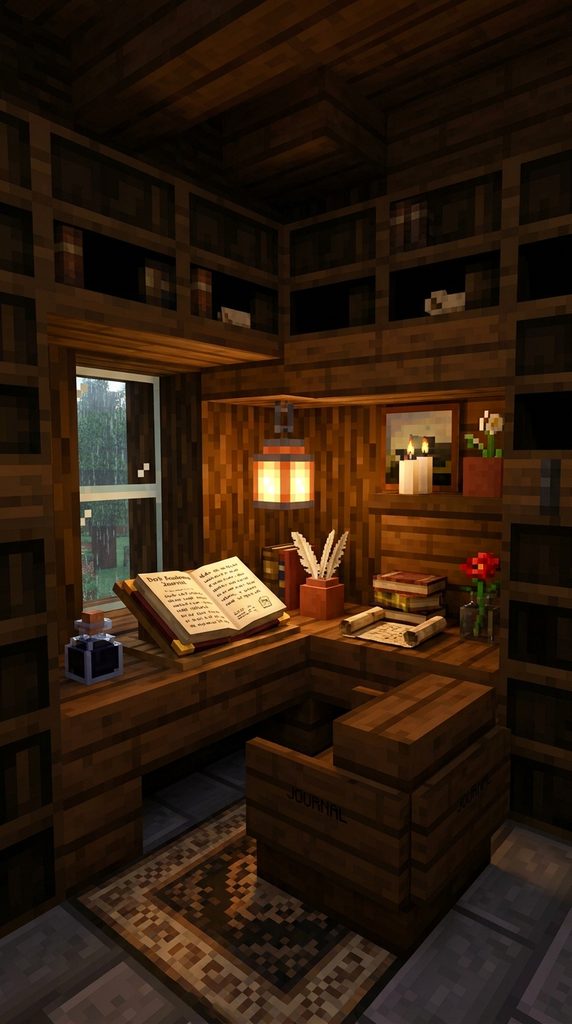
Dark Academia Study With Inkwell & Grimoire
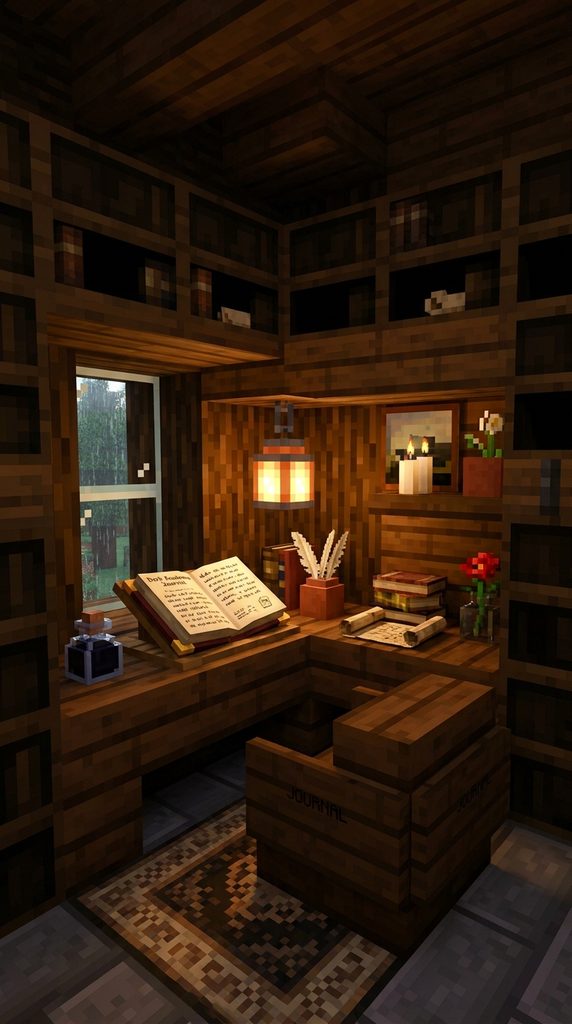
Step boldly into late-night academic research with a cozy, book-lined study desk tucked into a quiet cottage corner. In addition, surrounding a sturdy writing desk with towering bookshelves and stacked scrolls creates an immersive intellectual haven. Consequently, your cottage gains an inspiring study nook where enchanting preparations and map-making unfold naturally. Furthermore, using a decorative pot as an antique brush holder and a dragon breath bottle as an inkwell adds miniature storytelling. Thus, this design commands intense admiration from builders who cherish dark academia aesthetics. It merges scholarly mystery with practical map-making utility seamlessly.
Assembling The Detailed Writing Bureau
Furthermore, pairing upside-down spruce stairs with chiseled bookshelves creates an authentic roll-top writing bureau with drawers. For instance, placing a functional lectern holding a written book atop the desk lets you record server lore or coordinates. Meanwhile, an armor stand holding a leather tunic and scholar’s cap parked in an adjacent corner adds lived-in warmth. Therefore, the study looks like the private retreat of a wandering philosopher or village cartographer. Consequently, you master rich tabletop clutter that makes small rooms feel immensely deep and intriguing.
Required Materials And Building Blocks
- Spruce stairs, spruce slabs, and spruce trapdoors
- Chiseled bookshelves and classic bookshelves
- Lectern and writable book and quill
- Decorated pot, glass bottle, and flower pot for ink and quills
- Dark oak chair with sign armrests and a warm desk lantern
Step-By-Step Construction Guide
- First, build an L-shaped desk surface in the corner using two upside-down spruce stairs and a slab.
- Next, stack chiseled bookshelves along the adjacent wall to create floor-to-ceiling book storage.
- In addition, place an open lectern centered on the desk, inserting a written journal inside.
- Afterward, place a glass bottle and a flower pot on the counter to represent inkwells and quill jars.
- Finally, construct a cozy study chair using a wooden stair flanked by dark oak signs for armrests.
8. The Blossom-Canopy Vanity Table
Floral Dressing Nook With Ornate Mirror
Invoke charming fairytale vanity elegance by designing a delicate wooden dressing table nestled beneath blooming cherry blossoms. In addition, hanging a custom wall banner patterned with silver or gold gradients simulates a tall, ornate standing mirror. Consequently, your bedroom gains a touch of whimsical royal luxury that feels straight out of an enchanted forest palace. Furthermore, styling the vanity with miniature perfume flasks, jewelry boxes, and flower pots creates exquisite cosmetic clutter. Hence, builders adore this delicate, aesthetic accent for personal bedrooms and guest suites alike. It transforms simple corner walls into a glamorous, fairytale dressing station.
Designing The Custom Mirror Banner
Moreover, crafting a light-gray banner with a white gradient and dark border mimics antique reflective mirror glass with remarkable fidelity. In fact, framing the banner with folded birch trapdoors creates the illusion of an expensive, folding trifold dressing mirror. Meanwhile, placing a pink azalea blossom or cherry blossom leaves above the table lets soft pink petals drift gently through the air. Therefore, getting ready at your vanity feels like stepping into a romantic storybook illustration. As a result, this enchanting furniture piece brings unmatched pastel cottagecore sweetness to your interiors.
Required Materials And Building Blocks
- Stripped birch logs, birch stairs, and birch trapdoors
- Custom light-gray loom banner with white gradient and gray border
- Cherry leaves or flowering azalea leaves for canopy branches
- Glass bottles, decorated pots, and sea pickle for perfume flasks
- Smooth sandstone slab or smooth quartz for vanity tabletops
Step-By-Step Construction Guide
- First, place two stripped birch logs two blocks apart, spanning a smooth quartz slab across the top.
- Next, hang a custom gradient mirror banner on the wall centered directly above the dressing table.
- In addition, place birch trapdoors on either side of the banner, folding them inward like mirror wings.
- Afterward, decorate the vanity tabletop with glass bottles, candles, and a potted pink orchid.
- Finally, hang flowering cherry leaves from the ceiling overhead to shower the table in soft floral petals.
9. The Cottagecore Mudroom & Coat Rack
Welcoming Entryway Bench With Peg Hooks
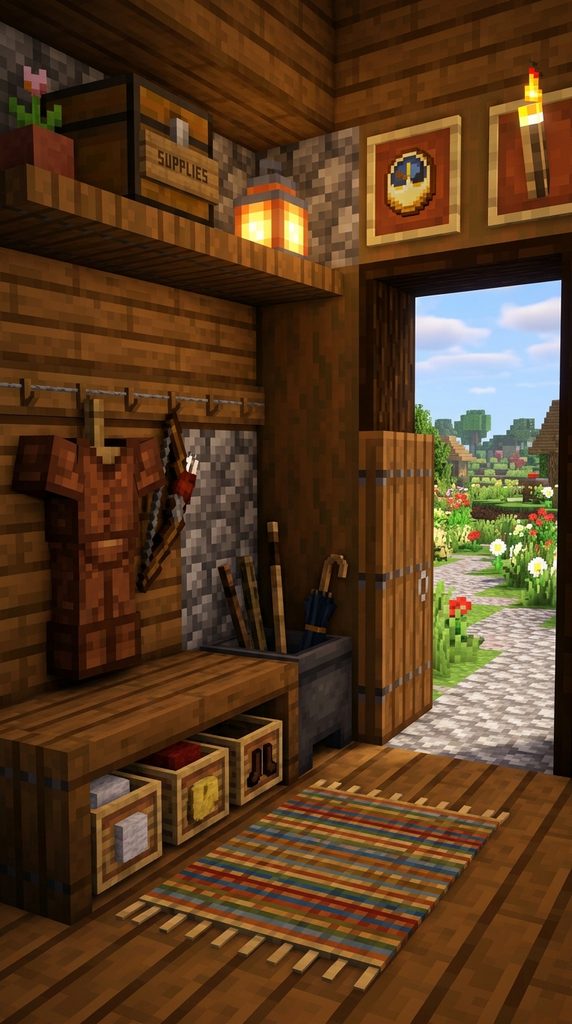
Welcome weary travelers returning from stormy journeys with a tidy, functional mudroom bench positioned beside the front door. Furthermore, providing a dedicated space to hang wet cloaks, store muddy boots, and stash umbrellas sets a hospitable domestic tone. Consequently, crossing your cottage threshold feels immediately grounded, comforting, and authentic to everyday country living. Additionally, tucking shoe-storage compartments beneath a sturdy wooden bench keeps clutter organized right at the entrance. Thus, this design commands intense admiration for its practical realism and welcoming entryway charm. You turn empty front foyers into cozy, functional transitional spaces effortlessly.
Crafting Built-In Peg Hooks And Shelving
Moreover, placing tripwire hooks or lever handles along an upper wooden runner creates authentic wall pegs for hanging gear. First, mount armor stands inside narrow wall alcoves to display leather armor sets as hanging coats and hats. Next, place cauldrons filled with water or composters beneath the bench to serve as umbrella stands and boot-scrapers. In addition, an overhead shelf made of spruce trapdoors holds storage chests and travel packs. Therefore, the entryway looks actively used by an intrepid explorer returning home from the wild. Consequently, your cottage entrance makes an unforgettable, cozy first impression on every guest.
Required Materials And Building Blocks
- Spruce stairs, slabs, and spruce trapdoors
- Tripwire hooks or levers for hanging coat pegs
- Armor stand with dyed leather armor tunic and cap
- Cauldron and composters for boot and umbrella bins
- Small chest or barrel for travel storage
Step-By-Step Construction Guide
- First, build a two-block-wide wooden bench beside your front door using spruce stairs and slabs.
- Next, place an armor stand wearing a brown leather tunic inside a shallow wall recess above the bench.
- In addition, mount two tripwire hooks along the wall runner beside the coat to act as hanging hooks.
- Afterward, place a metal cauldron beside the bench to represent a rustic umbrella and walking-stick stand.
- Finally, install an upper shelf using spruce trapdoors, decorating with a travel chest and lantern.
10. The Cozy Dining Nook & Hutch
Corner Breakfast Banquette With Crockery Cabinet
Celebrate leisurely morning breakfasts with an intimate corner dining banquette paired with a tall, glass-front china hutch. In addition, wraparound L-shaped booth seating maximizes seating capacity in tight dining rooms without cluttering floor pathways. Consequently, your cottage kitchen gains a charming dining space ready for hearty survival meals and celebratory feasts. Furthermore, building a tall display hutch packed with colorful ceramic pots, plates, and cakes evokes traditional European farmhouse dining. Thus, this design commands intense popularity among players who value cozy culinary roleplay. You bring the heartwarming charm of country bed-and-breakfasts into your home seamlessly.
Detailing The Farmhouse Crockery Hutch
Furthermore, combining chiseled bookshelves, barrels, and glass panes builds an authentic antique dish cabinet. For instance, using birch trapdoors as cabinet doors allows decorative pottery and tea sets to peer through with vintage charm. Meanwhile, centering a sturdy wooden dining table topped with heavy iron pressure plates mimics rustic ceramic dinner chargers. Therefore, the entire dining nook radiates hospitable abundance, ready to host a full party of hungry adventurers. As a result, gathering around this breakfast table becomes a cherished daily routine after grueling survival tasks.
Required Materials And Building Blocks
- Spruce stairs and slabs for corner banquette seating
- Oak fences and dark oak pressure plates for the dining table
- Chiseled bookshelves, barrels, and glass panes for the hutch
- Decorated pots, flower pots, and ceramic mugs
- Cake, bread, and pumpkin pies for festive table staging
Step-By-Step Construction Guide
- First, build an L-shaped corner bench using upside-down spruce stairs facing into the dining room.
- Next, erect a dining table in front of the bench using two oak fences topped with dark oak slabs.
- In addition, construct a vertical china hutch on the adjoining wall using chiseled bookshelves and glass.
- Afterward, stage the tabletop with heavy pressure-plate chargers, a fresh cake, and ceramic flower-pot mugs.
- Finally, hang an iron chandelier or paper lantern low over the table to cast intimate dining light.
11. The Window Greenery & Planter Boxes
Indoor Living Sill With Trailing Flora
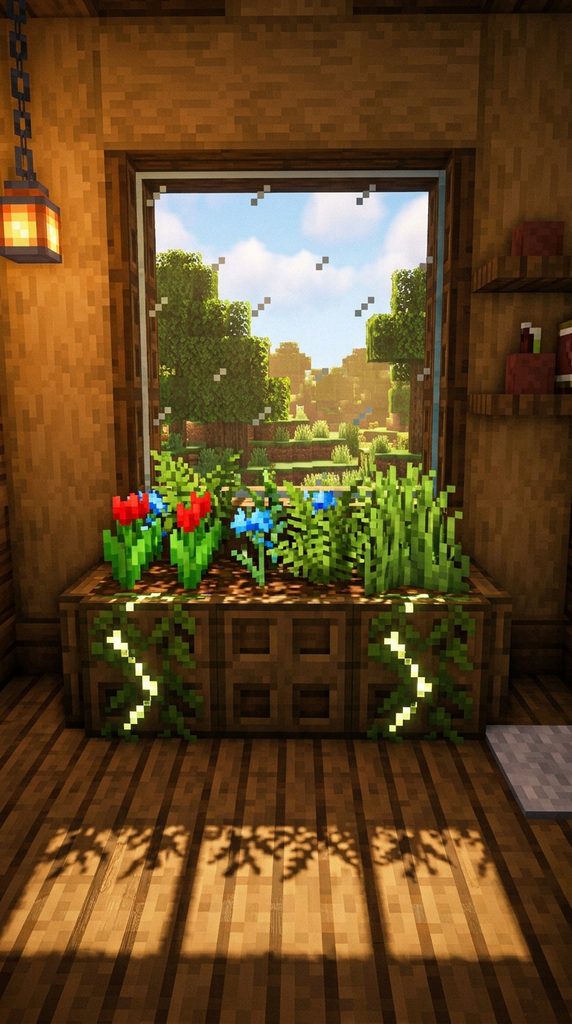
Bring the vibrant beauty of lush outdoor gardens directly indoors by framing cottage windows with thriving planter boxes. Furthermore, integrating blooming flowers, leafy ferns, and trailing vines along indoor sills softens rigid masonry walls with living botanical color. Consequently, natural window light filters through delicate foliage, casting dancing leaf shadows across wooden floorboards. Additionally, tucking hidden water sources behind spruce trapdoors lets you plant real agricultural crops right inside your living room. Hence, nature-loving builders cherish this fresh, oxygen-rich aesthetic for sunny kitchens and bedroom sills alike. It transforms plain glass windows into vibrant living garden portals.
Constructing Concealed Trapdoor Troughs
Moreover, folding spruce or dark oak trapdoors around grass or moss blocks creates a clean, built-in wooden planter trough. In fact, planting red poppies, cornflowers, and delicate ferns inside the trough mimics a flourishing indoor garden. Meanwhile, allowing weeping vines or glow lichen to trail down the front of the wooden boxes introduces rich vertical depth. Therefore, the windows look integrated with surrounding landscape gardens, creating a seamless nature retreat. Consequently, your cottage interior feels remarkably alive, fragrant, and bursting with botanical freshness.
Required Materials And Building Blocks
- Grass blocks, moss blocks, or podzol for planting soil
- Spruce trapdoors, birch trapdoors, and oak leaves
- Flowering azalea, ferns, and assorted colorful wildflowers
- Glow lichen or weeping vines for trailing foliage
- Glass panes and water bucket for hidden crop irrigation
Step-By-Step Construction Guide
- First, place a row of three grass blocks directly beneath an interior window sill.
- Next, surround the exposed dirt sides with spruce trapdoors, clicking them shut to form a neat box.
- In addition, plant a vibrant mix of ferns, red tulips, and cornflowers directly into the grass soil.
- Afterward, place trailing glow lichen along the wooden box face to simulate creeping moss.
- Finally, install clear glass panes in the window above, letting bright sunlight wash over the indoor flora.
12. The Bunk Bed & Storage Staircase
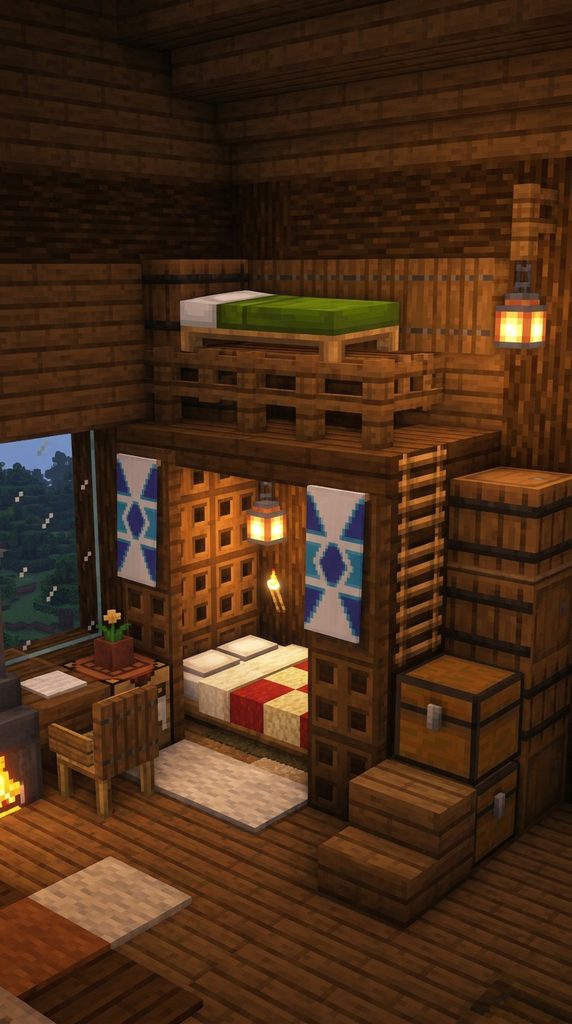
Clever Twin Sleeper With Integrated Drawers
Maximize every single block of vertical space in tight shared bedrooms by building a rustic twin bunk bed accessed via storage stairs. In addition, turning the hollow structural steps into functional storage drawers provides abundant chest space without eating floor room. Therefore, this ingenious design allows two players to share a cozy, fully functional bedroom while keeping gear impeccably organized. Furthermore, hanging cozy curtains and privacy screens around the lower bunk creates an intimate, bed-cave retreat. Thus, this design commands intense admiration for its smart architectural engineering and space-saving brilliance. It proves that compact survival quarters can be both exceptionally organized and deeply charming.
Engineering The Stepped Storage Risers
Moreover, alternating storage barrels and chests with upside-down spruce stairs creates a sturdy, climbable staircase packed with inventory slots. First, build the lower bunk flat on the floor, framing the sides with spruce trapdoors for a cozy, enclosed cabin feel. Next, span an upper bunk platform overhead using wooden slabs, adding safety fence railings to prevent nighttime falls. In addition, stacking chests seamlessly into the stair risers makes organizing weapons, tools, and farming loot effortless. Consequently, this bunk bed configuration represents the pinnacle of intelligent, space-saving survival cottage design.
Required Materials And Building Blocks
- Red or white beds (two total)
- Spruce slabs, spruce stairs, and spruce trapdoors
- Storage barrels and wooden chests for integrated drawers
- Oak fences for upper safety guardrails
- Colored banners to serve as hanging privacy curtains
Step-By-Step Construction Guide
- First, place a bed flat on the floor against a bedroom wall, enclosing head and foot with trapdoors.
- Next, build a raised wooden platform four blocks high directly above the lower bed using spruce slabs.
- In addition, place the second bed atop the platform, securing the open outer edge with oak fences.
- Afterward, build a stepped access staircase beside the beds, using barrels and chests for the risers.
- Finally, hang fabric banners along the lower bunk frame to create an intimate curtained sleeping nook.
13. The Rustic Loom & Tailor’s Loom Nook
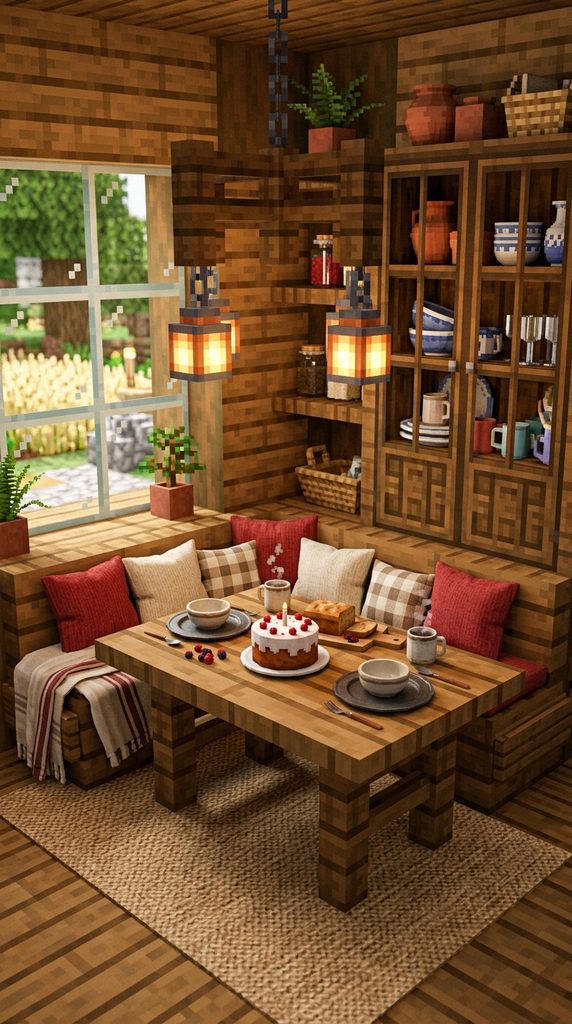
Crafting Alcove With Spools & Fabric Rolls
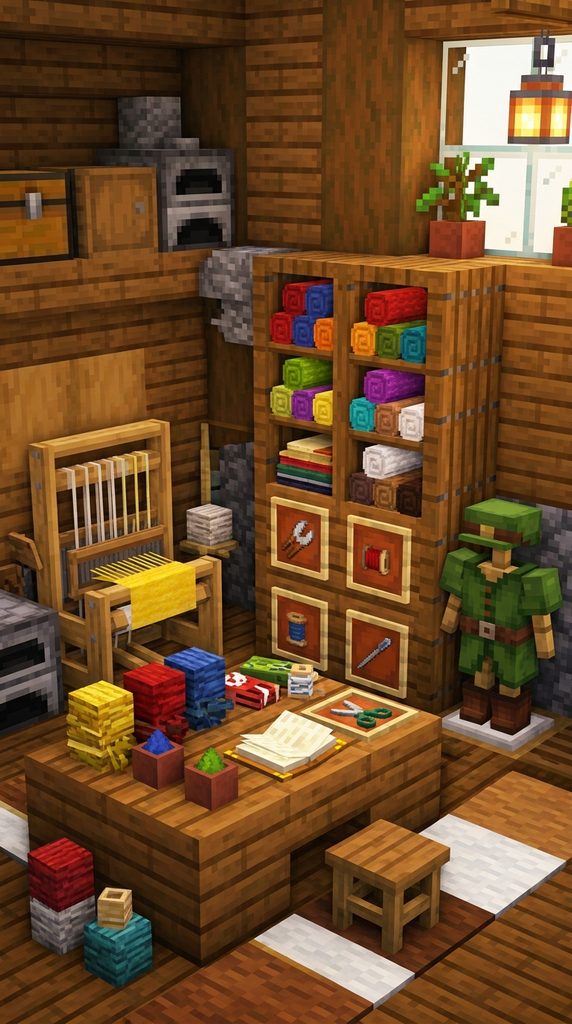
Celebrate traditional textile crafts by dedicating a cozy corner to an authentic tailoring studio and weaving loom. In addition, pairing a functional crafting loom with stacked colorful wool blocks mimics rolls of freshly woven tweed and linen. Consequently, your cottage interior gains a creative, artisan workshop atmosphere that honors timeless folk crafting traditions. Furthermore, hanging decorative banners, scissors, and string from nearby wall racks supplies delightful trade-specific clutter. Thus, this design commands immense artistic admiration for its unique thematic storytelling and vibrant textile colors. You turn simple survival banner-making into a rich, immersive domestic craft.
Stacking Colorful Fabric Bolts
Moreover, arranging vibrant wool blocks, terracotta, and carpets into vertical shelving compartments mimics an authentic haberdashery store. For instance, using shears inside an item frame on the wall suggests an active tailor hard at work cutting patterns. Meanwhile, placing an armor stand wearing dyed leather garments nearby showcases your character’s latest bespoke clothing designs. Therefore, the tailoring nook feels industrious, creative, and brimming with rich artisanal personality. As a result, crafting custom banners and leather gear becomes an inspiring, artistic experience in your survival home.
Required Materials And Building Blocks
- Functional loom and crafting table
- Assorted colored wool blocks and matching carpets
- Shears and string inside item frames
- Armor stand with customized dyed leather armor
- Bookshelves, oak barrels, and spruce display shelves
Step-By-Step Construction Guide
- First, place a functional loom block beside a wooden crafting table in a well-lit workshop corner.
- Next, build an open vertical shelving unit against the wall using spruce trapdoors and slabs.
- In addition, stack assorted wool blocks inside the shelves to represent bolts of woven fabric.
- Afterward, mount an item frame on the wall holding shears to serve as tailor’s fabric scissors.
- Finally, position an armor stand nearby displaying a beautifully dyed green and brown leather traveling coat.
14. The Indoor Firewood Woodbox & Kindling Shelf
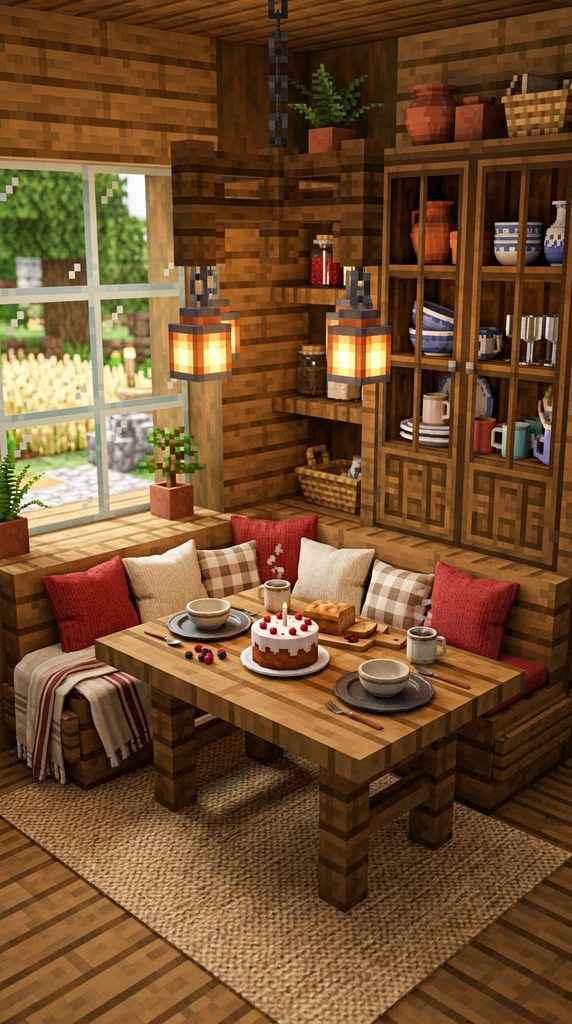
Rustic Hearthside Timber Storage Bay
Ensure your cottage hearth stays roaring through blizzards by building an authentic, built-in firewood woodbox packed with split logs. In addition, exposing the rough bark textures of varied wooden logs introduces rugged, outdoorsy character into refined living rooms. Consequently, the hearthside area feels well-prepared, cozy, and deeply grounded in self-sufficient frontier survival. Furthermore, storing an iron axe and kindling sticks in wall mounts nearby adds functional storytelling that captivates visitors. Hence, builders adore this simple, high-impact detailing trick for filling awkward empty spaces beside fireplaces. It transforms mundane log blocks into a convincing, essential domestic fuel store.
Layering Split Timber Textures
Moreover, alternating stripped spruce logs, dark oak logs, and raw oak logs horizontally mimics stacked cords of firewood. In fact, enclosing the woodpile inside a sturdy stone-brick or spruce-trapdoor alcove keeps the stacking neat and tidy. Meanwhile, placing a campfire beneath a stone floor slab nearby lets gentle embers crackle beside the timber store. Therefore, the woodbox looks ready to fuel the roaring fireplace through the coldest autumn nights. Consequently, this rustic hearthside vignette makes any living room feel ten times warmer and more grounded.
Required Materials And Building Blocks
- Stripped spruce logs, dark oak logs, and regular oak logs
- Spruce trapdoors or stone bricks for alcove framing
- Item frames with iron axe and wooden sticks for kindling
- Flower pots and dead bushes for decorative twig bundles
- Lantern or wall torch for warm hearthside illumination
Step-By-Step Construction Guide
- First, carve a two-block-wide, two-block-deep alcove into the wall beside your living room fireplace.
- Next, line the outer perimeter of the alcove with folded spruce trapdoors to create a timber crib.
- In addition, stack varied wood logs horizontally inside the nook, alternating bark and stripped faces.
- Afterward, mount an item frame on the side wall holding an iron woodchopping axe.
- Finally, place a flower pot containing a dead bush on an adjacent shelf to simulate dried kindling twigs.
15. The Cozy Reading Nook & Cat Perch
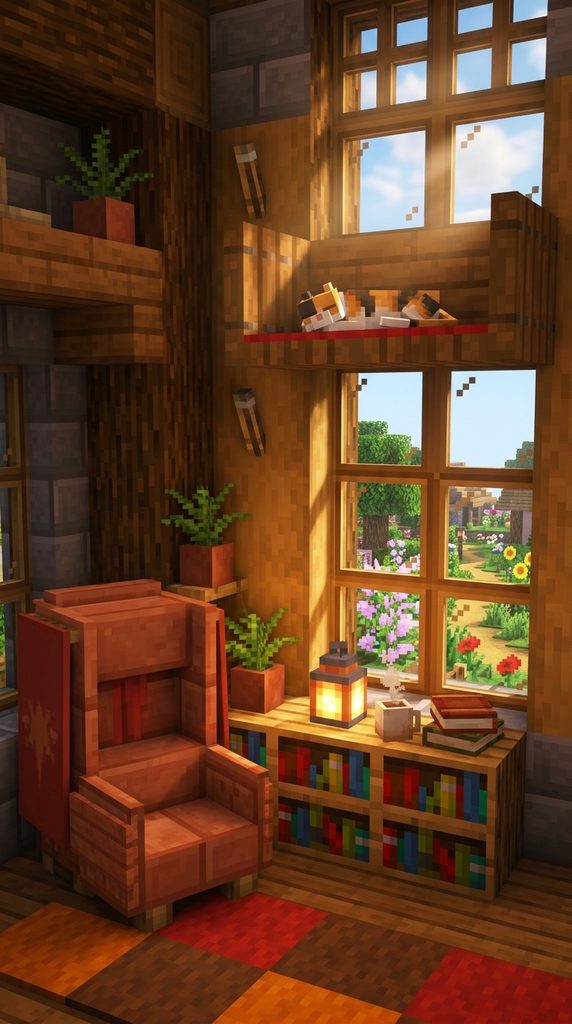
Velvet Armchair With Feline Sleeping Shelf
Celebrate the supreme joy of quiet rainy afternoons with an oversized wingback reading armchair and a dedicated sleeping perch for your pet cat. Furthermore, placing a soft wool armchair beside a low bookshelf creates the dreamiest spot to curl up with in-game storybooks. Consequently, your cottage interior gains an irresistible, peaceful sanctuary that celebrates quiet companionship and slow-paced living. Additionally, elevating a carpeted wooden shelf beside the window allows your tamed cat to nap comfortably in the afternoon sun. Thus, this heartwarming design commands immense love from pet owners and cozy gamers alike. It turns simple voxel blocks into the ultimate haven of domestic happiness and feline comfort.
Structuring The Wingback Armchair
Moreover, placing a smooth quartz or red sandstone stair flanked by matching wall banners creates an elegant, high-backed armchair. In fact, placing an item frame holding a book on a side table topped with a steaming mug creates a delightful tableau. Meanwhile, installing an elevated spruce slab perch above the radiator or fireplace gives your pet cat a warm, safe bed. Therefore, the room looks completely lived-in, loved, and filled with gentle domestic warmth. As a result, returning home to find your cat purring beside your favorite reading chair becomes the sweetest reward in your Minecraft world.
Required Materials And Building Blocks
- Red sandstone stairs or smooth quartz stairs for the armchair
- Matching colored banners for high wingback armrests
- Bookshelves, chiseled bookshelves, and lectern
- Spruce slab and carpet for an elevated cat sleeping shelf
- Flower pot mug and lantern for bedside reading light
Step-By-Step Construction Guide
- First, position a comfortable armchair in a sunny corner using a stair block flanked by matching banners.
- Next, place an end table beside the chair using an upside-down stair topped with a lantern and flower pot.
- In addition, stack bookshelves along the adjacent wall to keep plenty of reading material within arm’s reach.
- Afterward, mount an elevated spruce slab on the wall beside the window, topping it with a soft red carpet.
- Finally, lead your tamed calico cat to the perch, letting it sit down to nap peacefully in the sunbeams.