
Easter is a season of vibrant colors, creativity, and joyful traditions, and one of the most iconic activities associated with this holiday is decorating eggs. While children often engage in simple painting or dyeing, adult Easter egg decorating opens up a world of intricate, sophisticated, and artistic possibilities. This guide is designed for adults who want to elevate their Easter celebrations with beautifully crafted eggs that can double as home décor, gifts, or even conversation-starting table centerpieces. With careful attention to trends, techniques, and Pinterest-worthy designs, decorating Easter eggs as an adult is both a relaxing and rewarding craft.

Unlike traditional children’s egg-decorating activities, adult-focused techniques often involve advanced methods such as decoupage, metallic foiling, intricate patterns with markers or acrylic paints, and even natural dyeing methods using plants, spices, and coffee. Each method allows for endless customization, whether you prefer a minimalist modern aesthetic, vintage charm, rustic farmhouse feel, or luxurious, gold-accented eggs. The beauty of these techniques is that they are beginner-friendly yet offer room to experiment, making them perfect for both first-time adult decorators and experienced crafters looking to expand their skills.
Creating stunning Easter eggs also allows adults to explore the meditative and mindful aspects of crafting. From carefully selecting color palettes to delicately applying decals or patterns, the process encourages patience, focus, and artistic expression. The eggs themselves become miniature canvases, letting your personality, style, and taste shine through in a seasonal craft that’s both fun and functional. Many of these creations are not only visually pleasing but also highly shareable on platforms like Pinterest, where intricate, modern, and aesthetically cohesive designs gain traction and inspire others.
Another advantage of adult-focused Easter egg decoration is the ability to combine materials and techniques that go beyond traditional painting. From using marbling inks and metallic leaf to experimenting with lace, glitter, or natural elements, adult crafters can achieve a truly unique and sophisticated look. Additionally, this type of project encourages upcycling and using household items creatively, such as tea bags for subtle dye patterns or leftover ribbon and string for elegant wrapping effects.
Whether you plan to display your decorated eggs in a stylish Easter basket, incorporate them into your seasonal table décor, or give them as gifts to friends and family, these projects can transform your holiday experience. You’ll not only create a stunning visual impact but also enjoy a sense of accomplishment that comes from hands-on crafting. The following 20 Easter egg decoration ideas are carefully curated to cover a wide range of styles, techniques, and skill levels. Each idea includes a clear definition, step-by-step instructions, and a materials list to ensure success. You’ll find options for minimalist designs, colorful and bold patterns, sophisticated metallics, natural dyes, decoupage, and more.
This article is structured for maximum inspiration and usability, making it easy to pick a project based on your style and available materials. Each section is Pinterest-optimized, meaning the ideas are visually striking, save-worthy, and highly shareable. You can recreate these designs at home with everyday materials, but with a professional touch that elevates your Easter décor. By the end of this guide, you’ll be equipped with techniques and inspiration to create a cohesive and stylish Easter egg display that reflects your creativity and personal aesthetic. Whether you’re hosting a brunch, decorating a cozy corner, or crafting a meaningful gift, these ideas provide the perfect starting point for a memorable, artistic Easter celebration.
Now let’s dive into the first 10 creative and sophisticated Easter egg decoration ideas designed specifically for adults.
1. Marbleized Metallic Eggs
Introduction
Marbleized metallic eggs combine elegance with a modern twist, giving your Easter décor a chic and luxurious feel. This technique uses a combination of swirling paint and metallic accents to mimic natural stone patterns like marble or onyx, making each egg a unique piece of art. It’s a sophisticated project ideal for adults who enjoy contemporary home décor aesthetics. Perfect for table centerpieces or display bowls, marbleized metallic eggs are a standout addition to any Easter setup.

How-to Steps
- Begin with cleaned, hard-boiled or blown-out eggs.
- Fill a shallow bowl with room-temperature water.
- Drop a few shades of metallic acrylic paint into the water, layering them gently.
- Use a toothpick or skewer to swirl the paint to create marble-like patterns.
- Dip each egg gently into the water, rolling it to capture the pattern.
- Remove carefully and place on a drying rack.
- Once dry, seal with a clear varnish for shine and durability.
Materials Needed
- Hard-boiled or blown-out eggs
- Metallic acrylic paints (gold, silver, bronze)
- Shallow bowls
- Toothpick or skewer
- Clear varnish or sealer
- Gloves and paper towels
2. Botanical Pressed Eggs
Introduction
Pressed botanical eggs offer a natural, organic aesthetic by incorporating tiny flowers, leaves, or petals onto the egg’s surface. This delicate design is perfect for adults who love nature-inspired crafts and a soft, romantic look. The technique emphasizes detail and precision, creating eggs that resemble miniature works of art, suitable for elegant tablescapes or framed displays.

How-to Steps
- Gather small pressed flowers or leaves.
- Lightly brush the egg with craft glue or Mod Podge.
- Carefully place the pressed botanical elements onto the egg.
- Smooth gently with a soft brush or fingertip.
- Seal with multiple thin layers of clear varnish, allowing each layer to dry.
- Optional: add subtle metallic accents with gold paint for a refined finish.
Materials Needed
- Hard-boiled or blown-out eggs
- Pressed flowers or small leaves
- Mod Podge or craft glue
- Small brush
- Clear varnish or sealer
3. Hand-Painted Minimalist Patterns
Introduction
Minimalist hand-painted patterns are ideal for adults seeking simplicity and elegance in their Easter egg designs. This style focuses on clean lines, geometric shapes, and neutral color palettes, allowing you to create modern, Pinterest-worthy eggs without overwhelming complexity. Minimalist designs are versatile and can easily complement other seasonal décor.

How-to Steps
- Choose a base color and paint the egg completely. Allow it to dry.
- Using fine-tip brushes, draw geometric shapes, lines, or dots.
- Maintain symmetry and balance for a cohesive look.
- Allow designs to dry fully.
- Seal with clear varnish for longevity and shine.
Materials Needed
- Hard-boiled or blown-out eggs
- Acrylic paints in neutral shades
- Fine-tip paintbrushes
- Clear varnish or sealer
4. Glitter Ombre Eggs
Introduction
Glitter ombre eggs bring sparkle and glamour to your Easter celebrations. By blending shades of glitter from light to dark, these eggs create a visually striking gradient effect. This project is excellent for adults who enjoy a touch of luxury and festive shimmer, perfect for display in a stylish basket or centerpiece.

How-to Steps
- Paint the egg with a base color that complements the glitter.
- Apply a thin layer of glue to the bottom half of the egg.
- Sprinkle glitter over the glued area, gradually decreasing coverage toward the top for an ombre effect.
- Allow to dry completely.
- Repeat with additional layers for more intensity if desired.
- Seal lightly with clear varnish to prevent glitter fallout.
Materials Needed
- Hard-boiled or blown-out eggs
- Acrylic paint
- Glitter in various shades
- Craft glue
- Clear varnish
5. Gold Leaf Accented Eggs
Introduction
Gold leaf accents transform ordinary eggs into luxurious, statement-making pieces. This technique involves carefully applying delicate sheets of gold leaf to eggs, resulting in a high-end, modern aesthetic perfect for adults. The process emphasizes precision and patience, and the finished eggs can elevate any Easter décor with sophistication and shine.

How-to Steps
- Paint eggs with a base color of your choice.
- Apply adhesive or gilding glue in desired areas.
- Carefully place gold leaf sheets on the glued areas.
- Smooth gently with a soft brush.
- Seal with a clear varnish to protect the delicate gold leaf.
Materials Needed
- Hard-boiled or blown-out eggs
- Acrylic paint for base
- Gold leaf sheets
- Gilding adhesive
- Soft brush
- Clear varnish
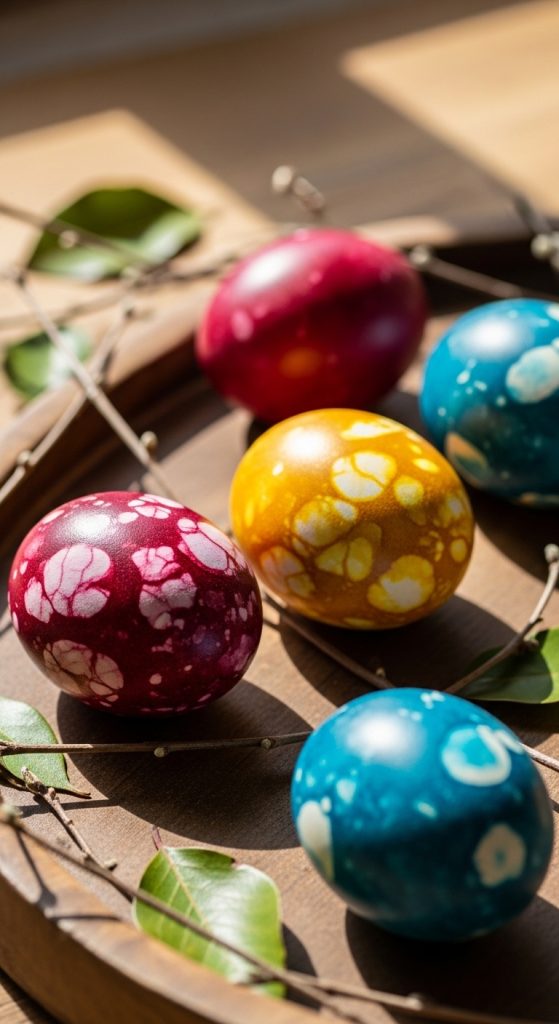
6. Marbled Natural Dye Eggs
Introduction
Marbled natural dye eggs provide a sophisticated and eco-friendly approach to Easter decorating. Using ingredients like turmeric, red cabbage, or beet juice, you can create earthy tones and subtle marbling effects on your eggs. This method is ideal for adults who enjoy sustainable crafting and natural aesthetics, producing unique eggs with organic textures and colors.
How-to Steps
- Prepare natural dye baths using turmeric, red cabbage, or beet juice.
- Add vinegar to each dye bath to enhance color adherence.
- Dip eggs partially or fully to create layered shades.
- For marbling, add a few drops of oil or swirl gently while dyeing.
- Remove eggs and allow to dry completely.
- Optional: seal with clear varnish for a polished finish.
Materials Needed
- Hard-boiled or blown-out eggs
- Turmeric, red cabbage, beet juice (or other natural dyes)
- Vinegar
- Shallow bowls
- Cooking oil (for marbling effect)
- Clear varnish
7. Chalkboard Painted Eggs
Introduction
Chalkboard painted eggs offer a playful yet sophisticated way to decorate for Easter. By using chalkboard paint, you create a writable surface on your eggs, allowing you to customize them with messages, doodles, or geometric designs. This technique is perfect for adults who enjoy interactive and versatile décor that can be personalized for guests or family.

How-to Steps
- Paint eggs with chalkboard paint and let dry.
- Use chalk or chalk markers to write or draw designs.
- Optional: apply a thin coat of sealant if you want the designs to last longer.
- Display in a basket, centerpiece, or as place settings.
Materials Needed
- Hard-boiled or blown-out eggs
- Chalkboard paint
- Chalk or chalk markers
- Small brush
- Optional: clear sealer
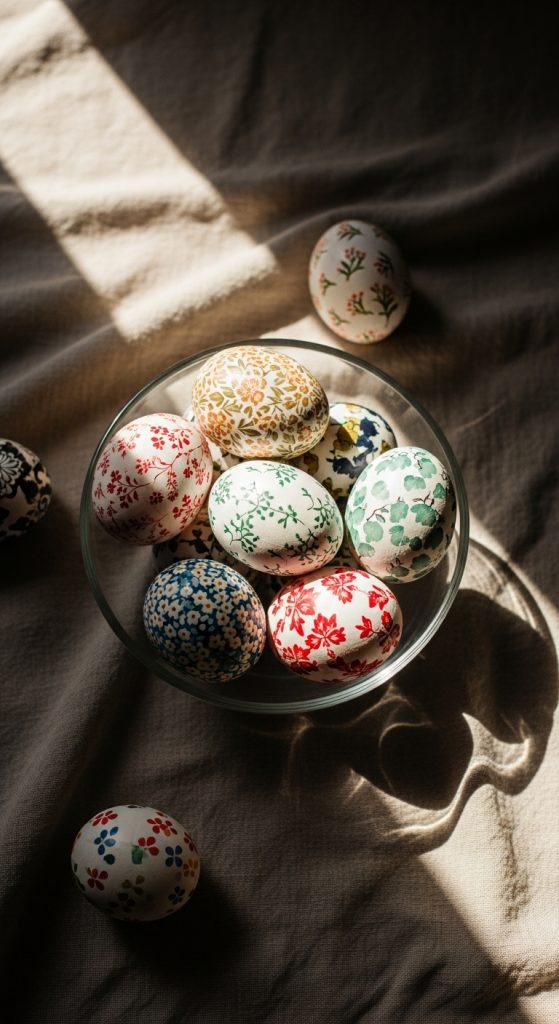
8. Decoupage Patterned Eggs
Introduction
Decoupage allows adults to apply intricate patterns or prints onto eggs using decorative paper, creating a professional-looking design with minimal artistic skill. From floral prints to abstract patterns, decoupage transforms eggs into sophisticated, gallery-worthy pieces suitable for modern or vintage-inspired Easter décor.
How-to Steps
- Cut decorative paper into small shapes.
- Apply a thin layer of Mod Podge to the egg.
- Carefully place paper shapes onto the egg, smoothing out bubbles.
- Apply additional Mod Podge over the top to seal.
- Allow to dry fully and display.
Materials Needed
- Hard-boiled or blown-out eggs
- Mod Podge or craft glue
- Decorative paper or napkins
- Small brush
9. Speckled Watercolor Eggs
Introduction x
Speckled watercolor eggs give a soft, artistic touch to Easter décor. By combining watercolor paints with a flicking technique, you can achieve a delicate, speckled effect that feels handmade and unique. This style is ideal for adults who appreciate subtle, elegant designs and want a more painterly aesthetic.

How-to Steps
- Paint eggs with a soft watercolor base using diluted acrylics or watercolor paints.
- Dip a stiff brush into a darker shade and flick paint gently over the egg to create speckles.
- Allow to dry fully.
- Optional: seal with clear varnish for longevity.
Materials Needed
- Hard-boiled or blown-out eggs
- Watercolor or diluted acrylic paints
- Stiff brush
- Paper towels
- Clear varnish
10. Ribbon-Wrapped Eggs
Introduction
Ribbon-wrapped eggs offer a sophisticated, textile-inspired approach to Easter décor. By carefully wrapping eggs with ribbons, you can create patterns, textures, and even layered designs that add depth and elegance. This technique is perfect for adults seeking a tactile and stylish decoration that can complement table settings, baskets, or gift packages.

How-to Steps
- Select coordinating ribbons in various widths and colors.
- Apply a small amount of glue at the starting point of the egg.
- Wrap the ribbon around the egg, securing the ends with glue.
- Layer ribbons for contrast or create geometric patterns.
- Display in a basket, centerpiece, or decorative bowl.
Materials Needed
- Hard-boiled or blown-out eggs
- Ribbons of various widths and colors
- Craft glue
- Small scissors
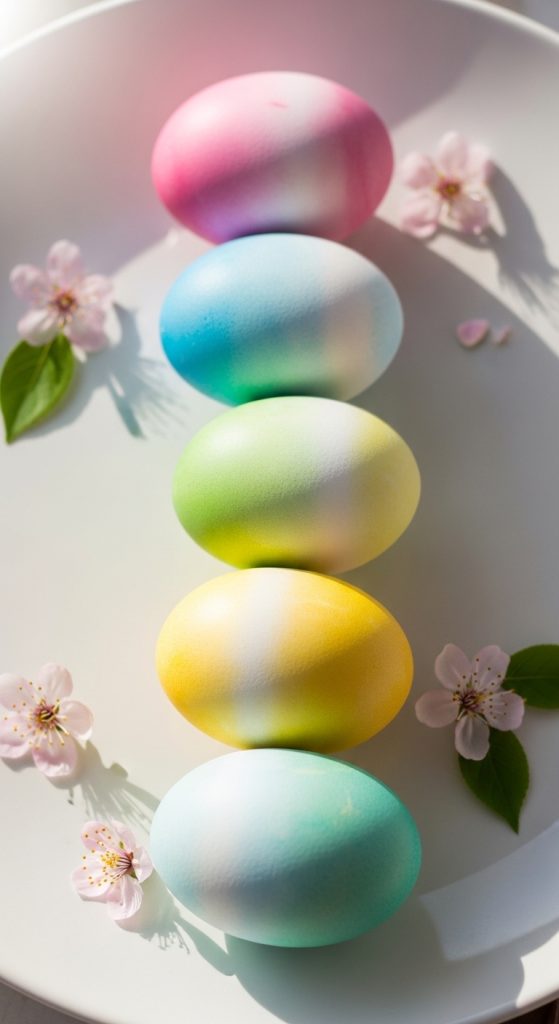
11. Ombre Dip-Dyed Eggs
Introduction
Ombre dip-dyed eggs offer a visually stunning gradient effect that adds sophistication and color depth to your Easter décor. This technique is perfect for adults who enjoy experimenting with shades and color transitions while keeping the process simple yet impactful. By layering colors from light to dark, you create eggs with a smooth gradient that is both modern and Pinterest-worthy. Ombre eggs can complement minimalist settings, vibrant Easter tablescapes, or pastel-themed décor. They are also versatile enough to match various color palettes, making them suitable for both neutral and bold aesthetic choices.
How-to Steps
- Prepare several dye baths in different intensities of the same color.
- Dip the egg lightly in the lightest shade first, then gradually into darker shades, leaving the egg in each bath for progressively longer periods.
- Carefully rinse the egg in water after each dip.
- Let the egg dry completely on a drying rack.
- Optional: apply a thin layer of clear varnish for shine and durability.
Materials Needed
- Hard-boiled or blown-out eggs
- Food coloring or liquid dye
- White vinegar
- Shallow bowls
- Clear varnish or sealer
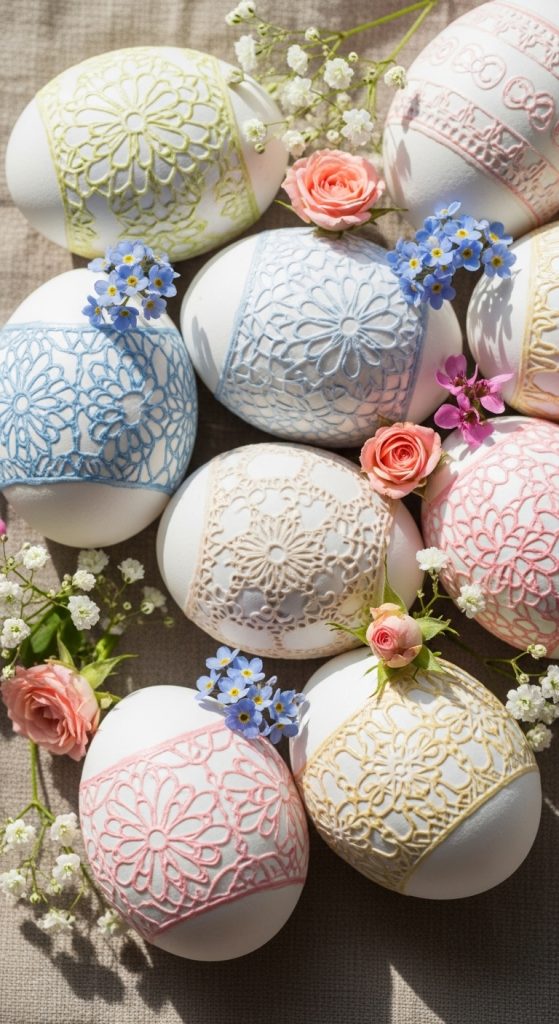
12. Lace-Imprinted Eggs
Introduction
Lace-imprinted eggs provide a delicate and elegant look that transforms ordinary eggs into intricate works of art. This technique involves pressing lace onto the egg surface to create beautiful, textured patterns. Perfect for adults who appreciate vintage aesthetics or romantic décor, lace eggs bring a sophisticated flair to Easter displays. They are particularly effective for muted pastel palettes or classic white eggs, creating a refined and timeless appeal. This method is simple yet delivers high-impact results, making it ideal for both beginners and seasoned crafters.
How-to Steps
- Cut a piece of lace slightly larger than the egg.
- Wrap the lace around the egg and secure it with a rubber band or string.
- Use a sponge to dab paint or spray acrylic over the lace.
- Carefully remove the lace while the paint is still slightly wet for sharp details.
- Allow the egg to dry fully.
- Optional: seal with clear varnish for longevity.
Materials Needed
- Hard-boiled or blown-out eggs
- Lace fabric
- Acrylic paint
- Sponge or spray bottle
- Rubber bands or string
- Clear varnish
13. Minimalist Monochrome Eggs
Introduction
Minimalist monochrome eggs embrace simplicity while making a strong visual impact. By using a single color in varying shades or matte finishes, these eggs create an elegant, cohesive look suitable for adult Easter décor. This technique is ideal for those who appreciate modern, Scandinavian-inspired designs or prefer understated elegance. The monochrome approach emphasizes form and texture, allowing you to experiment with matte, glossy, or metallic finishes. Monochrome eggs are versatile, save-worthy, and perfect for displaying in clusters, baskets, or centerpieces.

How-to Steps
- Select one color palette with at least two complementary shades.
- Paint each egg using one shade, ensuring even coverage.
- Optional: mix matte and glossy paints for texture contrast.
- Allow eggs to dry fully between coats.
- Seal with a clear varnish if desired.
Materials Needed
- Hard-boiled or blown-out eggs
- Acrylic paints in a single color palette
- Brushes or sponges
- Clear varnish
14. Glitter Polka Dot Eggs
Introduction
Glitter polka dot eggs add a fun yet sophisticated twist to classic Easter designs. Combining sparkle with precision, this technique is ideal for adults who enjoy playful décor with a polished look. By applying glitter dots over a painted or natural-colored egg, you can create eye-catching patterns that work beautifully in both minimalist and maximalist settings. The method is beginner-friendly and allows for endless customization using different glitter colors, sizes, and patterns. These eggs are perfect for display in elegant baskets, as table accents, or even as DIY gifts for loved ones.

How-to Steps
- Paint the egg with a base color and let it dry.
- Use craft glue or Mod Podge to create small dots across the surface.
- Sprinkle glitter onto the glued areas and shake off excess.
- Repeat for additional layers or color variations.
- Seal with a clear varnish to prevent glitter fallout.
Materials Needed
- Hard-boiled or blown-out eggs
- Acrylic paints
- Glitter in desired colors
- Craft glue or Mod Podge
- Small brush
- Clear varnish
15. Metallic Wax-Resist Eggs
Introduction
Metallic wax-resist eggs combine traditional wax-resist techniques with modern metallic finishes to create dramatic, stylish designs. This approach involves applying wax to eggs before dyeing them, resulting in unique patterns that resist the color. Once dyed, the wax is removed to reveal contrasting metallic accents, producing a sophisticated, adult-friendly look. This technique is perfect for those who enjoy experimenting with textures and contrasts, delivering eggs that are highly Pinterest-worthy and suitable for luxurious Easter décor.

How-to Steps
- Melt wax or use a wax crayon to draw patterns on the egg.
- Prepare a dye bath with your desired color.
- Dip the egg into the dye, allowing the wax to resist the color in drawn areas.
- Gently remove the wax using a soft cloth or heat.
- Apply metallic paint or leaf to the wax-free areas for added shine.
- Seal with clear varnish if desired.
Materials Needed
- Hard-boiled or blown-out eggs
- Wax crayon or melted wax
- Dye (food coloring or natural dyes)
- Metallic acrylic paints or gold/silver leaf
- Clear varnish
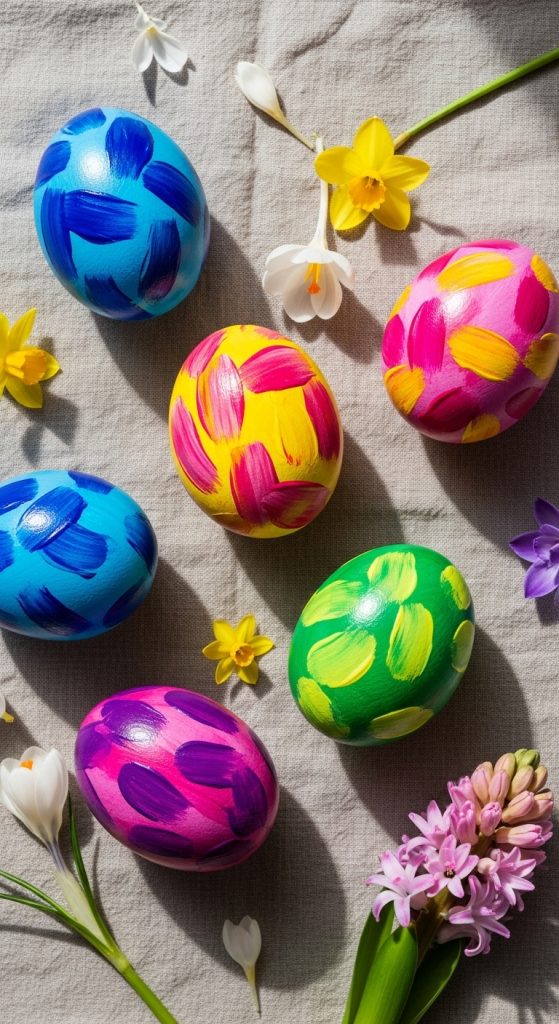
16. Abstract Brushstroke Eggs
Introduction
Abstract brushstroke eggs allow adults to explore artistic expression with bold, painterly designs. This technique embraces creativity and spontaneity, turning each egg into a miniature canvas for modern art-inspired patterns. Perfect for colorful, contemporary Easter décor, abstract brushstroke eggs are easy to personalize with a variety of colors, brush sizes, and layering techniques. They work beautifully in clusters, offering a gallery-like display for your Easter table. This method encourages experimentation while delivering visually striking, Pinterest-worthy results.
How-to Steps
- Paint a base layer on the egg in a neutral or soft color.
- Using different brushes, apply bold, abstract strokes in various colors.
- Layer brushstrokes to create depth and texture.
- Allow eggs to dry fully between layers.
- Optional: finish with a clear gloss or matte varnish for protection.
Materials Needed
- Hard-boiled or blown-out eggs
- Acrylic paints in various colors
- Brushes of different sizes
- Clear varnish
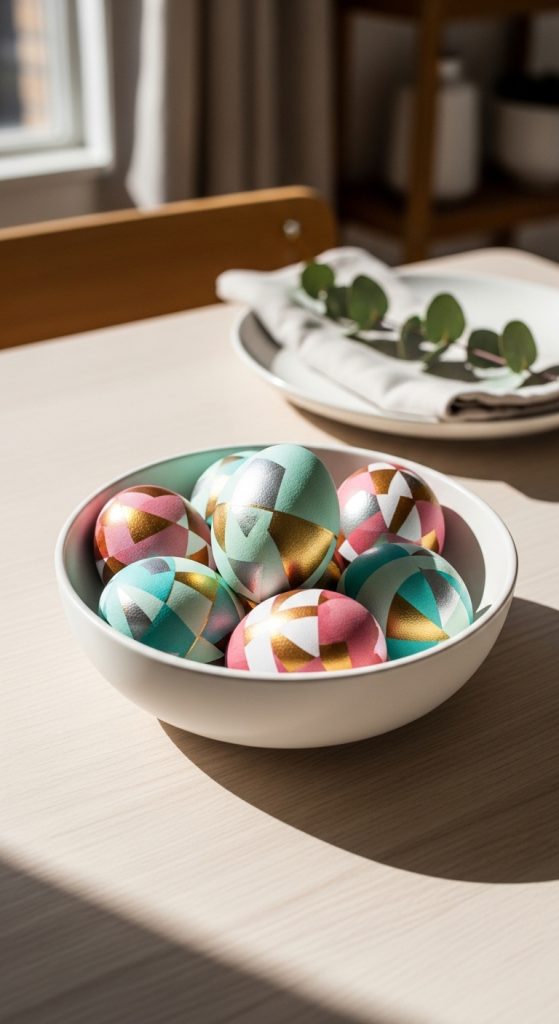
17. Geometric Tape-Resist Eggs
Introduction
Geometric tape-resist eggs provide a modern, structured aesthetic that is perfect for adults seeking clean lines and contemporary designs. By using painter’s tape to create patterns, you can achieve precise geometric shapes without freehand drawing. This method is beginner-friendly, highly customizable, and creates professional-looking results that are highly shareable on Pinterest. These eggs work beautifully in monochromatic or bold color schemes, making them ideal for sophisticated Easter displays or gift arrangements.
How-to Steps
- Paint the egg with a base color and allow it to dry completely.
- Apply painter’s tape in geometric patterns, triangles, or stripes.
- Paint over the exposed areas with contrasting colors.
- Carefully remove the tape once the paint is dry.
- Optional: seal with clear varnish for longevity.
Materials Needed
- Hard-boiled or blown-out eggs
- Acrylic paints
- Painter’s tape
- Brushes or sponges
- Clear varnish
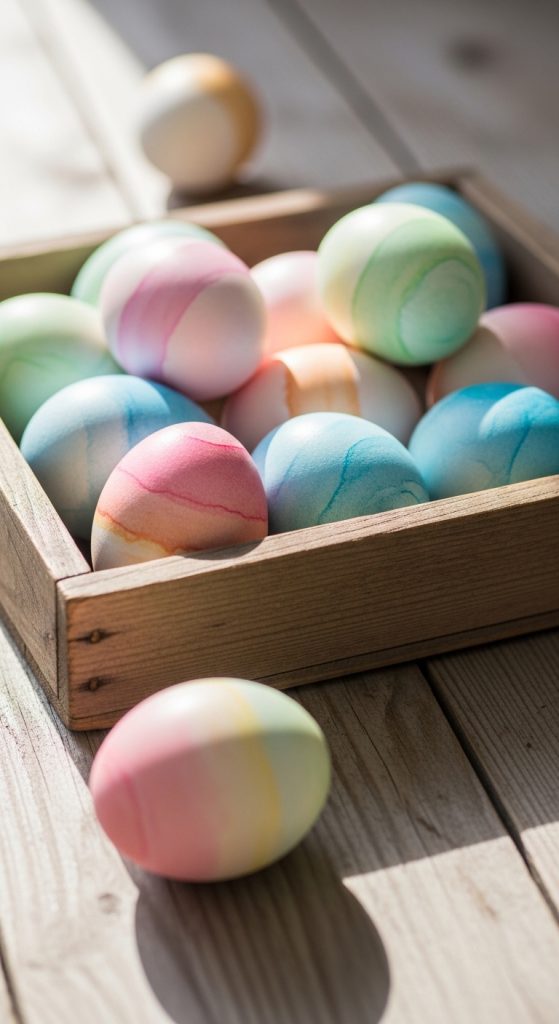
18. Watercolor Dipped Eggs
Introductionx
Watercolor-dipped eggs create soft, ethereal effects using diluted paints for a dreamy and artistic look. This technique is perfect for adults who enjoy subtle, painterly aesthetics and want eggs that resemble miniature watercolor paintings. It’s beginner-friendly, yet it offers a professional, Pinterest-ready result. Watercolor-dipped eggs work well in pastel-themed décor, elegant Easter tables, or creative gift displays, bringing a gentle, artistic charm to your seasonal decorations.
How-to Steps
- Mix watercolor paints with water to achieve soft tones.
- Dip a soft brush into the paint and apply loosely on the egg for a gradient effect.
- Layer additional washes for depth and variation.
- Allow the egg to dry completely.
- Optional: seal with a clear varnish for shine and durability.
Materials Needed
- Hard-boiled or blown-out eggs
- Watercolor paints
- Soft brushes
- Water and palette
- Clear varnish
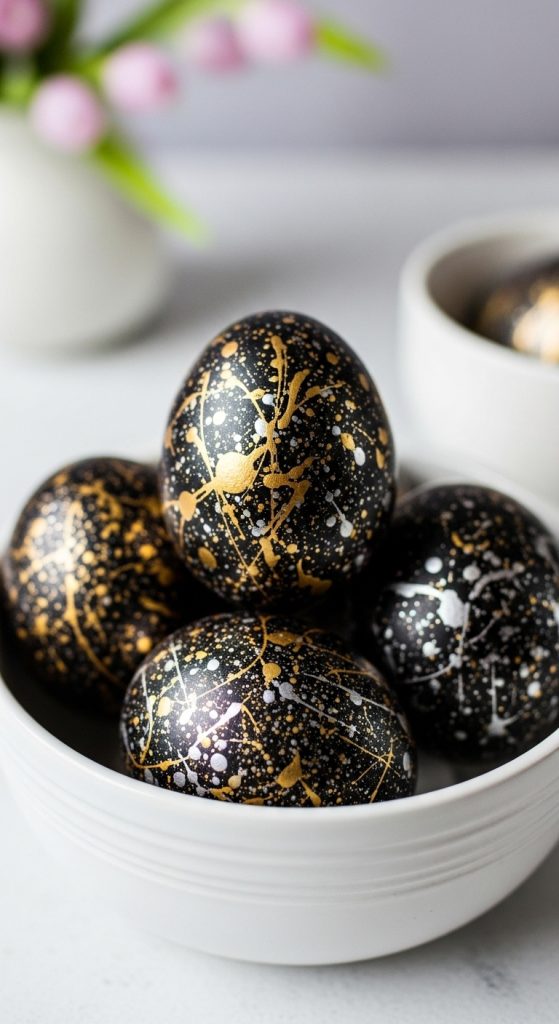
19. Metallic Splatter Eggs
Introduction
Metallic splatter eggs bring energy and sophistication through a combination of bold splatters and reflective metallic tones. This technique is ideal for adults seeking a dramatic, modern look with minimal effort. Each egg becomes a unique work of art with abstract metallic patterns, making it perfect for stylish Easter displays. Metallic splatter eggs are highly visual and Pinterest-friendly, ideal for contemporary tablescapes or statement decorative arrangements.
How-to Steps
- Paint the egg with a solid base color and let it dry.
- Load a stiff brush or toothbrush with metallic paint.
- Flick the paint onto the egg to create splatter patterns.
- Allow to dry fully.
- Optional: repeat with a second metallic color for contrast.
- Seal with clear varnish.
Materials Needed
- Hard-boiled or blown-out eggs
- Acrylic paints (base + metallic)
- Stiff brush or toothbrush
- Clear varnish
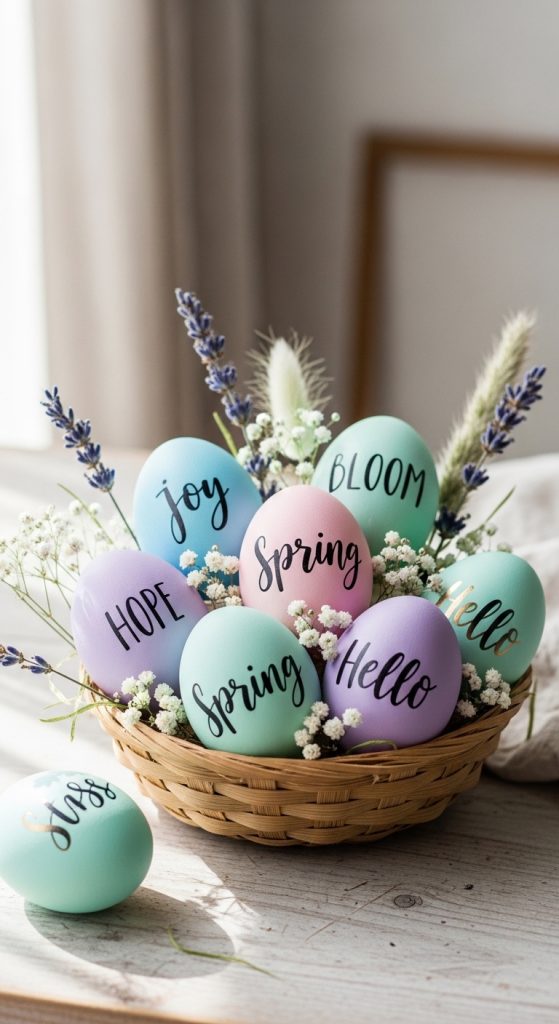
20. Hand-Lettered Message Eggs
Introduction
Hand-lettered message eggs offer a personalized, elegant, and interactive way to decorate Easter eggs. This technique is perfect for adults who enjoy combining creativity with meaningful messages. By writing quotes, greetings, or names on eggs, you create thoughtful, memorable pieces that can serve as gifts, table décor, or place markers. Hand-lettering can be paired with other design techniques, such as minimalistic painting, gold accents, or pastel backgrounds, for a fully cohesive and Pinterest-ready result.
How-to Steps
- Paint or dye eggs with a base color and allow to dry.
- Using a fine-tip marker or brush, write your message, quote, or greeting on the egg.
- Optional: decorate around the lettering with dots, small lines, or floral motifs.
- Allow any ink or paint to dry completely.
- Seal with clear varnish if desired.
Materials Needed
- Hard-boiled or blown-out eggs
- Acrylic paint or dye for base
- Fine-tip marker or brush pen
- Clear varnish