
A modern patio can completely transform your home’s outdoor space, turning it into a cozy retreat, an entertainment hub, or a peaceful oasis for relaxing after a long day. However, many homeowners hesitate to update their patios because they assume modern design requires expensive furniture, intricate landscaping, or costly décor. The truth is, a stunning patio makeover can be achieved on a budget with careful planning, creativity, and resourceful design solutions. By focusing on essential elements such as layout, seating, lighting, greenery, and décor accents, you can create a modern, Pinterest-worthy patio without breaking the bank.
Budget-friendly patio makeovers prioritize cost-effective materials, DIY projects, and multipurpose décor. For instance, using repurposed furniture, affordable planters, or simple lighting solutions can achieve a modern aesthetic while staying within a reasonable budget. Outdoor rugs, colorful cushions, and weather-resistant textiles can instantly upgrade the look of existing furniture. Incorporating greenery through potted plants, vertical gardens, or small raised beds adds natural charm and a sense of tranquility, transforming a plain patio into a lush outdoor haven. Even subtle changes, like painting existing furniture or installing inexpensive string lights, can dramatically enhance the ambiance and make the space feel fresh and modern.
Another key aspect of budget-friendly modern patios is smart space planning. Small patios can feel cramped if furniture and décor are not arranged thoughtfully, while larger patios can feel empty or disconnected without cohesive design. By carefully planning seating areas, walking paths, and focal points, you can create a harmonious layout that encourages relaxation, socializing, and functionality. Pinterest-inspired patios often feature modular seating, foldable furniture, or multi-purpose storage solutions that maximize comfort and usability without consuming excessive space.
Lighting is another critical component of modern patio design. Budget-friendly options include solar-powered lanterns, LED string lights, or DIY candle holders that create warmth and ambiance. Lighting not only extends usability into the evening but also adds a magical, inviting atmosphere that elevates the patio’s aesthetic. Pairing these lighting solutions with mirrors or reflective surfaces can visually enlarge the space, making even a small patio feel airy and open.
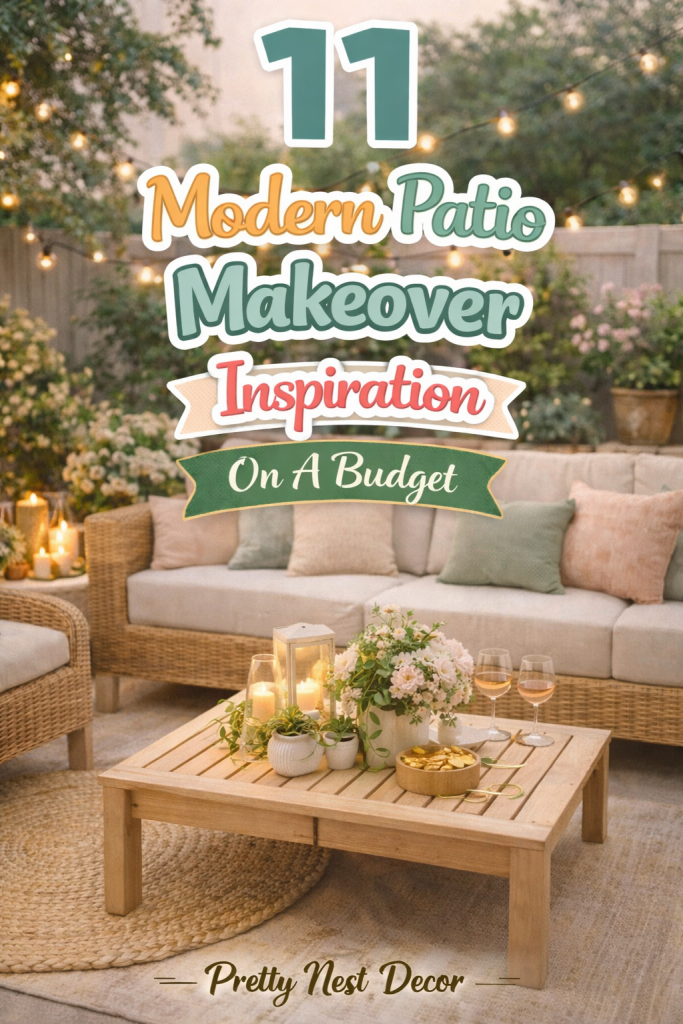
Texture and color play a vital role in creating a modern patio look. Neutral tones, monochromatic palettes, and contrasting textures such as wood, metal, and stone can instantly modernize a patio without costly renovations. Accessories like outdoor cushions, rugs, and decorative planters in affordable materials allow you to add personality, vibrancy, and seasonal flexibility to the space. For a cohesive Pinterest-ready design, it’s important to choose a consistent color scheme and stick with simple, clean lines throughout your décor.
In this guide, we present detailed modern patio makeover ideas on a budget, each offering practical, beginner-friendly solutions for small or large outdoor spaces. Every idea includes a clear explanation, step-by-step instructions, a materials/tools list, and tips for creating a cohesive, modern look without overspending. From DIY seating arrangements and creative lighting to vertical gardens, planters, and budget-friendly flooring upgrades, these ideas help you transform your patio into a stylish, functional, and inviting outdoor oasis.
Whether you’re working with a tiny balcony or a spacious backyard, these budget-conscious ideas will inspire you to rethink your patio space. By the end of this article, you’ll have practical strategies and creative inspiration to achieve a modern patio makeover that is visually appealing, functional, and remarkably affordable.
Let’s dive into the first 10 modern patio makeover ideas on a budget to transform your outdoor space into a Pinterest-worthy retreat.
Idea 1: DIY Pallet Seating with Cushions
Introduction
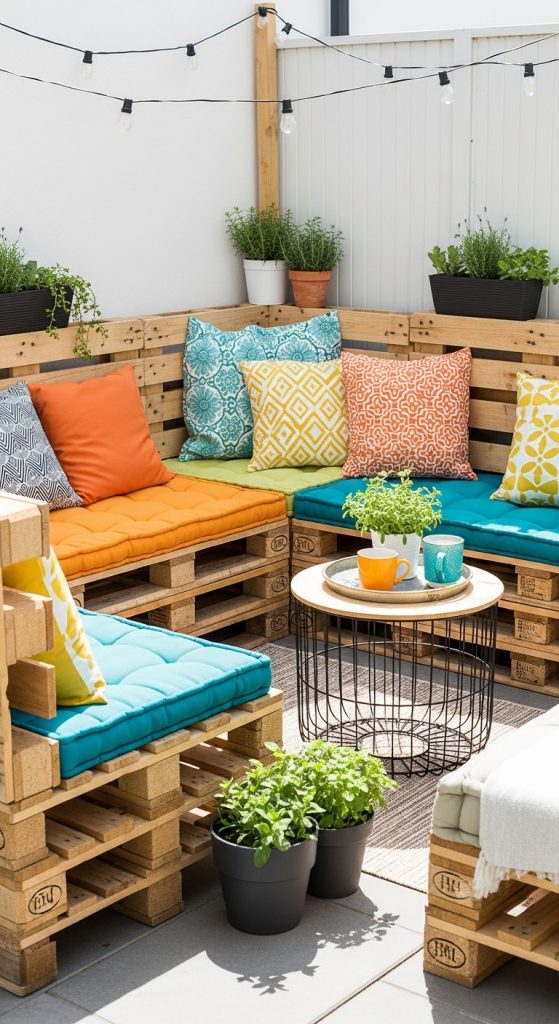
Creating comfortable seating is the cornerstone of any patio makeover, but traditional outdoor furniture can be expensive. A DIY pallet seating setup offers an affordable and modern solution. By repurposing wooden pallets, you can create stylish benches or lounge areas that fit your patio dimensions perfectly. With the addition of cushions and weather-resistant fabrics, pallet seating can rival the look and comfort of store-bought furniture while staying budget-friendly. This project also encourages creativity, as you can stain, paint, or customize the pallets to match your patio’s color palette.
Pallet seating is beginner-friendly and versatile. You can stack pallets for extra height, attach wheels for mobility, or integrate storage underneath. This solution is Pinterest-worthy because it combines rustic charm with modern simplicity, making your outdoor space feel inviting and cozy. Beyond aesthetics, pallet seating allows for modular arrangements, so your patio layout can evolve with your needs.
Materials Needed:
- Wooden pallets (free or low-cost from local stores)
- Outdoor cushions or foam
- Weather-resistant fabric or covers
- Sandpaper and paint/stain (optional)
- Screws and a screwdriver
- Optional caster wheels
Step-by-Step How-To:
- Sand pallets to remove rough edges and splinters.
- Stain or paint the pallets to match your patio’s style.
- Stack or arrange pallets to form seating units.
- Secure pallets together with screws for stability.
- Add cushions or foam pads, covering with weather-resistant fabric.
- Optionally, attach caster wheels for mobility.
- Place in your desired patio layout and arrange additional décor around it.
Idea 2: Vertical Garden with Wall Planters
Introduction
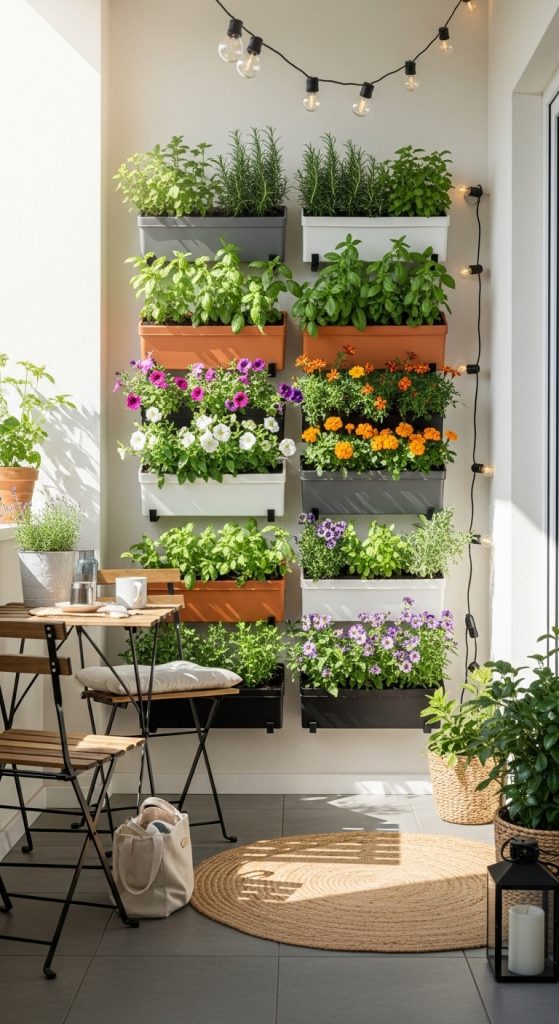
Greenery adds life, texture, and a natural vibe to modern patios, but floor space is often limited. A vertical garden using wall planters is a budget-friendly solution that maximizes space while enhancing visual appeal. Vertical gardens allow you to grow flowers, herbs, or small vegetables in stylish planters mounted on walls or fences. This approach not only saves space but also creates a beautiful focal point for your patio. By arranging plants at different heights, you achieve a lush, layered effect that is highly Pinterest-worthy and perfect for small outdoor areas.
This solution is beginner-friendly and customizable. You can use inexpensive materials like wooden crates, hanging baskets, or recycled containers to create a unique vertical garden. Plants can be swapped seasonally, giving your patio a fresh, ever-changing aesthetic. A vertical garden also improves the ambiance by adding greenery and softening the hard lines of modern patios, making it a functional and decorative upgrade.
Materials Needed:
- Wall-mounted planters or wooden crates
- Potting soil
- Plants (herbs, flowers, succulents)
- Screws and wall anchors
- Drill
- Watering can or small irrigation setup
Step-by-Step How-To:
- Choose a wall or fence with enough sunlight for your plants.
- Secure planters or crates to the wall using screws and anchors.
- Fill each planter with potting soil.
- Plant herbs, flowers, or succulents in the soil.
- Water thoroughly and arrange plants at varying heights for visual interest.
- Maintain plants with regular watering and pruning.
Idea 3: Budget-Friendly Outdoor Rug for Zoning
Introduction
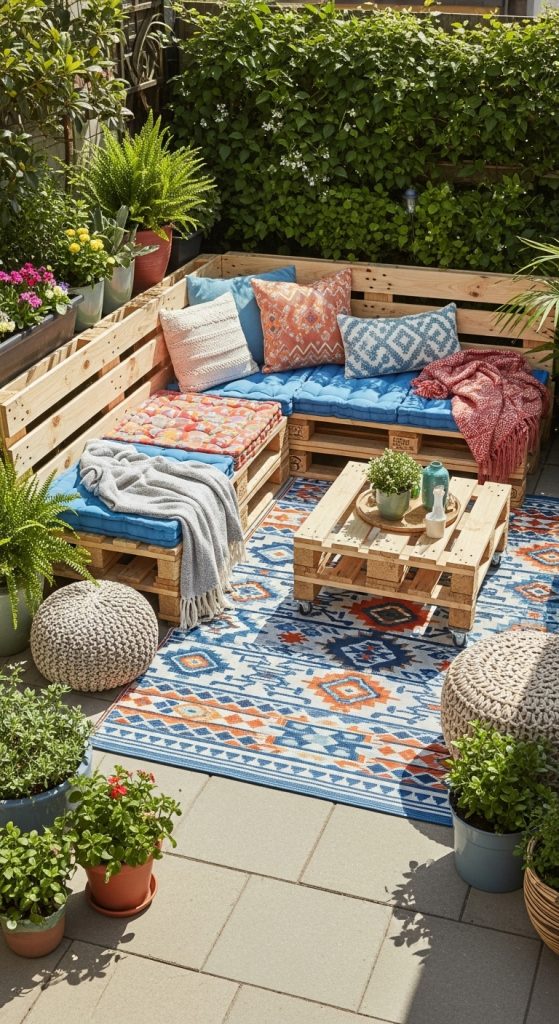
Adding a budget-friendly outdoor rug instantly defines your patio’s seating area, creates a sense of comfort, and adds a pop of color. Rugs are a cost-effective way to make a modern patio feel polished and cohesive without expensive renovations. By selecting weather-resistant materials, you can place rugs outdoors without worrying about damage from moisture or sun exposure. The rug acts as a foundation for your patio layout, anchoring seating, tables, and décor elements in a visually pleasing arrangement.
Outdoor rugs are beginner-friendly and offer a Pinterest-worthy design trick. They add texture, pattern, and warmth to patios while keeping your feet comfortable. Pairing rugs with cushions and throws creates a cozy, inviting space that feels like an extension of your indoor living area. Choosing colors that contrast or complement your patio furniture can modernize the space instantly, giving even a simple setup a designer look without breaking the budget.
Materials Needed:
- Weather-resistant outdoor rug
- Optional non-slip mat
- Patio furniture (chairs, benches, tables)
- Cushions or throws
Step-by-Step How-To:
- Measure the seating area to determine the rug size.
- Place a non-slip mat underneath if needed for safety.
- Center the rug in your seating area.
- Arrange furniture on top, leaving some rug edges exposed.
- Add cushions or throws to enhance comfort and color.
- Clean regularly to maintain vibrancy.
Idea 4: DIY String Light Canopy
Introduction
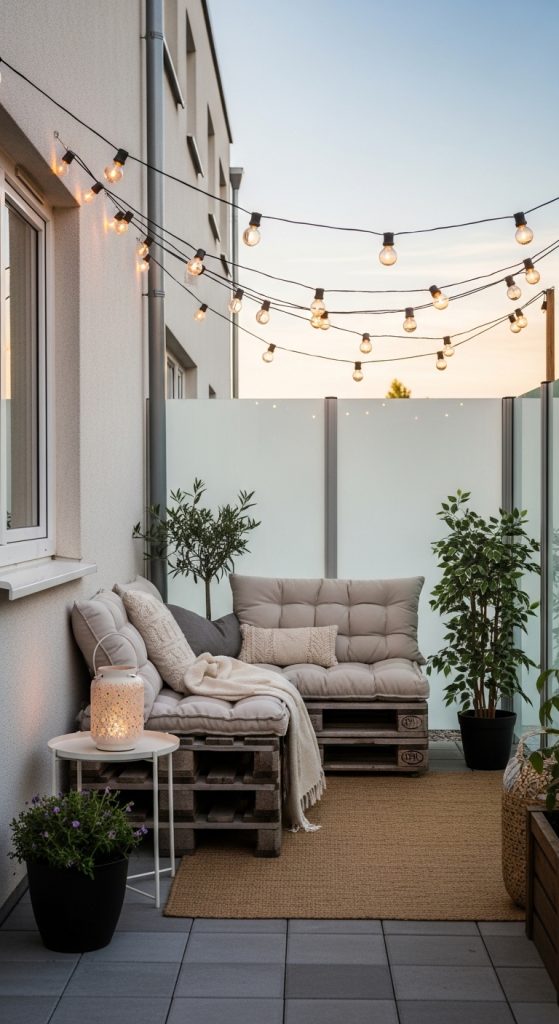
Lighting transforms patios, creating ambiance, warmth, and a magical effect. A DIY string light canopy is a budget-friendly solution that turns any patio into a Pinterest-worthy retreat. By suspending string lights above seating or dining areas, you create a cozy, inviting glow for evenings. This approach adds vertical interest to modern patios while staying affordable and beginner-friendly. String lights can be draped in a canopy style, zigzagged overhead, or framed along fences and walls to achieve a layered lighting effect.
Beyond aesthetics, string lights enhance functionality, extending the usability of your patio into the night. This budget-friendly upgrade works for small and large patios alike and can be customized with different colors, bulb shapes, or solar-powered options. Combining string lights with hanging plants or decorative fabric creates a dreamy outdoor environment suitable for relaxing or entertaining guests.
Materials Needed:
- Weatherproof string lights or solar-powered lights
- Hooks or mounting clips
- Ladder
- Extension cords (if needed)
- Optional outdoor fabric or decorative elements
Step-by-Step How-To:
- Measure the patio area to determine string light length.
- Install hooks or mounting clips at anchor points (walls, posts, or beams).
- Drape the lights in the desired pattern, securing with clips.
- Plug in or activate solar-powered lights.
- Optionally, add decorative fabric, greenery, or lanterns for added effect.
- Test lighting at night and adjust for even coverage.
Idea 5: DIY Pallet Coffee Table
Introduction
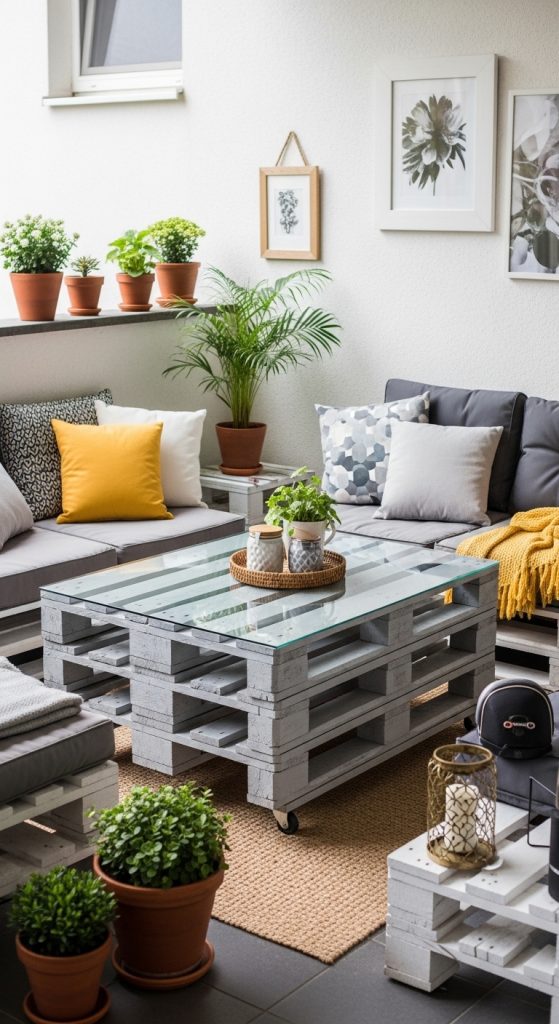
A DIY pallet coffee table is a stylish, budget-friendly addition to a modern patio. Repurposing wooden pallets allows you to create a functional table for drinks, snacks, or décor while keeping costs low. Pallet tables can be customized in height, shape, and finish, making them perfect for small or large patios. Adding a glass or acrylic top gives a modern touch and ensures durability while maintaining a minimalist aesthetic.
This solution is beginner-friendly and Pinterest-worthy, blending rustic charm with modern simplicity. Pallet tables complement DIY pallet seating and can be enhanced with storage underneath for magazines, cushions, or outdoor accessories. They serve as a focal point for your patio, providing both functionality and style. By sanding, painting, or staining the pallets, you can match your patio’s color scheme for a cohesive look.
Materials Needed:
- Wooden pallets
- Sandpaper and paint/stain
- Screws and screwdriver
- Optional glass or acrylic top
- Wheels or legs (optional)
Step-by-Step How-To:
- Sand pallets thoroughly to remove rough edges.
- Paint or stain the pallets as desired.
- Stack or attach pallets for desired height and stability.
- Secure with screws and attach optional legs or wheels.
- Add glass or acrylic top for a modern finish.
- Place on patio and style with décor or functional items.
Idea 6: DIY Outdoor Cushions with Affordable Fabrics
Introduction
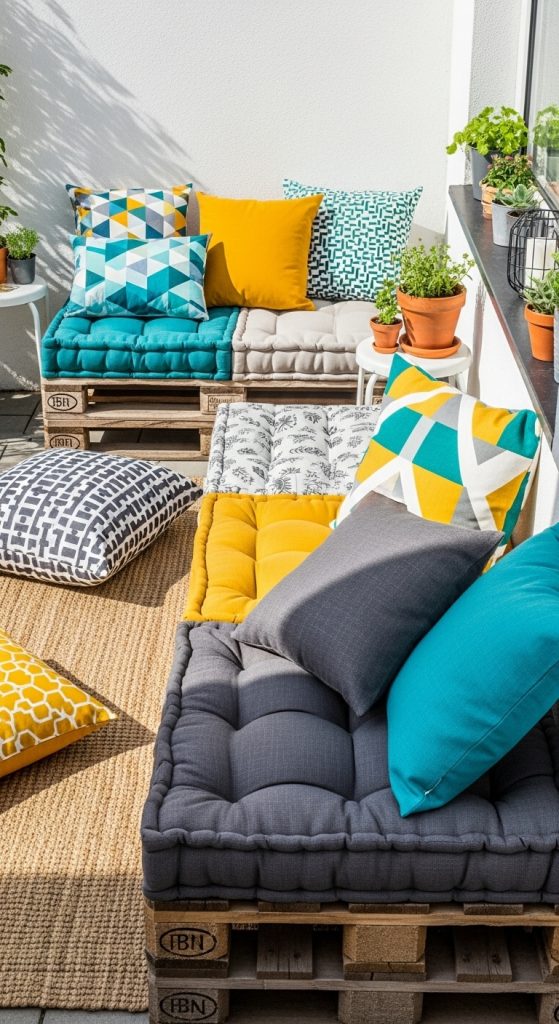
Cushions and textiles can instantly elevate the comfort and style of a patio, but buying pre-made outdoor cushions can be expensive. A DIY cushion project using affordable, weather-resistant fabrics allows you to create a modern, cozy seating area on a budget. By choosing fabrics in neutral tones or vibrant colors, you can complement your pallet seating or existing furniture while giving your patio a refreshed, designer-inspired look. DIY cushions allow for customization in size, shape, and firmness, ensuring they fit perfectly with your patio layout and furniture.
This solution is beginner-friendly, Pinterest-worthy, and highly versatile. You can use fabric remnants, outdoor curtain material, or recycled textiles to save money. Adding cushions encourages relaxation and creates a visually appealing focal point, especially when combined with throws or patterned pillows. The DIY approach also gives you control over durability, allowing you to create covers that are removable and washable, ensuring longevity and easy maintenance.
Materials Needed:
- Outdoor or weather-resistant fabric
- Foam or cushion filling
- Sewing machine or needle and thread
- Scissors and measuring tape
- Optional zipper or Velcro for removable covers
Step-by-Step How-To:
- Measure your furniture to determine cushion dimensions.
- Cut foam and fabric according to measurements.
- Sew fabric pieces together to create cushion covers, leaving an opening to insert foam.
- Insert foam into covers and close with a zipper or Velcro.
- Arrange cushions on seating and add decorative pillows or throws for style.
- Maintain cushions by cleaning covers as needed.
Idea 7: DIY Planter Boxes from Recycled Materials
Introduction
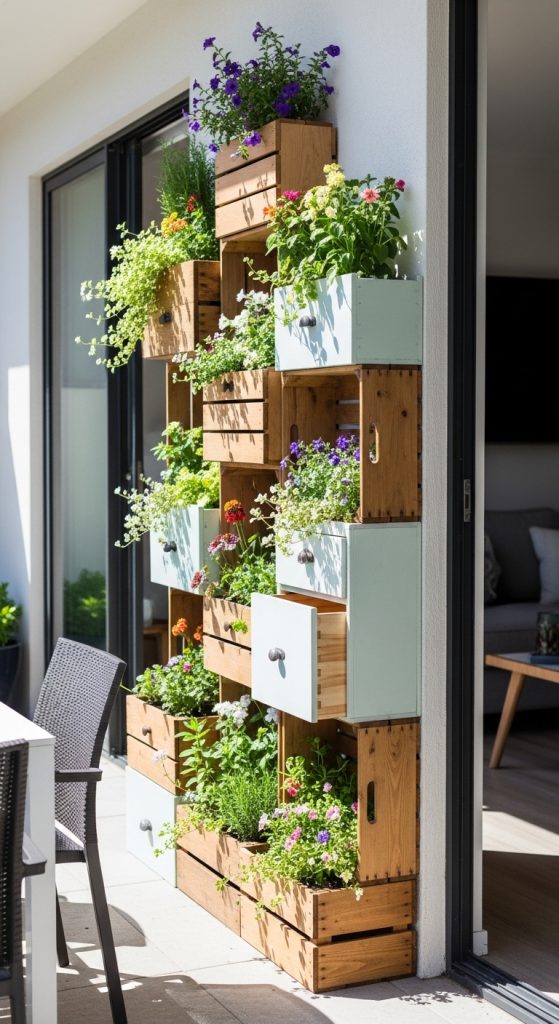
Adding greenery through DIY planter boxes made from recycled materials is a budget-friendly way to modernize your patio. Planter boxes can hold flowers, herbs, or small shrubs, creating a lively and inviting outdoor space. By repurposing wooden crates, old drawers, or pallets, you can craft stylish planters without spending a fortune. This approach is beginner-friendly and Pinterest-worthy because it combines sustainability with creative design, giving your patio a unique, modern charm.
Planter boxes can be arranged along the patio edge, hung vertically, or used as dividers between seating areas. They enhance the ambiance, soften hard patio surfaces, and contribute to a cohesive outdoor aesthetic. Plants also improve air quality and create a relaxing environment, making your patio feel like a true oasis.
Materials Needed:
- Recycled wooden crates, drawers, or pallets
- Sandpaper and paint/stain
- Screws or nails
- Plastic liners or pots for planting
- Potting soil and plants (herbs, flowers, succulents)
Step-by-Step How-To:
- Sand and clean recycled materials to remove rough edges.
- Paint or stain the wood for a modern finish.
- Line crates with plastic or insert pots for planting.
- Fill with soil and plant desired greenery.
- Place planter boxes strategically on patio or hang vertically.
- Water and maintain plants regularly.
Idea 8: Affordable Outdoor Side Tables
Introduction
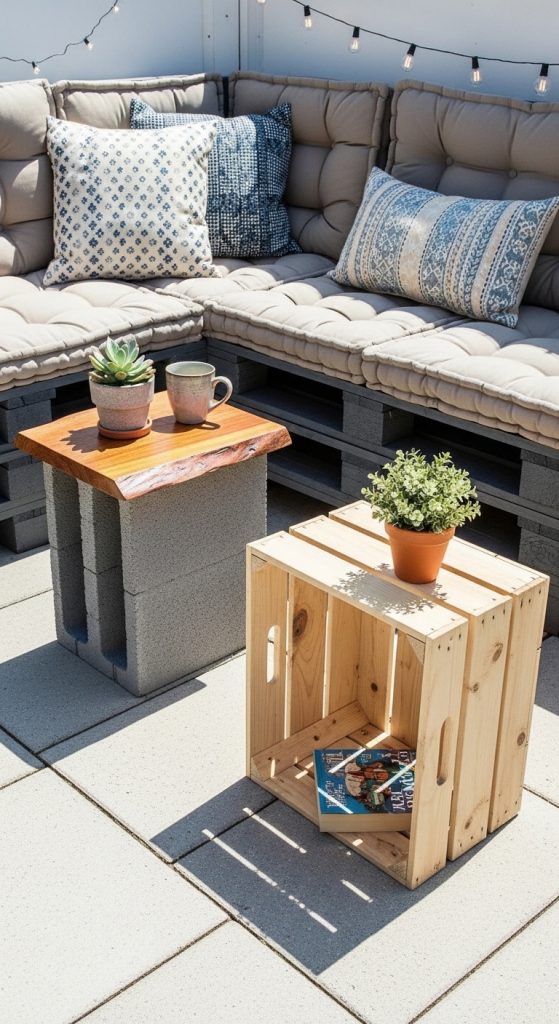
Small side tables are essential for modern patio functionality, providing surfaces for drinks, décor, or snacks. Building or repurposing affordable outdoor side tables is a cost-effective way to add utility and style. You can use inexpensive materials like cinder blocks, wooden crates, or pallets to create modern, minimalist tables that complement your seating area. This solution is beginner-friendly and allows for customization in height, size, and design.
Side tables improve usability while making your patio Pinterest-worthy by offering clean lines and practical surfaces. They are ideal for small patios because they don’t consume significant space, and lightweight designs can be moved as needed. Paired with DIY cushions or pallet seating, these tables complete a cohesive, budget-friendly patio makeover.
Materials Needed:
- Wooden crates, pallets, or cinder blocks
- Sandpaper and paint/stain (optional)
- Screws and screwdriver (if assembling wood pieces)
- Optional tabletop surface (plywood, glass, or acrylic)
Step-by-Step How-To:
- Select material and determine desired table height and size.
- Sand and finish wood or clean cinder blocks.
- Assemble pieces using screws or stacking method.
- Add tabletop surface if desired for a polished finish.
- Place tables beside seating and style with plants, lanterns, or décor.
Idea 9: DIY Outdoor Privacy Screen
Introduction
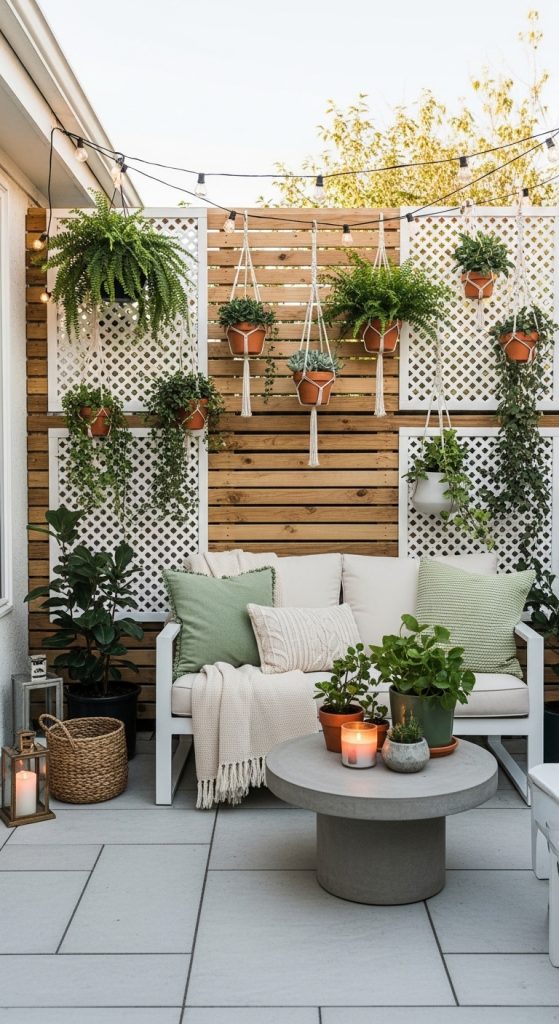
A modern patio makeover often requires a sense of privacy without high costs. A DIY outdoor privacy screen achieves this by creating a stylish barrier that blocks neighbors’ views while enhancing décor. Privacy screens can be made from inexpensive materials like wooden slats, lattice panels, or bamboo, providing a natural, minimalist look. This solution is beginner-friendly and allows customization in height, width, and finish, making it adaptable for any patio size.
Privacy screens also serve as a backdrop for plants, lights, or wall art, adding layers of texture and visual interest. They help define your patio space, create cozy zones, and elevate the overall aesthetic. With thoughtful placement and creative design, these screens make your patio feel intimate, stylish, and Pinterest-worthy.
Materials Needed:
- Wooden slats, lattice panels, or bamboo fencing
- Screws or nails
- Drill or hammer
- Outdoor paint or stain (optional)
- Decorative elements (plants, lights, or fabric)
Step-by-Step How-To:
- Measure the area where the privacy screen will be installed.
- Assemble panels using screws or nails for stability.
- Paint or stain panels for a modern finish.
- Position the screen on patio edges or near seating areas.
- Add decorative elements such as potted plants or string lights.
- Ensure stability and safety, adjusting placement if necessary.
Idea 10: Budget-Friendly Patio Flooring Upgrade
Introduction
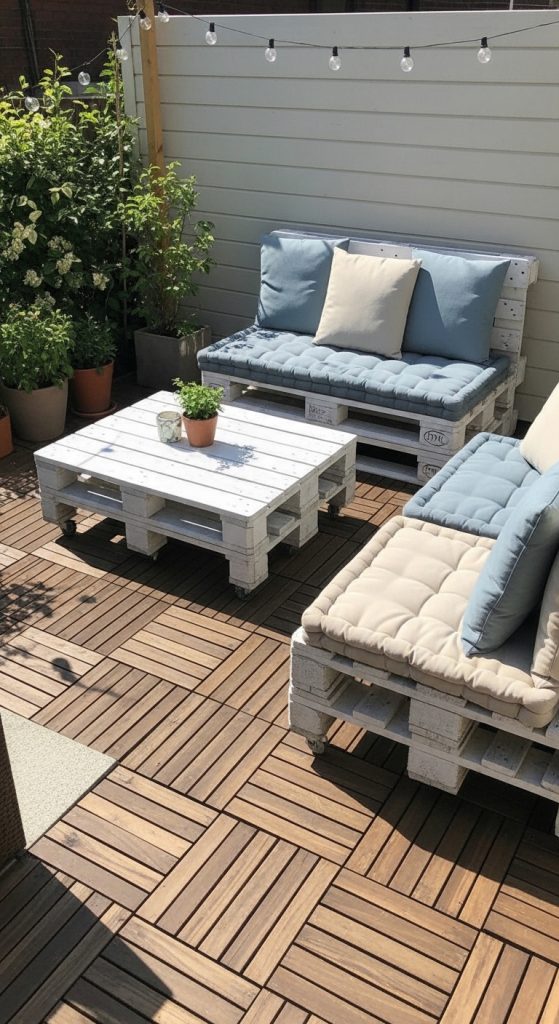
Modern patios often require updated flooring to create a cohesive and stylish look. Budget-friendly patio flooring upgrades like interlocking deck tiles, outdoor rugs, or painted concrete patterns are practical and affordable. These solutions enhance visual appeal without expensive renovations. Interlocking tiles are especially beginner-friendly, easy to install, and available in wood, composite, or stone finishes. Painted stencils or inexpensive rugs can also define seating zones, adding texture, pattern, and modern flair.
Upgraded flooring immediately elevates your patio’s design, making it Pinterest-worthy while staying within budget. It also improves comfort and usability, creating a more inviting outdoor environment for relaxation or entertaining. By combining flooring upgrades with seating, planters, and lighting, you achieve a cohesive, modern patio makeover without overspending.
Materials Needed:
- Interlocking deck tiles, outdoor rugs, or paint and stencil kit
- Measuring tape
- Level (for tiles)
- Optional outdoor sealant
Step-by-Step How-To:
- Measure patio surface to determine the number of tiles or rug size needed.
- Prepare surface by cleaning and leveling.
- Lay interlocking tiles or position outdoor rugs.
- If painting, stencil desired pattern on patio surface and allow to dry.
- Apply sealant if needed for durability.
- Arrange furniture and décor on upgraded flooring for a finished look.
Idea 11: DIY Hanging Planters with Macramé
Introduction
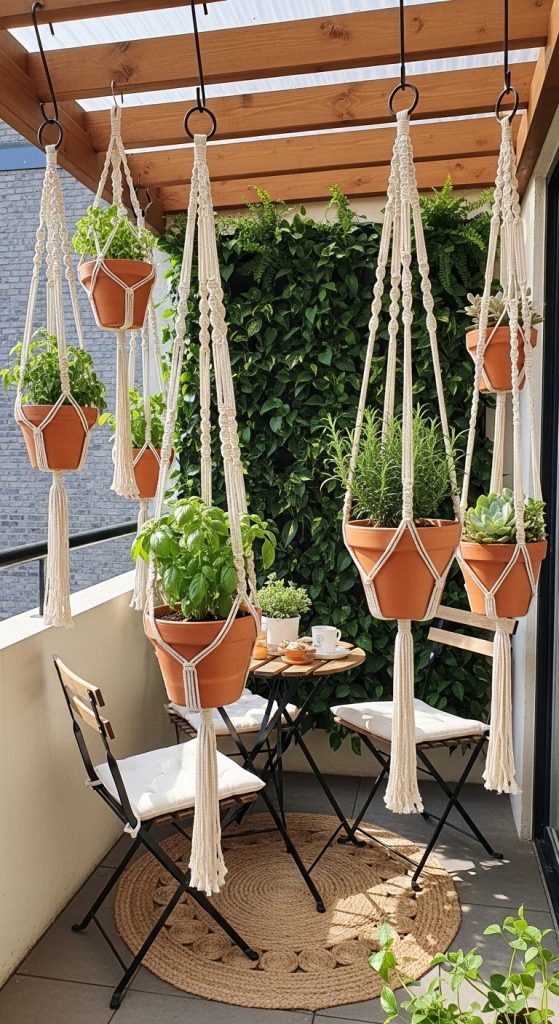
Adding vertical greenery is a fantastic way to enhance a modern patio without taking up floor space. DIY hanging planters with macramé combine creativity, affordability, and modern aesthetics, making your patio Pinterest-worthy on a budget. Macramé plant hangers are lightweight, stylish, and can hold a variety of potted plants, from flowers to herbs or succulents. Hanging planters draw the eye upward, creating a sense of height and dimension that makes even small patios feel airy and spacious.
This solution is beginner-friendly and highly customizable. You can create macramé hangers using inexpensive cord or rope, choose different knots and designs, and select pots that complement your patio’s color scheme. Hanging planters not only add visual interest but also allow for practical gardening in small spaces. They are perfect for patios with limited floor area, balconies, or rooftop terraces, allowing you to maximize greenery without clutter. Combining hanging plants with other budget-friendly upgrades like string lights or DIY seating creates a cohesive, stylish modern patio that feels inviting and cozy.
Materials Needed:
- Macramé cord or strong rope
- Small to medium-sized pots with drainage
- Scissors
- Hooks or ceiling anchors
- Optional beads or decorative accents
Step-by-Step How-To:
- Measure and cut cord lengths according to the desired length of your hanger.
- Tie macramé knots to form a supportive holder for your pot.
- Insert pot into the finished macramé hanger, ensuring it sits securely.
- Install hooks or anchors on a ceiling beam, pergola, or overhead support.
- Hang the planter and adjust for balance.
- Water plants as needed and rotate occasionally for even growth.
- Optionally, add decorative beads or knots for a personalized touch.