
Easter is one of the most joyful seasons for kids and toddlers. The arrival of spring, pastel colors, adorable bunnies, and egg-themed decorations naturally spark curiosity and creativity. One of the best ways to celebrate the season is through hands-on DIY crafts, which not only entertain little ones but also help develop fine motor skills, creativity, and confidence.
Creating Easter crafts for kids allows families to slow down, engage in mindful activities, and build memories together. Toddlers in particular benefit from sensory experiences like gluing, painting, and feeling different textures, which are abundant in Easter craft materials. From soft pastel paints and felt shapes to natural elements like twigs and moss, each material offers opportunities for exploration and imagination.
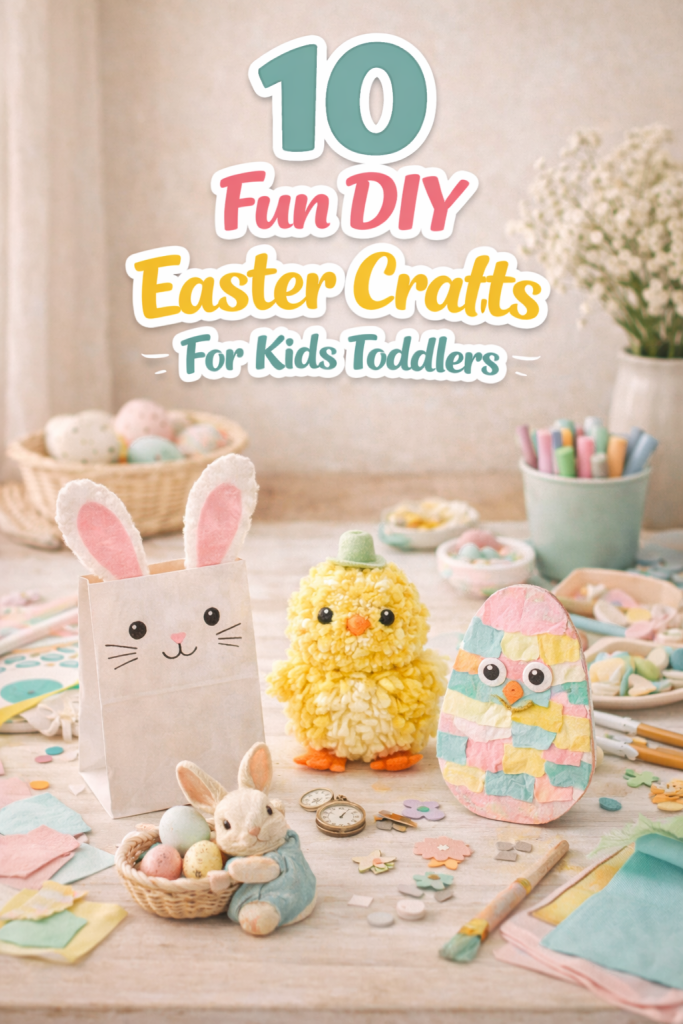
These crafts can be simple enough for toddlers to participate with minimal supervision while still producing charming, Pinterest-worthy results. Parents can also scale complexity for older kids, adding intricate patterns, layering, and mixed media elements. This flexibility makes DIY Easter crafts ideal for siblings of varying ages.
Beyond entertainment, Easter crafts teach children about colors, shapes, and coordination. Activities such as decorating eggs or creating bunny puppets involve hand-eye coordination, planning, and creativity. Crafts can also be thematic, reflecting elements of spring: chicks, flowers, eggs, baskets, and rainbows. This thematic focus enhances educational value and creates a sense of accomplishment when the finished projects align with holiday symbols.
A curated set of fun DIY Easter crafts can transform your home into a colorful, festive space. Even simple creations — like handprint chicks on paper or cotton ball bunnies — can be displayed on walls, refrigerators, or as part of a table centerpiece. Seasonal craft displays reinforce the sense of holiday celebration and allow children to see their creations proudly showcased.
In this guide, you will discover 10 fun and beginner-friendly Easter crafts for kids and toddlers, designed to be safe, engaging, and visually appealing. Each idea includes:
- Materials list (easy to source, safe for little hands)
- Step-by-step instructions
- Tips for toddler-friendly execution
- Optional variations for older kids
- Pinterest-optimized styling and display suggestions
By the end of this article, you will have a complete set of Easter craft ideas to keep your kids entertained, spark their creativity, and create adorable, Instagram- and Pinterest-ready DIY decorations. From egg painting to bunny masks, and sensory-friendly crafts to playful outdoor activities, every idea has been selected to balance fun, simplicity, and holiday charm.
Let’s dive into the first craft idea, perfect for toddlers and preschoolers alike.
1. Cotton Ball Bunny Craft
Introduction
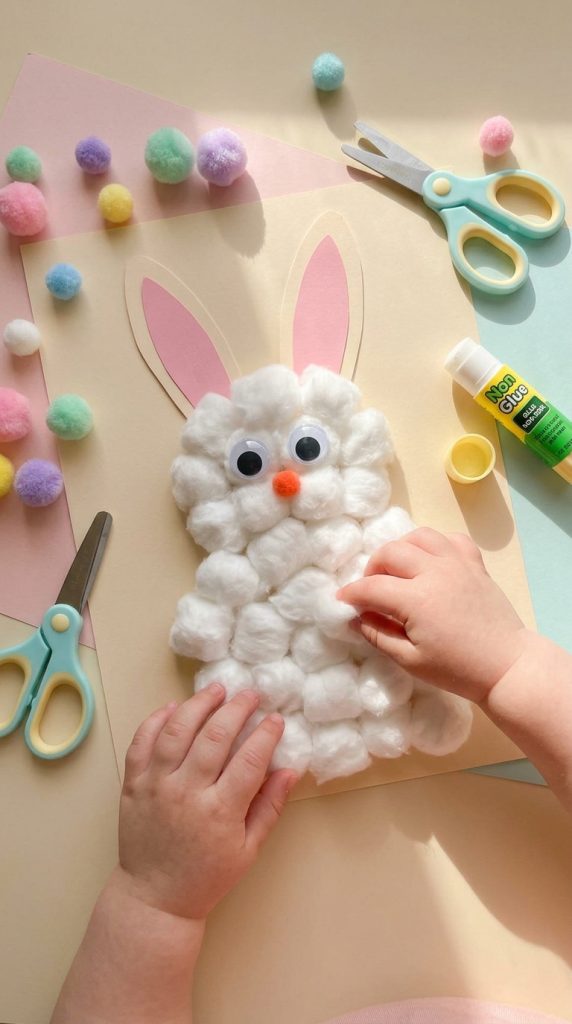
The cotton ball bunny is a classic toddler-friendly Easter craft. It combines soft textures, simple gluing, and basic shapes to create a cute bunny that kids can personalize. Toddlers love sticking cotton balls onto paper or cardstock, which develops hand-eye coordination and sensory exploration. The project also encourages creativity — kids can experiment with different colored papers, add eyes, or decorate with tiny pastel bows.
This craft is extremely safe for toddlers as it uses non-toxic glue, soft cotton, and paper materials. It can be completed in under 20 minutes, making it perfect for short attention spans. Once finished, these cotton ball bunnies can be displayed on windows, walls, or added to Easter baskets as decoration.
Parents can adapt the craft for older kids by introducing additional details, such as painted backgrounds, patterned paper ears, or small embellishments like pom-poms and sequins. The tactile nature of cotton balls combined with the visual reward of a bunny shape makes this craft highly engaging and satisfying for young children.
Materials Needed
- White cotton balls
- Cardstock or construction paper (various pastel colors)
- Non-toxic glue stick or white school glue
- Safety scissors (for parent use)
- Googly eyes or markers for eyes and nose
- Optional: pastel ribbons, pom-poms, glitter
Step-by-Step How-To
- Draw or print a simple bunny outline on cardstock.
- Cut out the ears separately using pastel construction paper.
- Let the toddler apply glue to the bunny body.
- Stick cotton balls onto the glued area until the bunny is fully covered.
- Attach ears using glue.
- Add eyes and nose with googly eyes or markers.
- Optional: decorate with a ribbon bow around the bunny’s neck.
Styling Tip
Display multiple cotton ball bunnies together on a pastel background to create a playful, Pinterest-ready Easter scene. Mixing soft cotton textures with bright paper colors enhances visual interest.
2. Painted Easter Eggs (Toddler-Safe)
Introduction
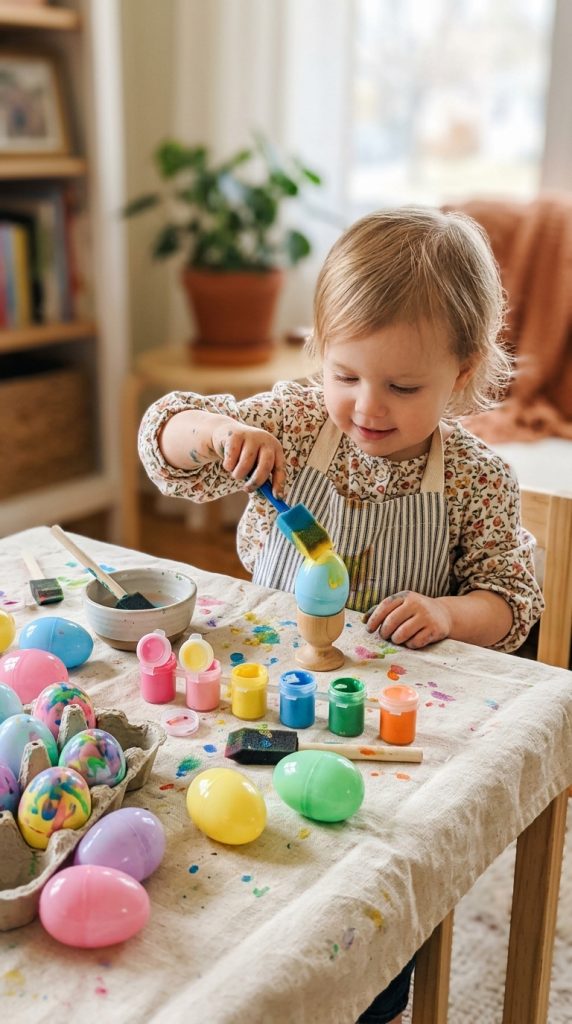
Painting Easter eggs is a quintessential holiday activity that toddlers adore. The bright colors, smooth surfaces, and endless design possibilities make it ideal for engaging young artists. Unlike traditional dyeing, toddler-safe paints (like tempera or acrylic washable paints) allow kids to experiment freely without the risk of staining or ingesting unsafe dyes.
This craft promotes hand-eye coordination, color recognition, and creativity. Toddlers can practice rolling, stamping, and brushing paint onto wooden, plastic, or blown eggs. They can create stripes, polka dots, smiley faces, or abstract patterns. The project is easy to adapt: for older kids, you can introduce stencils, stickers, or layering techniques.
Once the eggs are painted, they can be displayed in baskets, on decorative trays, or used in Easter egg hunts. Painted eggs also make perfect keepsakes or gifts for family members. The tactile nature of rolling and brushing eggs gives toddlers sensory stimulation while keeping their attention for a fun holiday activity.
Materials Needed
- Plastic, wooden, or blown eggs
- Toddler-safe paints (washable tempera or acrylic)
- Small paintbrushes or foam brushes
- Palette or paper plate for mixing
- Apron or protective clothing
- Optional: stickers, glitter glue, or stencils
Step-by-Step How-To
- Set up a covered workspace with paper or plastic for protection.
- Pour paint into small containers for easy toddler access.
- Show toddlers basic brush strokes or rolling techniques.
- Let them paint freely, layering colors as desired.
- Allow painted eggs to dry completely.
- Optional: decorate with stickers or glitter for extra flair.
- Display in baskets or decorative trays.
Styling Tip
Place painted eggs in nests of shredded pastel paper or moss for a visually appealing Pinterest-ready presentation.
3. Bunny Handprint Craft
Introduction
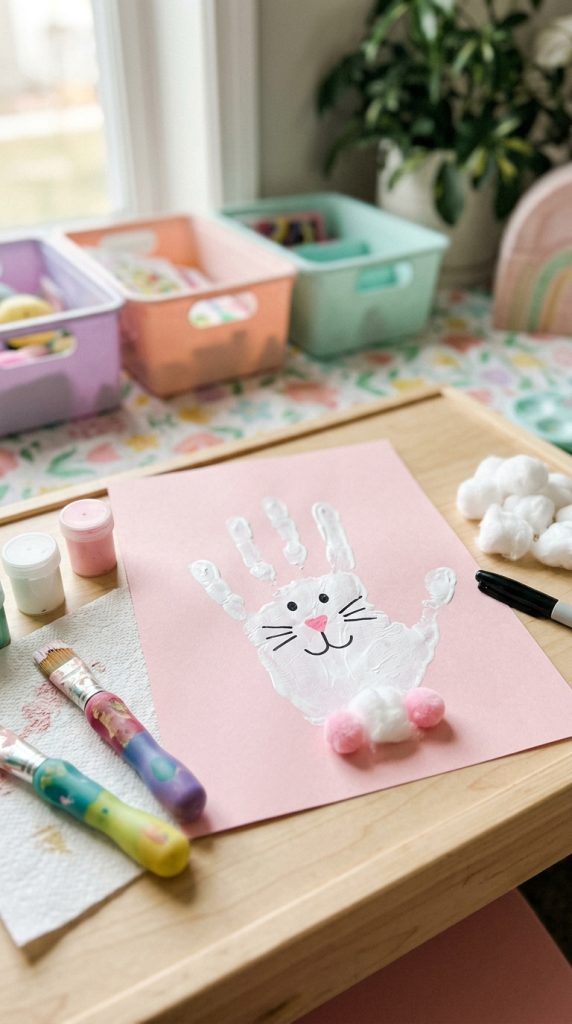
The bunny handprint craft is a classic and interactive Easter project for toddlers. It transforms their own handprints into an adorable bunny, creating a lasting keepsake that parents can cherish for years. This craft engages toddlers’ motor skills, encourages creativity, and makes them feel proud of contributing to holiday décor.
Using non-toxic paints and construction paper, kids can explore colors and textures while creating an art piece that is uniquely theirs. The handprint technique is simple yet highly rewarding — toddlers see instant results as their handprint magically transforms into a bunny. Parents can guide the process while letting children experiment with different colors, adding personality with bows, glitter, or drawn features.
The bunny handprint craft also doubles as a personalized decoration. Finished handprint bunnies can be displayed on walls, refrigerator doors, or incorporated into a homemade Easter card for family members. This craft is perfect for groups or classrooms, as it allows multiple children to create coordinated artwork with ease.
It’s beginner-friendly but also scalable. For older kids, you can add layered details like pastel eggs, grass, or cloud backgrounds to create a more intricate scene. This craft encourages both fine motor development and creative storytelling, making it ideal for toddlers and preschoolers.
Materials Needed
- Non-toxic paint (white, pastel pink, and optional other colors)
- Construction paper (pastel or neutral)
- Paintbrush or sponge
- Black marker for facial features
- Optional: ribbon or glitter for decoration
- Wet wipes for cleanup
Step-by-Step How-To
- Pour a small amount of white paint onto a palette or paper plate.
- Help toddlers apply paint evenly to the palm and fingers.
- Press the hand onto construction paper to create the bunny body and ears.
- Allow the paint to dry completely.
- Use a black marker to draw eyes, nose, whiskers, and mouth.
- Optional: add a ribbon bow or glitter accents for extra charm.
- Display on walls, windows, or turn into cards.
Styling Tip
Create a wall gallery by mounting multiple handprint bunnies in different pastel colors to form a cheerful Easter display. Grouping odd numbers (3, 5, or 7) adds visual appeal.
4. Paper Plate Chick Craft
Introduction
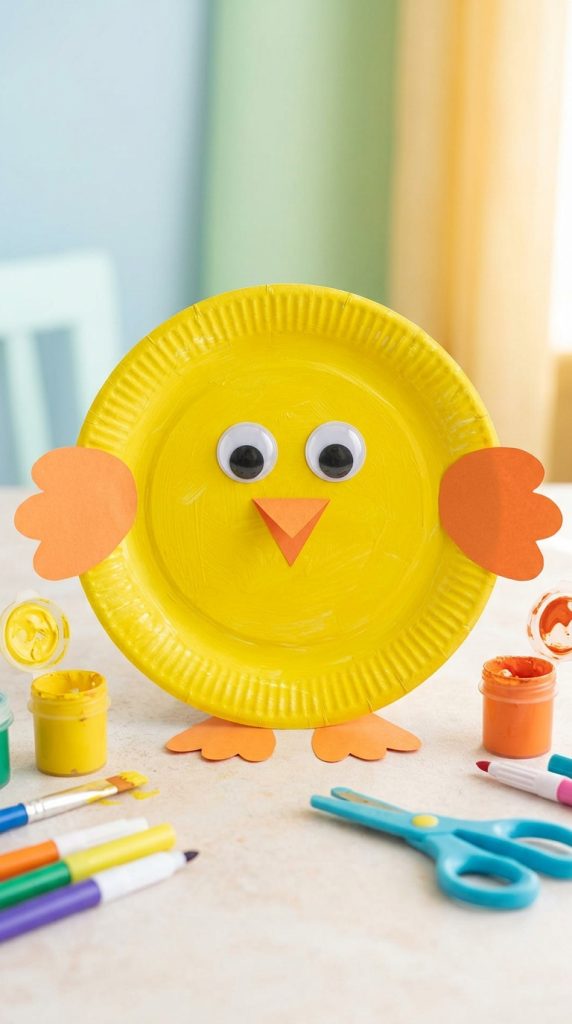
The paper plate chick craft is perfect for toddlers because it combines painting, cutting, and assembly in a simple, hands-on activity. Using a paper plate as the base allows children to freely explore colors while shaping a cute Easter chick. This craft encourages sensory exploration and creativity while building confidence as toddlers watch the chick come to life under their hands.
This craft also offers opportunities for teaching colors, shapes, and sequencing. Toddlers can practice painting the plate yellow, cutting out a beak and wings, and arranging the pieces before gluing them down. Parents can assist with cutting, while children do painting and assembling, fostering collaboration and independence.
The paper plate chick craft is visually appealing and can be easily displayed. Hang multiple chicks on a wall, string them into a garland, or attach to Easter cards. The tactile experience of painting, gluing, and manipulating shapes supports motor skill development. It’s also adaptable — older kids can add details like feathers, glitter, or googly eyes to personalize their creation.
This craft balances fun, simplicity, and educational value. It’s perfect for playdates, classroom activities, or a quiet afternoon at home, keeping toddlers engaged and proud of their finished chick.
Materials Needed
- Paper plates
- Yellow paint (washable)
- Orange construction paper (beak and feet)
- Black marker or googly eyes
- Non-toxic glue
- Safety scissors (for parent use)
- Optional: feathers, glitter, or stickers
Step-by-Step How-To
- Paint the paper plate yellow and let it dry.
- Cut out a small triangle from orange paper for the beak and two small feet.
- Attach the beak and feet using glue.
- Add eyes with markers or googly eyes.
- Optional: glue small feathers onto the plate for texture.
- Allow glue to dry completely.
- Display as wall art, garland, or on tables.
Styling Tip
Hang several paper plate chicks in a pastel-themed arrangement to create a playful Easter wall display. Mix heights and spacing for a whimsical, Pinterest-ready look.
5. Pom-Pom Easter Egg Craft
Introduction
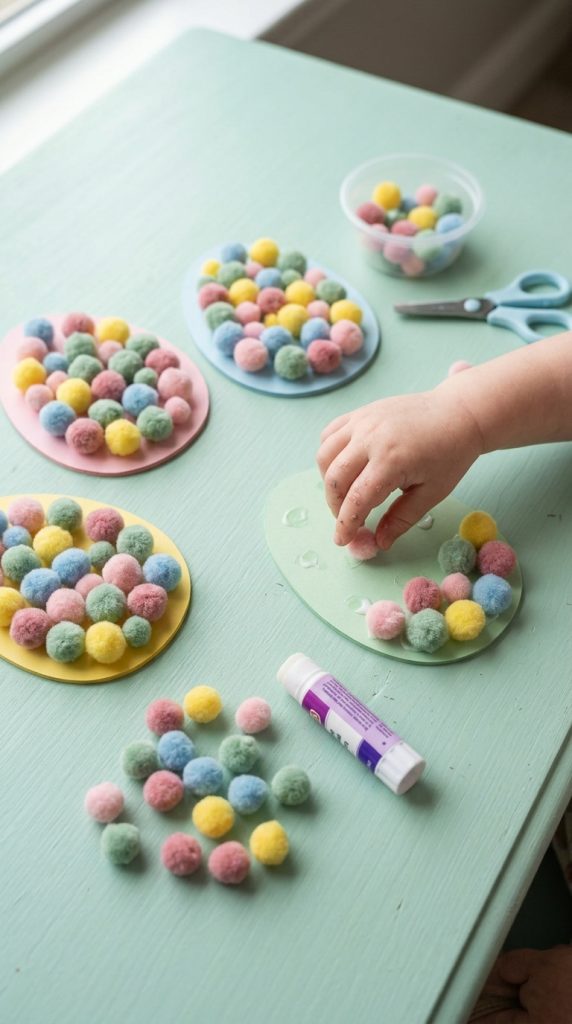
Pom-pom Easter eggs are a tactile and colorful craft perfect for toddlers. Using soft, fluffy pom-poms adds a sensory element that engages young children while producing visually appealing results. This craft encourages fine motor development as toddlers pick up and glue small pom-poms, improving hand-eye coordination and dexterity.
The project is extremely flexible — children can choose their favorite colors and create patterns or random designs. Parents can cut egg shapes from cardstock and allow toddlers to fill them with pom-poms, creating textured and vibrant Easter eggs. These eggs are safe for toddlers as all materials are non-toxic and easy to handle.
Once completed, pom-pom eggs can be displayed in Easter baskets, used as garland decorations, or attached to craft sticks for a fun table centerpiece. The sensory and visual combination makes this craft particularly engaging and satisfying. It’s ideal for playdates, classrooms, or family crafting sessions, giving toddlers a sense of accomplishment and pride.
Older kids can take the craft further by adding glitter glue, small stickers, or layering pom-poms to create patterns and designs. This flexibility makes it a scalable and highly Pinterest-worthy project.
Materials Needed
- Cardstock or construction paper (egg shapes)
- Assorted colorful pom-poms
- Non-toxic glue
- Optional: markers or glitter glue for extra details
Step-by-Step How-To
- Cut egg shapes from cardstock.
- Pour small amounts of glue onto the egg or use a glue stick.
- Allow toddlers to stick pom-poms onto the egg surface until fully covered.
- Optional: add patterns or outlines with markers or glitter glue.
- Let glue dry completely.
- Display in baskets, on sticks, or as garland.
Styling Tip
Arrange pom-pom eggs in pastel baskets or frame multiple eggs together on a background sheet for a cohesive, Pinterest-ready presentation.
6. Bunny Mask Craft
Introduction
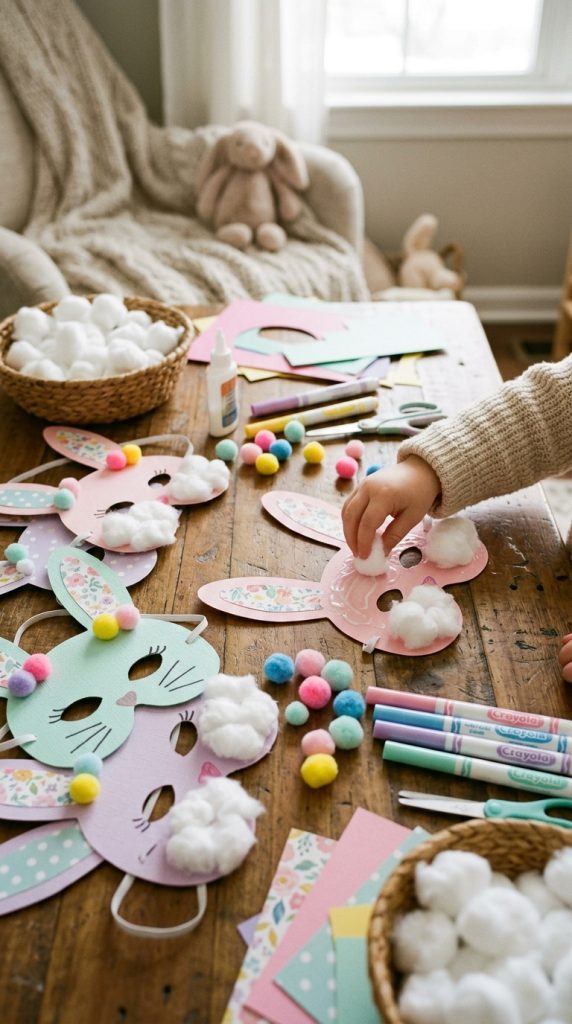
Bunny masks are a fun, interactive craft that toddlers and preschoolers can both make and wear. This activity combines creativity with role-play, allowing children to make an adorable Easter accessory and then act out stories, hunt for eggs, or pose for photos. Bunny masks develop fine motor skills, hand-eye coordination, and creativity, and they also provide an opportunity for imaginative play.
Using cardstock, construction paper, cotton balls, and safe adhesives, toddlers can assemble their own bunny face with ears and decorative details. The project is simple enough for young children with adult assistance for cutting and gluing, but older kids can decorate independently with paint, markers, stickers, or glitter.
Bunny masks are not only entertaining to make but also highly Instagram- and Pinterest-worthy. They can be displayed on walls as part of a gallery of Easter crafts or used in family photos during holiday celebrations. Making the craft also encourages kids to follow a sequence of steps — painting, gluing, assembling — which promotes focus and sequencing skills.
Parents can further personalize masks by adding features such as pastel ribbons for ears, whiskers made from pipe cleaners, or small pom-poms for noses. This combination of art and play ensures that children stay engaged and proud of their creations.
Materials Needed
- Cardstock or construction paper (white, pink, and pastel colors)
- Cotton balls
- Non-toxic glue or glue stick
- Safety scissors (for parent use)
- Markers for eyes, nose, and whiskers
- Elastic string or ribbon to secure the mask
- Optional: glitter, stickers, or pastel embellishments
Step-by-Step How-To
- Draw or print a bunny face template on cardstock.
- Cut out the face and ear shapes (parents can help with scissors).
- Glue cotton balls onto the bunny face to create a fluffy texture.
- Add pink inner ear details and draw eyes, nose, and whiskers with markers.
- Attach an elastic string or ribbon to the sides of the mask to wear.
- Optional: decorate further with glitter or stickers.
- Allow glue to dry fully before wearing.
Styling Tip
Take a group photo of children wearing their bunny masks in front of a pastel or Easter-themed backdrop for a Pinterest-worthy family Easter craft post.
7. Felt Easter Basket Craft
Introduction
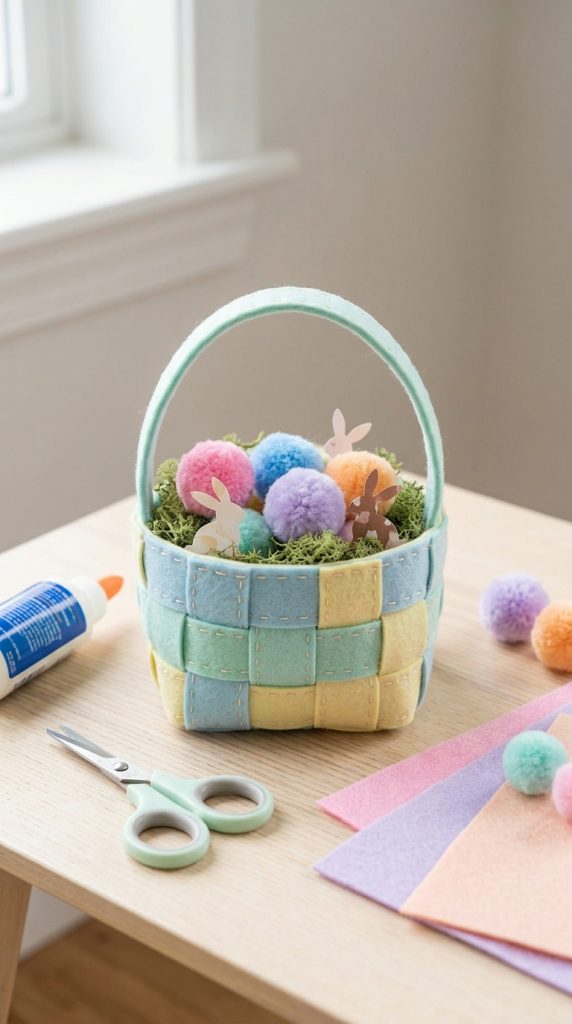
Felt Easter baskets are a perfect toddler-friendly craft that combines simple sewing or gluing with imaginative play. This craft creates small, reusable baskets that children can fill with their own Easter treasures, such as pom-pom eggs, paper bunnies, or chocolate eggs. The soft texture of felt makes it safe and easy for little hands to handle, while the bright pastel colors provide visual stimulation.
Making a felt basket helps toddlers practice hand-eye coordination and fine motor skills as they glue or stitch the basket together. Parents can pre-cut the pieces to make the craft age-appropriate. This DIY craft also encourages children to explore color combinations and practice creative decision-making.
The finished felt baskets can be used in Easter egg hunts, displayed on tables as part of seasonal décor, or gifted to family and friends. They are highly Pinterest-worthy, especially when displayed in a coordinated arrangement with pastel eggs, floral accents, or moss.
For older children, you can add embellishments like felt flowers, small ribbons, or stickers. This craft bridges creativity and play, giving toddlers a tangible result that is both fun to make and use.
Materials Needed
- Felt sheets (various pastel colors)
- Non-toxic glue or yarn for simple stitching
- Scissors (parent use recommended)
- Pom-poms, paper eggs, or small Easter items to fill the basket
- Optional: ribbons, felt flowers, or stickers
Step-by-Step How-To
- Cut out the basket base and side strips from felt sheets.
- Glue or stitch the side strips to the base to form a small basket.
- Create a handle by gluing or stitching a felt strip across the top.
- Allow glue or stitches to secure fully.
- Fill the basket with small eggs, bunnies, or pom-poms.
- Optional: decorate the basket with felt flowers, ribbons, or stickers.
Styling Tip
Display multiple felt baskets in a row with pastel moss or shredded paper filler for a Pinterest-ready table or shelf display.
8. Paper Roll Bunny Craft
Introduction
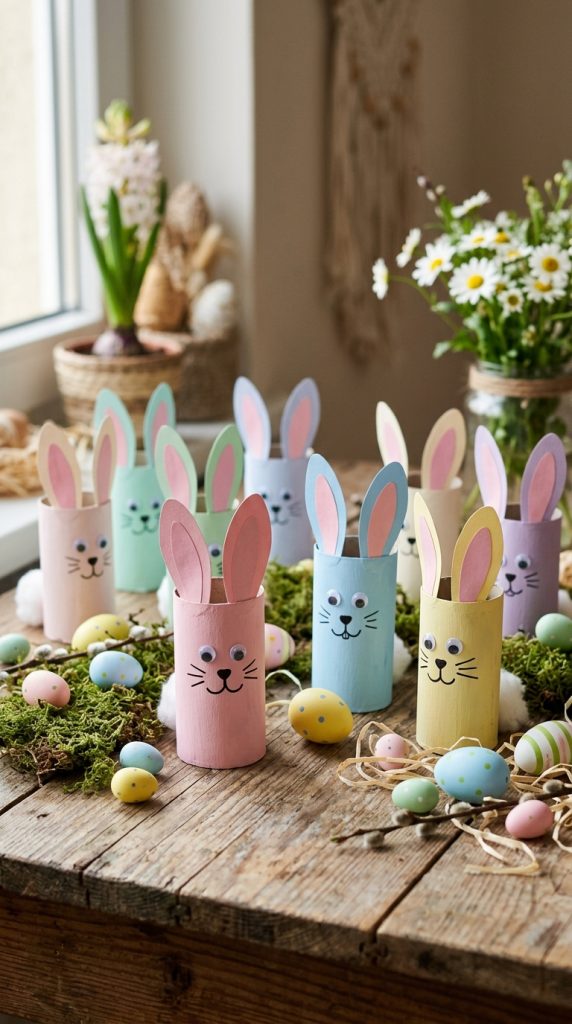
The paper roll bunny craft is a simple, eco-friendly DIY that uses recycled cardboard rolls to create adorable Easter bunnies. This project encourages toddlers to explore painting, cutting, and gluing while repurposing household items. It develops fine motor skills, creativity, and hand-eye coordination, and is highly engaging because children can personalize each bunny with different colors and accessories.
Paper roll bunnies are also incredibly versatile. They can be decorated with cotton balls, felt, stickers, or markers and placed as décor around the home or used as part of a small Easter scene. Toddlers love watching a plain cardboard tube transform into a cute bunny character.
This craft works well for groups, classrooms, or family sessions. Each child can create their own bunny, resulting in a cheerful and colorful collection. Finished bunnies can be arranged on windowsills, mantels, or Easter tables for a cohesive, visually appealing display. Older kids can get more creative by adding paper egg accessories, hats, or scarves to the bunnies.
Materials Needed
- Cardboard paper rolls (toilet or paper towel tubes)
- Paint (non-toxic, toddler-safe)
- Cotton balls
- Construction paper for ears, eyes, and nose
- Glue stick or white school glue
- Optional: ribbon, felt, or small pom-poms
Step-by-Step How-To
- Paint the paper roll in desired pastel color.
- Allow paint to dry completely.
- Cut out bunny ears from construction paper and glue them to the top.
- Glue cotton balls to create the bunny tail and fluffy belly.
- Add eyes, nose, and mouth with construction paper or markers.
- Optional: tie a ribbon around the bunny’s neck for extra charm.
- Arrange bunnies in small group displays or baskets.
Styling Tip
Place a few paper roll bunnies in a small basket with faux grass and pastel eggs for a playful, Pinterest-ready Easter vignette.
9. Popsicle Stick Chick Craft
Introduction
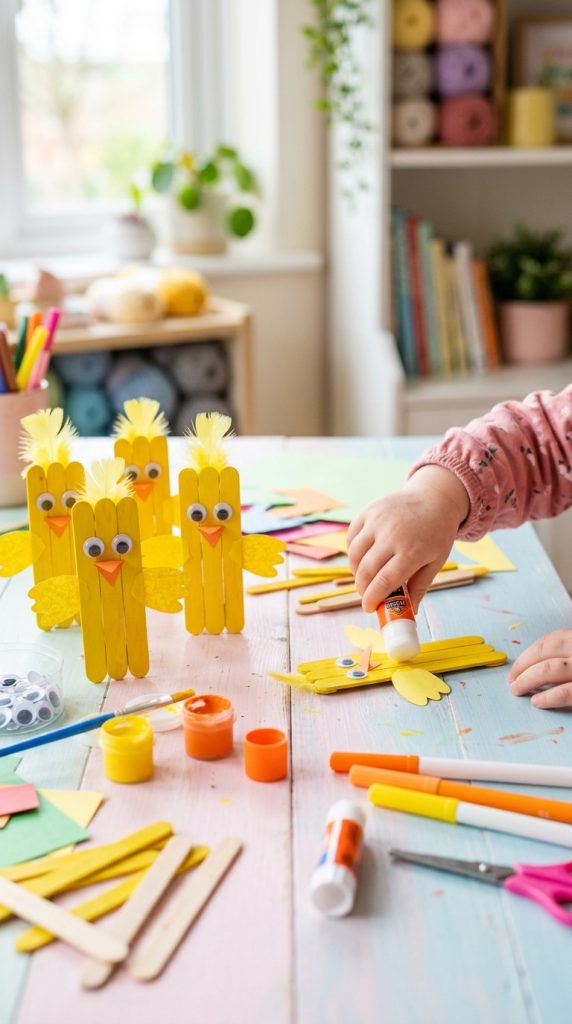
Popsicle stick chicks are a simple, tactile craft that toddlers love because it combines painting, gluing, and assembling in a structured yet fun way. Using popsicle sticks as a base gives stability while allowing for creative decoration. Toddlers can paint the sticks yellow, attach paper wings, and add eyes and beaks to create their own fluffy Easter chicks.
This craft encourages hand-eye coordination, fine motor skill development, and color recognition. The repetitive action of gluing small pieces and painting provides sensory stimulation and a sense of accomplishment. Parents can help with cutting, while toddlers focus on painting and assembling, making it a collaborative activity.
Popsicle stick chicks are lightweight and can be displayed on windowsills, incorporated into Easter card designs, or attached to sticks for a small centerpiece. They can be arranged in groups for a colorful and whimsical Easter display, perfect for Pinterest inspiration. Older children can create multiple layers or patterns for added complexity.
Materials Needed
- Popsicle sticks
- Yellow paint
- Construction paper (orange beak and wings)
- Googly eyes or black marker
- Glue stick or white school glue
- Optional: feathers or glitter
Step-by-Step How-To
- Paint popsicle sticks yellow and let them dry.
- Cut out paper wings and beak shapes.
- Glue wings to the back of the painted popsicle stick and beak to the front.
- Attach eyes with glue or draw them with a marker.
- Optional: add small feathers or glitter for extra flair.
- Display in small arrangements, frames, or baskets.
Styling Tip
Group popsicle stick chicks in odd numbers (3 or 5) for an eye-catching Easter table or window display.
10 Egg Carton Bunny Craft
Introduction
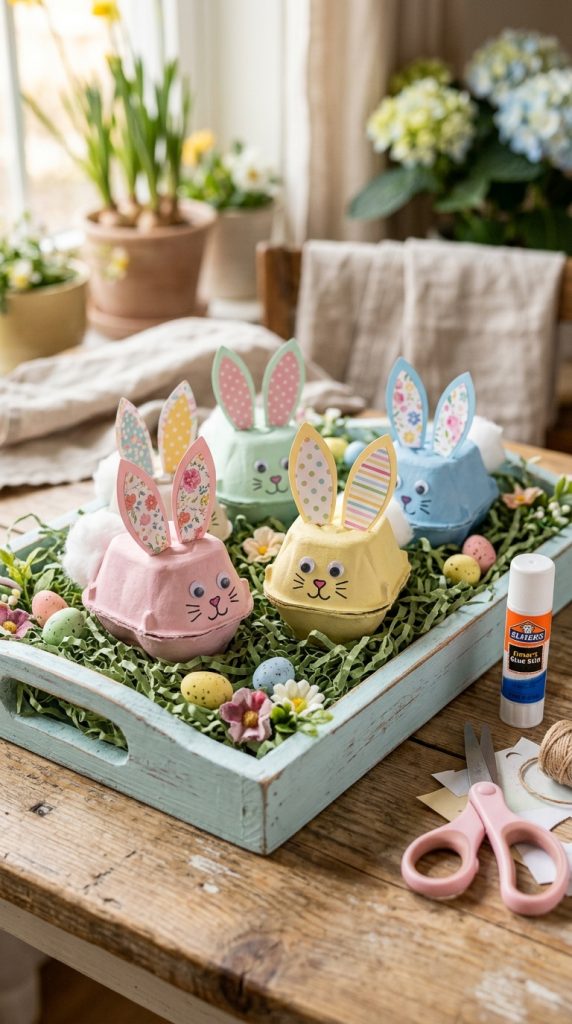
Egg carton bunnies are a fun, eco-friendly craft that transforms simple egg cartons into adorable bunny characters. This project is perfect for toddlers because it combines painting, cutting, and gluing in a hands-on activity. It encourages creativity, fine motor skills, and problem-solving as children figure out how to assemble the parts into a recognizable bunny.
Egg carton bunnies can be painted in pastel colors, decorated with cotton ball tails, googly eyes, and paper ears. Toddlers enjoy seeing a recycled item turn into a playful Easter decoration, giving them a sense of accomplishment. This craft is versatile and can be scaled for older kids by adding details like whiskers, bow ties, or glitter accents.
These bunnies can be displayed on tables, shelves, or in baskets as part of a larger Easter scene. They are lightweight, durable, and safe for toddlers to handle. Finished projects also make thoughtful gifts for family members or classroom exchanges.
Materials Needed
- Cardboard egg carton
- Non-toxic paints (pastel colors)
- Construction paper for ears
- Cotton balls for tail
- Googly eyes or marker
- Glue stick or school glue
- Optional: glitter, ribbons, or pom-poms
Step-by-Step How-To
- Cut individual egg carton cups from the carton.
- Paint the cups in desired pastel color and let dry.
- Attach paper ears at the top.
- Glue on googly eyes or draw eyes and nose.
- Attach a cotton ball tail at the back.
- Optional: add ribbons or glitter for extra charm.
- Display bunnies individually or in small Easter baskets.
Styling Tip
Arrange multiple egg carton bunnies on a pastel-lined tray or basket for a cohesive, Pinterest-ready Easter centerpiece.