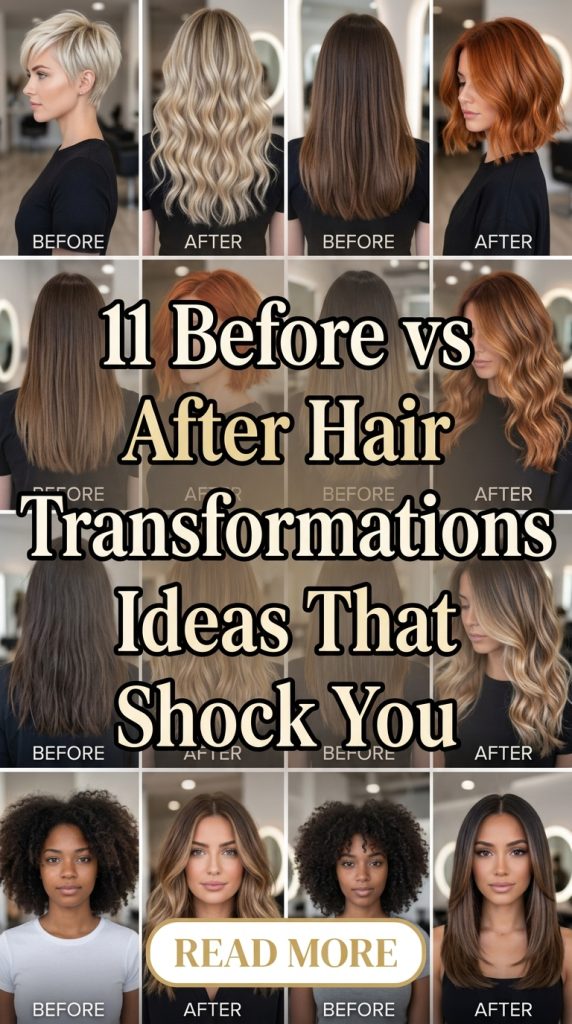
Before vs after hair transformations are one of the most powerful and visually satisfying concepts in the beauty world. They don’t just show a hairstyle—they show a complete change in appearance, confidence, and overall style in a single comparison. This is exactly why this type of content performs so strongly on platforms like Pinterest, Instagram, and TikTok.
The human brain is naturally drawn to transformation. We are wired to notice change, especially when it is dramatic and visually clear. A simple shift from dull, flat, or unstyled hair to smooth, voluminous, and styled hair creates an immediate emotional reaction. It feels inspiring, surprising, and often even motivating. This is why before vs after content consistently goes viral in the beauty niche.
Hair transformations are especially impactful because hair plays a major role in defining facial appearance. A small change in texture, volume, or styling can completely alter how someone looks. For example, frizzy or unstyled hair may make a look appear tired or casual, while the same hair after styling can look polished, elegant, and high-end.
Another reason these transformations are so popular is because they feel realistic and achievable. Unlike extreme makeovers that require dramatic changes like surgery or permanent treatments, most hair transformations can be achieved using styling techniques, simple tools, or affordable products. This makes the content relatable and highly engaging for a wide audience.
Before vs after hair content also performs well because it tells a visual story without needing many words. The “before” image creates curiosity, while the “after” image delivers satisfaction. This emotional contrast is what keeps viewers engaged and encourages them to save, share, or try the look themselves.
In today’s beauty trends, especially on Pinterest, the focus is on “effortless transformation.” People don’t want complicated routines—they want quick, visible improvements. This is why hair transformations that show simple changes like adding layers, curls, shine, or volume are extremely popular. They feel achievable even for beginners.
Another important factor is confidence. Hair transformations are not just about appearance; they are deeply connected to self-image. A good hairstyle can completely change how someone feels about themselves. Many people experience a boost in confidence after simply changing their hair texture or styling routine. This emotional impact makes transformation content more powerful than regular hairstyle ideas.
Lighting, angles, and styling also play a major role in how dramatic a transformation appears. The best before vs after comparisons often use consistent angles but different styling techniques to highlight contrast clearly. For example, flat straight hair in the “before” image and voluminous waves in the “after” image create a strong visual difference that feels almost unbelievable.
Hair transformations also work across all hair types and lengths. Whether the hair is short, long, curly, straight, thick, or thin, there is always potential for improvement and styling variation. This universality is one of the reasons this content never goes out of trend.
Another reason this topic is so powerful on Pinterest is its save-worthy nature. Users often save transformation ideas because they want to recreate them later or use them as inspiration for salon visits. This makes before vs after posts highly valuable for engagement and long-term traffic.
From a content creation perspective, hair transformation ideas are also extremely flexible. They can include:
- Cutting and layering changes
- Curling and straightening transformations
- Volume enhancement styles
- Color-enhanced looks (without permanent dye focus)
- Styling upgrades using accessories
- Frizz control and smoothing techniques
Each transformation tells a different story, but all follow the same powerful visual formula: simple before → dramatic after.
In this guide, you will explore 11 Before vs After Hair Transformation Ideas That Shock You, designed to help you understand how small styling changes can create a huge visual impact. Each idea will explain:
- What the transformation is
- How it changes the look
- How to achieve it step-by-step
- Who it works best for
- Styling tips for better results
- Common mistakes to avoid
The goal is not just to show pretty hairstyles, but to help you understand the real techniques behind transformations that make hair look healthier, fuller, shinier, and more expensive.
By the end of this guide, you will be able to see hair not just as it is—but as what it can become with the right styling approach.
Now let’s begin exploring the first transformation ideas that can completely change your hair from simple to stunning.
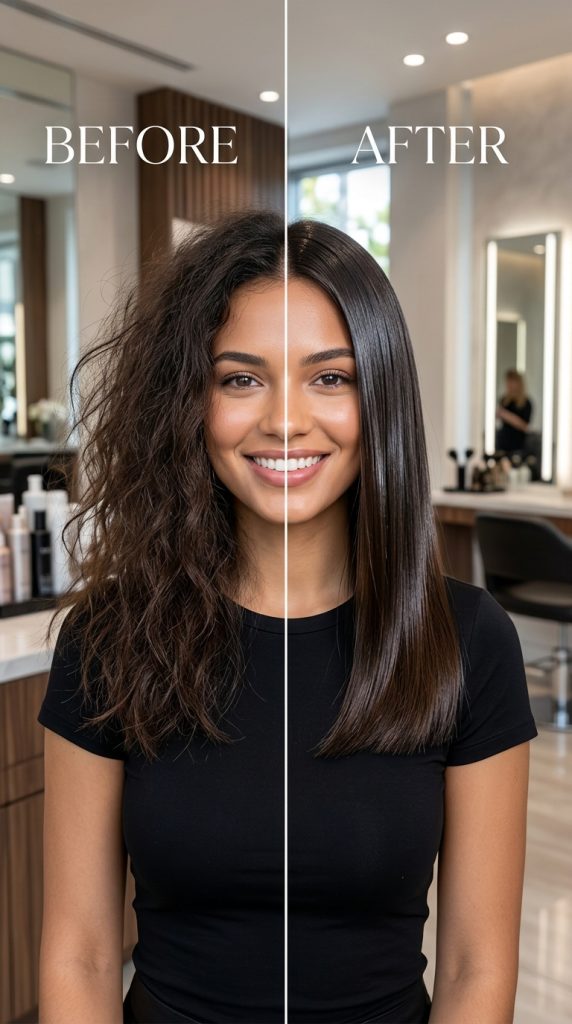
1. Frizzy Hair to Sleek Glass Hair Transformation
Explanation (What it is)
The frizzy to sleek “glass hair” transformation is one of the most dramatic and satisfying changes in hair styling. It focuses on turning dry, frizz-prone, uneven hair into smooth, shiny, reflective hair that looks almost like glass.
What makes this transformation so powerful is the contrast. Frizzy hair often looks unpolished, messy, or dry, while sleek glass hair gives a completely different impression—clean, healthy, expensive, and professionally styled.
This look is heavily associated with luxury beauty trends because smooth, reflective hair signals care, maintenance, and high-quality styling. It is often seen in salon finishes, editorial shoots, and high-end fashion campaigns.
The transformation doesn’t always require permanent changes. Most of the effect comes from styling techniques, hydration, and heat styling control.
How to achieve it (Step-by-step)
Start with preparation:
- Wash hair with smoothing or hydrating shampoo
- Apply anti-frizz conditioner
- Use a heat protectant before styling
Drying technique:
- Blow dry in downward direction
- Use a round brush for smooth finish
- Avoid rough towel drying
Styling process:
- Use a straightener in small sections
- Apply lightweight shine serum
- Finish with anti-frizz spray
Finishing touch:
- Tuck hair behind ears for sleek look
- Keep parting clean and defined (middle or side part)
Best for (Who should use it)
- Frizzy or dry hair types
- Formal or professional looks
- Evening or event styling
- People wanting polished luxury hair
Pro tip (Expert advice)
Always straighten in thin sections—this is what creates that true “glass reflection” finish instead of a flat look.
Mistake to avoid
Avoid using too much oil or serum—it can make hair look greasy instead of shiny.
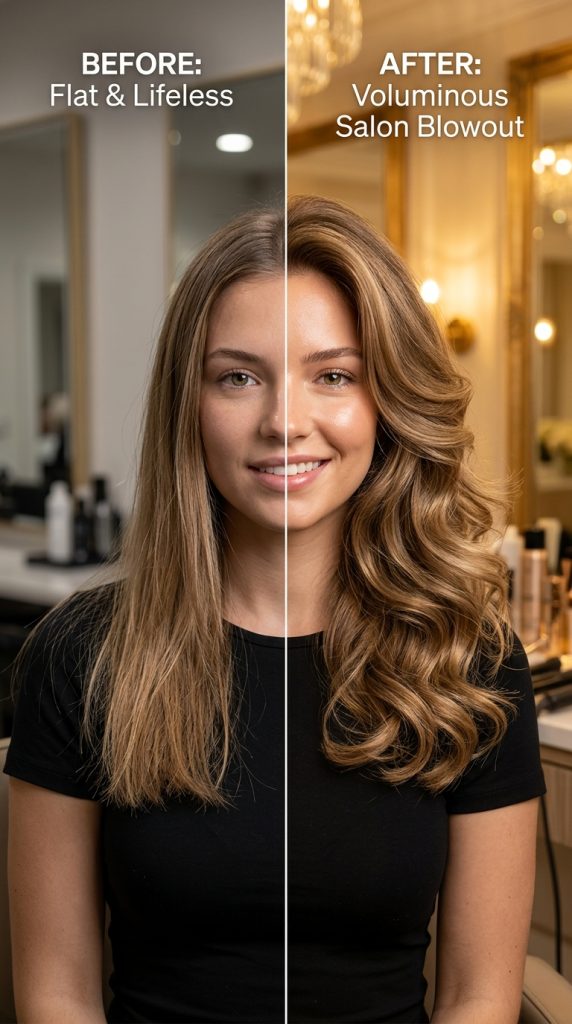
2. Flat Limp Hair to Voluminous Blowout Transformation
Explanation (What it is)
The flat to voluminous blowout transformation is designed to turn lifeless, flat hair into full, bouncy, salon-style volume. This change is one of the most visually impactful because it completely alters the shape of the face and head structure.
Flat hair often looks heavy or tired, while voluminous hair creates energy, youthfulness, and a luxurious salon-finished appearance. This is why blowouts are a staple in high-end hairstyling and celebrity looks.
The key idea is creating lift at the roots and movement through the lengths of the hair. Instead of sitting flat against the head, the hair is styled to have body and bounce.
How to achieve it (Step-by-step)
Preparation:
- Use volumizing shampoo and lightweight conditioner
- Apply root-lifting mousse on damp hair
Drying technique:
- Blow dry upside down for root lift
- Use a round brush to lift sections at the crown
- Focus heat at roots first
Styling process:
- Curl large sections away from face
- Use Velcro rollers for extra volume (optional)
Finishing touch:
- Shake hair gently for natural bounce
- Apply light-hold hairspray for movement
Best for (Who should use it)
- Fine or thin hair types
- Flat or lifeless hair textures
- Special events or photoshoots
- Glam and feminine hairstyles
Pro tip (Expert advice)
Volume starts at the roots—if the crown has lift, the entire hairstyle will look more expensive and styled.
Mistake to avoid
Avoid over-curling small sections—it can make the hair look too tight instead of voluminous.
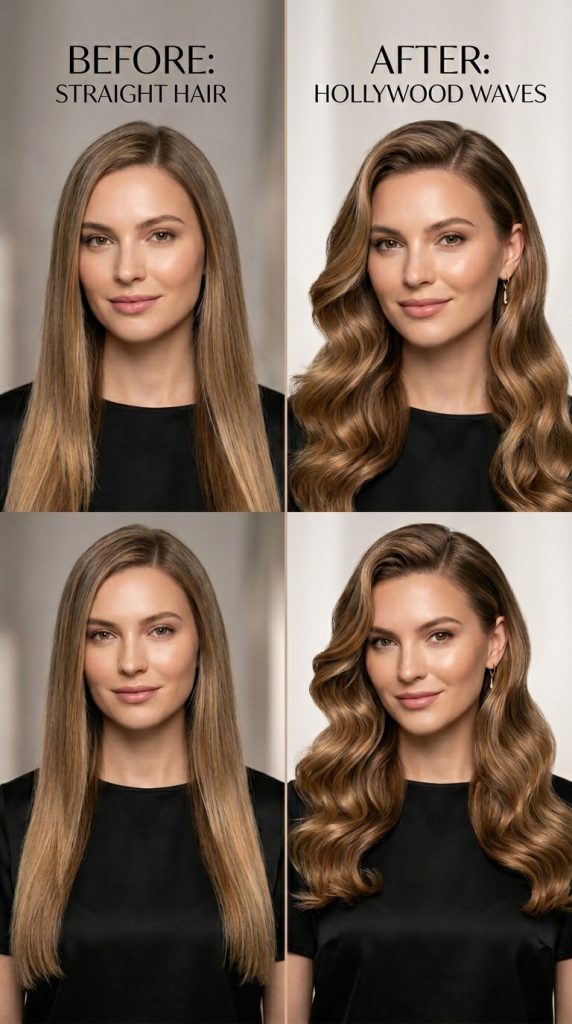
3. Basic Straight Hair to Soft Hollywood Waves Transformation
Explanation (What it is)
The straight to Hollywood waves transformation is one of the most iconic hairstyle upgrades because it instantly turns a simple everyday look into a glamorous, red-carpet-inspired style.
Straight hair is clean and minimal, but it can sometimes look too simple or flat. Adding soft waves introduces movement, softness, and dimension, which dramatically enhances the overall appearance.
Hollywood waves are known for their smooth, uniform S-shape pattern that creates a polished and luxurious finish. This style is commonly seen in fashion events, celebrity appearances, and Pinterest beauty inspiration boards.
What makes this transformation so powerful is how universally flattering it is. It enhances facial structure, adds softness around the face, and creates a balanced, elegant look.
How to achieve it (Step-by-step)
Preparation:
- Apply heat protectant spray
- Use smoothing serum for shine
Curling process:
- Use a large barrel curling iron
- Curl all sections in the same direction for uniform waves
- Hold curls briefly and release gently
Shaping technique:
- Let curls cool completely
- Brush through softly for wave formation
Finishing touch:
- Apply shine spray for glossy finish
- Tuck one side behind ear for elegance
Best for (Who should use it)
- Medium to long hair
- Formal events or parties
- Romantic or feminine aesthetics
- Photoshoots or special occasions
Pro tip (Expert advice)
Let curls fully cool before brushing—this is what keeps waves smooth and long-lasting.
Mistake to avoid
Avoid mixing curl directions too randomly—it breaks the Hollywood wave pattern and makes it look messy instead of elegant.
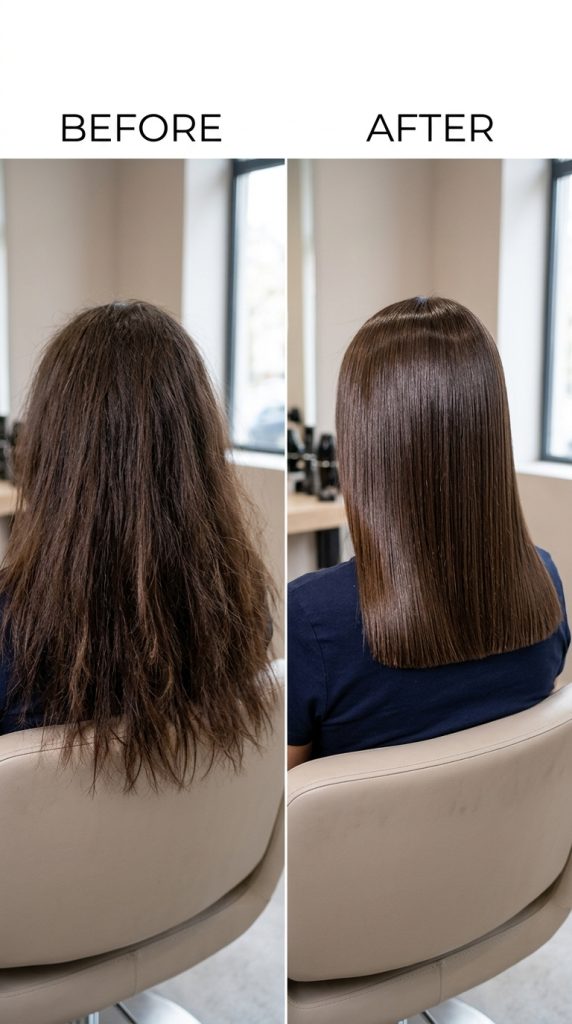
4. Split Ends & Dry Hair to Healthy Glossy Trim Transformation
Explanation (What it is)
This transformation focuses on turning visibly damaged, dry, and split-end hair into smooth, freshly trimmed, healthy-looking hair. It may sound simple, but visually it is one of the most satisfying upgrades because it completely changes how “cared for” the hair looks.
Split ends and dryness often make hair appear older, frizzy, and unmaintained, even if the length is long and thick. When the ends are trimmed and the hair is properly hydrated, the entire look becomes cleaner, softer, and more luxurious.
What makes this transformation powerful is the “fresh salon effect.” Even without changing length dramatically, just removing damaged ends and adding shine instantly gives a polished, expensive appearance.
This look is strongly associated with healthy beauty standards and salon-fresh aesthetics seen in professional hair care campaigns and Pinterest “healthy hair goals” trends.
How to achieve it (Step-by-step)
Preparation:
- Identify dry or split ends (usually bottom 1–2 inches)
- Use moisturizing shampoo and conditioner
Treatment:
- Apply deep conditioning mask once or twice weekly
- Use leave-in conditioner for hydration
Trimming (key step):
- Get a light trim every 6–8 weeks
- Focus only on damaged ends for maintaining length
Styling finish:
- Apply lightweight hair oil to ends only
- Blow dry with cool air for shine
Best for (Who should use it)
- Dry or damaged hair
- Long hair with split ends
- People growing their hair out
- Anyone wanting healthier appearance
Pro tip (Expert advice)
Even a small trim can dramatically improve how thick and healthy the hair looks.
Mistake to avoid
Avoid applying heavy oil on roots—it can make hair look greasy instead of healthy.
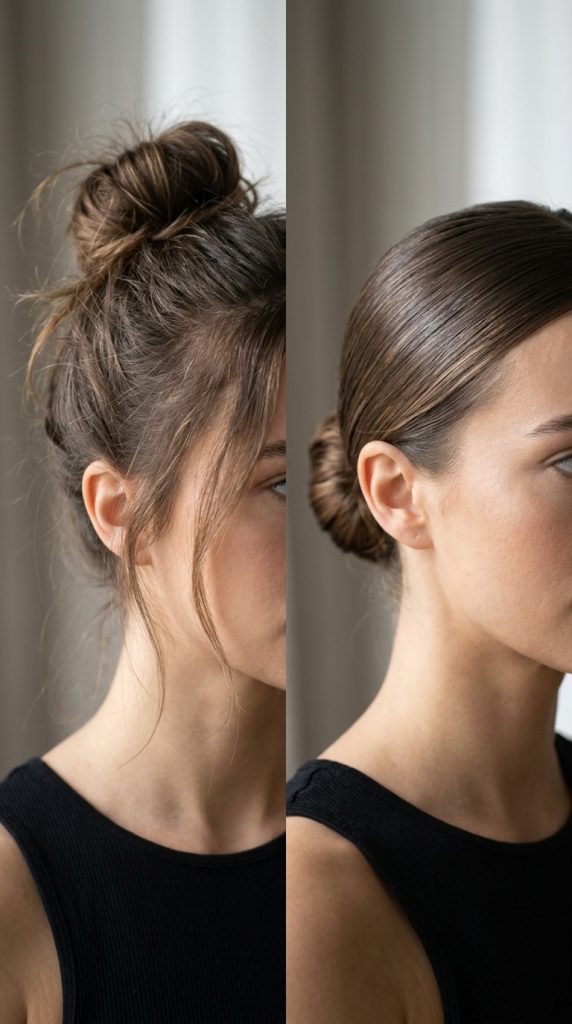
5. Messy Bun to Sleek Low Bun Transformation
Explanation (What it is)
The messy bun to sleek low bun transformation is a powerful upgrade that takes an everyday casual hairstyle and turns it into a polished, elegant, and structured look. A messy bun often feels relaxed and effortless, but a sleek low bun gives a refined, intentional, and high-end appearance.
What makes this transformation so impactful is the shift in “energy.” The messy bun gives a carefree vibe, while the sleek bun creates sophistication and confidence. This is why it is often used in professional settings, formal events, and clean luxury aesthetics.
The sleek low bun is also strongly associated with minimalist and “old money” styling because it emphasizes structure, shine, and control rather than volume or chaos.
How to achieve it (Step-by-step)
Preparation:
- Brush hair thoroughly to remove tangles
- Apply smoothing serum or gel
Styling process:
- Part hair in the middle or side
- Gather hair into a low ponytail
- Twist hair tightly into a bun
Securing:
- Use bobby pins to hold bun in place
- Smooth flyaways with gel or hairspray
Finishing touch:
- Tuck ends neatly under bun
- Add shine spray for polished finish
Best for (Who should use it)
- Formal or office looks
- Weddings or events
- Straight or slightly wavy hair
- Minimalist fashion aesthetics
Pro tip (Expert advice)
The tighter and smoother the base, the more expensive and elegant the bun looks.
Mistake to avoid
Avoid leaving random loose strands unless intentionally styled—messiness reduces the sleek luxury effect.
6. Thin Hair to Thick Volume Illusion Transformation
Explanation (What it is)
This transformation focuses on making thin or fine hair appear significantly thicker and fuller through styling techniques. It does not change the actual hair density but creates a strong visual illusion of volume and body.
Thin hair often looks flat, soft, and lacking structure, which can make hairstyles appear less styled. By using the right techniques, the same hair can look dramatically fuller, more textured, and salon-ready.
What makes this transformation so impressive is how much visual impact it creates without permanent changes. It is one of the most requested beauty upgrades because it instantly improves confidence and overall appearance.
This technique is widely used in professional hairstyling, editorial shoots, and Pinterest volume-focused hair trends.
How to achieve it (Step-by-step)
Preparation:
- Use volumizing shampoo and lightweight conditioner
- Apply root-lifting spray on damp hair
Drying technique:
- Blow dry upside down for root lift
- Use round brush at crown area
Styling process:
- Curl hair in large sections for body
- Backcomb lightly at roots if needed
Finishing touch:
- Use dry shampoo for extra texture
- Set with light-hold hairspray
Best for (Who should use it)
- Fine or thin hair types
- Flat or limp hair
- Everyday and glam styling
- Photoshoots or special events
Pro tip (Expert advice)
Volume looks most natural when focused at the crown and mid-lengths, not just the ends.
Mistake to avoid
Avoid heavy products near roots—they weigh hair down and reduce volume instantly.
7. Heat-Styled Hair to Heatless Curls Transformation
Explanation (What it is)
This transformation shows the shift from regularly heat-styled hair (straighteners or curling irons) to soft, heatless curls created without damage. The “before” usually looks smooth but flat or slightly over-styled, while the “after” has natural bounce, softness, and healthier-looking texture.
What makes this transformation so powerful is the visual “health upgrade.” Heatless curls are associated with damage-free hair care, softness, and effortless beauty. The hair looks more natural, shiny, and full of movement, which creates a very Pinterest-friendly aesthetic.
It also reflects a modern beauty shift—people are moving away from excessive heat styling and toward healthier, low-damage routines. This makes the transformation both visually appealing and lifestyle-relevant.
How to achieve it (Step-by-step)
Preparation:
- Start with slightly damp or dry brushed hair
- Apply lightweight leave-in conditioner
Heatless curling methods:
- Use silk robe belt or curling ribbon overnight
- Braids (loose for waves, tight for texture)
- Sock curls or foam rollers
Setting process:
- Leave hair wrapped overnight or 6–8 hours
- Ensure hair is fully dry before removing
Finishing touch:
- Gently separate curls with fingers
- Apply light serum for shine
Best for (Who should use it)
- Damaged or dry hair
- Everyday natural styling
- Heat-free beauty routines
- Long or medium hair lengths
Pro tip (Expert advice)
The looser the wrap, the softer and more natural the curls will look.
Mistake to avoid
Avoid brushing curls aggressively—it breaks the natural wave pattern and reduces volume.
8. Flat Straight Hair to Face-Framing Layered Blowout Transformation
Explanation (What it is)
This transformation upgrades simple flat straight hair into a layered, face-framing blowout style that adds shape, movement, and dimension. Straight hair often looks sleek but can lack personality or volume, especially when it falls flat against the face.
By introducing face-framing layers and a blowout finish, the hairstyle becomes more dynamic and flattering. The layers highlight facial features like cheekbones and jawline, while the blowout adds bounce and salon-level polish.
What makes this transformation so impactful is the shape change. Instead of hair just falling straight down, it now frames the face and creates a structured yet soft silhouette.
This look is heavily used in luxury salon styling and Pinterest “effortless glam” aesthetics.
How to achieve it (Step-by-step)
Preparation:
- Ask for soft face-framing layers (or style with heat tools)
- Apply heat protectant
Blowout process:
- Use round brush to lift roots
- Curl ends slightly inward or outward
- Focus on front sections for framing
Styling finish:
- Add light volume spray at crown
- Smooth ends with serum
Best for (Who should use it)
- Straight or fine hair
- Round or oval face shapes
- Everyday polished looks
- Work or casual glam styling
Pro tip (Expert advice)
Face-framing layers should start around chin or cheek level for the most flattering effect.
Mistake to avoid
Avoid making layers too harsh or choppy—it reduces the soft luxury blowout effect.
9. Simple Ponytail to High Volume Glam Ponytail Transformation
Explanation (What it is)
This transformation takes a basic, everyday ponytail and upgrades it into a high-volume, glam version that looks polished, lifted, and full of energy. A simple ponytail often appears flat or casual, while a voluminous ponytail creates a bold, confident, and styled appearance.
What makes this transformation so striking is the change in height, texture, and fullness. By adding lift at the crown and volume in the tail, the entire face appears more lifted and defined. This is why glam ponytails are often used in red carpet looks and influencer styling.
The glam ponytail is also a favorite in Pinterest beauty trends because it looks both simple and dramatic at the same time.

How to achieve it (Step-by-step)
Preparation:
- Apply volumizing mousse or dry shampoo
- Tease crown lightly for lift
Styling process:
- Tie hair into high or mid ponytail
- Wrap small section of hair around elastic for clean finish
Volume enhancement:
- Curl ponytail lightly for bounce
- Gently pull sections to create fullness
Finishing touch:
- Smooth front hair for sleek look
- Add shine spray for polished effect
Best for (Who should use it)
- Thin or medium hair
- Party or glam looks
- Oval or heart-shaped faces
- Quick but stylish hairstyles
Pro tip (Expert advice)
Adding crown volume is the secret step that makes a ponytail look expensive instead of basic.
Mistake to avoid
Avoid tying ponytail too tight without volume—it flattens the whole look and reduces glam effect.
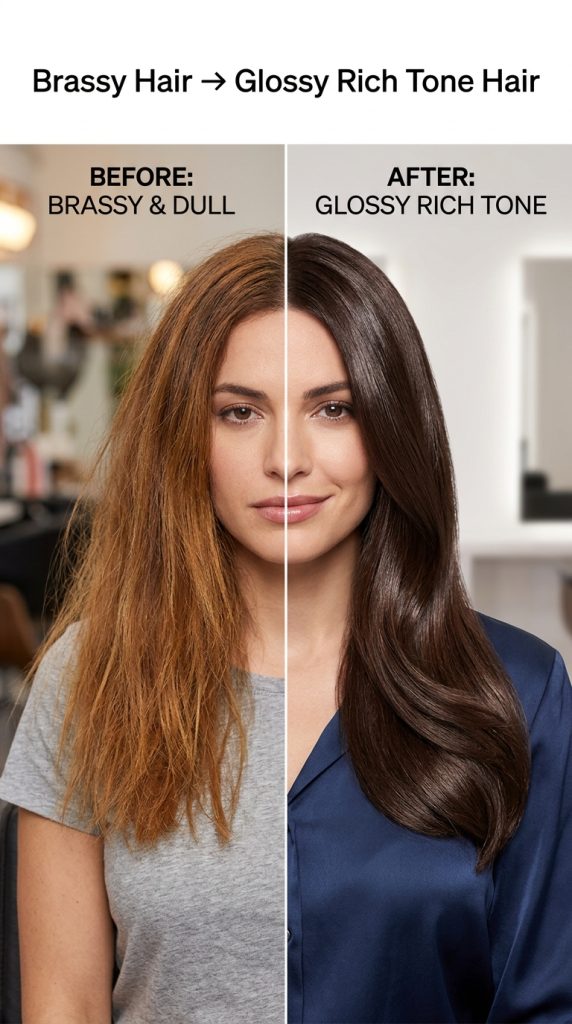
10. Brassy, Uneven Hair Color to Glossy Rich-Look Tone Transformation
Explanation (What it is)
This transformation focuses on taking dull, brassy, uneven-looking hair color and turning it into a glossy, rich-toned, salon-finished shade. Even if the haircut stays exactly the same, the change in tone alone can completely transform the entire appearance.
Brassy hair often looks dry, faded, or over-processed, which can make the overall look feel unbalanced. When the tone is corrected and enhanced—whether it becomes cooler, warmer, or more neutral—the hair suddenly looks healthier, shinier, and more expensive.
What makes this transformation so powerful is the “luxury color effect.” Rich-toned hair reflects light better, looks more dimensional, and gives the impression of professional salon care. This is why glossy brunette, caramel, and soft blonde tones are heavily featured in Pinterest beauty trends.
Even without dramatic color changes, simple gloss treatments or toning can create a visible upgrade.
How to achieve it (Step-by-step)
Preparation:
- Identify brassy or uneven tones
- Use color-safe shampoo and conditioner
Color correction methods:
- Purple shampoo for blonde brassiness
- Blue shampoo for orange tones in brown hair
- Gloss or toner treatment for shine boost
Treatment process:
- Apply toner or gloss evenly from mid-length to ends
- Leave for recommended time
- Rinse with cool water for shine
Finishing touch:
- Apply lightweight shine serum
- Avoid heavy oil at roots
Best for (Who should use it)
- Colored or highlighted hair
- Dull or faded tones
- People wanting salon-fresh look
- Blonde, brunette, or balayage styles
Pro tip (Expert advice)
Gloss treatments every few weeks can keep hair looking freshly done without full recoloring.
Mistake to avoid
Avoid overusing purple shampoo—it can make hair look overly ashy or dull instead of rich.
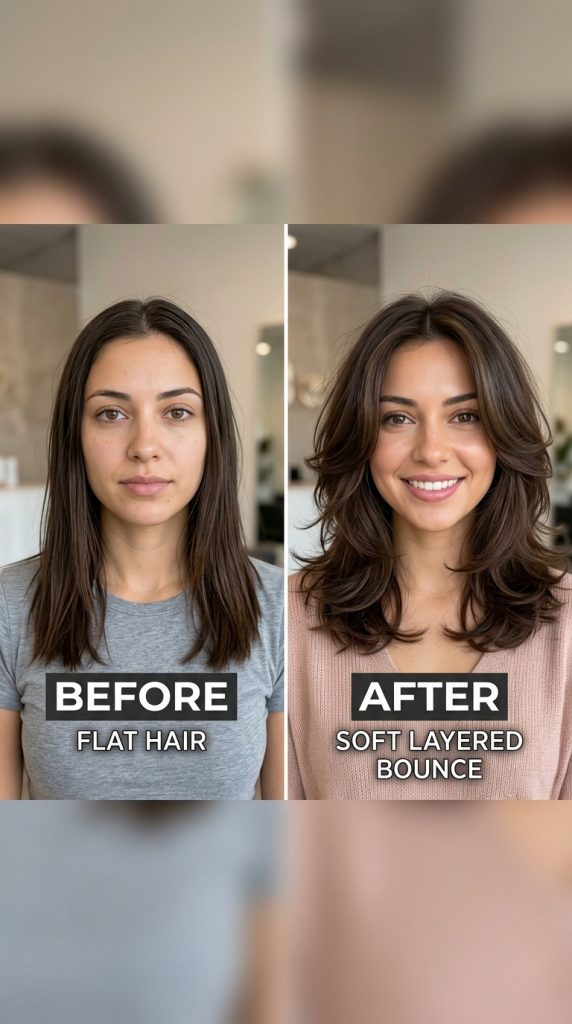
11. Flat Lifeless Hair to Soft Layered Bounce Transformation
Explanation (What it is)
This transformation upgrades flat, lifeless hair into soft, layered bounce with movement and natural flow. Flat hair often lacks shape and can make the face look less defined, while layered bounce adds softness, dimension, and a much more styled appearance.
What makes this transformation so visually powerful is the change in structure. Instead of hair falling straight and heavy, it gains movement, texture, and volume that frames the face more beautifully. Layers create natural lift, especially around the ends and mid-lengths, making the hair feel lighter and more dynamic.
This is one of the most popular transformations in salons because it doesn’t require extreme cutting or coloring—just strategic layering and styling to create a completely refreshed look.
On Pinterest, this style is associated with effortless beauty, soft glam, and “expensive natural hair” aesthetics.
How to achieve it (Step-by-step)
Preparation:
- Ask for soft long layers or feathered layers
- Use lightweight volumizing shampoo
Cut/style process:
- Focus layers around face and lower lengths
- Avoid harsh or choppy cuts
Blowout styling:
- Use round brush for soft lift
- Curl ends slightly inward or outward
- Add crown volume for balance
Finishing touch:
- Apply lightweight texturizing spray
- Separate layers gently with fingers
Best for (Who should use it)
- Flat or heavy hair
- Long to medium hair lengths
- Soft glam or natural aesthetics
- Everyday wearable styling
Pro tip (Expert advice)
The most flattering layers are subtle—soft movement always looks more expensive than sharp, extreme cuts.
Mistake to avoid
Avoid over-layering thin hair—it can reduce density and make hair look even flatter.