
Building your first base in a Minecraft cherry blossom biome is an unforgettable experience. Cherry blossom wood brings a gentle, charming, and aesthetic pink tone to any world. It transforms simple survival shelters into cozy, eye-catching home designs effortlessly. However, building with pink blocks can sometimes feel tricky for beginners. You need balanced accent materials that contrast well without looking messy. In this comprehensive tutorial guide, you will discover simple starter cherry blossom houses. These beginner-friendly tutorial ideas are easy to build in early survival mode.
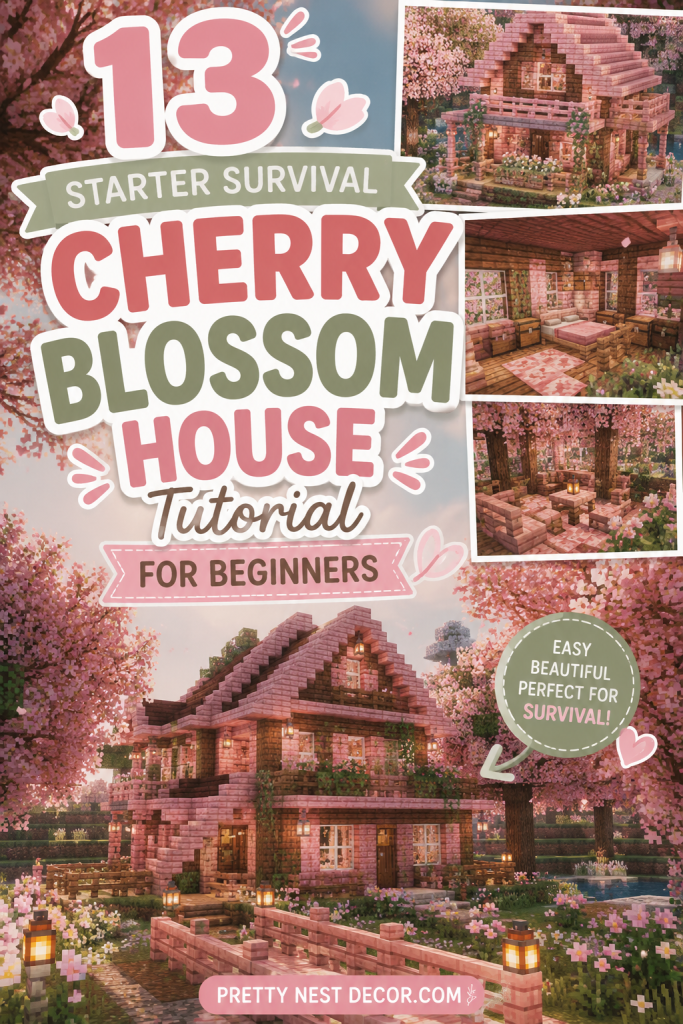
Understanding basic color combinations will completely elevate your building style today. Cherry wood features a vibrant, warm pink hue with soft natural grain. Pairing it with white quartz, birch, or stone bricks creates instant balance. Furthermore, stripped cherry logs offer a clean, smooth pastel texture for walls. Transitioning between dark oak roofs and pink walls adds dramatic visual depth. You can build small starter cabins or elevated stilt houses easily. Therefore, learning these starter tutorials expands your survival building skills significantly.
In this guide, we will explore thirteen distinct starter cherry blossom tutorials. Each idea includes a clear explanation, materials list, and guide. You will learn how to build sturdy frames, walls, and roofs step-by-step. Additionally, these designs require minimal resources, perfect for early game survival. So, grab your wooden axe, gather your pink planks, and start building. Let us dive directly into these beginner-friendly cherry blossom tutorials.
1. Cozy Cherry Wood A-Frame Cabin
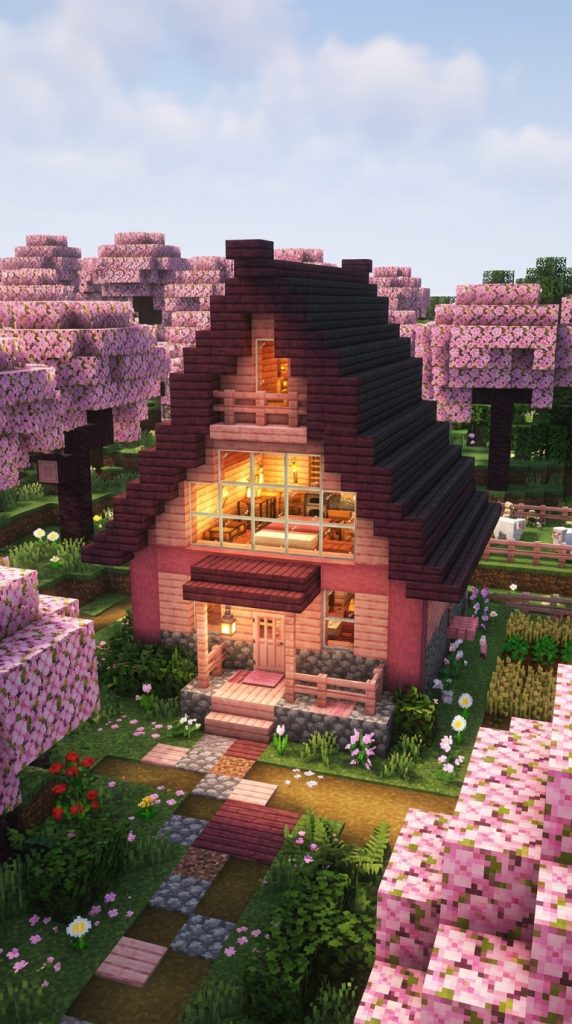
The A-frame cabin is one of the easiest starter houses to build. It features a steep, triangular roof that stretches down near the ground. Furthermore, combining pink cherry planks with spruce stair trims creates warm contrast. This design requires very few materials, making it ideal for night one.
A-frame cabins offer excellent protection from hostile mobs while looking extremely cozy. The angled roof design eliminates the need for complex wall framing. Furthermore, large glass windows on the front wall allow plenty of natural light. Consequently, your starter cabin feels open, warm, and safe for sleeping.
Cozy Cabin Lighting
Lighting a small A-frame cabin requires simple, space-saving decoration ideas. Hanging a single iron lantern from the top ceiling beam provides ample light. Furthermore, placing a campfire outside under a stone chimney adds rising smoke. Sunlight filtering through the front glass window enhances the warm pink interior.
Materials Needed
- Cherry Wood Planks
- Spruce Wood Stairs
- Stripped Cherry Log
- Glass Panes
- Iron Lanterns
Step-by-Step Guide
First, clear a flat seven-by-nine block area on the grass floor. Place stripped cherry logs at the four corners to mark your layout. Next, build a solid stone brick line along the front for foundation. Consequently, you establish a sturdy, level base frame for your cabin.
Second, construct a steep triangular roof using dark spruce wood stairs. Begin at ground level on both sides and meet at the center top. Next, fill the front and back wall faces using pink cherry planks. Consequently, your cabin gains its iconic, cozy A-frame shape immediately.
Third, carve out a large central opening on the front wall face. Install clear glass panes to create a tall, bright triangular window. Additionally, place a spruce door at the center base for easy entry. Finally, hang an iron lantern inside to complete your cozy cabin.
2. Elevated Cherry Blossom Stilt House
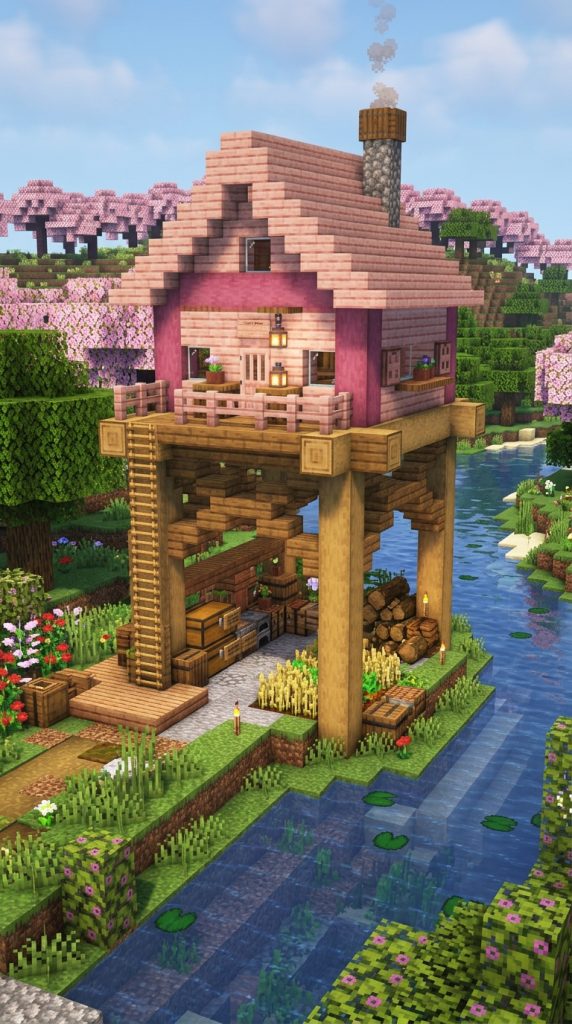
Building an elevated stilt house keeps your starter base safe from creepers. It features a compact cherry wood cabin lifted above ground level by pillars. Furthermore, the open space underneath serves as a convenient storage or farming area. This tutorial is perfect for building near rivers or uneven hillsides.
Stilt houses provide built-in security during your early survival nights. Lifting your living quarters prevents surprise mob encounters near your front door. Furthermore, adding a ladder or simple wooden staircase makes access easy. Consequently, your base remains safe, functional, and visually impressive from afar.
Ground Clearance Security
Lifting your living floor three or four blocks off the ground offers safety. Hostile mobs like zombies and spiders cannot reach your upper entrance easily. Furthermore, lighting the area underneath with torches prevents unwanted mob spawns below. Consequently, your lower storage zone stays safe for crafting and smelting.
Materials Needed
- Cherry Wood Planks
- Oak Logs
- Cherry Wood Fences
- Glass Panes
- Wooden Ladders
Step-by-Step Guide
First, erect four sturdy vertical pillars using four-block-tall oak logs. Space the logs six blocks apart to create a square base layout. Next, connect the tops of the pillars using horizontal oak log beams. Consequently, you build a strong, elevated wooden platform for your home.
Second, build a flat floor platform on top using pink cherry planks. Construct four-block-tall walls around the perimeter using stripped cherry wood. Next, cut out two-by-two window openings on three wall sides today. Consequently, your elevated cabin receives abundant natural sunlight and views.
Third, build a simple sloped roof using cherry wood stairs and slabs. Attach wooden ladders or a narrow fence staircase to one front pillar. Additionally, place crafting tables and chest storage under the open stilt platform. Finally, surround the lower base with oak leaves for natural detail.
3. Rustic Stone and Cherry Starter Cottage
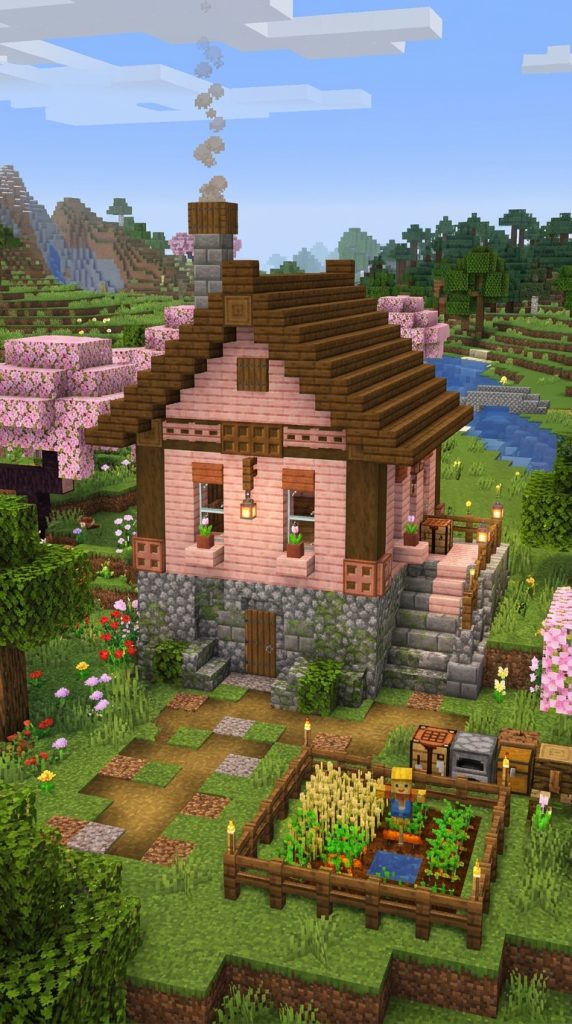
Combining heavy stone bricks with soft pink cherry wood creates timeless balance. This starter cottage features a solid cobblestone foundation with pink plank walls. Furthermore, a dark oak roof provides rich, dark framing over the structure. It offers a grounded, classic aesthetic that fits any biome border.
Rustic cottages offer excellent durability against blast damage and weather elements. The thick stone base provides a heavy, realistic look to your build. Furthermore, adding small flower boxes beneath windows introduces vibrant natural colors. As a result, your starter cottage looks warm, homey, and sturdy.
Wall Texture Blending
Mixing different stone textures along the base adds realistic rustic detail easily. Interspersing cobblestone with mossy stone bricks simulates aged, natural weathering over time. Furthermore, placing pink petals along the stone foundation softens hard block edges. Consequently, the stone foundation blends seamlessly into surrounding grassy terrain.
Materials Needed
- Cherry Wood Planks
- Cobblestone
- Stone Bricks
- Dark Oak Stairs
- Flower Pots
Step-by-Step Guide
First, lay down an eight-by-ten block foundation using rough cobblestone. Build the cobblestone base two blocks tall for a sturdy stone foundation. Next, place stone brick stairs along the front to create an entrance. Consequently, you establish a strong, weather-resistant base frame for walls.
Second, build three-block-tall upper walls using warm pink cherry planks. Frame the wall corners using upright stripped oak logs for structural support. Next, install small one-block window openings framed with dark oak trapdoors. Consequently, your cottage walls look detailed, cozy, and well-supported.
Third, construct an A-frame roof using dark oak stairs along edges. Fill the inner roof slope using pink cherry wood slabs for color. Additionally, place potted pink tulips along the front stone window sills. Finally, hang a iron lantern above the front entrance door frame.
4. Minimalist Cherry Wood Survival Cube
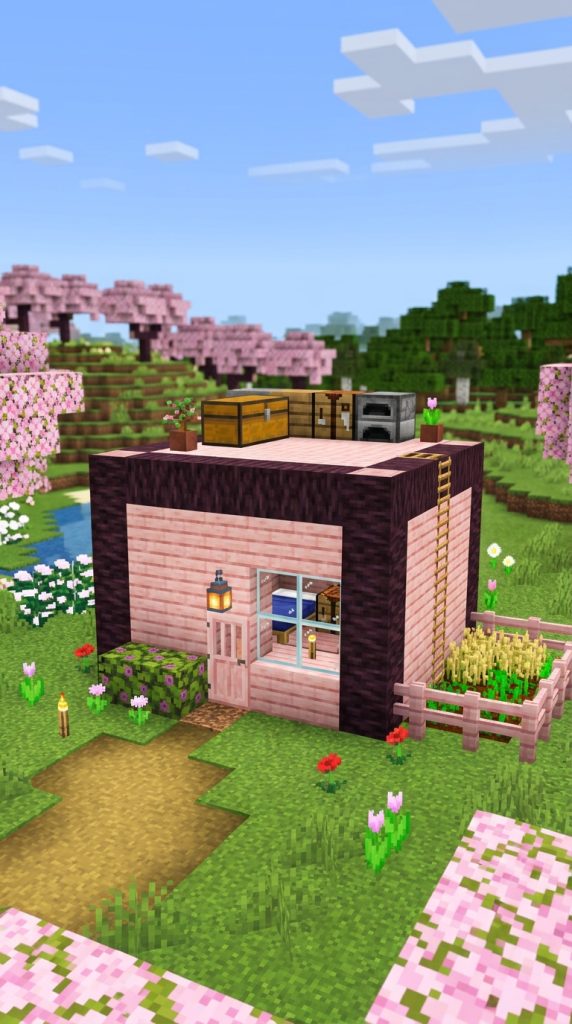
If you need a fast, cute shelter on day one, build this. The minimalist survival cube focuses on compact space, symmetry, and function. Furthermore, using stripped cherry logs creates a clean, pastel exterior box shape. It requires minimal logs while offering complete safety and essential storage space.
Compact cube builds are surprisingly versatile and easy to expand later on. You can stack additional modules on top as your resource inventory grows. Furthermore, the flat roof serves as an early-game crop farm or lookout. Consequently, this minimalist design delivers maximum function with minimal effort.
Space-Efficient Interiors
Maximizing interior floor space in a small cube requires clever block placement. Sunking your bed, crafting table, and furnace into the floor saves room. Furthermore, placing double chests along upper wall edges utilizes vertical space efficiently. Consequently, your tiny starter cube feels spacious and organized inside.
Materials Needed
- Stripped Cherry Log
- Cherry Wood Planks
- Glass Blocks
- Oak Trapdoors
- Torches
Step-by-Step Guide
First, construct a simple five-by-five block square using stripped cherry logs. Build the corner posts four blocks tall to establish interior height room. Next, connect the top posts using horizontal stripped cherry logs smoothly. Consequently, you create a clean, minimalist cube frame for your home.
Second, fill the wall sections using light pink cherry wood planks. Leave a two-block-high opening on the front wall for glass blocks. Next, place clear glass blocks into the opening for a clean window. Consequently, your small cube receives plenty of daytime light inside.
Third, lay down a smooth floor using light-colored birch wood planks. Place a bed, crafting table, furnace, and chest inside the room. Additionally, install a flat roof using cherry slabs for extra storage space. Finally, place torches on all outer corners to prevent mob spawns.
5. Overgrown Pink Blossom Treehouse
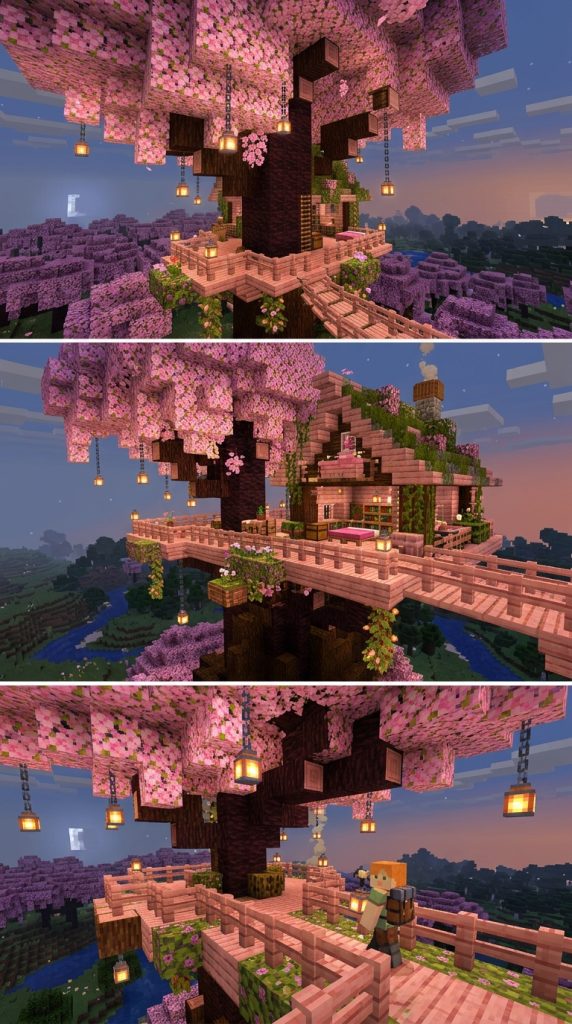
Building a treehouse inside a custom cherry blossom tree feels truly magical. This tutorial guides you through building a cozy platform among pink leaves. Furthermore, natural leaf canopy coverage protects your shelter from hostile phantoms above. It offers an adventurous, secret hideout vibe for fantasy lovers.
Treehouses blend seamlessly into cherry blossom forest biomes without destroying natural landscapes. Living elevated among falling pink petal particles creates an enchanting survival environment. Furthermore, tree trunks provide natural vertical support for multi-level platforms. Consequently, your treehouse base looks whimsical, hidden, and cozy.
Canopy Leaf Styling
Expanding a natural tree canopy creates a thick, protective leaf roof overhead. Adding extra cherry leaves around your living platform increases natural privacy and security. Furthermore, hanging glowberry vines or lanterns beneath leaves creates soft night lighting. Consequently, your leafy canopy glows gently against the dark night sky.
Materials Needed
- Cherry Wood Planks
- Cherry Leaves
- Oak Fences
- Ladders
- Iron Lanterns
Step-by-Step Guide
First, locate a large cherry blossom tree or grow one using bone meal. Clear out a few central leaf blocks inside the lower branch canopy. Next, attach wooden ladders vertically along the main trunk for climbing. Consequently, you create a safe, hidden entrance path up the tree.
Second, build a five-by-five floor platform using pink cherry planks. Anchor the platform beams securely into surrounding thick wooden tree branches. Next, build low safety railings around the perimeter using cherry fences. Consequently, your elevated wooden treehouse platform stays safe from accidental falls.
Third, construct a small, three-block-tall sleeping cabin on the platform. Cover the cabin roof with thick, overlapping cherry blossom leaf blocks. Additionally, hang iron lanterns from surrounding branches to light up the canopy. Finally, place a cozy bed, chest, and lantern inside your treehouse.
6. Cute Cherry Blossom Bakery Starter
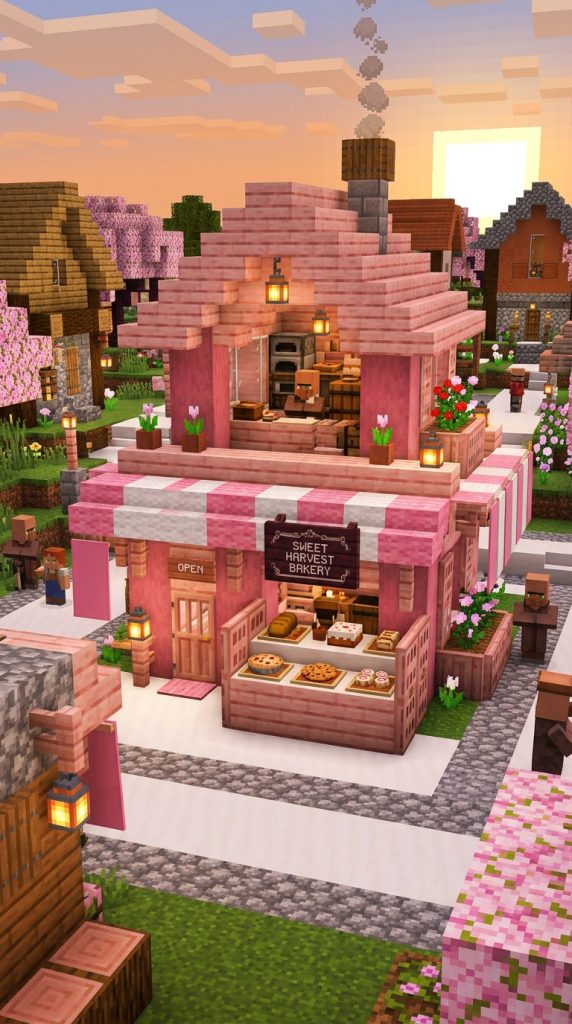
Turn your survival base into a sweet, charming village bakery shop. This design features a open front display counter using wooden trapdoors. Furthermore, combining pink cherry planks with smooth white quartz creates a sweet aesthetic. It offers a fun, roleplay-friendly starter base for food storage.
Bakery-style builds are perfect for organizing your early-game farming items and food. You can display cooked bread, cakes, and apples on front counters. Furthermore, adding a small wheat garden nearby supplies continuous baking ingredients easily. Consequently, your base becomes both a cute shop and food hub.
Display Counter Aesthetics
Designing a charming front display counter adds immense personality to starter builds. Placing item frames or cakes on top of trapdoors looks authentic. Furthermore, using striped pink and white wool awnings overhead adds cute colors. Consequently, your starter base looks like an active, inviting village shop.
Materials Needed
- Cherry Wood Planks
- Smooth Quartz Block
- Cherry Wood Trapdoors
- Pink Wool
- White Wool
Step-by-Step Guide
First, lay down a six-by-eight block floor using polished smooth quartz. Build the back and side walls using clean pink cherry planks. Next, leave the front wall completely open for your bakery display counter. Consequently, you establish a bright, open shop layout for your base.
Second, build a front counter using cherry wood trapdoors and slabs. Place cake items or wooden barrels underneath the counter for storage space. Next, construct a pink and white striped awning using colored wool blocks. Consequently, your bakery storefront gains a cute, colorful, and inviting overhang.
Third, place furnaces and smoker blocks along the interior back wall. Store your extra wheat, bread, and sugar inside labelled wooden barrels. Additionally, hang a iron lantern above the front counter for night lighting. Finally, place potted pink petals on the counter for decorative charm.
7. Mountain Cliffside Cherry Bunker

Carving your starter home directly into a cherry biome cliff saves resources. This tutorial covers building a modern glass facade into a mountain wall. Furthermore, the natural stone mountain provides complete protection on three sides. It combines rugged cliff textures with sleek pink wooden interior rooms.
Cliffside bunkers are exceptionally safe and easy to defend in survival mode. You only need to build one exterior wall face to seal your home. Furthermore, expanding your base later simply requires digging deeper into the mountain. Consequently, this design saves time while offering endless expansion options.
Cliffside Facade Blending
Blending glass windows into rough mountain rock creates a sleek, integrated look. Framing large glass panes with smooth stripped cherry logs adds warmth. Furthermore, letting natural vines drape over the cliff face softens sharp edges. Consequently, your mountain bunker looks hidden, modern, and beautifully integrated.
Materials Needed
- Stripped Cherry Log
- Cherry Wood Planks
- Glass Panes
- Stone Bricks
- Lanterns
Step-by-Step Guide
First, find a flat mountain cliff face inside a cherry blossom biome. Hollow out a six-by-six interior room that is four blocks tall. Next, pave the interior floor using smooth pink cherry wood planks. Consequently, you create a safe, fully enclosed underground living space.
Second, clear out the front mountain wall opening for your exterior facade. Frame the outer opening using heavy stone bricks and stripped cherry logs. Next, fill the large central opening using clear glass window panes. Consequently, your cliffside bunker receives abundant light and panoramic views outside.
Third, divide the interior space into sleeping, crafting, and storage zones. Place furnaces, crafting tables, and double chests along natural stone walls. Additionally, hang iron lanterns from the smooth stone ceiling for lighting. Finally, add a small wooden balcony extending out from the cliff face.
8. Compact Cherry Tower Lookout
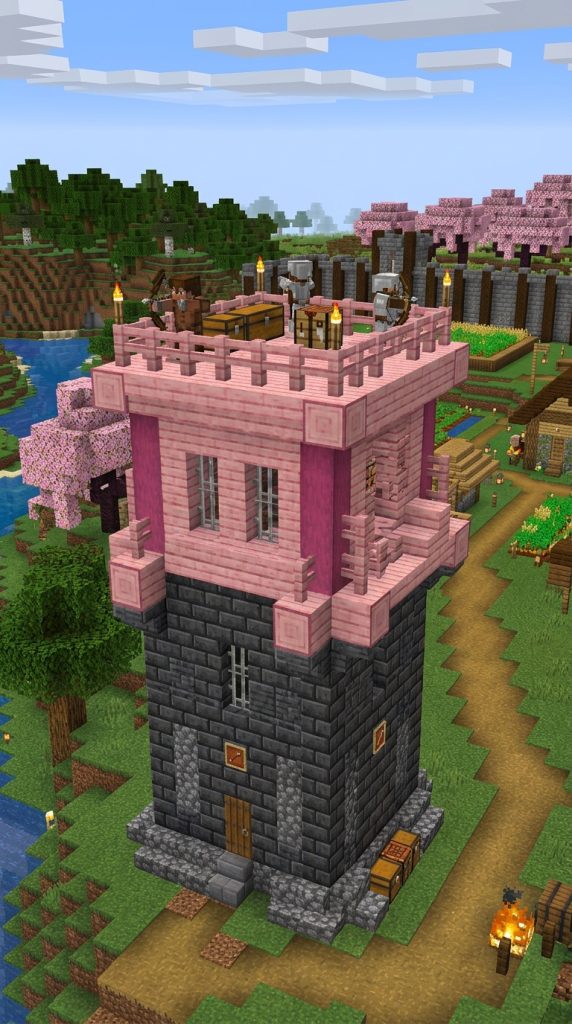
A compact tower base offers excellent 360-degree visibility over surrounding terrain. This starter tower features a sturdy stone base with a cherry wood top. Furthermore, the open rooftop balcony serves as a perfect archer lookout post. It keeps you safe while allowing you to spot mobs from afar.
Vertical tower bases save valuable ground space while offering great utility. You can organize different survival functions on separate floor levels easily. Furthermore, the elevated roof platform makes spotting nearby structures and biomes simple. As a result, your starter tower acts as both home and landmark.
Vertical Space Efficiency
Organizing a multi-story tower requires compact vertical ladder access paths. Placing ladders along interior corner walls keeps central floor space open. Furthermore, using trapdoor hatches between floors prevents accidental falls down ladder shafts. Consequently, navigating your vertical starter tower stays quick, safe, and easy.
Materials Needed
- Stone Bricks
- Cherry Wood Planks
- Stripped Cherry Log
- Iron Bars
- Torches
Step-by-Step Guide
First, construct a four-by-four square base using sturdy stone brick blocks. Build the stone foundation wall six blocks tall to establish first floor height. Next, install a heavy wooden door on the front stone face. Consequently, you create a creep-proof, explosion-resistant lower entry tower floor.
Second, build a second floor on top using warm pink cherry planks. Extend corner pillars upward using vertical stripped cherry logs for support. Next, cut narrow, one-block window slits into walls using iron bars. Consequently, your upper tower floor gains safe, protective archer firing ports.
Third, construct an open rooftop balcony framed with stone brick walls. Place a bed and crafting table on the middle wooden floor level. Additionally, mount glowing torches on all four upper roof corners today. Finally, install interior ladders connecting all three functional tower floor levels.
9. Traditional Japanese-Inspired Starter Hut
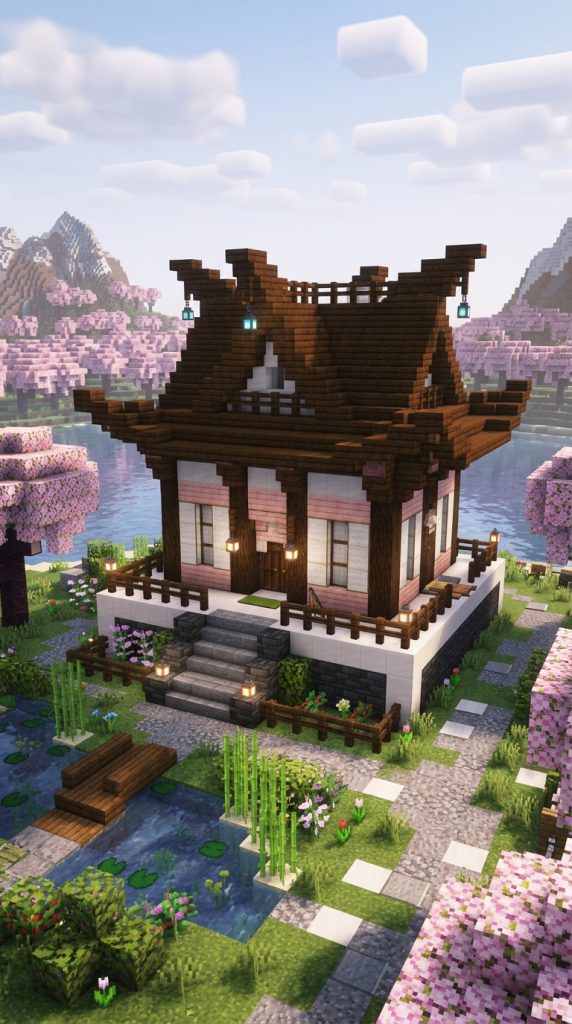
Embrace the natural aesthetic of cherry blossoms with a traditional Asian-inspired hut. This tutorial uses dark oak curved roofs paired with soft pink walls. Furthermore, white wool or quartz blocks simulate traditional paper sliding doors. It offers an elegant, peaceful starter base full of cultural charm.
Asian-inspired architecture complements cherry blossom biomes more than any other style. Sweeping curved rooflines create a dramatic, beautiful silhouette against the sky. Furthermore, using open interior layouts promotes a calm, minimalist survival lifestyle. Consequently, your starter base looks artistic, balanced, and serene.
Curved Roof Construction
Building sweeping roof overhangs requires careful stair and slab placement steps. Extending roof corners out and curving them upward creates authentic Asian silhouettes. Furthermore, using dark oak or mangles provides strong color contrast against pink. Consequently, your roofline becomes the stunning visual highlight of the build.
Materials Needed
- Cherry Wood Planks
- Dark Oak Stairs
- Smooth Quartz Block
- Dark Oak Fences
- Paper Lanterns or Torches
Step-by-Step Guide
First, lay a raised floor platform using smooth white quartz blocks. Frame the outer platform edge using dark oak logs for clean lines. Next, place four corner posts using dark oak logs three blocks tall. Consequently, you establish a clean, elevated foundation for your traditional hut.
Second, fill wall panels using alternating cherry planks and white quartz blocks. Use dark oak fences to create open grid window designs on sides. Next, install a dark oak wooden door in the center front opening. Consequently, your walls mimic classic paper sliding screen doors beautifully.
Third, build a sweeping, flared roof using dark oak stairs and slabs. Extend the roof edges two blocks beyond the walls, curving tips upward. Additionally, hang red paper lanterns or torches beneath the sweeping eaves. Finally, pave a smooth gravel walkway leading up to the front entrance.
10. Cozy Cherry Twin-Cabin Base
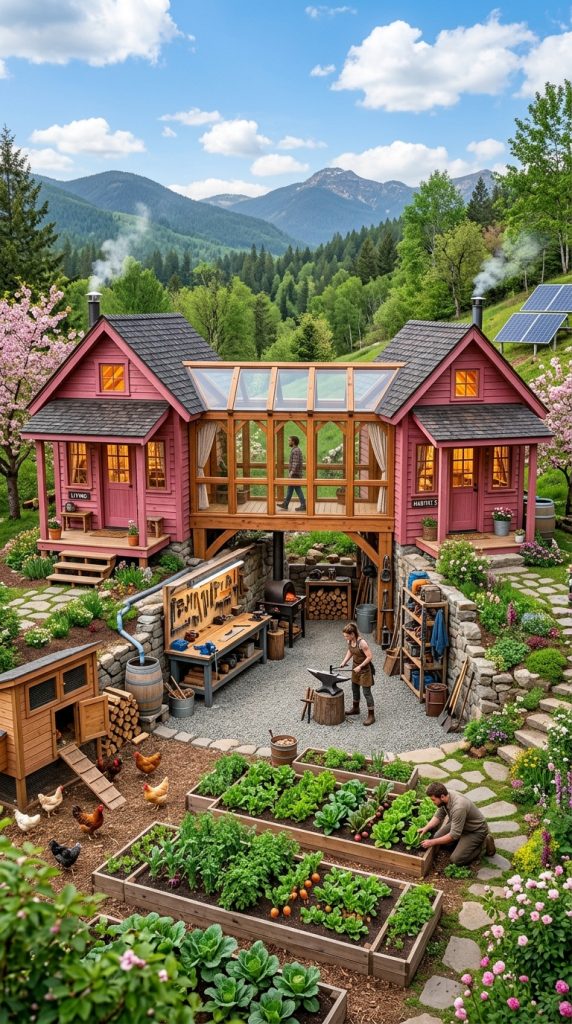
The twin-cabin design connects two small starter huts with a covered bridge. One cabin serves as your personal bedroom, while the other holds storage. Furthermore, the open breezeway underneath creates a safe sheltered outdoor workshop. It offers an organized, expanded base setup for growing survival needs.
Separating your living space from clutter keeps your base feeling clean. Dedicated storage rooms allow you to organize chests, ores, and crops easily. Furthermore, the covered bridge connection offers safe travel between rooms at night. Consequently, your base feels like a cozy, multi-room homestead.
Connected Breezeway Function
The open space beneath the connecting bridge serves as a functional workspace. Placing your furnaces, blast furnaces, and anvil outdoors saves indoor room. Furthermore, keeping workstations covered protects you from rain while crafting outdoors. Consequently, your daily survival tasks become faster and more convenient.
Materials Needed
- Cherry Wood Planks
- Stripped Oak Log
- Spruce Wood Stairs
- Glass Panes
- Chests
Step-by-Step Guide
First, build two identical four-by-four wooden frames spaced four blocks apart. Use stripped oak logs for the corner support posts on both cabins. Next, lay down pink cherry plank floors inside both cabin frames. Consequently, you lay the foundation for two separate, organized living modules.
Second, build three-block-tall walls on both cabins using pink cherry planks. Construct simple A-frame roofs over both cabins using dark spruce stairs. Next, connect the upper floors of both cabins using a raised wooden bridge. Consequently, you link both structures together into one cohesive twin base.
Third, enclose the connecting bridge with glass panes and cherry wood slabs. Dedicate the left cabin for double chest storage and resource organization. Additionally, place your bed, armorsmith, and decorative items in the right cabin. Finally, set up your smelting workshop under the sheltered central bridge.
11. Cherry Blossom Waterfront Dock House
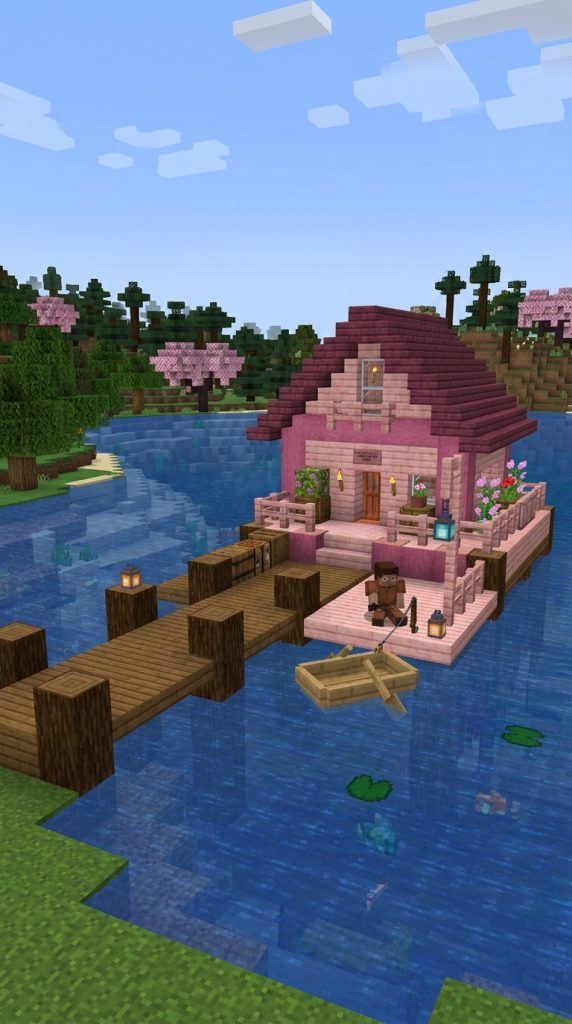
Build a serene starter home right along the edge of a lake or river. This design features an extended wooden pier with a cute pink cabin attached. Furthermore, you can park your boats directly underneath or alongside the dock. It offers easy aquatic travel, fishing access, and peaceful water views.
Waterfront bases make exploring your Minecraft world by boat exceptionally convenient. You can embark on ocean voyages directly from your front porch steps. Furthermore, fishing off your back deck provides an easy, endless early-game food supply. As a result, your dock house is both scenic and practical.
Aquatic Deck Integration
Extending wooden plank decks directly over water requires sturdy underwater pillar supports. Using dark oak or spruce logs simulates water-aged wooden piers realistically. Furthermore, attaching trapdoors along deck edges creates clean, detailed safety borders. Consequently, your waterfront dock house looks anchored, realistic, and cozy.
Materials Needed
- Cherry Wood Planks
- Spruce Logs
- Glass Panes
- Oak Trapdoors
- Boats
Step-by-Step Guide
First, drive sturdy spruce log pillars deep into the riverbed or lake floor. Extend the pillars two blocks above the water surface for safety. Next, build a wide platform over the water using pink cherry planks. Consequently, you construct a spacious, stable waterfront pier for your house.
Second, build a cozy five-by-six cabin on the back half of the pier. Use stripped cherry logs for walls and clear glass for large windows. Next, build a simple sloped roof using dark spruce wood stairs. Consequently, your waterfront home offers panoramic views across the open water.
Third, add safety railings along the outer pier edges using oak trapdoors. Attach a wooden ladder leading down into the water for easy swimming access. Additionally, tie a wooden boat to the pier posts using a lead or fence. Finally, place fishing rods in item frames on the outer porch wall.
12. Greenhouse Starter Cherry Base
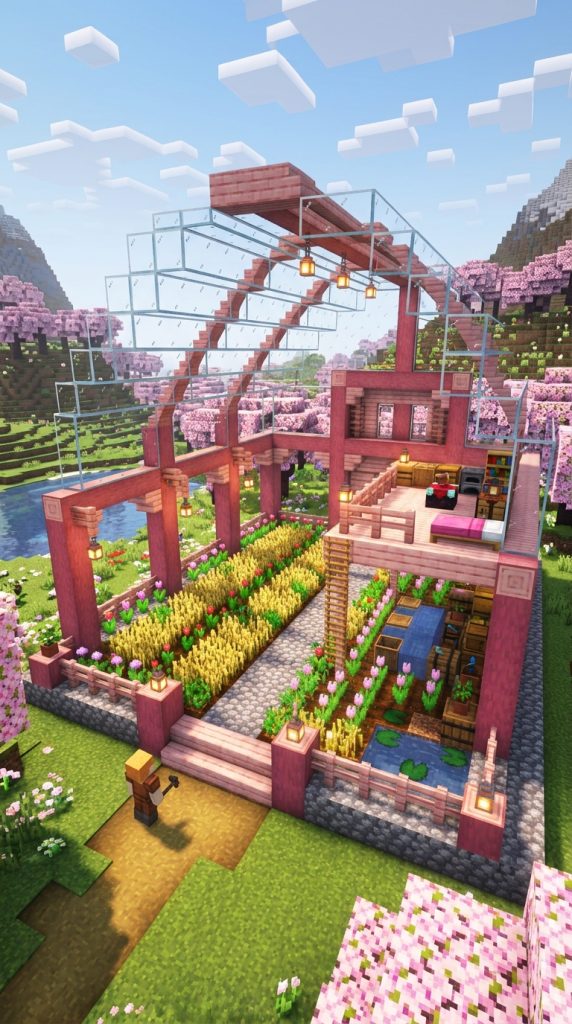
For farming enthusiasts, a greenhouse starter base combines living and growing space. This design features glass roof panels that let light flood into crops. Furthermore, pink cherry wood frames hold the glass structure together beautifully. It allows you to grow wheat, carrots, and flowers safely inside your base.
Indoor farming protects your precious crops from trampling and hostile mob spawns. You can tend to your gardens safely, even during dangerous survival nights. Furthermore, the bright, sunlit glass interior creates a warm, cheerful atmosphere. Consequently, your home functions as both a cozy shelter and farm.
Interior Crop Layouts
Organizing crop rows efficiently inside a greenhouse maximizes your food harvest yield. Placing water channels under wooden trapdoors keeps walking paths flat and dry. Furthermore, adding bone meal dispensers accelerates crop growth for emergency food needs. Consequently, your indoor greenhouse farm operates with high efficiency daily.
Materials Needed
- Cherry Wood Planks
- Glass Blocks
- Oak Logs
- Water Bucket
- Farmland Soil
Step-by-Step Guide
First, build an eight-by-eight block outer frame using sturdy oak logs. Lay down a stone brick perimeter to enclose your farming and living areas. Next, fill half the interior floor with fertile farmland soil and water channels. Consequently, you prepare a dedicated, irrigated indoor farming zone for crops.
Second, construct six-block-tall walls using a mix of cherry planks and glass. Build a sweeping arched roof made entirely of clear glass blocks. Next, install double doors at the front for easy access with farm tools. Consequently, your greenhouse receives full sunlight while remaining fully enclosed and safe.
Third, plant wheat, carrots, and pink tulips inside the tilled farmland soil rows. Build a small raised loft bed area on the non-farming floor side. Additionally, place sea lanterns or hidden torches under water channels for night light. Finally, store your seeds and farming tools inside labelled wooden chests.
13. Fairycore Cherry Blossom Cottage
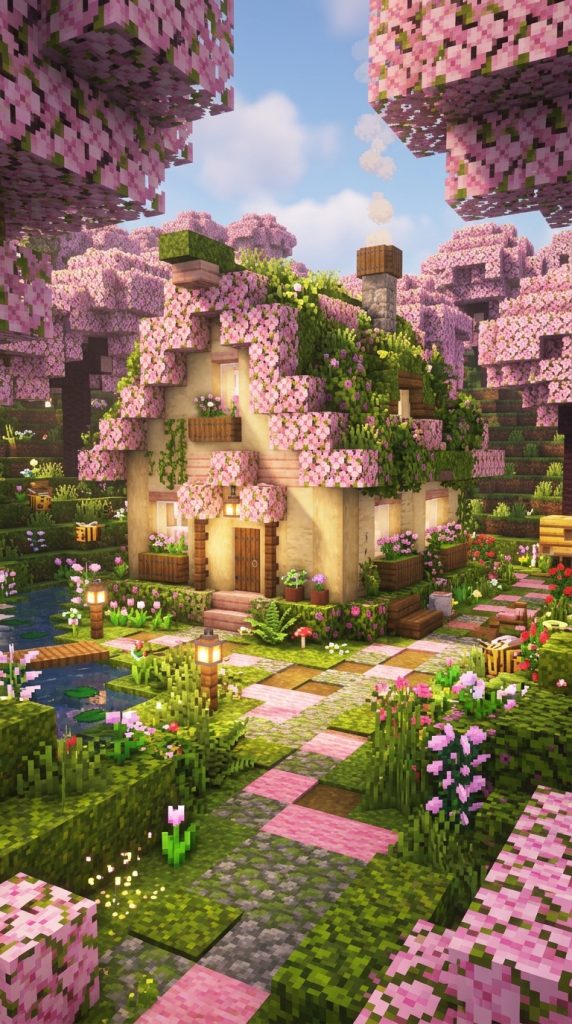
The fairycore cottage brings a whimsical, magical aesthetic to your survival world. It features a cozy curved roof covered in pink petals and azalea leaves. Furthermore, using stripped birch logs creates soft, creamy wall textures that match pink. It feels like a enchanted cottage hidden deep inside a magical forest.
Fairycore builds focus on organic shapes, lush greenery, and soft pastel colors. Adding moss blocks and hanging vines makes the house feel part of nature. Furthermore, placing spore blossoms overhead casts magical floating green particles through the air. Consequently, your fairycore cottage feels enchanting, cozy, and truly unique.
Whimsical Botanical Styling
Decorating rooflines with overgrown leaves and vines creates a fairytale cottage aesthetic. Mixing pink cherry leaves with flowering azaleas introduces subtle purple highlights naturally. Furthermore, scattering pink petal carpets around outdoor pathways adds soft texture to grass. Consequently, your cottage looks as though it grew naturally from the forest.
Materials Needed
- Cherry Wood Planks
- Stripped Birch Log
- Flowering Azalea Leaves
- Moss Blocks
- Pink Petals
Step-by-Step Guide
First, construct an asymmetrical, organic foundation using green moss blocks on grass. Avoid sharp straight lines; curve the base slightly for a natural shape. Next, build four-block-tall walls using creamy stripped birch logs today. Consequently, your cottage acquires a soft, handcrafted, and organic base layout.
Second, build a steep, gently curved roof using pink cherry wood stairs. Cover sections of the roof with flowering azalea and cherry leaf blocks. Next, let green vines and leaves drape down naturally over the front walls. Consequently, your cottage roof looks lush, overgrown, and deeply whimsical.
Third, install small, round window openings using clear glass panes and trapdoors. Scatter pink petals and wild flower patches around the front door pathway. Additionally, hang glowing end rods or lanterns beneath roof overhangs for magical light. Finally, place a cozy pink bed inside to complete your fairy cottage.