
Welcome to your ultimate comprehensive guide for building simple, aesthetic, and functional beginner houses in Minecraft. First, constructing your first permanent shelter holds immense creative potential for your survival journey. Therefore, you should never settle for an uninspired dirt cube or a dark hole in the ground. Consequently, thoughtful architectural planning and simple block texturing completely transform basic survival shelters. Furthermore, surviving your initial days in a harsh, mob-filled world feels overwhelming without a secure base. However, you can easily construct a charming, well-defended home starting today. Moreover, cozy aesthetic starter builds are currently trending across the entire building community. Additionally, platforms like Pinterest and YouTube are full of beginner-friendly blueprints and layout inspiration. Thus, you can find brilliant building ideas utilizing easily accessible early-game blocks like oak, cobblestone, and glass. Still, designing a spacious layout with limited early resources feels tricky sometimes. Next, we will break down fifteen easy, visually stunning beginner house concepts step by step. Specifically, beginner builds require smart material choices, clear floor plans, and functional utility integration. Therefore, you must master basic structural techniques before placing your first foundation block. Also, your survival home is your primary spawn anchor, storage warehouse, and crafting workshop. Ultimately, it should reflect your unique creative vision and personal style always.
Mastering Early-Game House Geometry
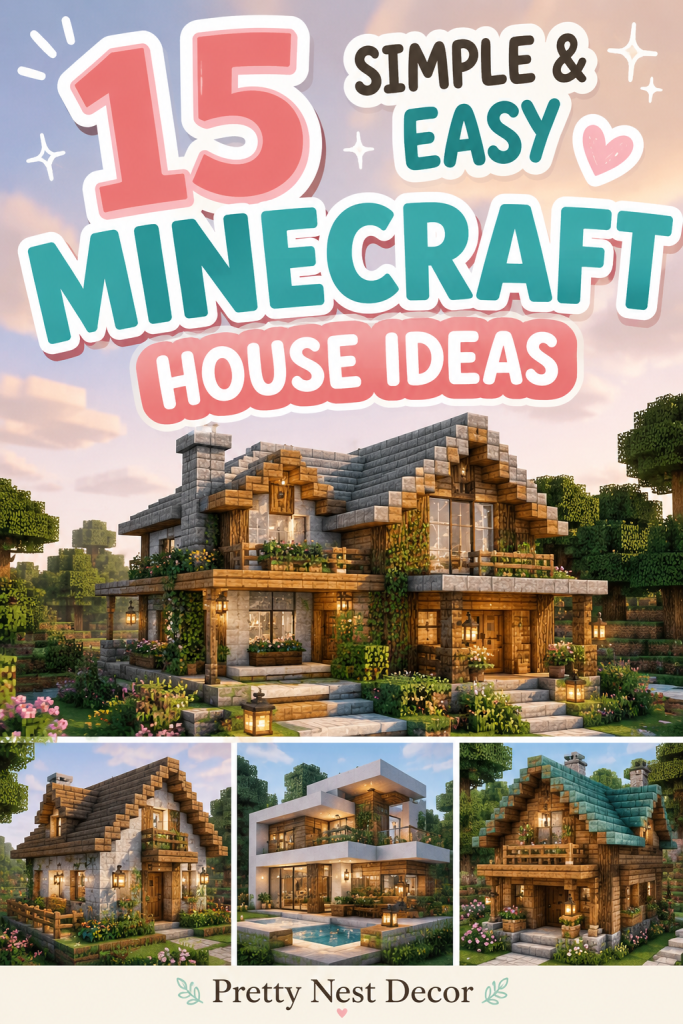
Now, let us discuss foundational architectural geometry techniques today. First, always test your house footprint dimensions carefully before raising walls. Consequently, you will avoid awkward asymmetrical roof lines and cramped interior rooms. Moreover, improper block dimensions ruin clean pitched roofs almost instantly. Instead, always choose odd-numbered structural footprints, such as 5×5, 7×7, or 9×9 layouts. Furthermore, odd dimensions provide a clear center block for single doors, symmetrical windows, and centered roof ridges. Consider the primary functional zones of your starter house during early planning. For instance, do you need an integrated bed alcove and furnace line on the ground floor? Alternatively, maybe you prefer a dedicated upper-level sleeping loft with an open ground floor workshop. Regardless, defining your spatial layout beforehand is extremely crucial. Next, think carefully about structural frame corner posts and wall recesses. Therefore, always place log corner pillars one block proud of your wall panels. Specifically, stripping corner logs or using raw bark logs creates instant depth and shadow lines. Additionally, wooden trapdoors and glass panes prevent flat, boring exterior facades. Ultimately, solid geometric planning ensures your starter house looks structurally sound and spacious.
Establishing an Aesthetic Starter Block Palette
Moving forward, choosing a cohesive block color theme is vital for visual appeal. First, a strong palette unifies the entire exterior facade and interior living space. For example, traditional oak timber and gray cobblestone styling remains timeless for beginners. Consequently, it utilizes abundant forest timber and easily mined stone blocks. Alternatively, dark spruce and stone brick combinations create a warm, rustic mountain atmosphere. Furthermore, pale birch planks and white wool fills make compact starter cottages feel bright, clean, and modern. Moreover, desert sandstone and terracotta themes bring warm, Mediterranean vibes to arid biomes. Thus, you can prominently use smooth sandstone, acacia wood trims, and orange terracotta accents. Additionally, overgrown forest themes provide a very fresh, natural look using green leaf blocks and moss. Ultimately, pick a visual style that matches your surrounding spawn biome and available resources. Next, always stick to a specific four-block palette rule during early construction. Consequently, this prevents visual noise and messy, clashing textures across your exterior. Generally, dark wooden corner frames with textured stone foundations and warm plank wall fills work best.
The Importance of Safe & Atmospheric Lighting
Next, strategic lighting placement completely changes house ambiance while keeping hostile mobs away. First, harsh bright torches placed randomly on walls and floors are rarely ever flattering. Instead, always opt for warm, diffused, and recessed ambient light sources. Furthermore, hanging iron lanterns are absolute necessities for cozy, rustic aesthetic builds. Moreover, they instantly create a charming golden glow across timber porches and sleeping lofts. Additionally, placing hidden light sources like torches or sea lanterns under wool carpets offers clean illumination. Therefore, you can light entire rooms without cluttering floor walking paths with visible torches. Consequently, place ambient light sources strategically around bed frames, craft tables, and doorways. Also, consider exterior campfire smoke chimneys for cozy visual warmth if early resources allow. Ultimately, layering ambient, task, and accent lighting is key to a beautiful home. Next, hide light blocks under leafy window planter boxes cleanly. Alternatively, hang lanterns from wooden fence posts along exterior roof eaves. Thus, you easily ensure a beautifully illuminated, safe starter sanctuary.
Incorporating Custom Exterior Landscaping
Furthermore, lively natural details breathe immediate life into simple square houses. First, organic landscaping accents soften harsh blocky corners and flat wall faces. Moreover, custom garden elements improve surrounding property value and immersion instantly. Consequently, they make your starter homestead feel genuinely lived-in and established. Additionally, vertical creeping vines and leaf blocks are perfect for rustic weathered cottages. Therefore, you should actively utilize your empty exterior walls for window planter boxes. Next, consider simple gravel and coarse dirt pathways leading to your front doorway. Specifically, mixing gravel, cobblestone, and path blocks creates realistic worn walking trails. Furthermore, use wooden trapdoors as decorative window shutters and flower box holders. Ultimately, this cleverly introduces vibrant secondary colors like red poppies and yellow dandelions. However, always choose plant types suited for your specific spawn biome. Consequently, tropical jungle bushes look out of place around snowy tundra cabins. Thus, study your surrounding landscape thoroughly before planting your garden.
Maximizing Interior Floor Plans & Storage
Now, let us directly address interior room floor plans and early storage organization. First, plain single-material dirt or stone floors feel very uninspiring to live in. However, you can easily upgrade interior floors quite quickly using accessible materials. For instance, alternating wooden plank types or checkered wool rugs creates rich floor textures. Moreover, recessed wall storage systems maximize floor space inside compact starter rooms. Sinking double chests, furnaces, and crafting tables flush into interior walls keeps walking paths open. Consequently, your compact starter base will visually appear twice as large inside. Additionally, layered wooden slabs and trapdoors create stylish floating wall shelves and loft ladders. Therefore, choose contrasting wood species very carefully for interior furniture details. Ultimately, a detailed, organized interior layout elevates your entire survival experience. Next, keep main walking routes from the front door to the bed completely clear. Thus, utilize clever vertical space and under-stair storage compartments whenever possible.
Preparing for Your First Construction Project
Finally, you are completely ready to begin constructing your dream starter home. First, completely clear out and level your chosen building plot on the terrain. Moreover, clear away tall grass, loose dirt mounds, and obstructing tree leaves. Consequently, you will start with a totally fresh, level landscape canvas. Furthermore, gather all your necessary building materials and tools beforehand in storage chests. Ultimately, proper resource preparation makes the construction process fast, organized, and enjoyable. Next, we will explore fifteen mind-blowing beginner house blueprints and design concepts. Therefore, keep reading for ultimate Minecraft starter architecture inspiration. First, take notes on your favorite material block lists and footprint dimensions. Next, envision how each design integrates with your specific survival world seed. Consequently, your dream aesthetic home is entirely achievable today. Furthermore, you can mix, match, and modify these design concepts freely. Ultimately, spatial creativity and imagination are your absolute best assets right now.
1. Classic Oak & Cobblestone Starter Cottage

First, the classic oak and cobblestone starter cottage is timeless and inviting. Moreover, a traditional rustic cottage is an absolute survival essential for any new world. Consequently, this design focuses entirely on accessible early-game forest resources. Furthermore, it transforms basic wooden planks into a picturesque countryside home. Additionally, the starter cottage aesthetic predominantly uses raw oak logs and mined cobblestone. Therefore, you will only need basic wooden and stone tools to gather materials. Next, this specific concept works perfectly for flat grassy plains and forest clearings. Specifically, it maximizes a compact 7×7 footprint with an open ground floor and sleeping loft. Ultimately, you can safely store your early ores and sleep through dangerous nights. However, you must carefully calculate your roof overhang steps. Consequently, flat wall edges look plain and uninspired from the exterior. Instead, always extend roof stairs one block past the exterior walls. Thus, the cottage feels dimensional, well-sheltered, and cozy always. Furthermore, oak cottages create truly save-worthy aesthetic screenshots.
Exploring the Classic Cottage Concept
Next, let us clearly define this specific starter cottage concept. Essentially, a classic cottage relies on an exposed wooden log frame with stone infill. Furthermore, it incorporates natural materials like oak planks, cobblestone, and glass panes. Moreover, dark oak or spruce trapdoor shutters are signature accent detail elements. Consequently, the overall house look is beautifully balanced, rustic, and durable. Additionally, this style heavily features an overhanging A-frame pitched roof. Therefore, do not fear mixing different available wood species for trims. Ultimately, the goal is a personalized, cozy survival haven. However, maintaining a cohesive base color palette is vital always. Consequently, this prevents the final exterior from clashing visually. Thus, an aesthetic oak cottage feels effortlessly charming always today. First, it openly invites you to store your hard-earned loot. Next, it serves as a stunning central feature in your starter village. Moreover, it naturally draws the eye immediately toward warm window lights.
Step-by-Step Build Guide
Now, here is the step-by-step practical construction guide today. First, mark out a 7×7 square foundation outline on flat ground using cobblestone. Next, erect four-block tall oak log corner pillars at all four corners. Furthermore, connect the corner pillars at the top using horizontal oak log beams. Consequently, fill the lower two wall layers with cobblestone and the upper layer with oak planks. Moreover, leave a two-block tall opening in the front wall for a wooden door. Additionally, punch out centered 1×2 window openings on side walls and insert glass panes. Therefore, frame the exterior windows using flipped-up oak trapdoors as shutters. Next, construct an overhanging A-frame pitched roof using cobblestone stairs and oak plank slabs. Ultimately, build an interior wooden loft floor on the upper level for your bed and chests. Furthermore, hang an iron lantern from the central roof beam for warm light. Consequently, your basic classic oak starter cottage is complete. Finally, plant a small wheat garden along the front pathway.
Required Blocks and Materials
Finally, here is the explicitly required block list today. First, you absolutely need two stacks of raw oak logs. Next, successfully procure three stacks of mined cobblestone blocks. Furthermore, securely craft two stacks of smooth oak wood planks. Moreover, carefully collect one stack of cobblestone stairs for the roof. Consequently, craft twenty clear glass blocks or glass panes for windows. Additionally, gather sixteen oak trapdoors for exterior window shutters. Therefore, you also need one wooden door and two iron lanterns. Ultimately, collect sixteen oak slabs for the interior sleeping loft. Furthermore, gather one bed, two double chests, and a crafting table. Consequently, these affordable materials guarantee a breathtaking starter transformation always. Next, proudly construct this exact cottage in your survival world. Thus, you will quickly impress all your multiplayer friends.
2. Cozy Spruce Mountain Cabin

First, spruce wood creates an amazingly rustic, warm mountain aesthetic. Moreover, a cozy spruce cabin offers maximum protection against chilly biomes. Consequently, this design heavily channels deep northern taiga and snowy mountain biomes. Furthermore, it totally transforms how your survival base looks against evergreen forests. Additionally, spruce wood occupies a very rich, dark chocolate palette. Therefore, it leaves a bold, cozy impression on snow and green terrain. Next, this lovely idea maximizes tall spruce trees found in northern biomes. Specifically, living inside a steep-roofed timber cabin feels incredibly comforting. Ultimately, it strongly encourages exploring deep wild taiga forests for resources. However, you must perfectly measure your stone foundation borders. Consequently, uneven walls pushing against steep roofs look messy. Instead, carefully choose a rectangular 7×9 stone brick base layout. Thus, you can easily expand it with side chimneys and porches later. Furthermore, spruce mountain cabins are classic aesthetic staples always.
Exploring the Mountain Cabin Vibe
Next, let us vividly define the spruce mountain cabin setup. Essentially, it is a rugged timber survival home built for harsh climates. Furthermore, it primarily features smooth stone brick foundations and stripped spruce logs. Moreover, dark spruce stairs offer a steep, snow-shedding roof profile. Consequently, the look is highly rugged, warm, and deeply cozy. Additionally, this style greatly benefits from an exterior stone chimney. Therefore, adding campfire smoke particles creates an authentic heated hearth feel. Ultimately, the aesthetic is heavily focused on wilderness survival comfort. However, prioritizing comfortable interior walking space is crucial always. Consequently, cramped chests blocking doorways quickly become annoying during daily routines. Thus, an aesthetic spruce cabin requires smart vertical loft space. First, it beautifully invites cozy nights during heavy rain or snow. Next, it successfully creates a functional craft and smelting hub. Moreover, it dramatically elevates basic survival gameplay comfort.
Step-by-Step Build Guide
Now, here is the detailed step-by-step spruce cabin guide. First, lay a rectangular 7×9 foundation using smooth stone bricks. Next, erect five-block tall spruce log corner pillars at all four corners. Furthermore, strip the bark off the corner logs using an axe for a sleek finish. Consequently, fill the wall sections with dark spruce planks and stone brick trims. Moreover, construct a steep, high-pitched roof using spruce stairs with stone brick borders. Additionally, build a cobblestone fireplace chimney extending up the side wall. Therefore, place a campfire inside the chimney top and surround it with trapdoors. Next, install clear glass panes in small, high window openings. Ultimately, build an elevated wooden sleeping platform inside using spruce slabs and ladders. Furthermore, place glowing iron lanterns on porch fence posts. Consequently, your charming mountain spruce cabin is ready for survival. Finally, happily store your valuable ores safely inside tonight.
Required Blocks and Materials
Finally, here is the specific required materials list today. First, you absolutely need three stacks of raw spruce logs. Next, eagerly gather two stacks of smooth stone bricks. Furthermore, definitely craft three stacks of dark spruce planks. Moreover, gracefully acquire two stacks of spruce wood stairs. Consequently, gladly select sixteen clear glass panes for cozy windows. Additionally, proudly procure one campfire block for the smoking chimney. Therefore, you also need one stack of cobblestone for the fireplace. Ultimately, heavily invest in sixteen spruce trapdoors for details. Furthermore, safely craft one spruce door and three iron lanterns. Consequently, these sturdy materials guarantee a charming rustic cabin. Next, perfectly build your mountain forest setup today right now. Thus, your home will immediately look super cozy always.
3. Simple Desert Sandstone Oasis Home

First, modern minimalist sandstone designs are exceptionally clean and bright. Moreover, they visually expand simple desert biome landscapes with warm tones. Consequently, this design strictly uses warm earthy yellow and cream tones. Furthermore, it heavily relies on flat rooftop terraces and arched doorways. Additionally, sandstone styling completely eliminates messy, chaotic block clutter. Therefore, the desert oasis house instantly feels organized, sleek, and authentic. Next, this sophisticated idea is perfect for builders who spawn in deserts. Specifically, an all-yellow sandstone theme with lush palm greenery looks stunning. Ultimately, it elegantly mimics a traditional Mediterranean or desert oasis villa. However, you must carefully mix different tactile sandstone variants. Consequently, flat single-tone walls look plain and unfinished very quickly. Instead, boldly mix smooth sandstone with cut sandstone and chiseled bricks. Thus, your desert home remains highly visually interesting always. Furthermore, sandstone oasis homes are modern Minecraft building staples.
Defining Desert Oasis Architecture
Next, let us clearly define the desert sandstone concept. Essentially, it is building utilizing warm desert sand and clay hues. Furthermore, it heavily manipulates flat rooftop living spaces and open balconies. Moreover, bold geometric parapets and shaded canopies enhance this sleek style. Consequently, the overall feeling is extremely bright, airy, and civilized. Additionally, this style frequently utilizes orange acacia wood and terracotta accents. Therefore, vibrant desert wood species break up yellow stone surfaces nicely. Ultimately, the aesthetic feels incredibly tailored, solid, and heat-resistant. However, maintaining strict earthy block choices is very important. Consequently, dark cobblestone blocks ruin the warm desert illusion. Thus, an aesthetic desert home requires total color discipline. First, it beautifully provides a cool, shaded visual refuge from the sun. Next, it famously highlights clean square geometric shapes. Moreover, it quietly commands intense respect for minimalist architecture.
Step-by-Step Build Guide
Now, here is the step-by-step desert oasis home guide. First, clear a flat 9×9 plot in a desert or beach biome. Next, lay a smooth sandstone foundation border along the perimeter. Furthermore, erect four-block tall cut sandstone pillars at the corners. Consequently, fill the wall panels using a textured mix of smooth and cut sandstone. Moreover, create wide arched doorway and window openings using sandstone stairs. Additionally, install orange stained glass or clear panes in windows. Therefore, construct a flat rooftop terrace floor using smooth sandstone slabs. Next, border the rooftop terrace with sandstone stairs to form shaded battlements. Ultimately, erect an open wooden shade pergola on the roof using acacia fences and slabs. Furthermore, plant a small sugar cane and cactus garden in the courtyard. Consequently, your highly striking desert sandstone oasis home is complete. Finally, proudly admire your sun-baked architectural villa today.
Required Blocks and Materials
Finally, here is the desert home required materials list today. First, you definitely need four stacks of smooth sandstone. Next, eagerly harvest two stacks of cut sandstone bricks. Furthermore, specifically craft one stack of sandstone stairs. Moreover, carefully acquire one stack of smooth sandstone slabs. Consequently, securely collect sixteen orange stained glass panes. Additionally, properly craft twenty acacia wood fences for rooftop pergolas. Therefore, you strictly need one stack of acacia slabs. Ultimately, safely purchase four iron lanterns or redstone lamps. Furthermore, carefully select one acacia wood door for access. Consequently, these exact materials ensure a stunning desert build. Next, beautifully photograph your sleek yellow house for showcase. Thus, your clean taste will inspire many players.
4. Compact Underground Bunker & Dugout

First, a compact underground bunker is the ultimate early survival fortress. Moreover, building beneath the ground requires minimal surface building materials. Consequently, this design focuses entirely on excavation and subterranean security. Furthermore, it completely protects you from surface creeper explosions and phantom attacks. Additionally, underground bunker styling allows limitless expansion downwards into caves. Therefore, your sleeping quarters instantly feel safe, fortified, and quiet always. Next, this practical idea is perfect for hardcore survival players. Specifically, carving directly into solid rock saves hundreds of exterior blocks. Ultimately, it highly maximizes underground depth and hidden security. However, you must carefully line internal dirt and stone walls. Consequently, raw dirt walls look unpolished and unfinished inside. Instead, replace interior walls with smooth wooden planks and stone bricks. Thus, your subterranean rooms remain totally cozy, bright, and dry. Furthermore, underground bunker homes are timeless survival classics.
Exploring Subterranean Bunker Aesthetics
Next, let us deeply explore the underground dugout concept. Essentially, it is a fortified subterranean room hidden beneath natural terrain. Furthermore, it incorporates rich materials like cobbled deepslate, stone bricks, and oak. Moreover, hidden trapdoor surface entrances keep your base secret. Consequently, the overall room look is deeply secure, organized, and cozy. Additionally, this style greatly benefits from warm recessed wall lighting. Therefore, glowing lanterns and redstone lamps make underground rooms feel spacious. Ultimately, the aesthetic is heavily focused on efficient bunker living. However, prioritizing proper room ventilation shafts is great for realism. Consequently, adding a glass skylight connects your underground bunker to daylight. Thus, an aesthetic dugout feels bright and comfortable always. First, it beautifully organizes your survival workstations in one room. Next, it happily serves as a blast-proof mineral storage vault. Moreover, it proudly represents clever underground spatial planning.
Step-by-Step Build Guide
Now, here is the detailed step-by-step underground dugout guide. First, locate a flat grassy area and dig a 7×7 pit, four blocks deep. Next, line the entire excavated floor with smooth oak wood planks. Furthermore, replace all four dirt wall faces with smooth stone bricks. Consequently, construct a sturdy ceiling using oak wood logs and glass center skylights. Moreover, install a vertical ladder leading up to a surface wooden trapdoor. Additionally, build recessed wall arches for your bed, furnaces, and double chests. Therefore, install smooth stone stairs around wall borders for ceiling depth. Next, hang glowing iron lanterns from the ceiling beams overhead. Ultimately, lay a colorful checkered wool rug across the central floor. Furthermore, place a crafting table, anvil, and brewing station along the walls. Consequently, your highly secure underground survival bunker is finished. Finally, climb down your ladder and seal the surface hatch tonight.
Required Blocks and Materials
Finally, here is the underground bunker required materials list. First, you definitely need three stacks of smooth stone bricks. Next, actively harvest two stacks of smooth oak wood planks. Furthermore, carefully collect one stack of oak logs for ceiling beams. Moreover, smartly acquire eight clear glass blocks for the skylight. Consequently, securely craft twelve wooden ladder segments. Additionally, properly use sixteen stone brick stairs for wall borders. Therefore, you happily need two wooden trapdoors for surface hatches. Ultimately, confidently select four iron lanterns for safe lighting. Furthermore, gather one bed, four double chests, and two furnaces. Consequently, these smart materials completely solve early-game housing needs. Next, cleanly construct your cozy underground shelter today. Thus, your safe bunker will keep you alive through every night.
5. Whimsical Fairytale Mushroom Hut
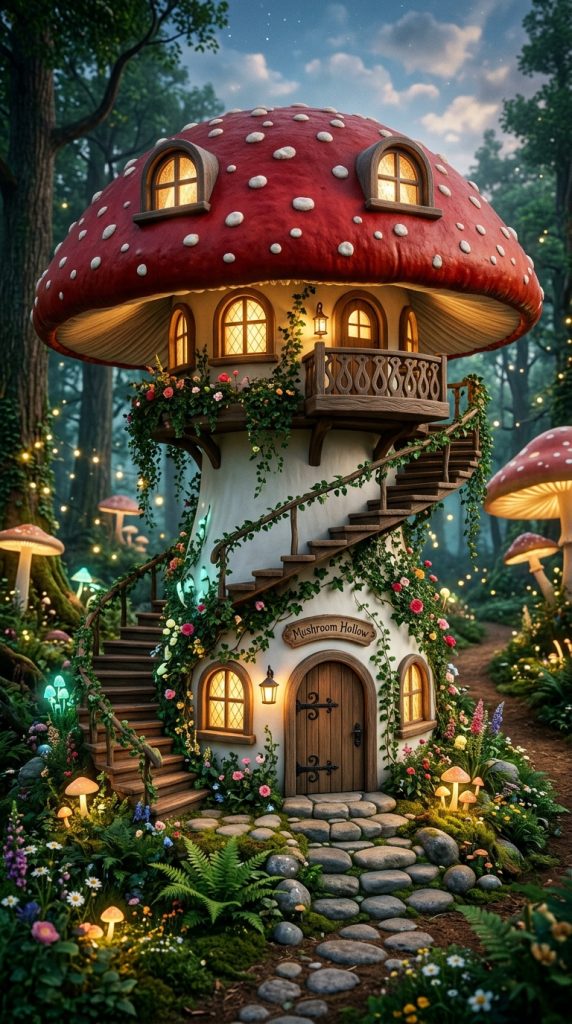
First, a whimsical fairytale mushroom hut is wonderfully creative and unique. Moreover, building inside or beneath giant mushrooms offers instant fantasy charm. Consequently, this design cleverly utilizes natural giant red or brown mushrooms. Furthermore, it instantly creates a playful, enchanted storybook forest atmosphere. Additionally, mushroom caps prominently feature vibrant red and white spotted patterns. Therefore, they perfectly fit trending whimsical cottagecore aesthetics. Next, this delightful idea actively promotes compact vertical fantasy living. Specifically, living inside a hollowed mushroom stem saves ground space completely. Ultimately, it physically elevates your bedroom high into the forest canopy. However, securely gathering mushroom blocks requires care. Consequently, breaking mushroom blocks with bare hands destroys the textured blocks. Instead, use silk touch tools or grow giant mushrooms directly with bonemeal. Thus, your beautiful mushroom roof remains perfectly intact and vibrant. Furthermore, mushroom huts are universally loved across the community.
Exploring the Mushroom Hut Aesthetic
Next, let us clearly define the whimsical mushroom building concept. Essentially, it is a hollowed stem and cap structure functioning as a home. Furthermore, it beautifully floats above the green forest floor. Moreover, bright red cap overhangs and white stem walls are key elements. Consequently, the visual look is highly distinctive, playful, and magical. Additionally, this style greatly benefits from cozy interior multi-level lofts. Therefore, the upper cap space becomes a soft, rounded sleeping quarters. Ultimately, the aesthetic heavily encourages magical fairytale storytelling. However, growing a giant mushroom in the right spot is necessary first. Consequently, plant a small red mushroom on podzol or in dark soil with bonemeal. Thus, an aesthetic mushroom hut requires just a few minutes of setup. First, it beautifully acts as a whimsical landmark in dark forests. Next, it successfully breaks traditional square wooden box rules. Moreover, it joyfully brings storybook magic straight into survival.
Step-by-Step Build Guide
Now, here is the step-by-step mushroom hut construction guide. First, grow a giant red mushroom using bone meal on dirt or podzol. Next, carefully hollow out the interior white stem blocks from ground to cap. Furthermore, lay an oak plank floor at the base and install a front door. Consequently, build a second wooden floor platform inside the upper red cap. Moreover, securely attach a vertical wooden ladder along the interior stem wall. Additionally, carefully break single red cap blocks to insert glass windows. Therefore, place clear glass panes to create 360-degree canopy windows. Next, place a cozy red bed and chests inside the upper cap loft. Ultimately, hang a glowing iron lantern from the central ceiling point. Furthermore, plant small mushrooms and flowers around the base exterior. Consequently, your amazingly fun fairytale mushroom hut is complete. Finally, climb your ladder and enjoy your elevated canopy view.
Required Blocks and Materials
Finally, here is the mushroom hut required materials list today. First, you absolutely need one red mushroom and five bone meal items. Next, securely gather one stack of smooth oak wood planks. Furthermore, strictly acquire half a stack of wooden ladder segments. Moreover, carefully craft twelve clear glass panes for canopy windows. Consequently, proudly collect one red bed for your upper sleeping loft. Additionally, easily craft two glowing iron lanterns for light. Therefore, you definitely need one wooden door and a double chest. Ultimately, completely ensure you have a crafting table and furnace. Furthermore, proudly obtain a shovel for clearing foundation dirt. Consequently, these simple materials guarantee a fun mushroom house. Next, record a quick tour of your magical home for your friends. Thus, everyone will certainly adore your whimsical woodland base.
6. Elevated Birch River Stilt House
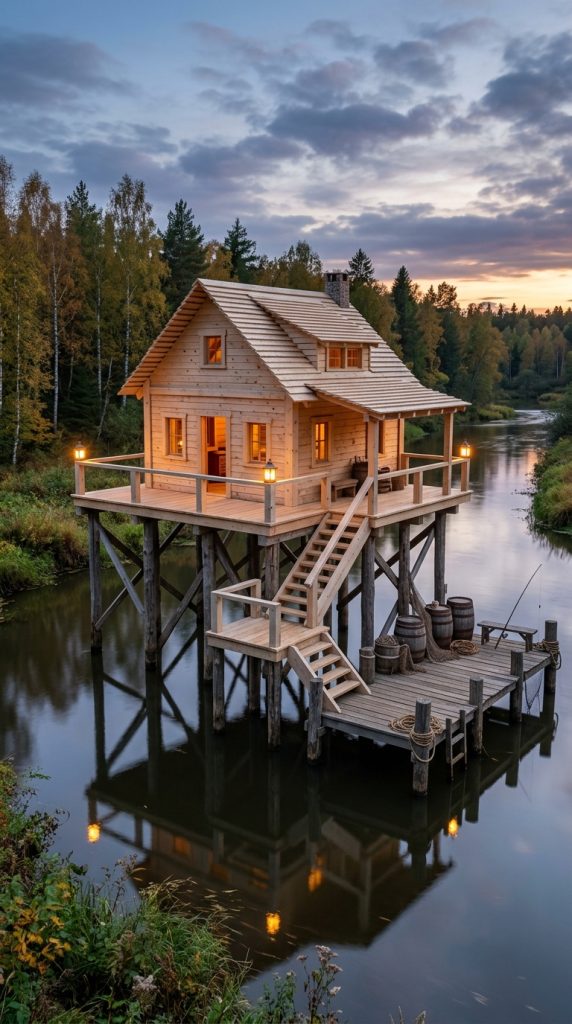
First, building over water is a truly wonderful and safe building option. Moreover, an elevated birch river stilt house perfectly fits lake and river biomes. Consequently, this design heavily channels peaceful waterfront docks and fishing cabins. Furthermore, it totally transforms how you access aquatic resources and boat travel. Additionally, elevated stilts occupy zero actual shoreline land space. Therefore, it leaves plenty of room on the shore for large crop farming. Next, this lovely idea maximizes your daily fishing and boating opportunities. Specifically, walking out onto an elevated wooden deck feels super relaxing. Ultimately, it strongly encourages enjoying open river views every sunrise. However, you must perfectly measure your water stilt support depth. Consequently, floating stilts above water look unnatural and broken. Instead, carefully extend wooden fence posts down to riverbed sand. Thus, your structure appears fully grounded and highly stable always. Furthermore, stilt setups are classic aesthetic building staples.
Exploring Waterfront Stilt Aesthetics
Next, let us vividly define the river stilt house setup. Essentially, it is a lightweight timber cabin floating above calm water. Furthermore, it primarily features rugged wooden fence stilts and birch planks. Moreover, smooth birch plank decking offers a bright, clean floor. Consequently, the look is highly coastal, airy, and delightfully rustic. Additionally, this style greatly benefits from an attached fishing dock. Therefore, nautical-inspired decor elements like barrels work incredibly well here. Ultimately, the aesthetic is heavily focused on serene waterfront living. However, prioritizing secure deck walking borders is crucial always. Consequently, slipping into deep water constantly becomes annoying during storage runs. Thus, an aesthetic stilt house requires sturdy fence railings along decks. First, it beautifully invites quiet morning fishing right outside your door. Next, it successfully creates a functional aquatic base destination. Moreover, it dramatically elevates basic riverside survival construction.
Step-by-Step Build Guide
Now, here is the detailed step-by-step river stilt house guide. First, select a calm, shallow riverbank or lake shoreline plot. Next, drive vertical oak fence pillars down into the waterbed, spaced in a 7×7 grid. Furthermore, extend the fence posts two blocks above the water surface line. Consequently, build a 7×7 horizontal wooden platform using birch planks and slabs. Moreover, construct a cozy 5×5 cabin on the rear half of the platform. Additionally, leave a two-block wide front deck open for fishing and boat mooring. Therefore, install oak fence railings along all open deck edges for safety. Next, construct a pitched roof over the cabin using birch wood stairs. Ultimately, hang iron lanterns from the four corner fence posts over water. Furthermore, attach a wooden ladder from the deck down to a water boat dock. Consequently, your charming elevated birch stilt house is ready. Finally, cast your fishing rod into the water from your front porch.
Required Blocks and Materials
Finally, here is the specific required materials list today. First, you absolutely need two stacks of oak fence posts. Next, eagerly gather three stacks of smooth birch wood planks. Furthermore, definitely craft two stacks of birch wood stairs. Moreover, gracefully acquire two wooden storage barrels for fish. Consequently, gladly select twelve clear glass panes for windows. Additionally, proudly procure four glowing iron lanterns for light. Therefore, you also need one wooden door for front access. Ultimately, heavily invest in a crafting table, furnace, and bed. Furthermore, safely craft one wooden boat for water transport. Consequently, these lovely materials guarantee a charming aquatic home. Next, perfectly build your water deck setup today right now. Thus, your friends will immediately love your peaceful lakeside lifestyle.
7. Beginner Hillside Hobbit Hole

First, a hillside hobbit hole is brilliantly integrated into natural terrain. Moreover, it completely eliminates complex exterior four-wall construction. Consequently, this design actively combines natural grassy hills with warm timber. Furthermore, it perfectly blends your front doorway into lush green slopes. Additionally, a circular wooden entrance arch provides incredible storybook charm. Therefore, you always have a cozy, well-camouflaged underground bunker. Next, this practical idea keeps building material costs super low. Specifically, carving directly into dirt hills instantly saves hundreds of blocks. Ultimately, it highly maximizes natural terrain depth very cleverly. However, you must carefully line internal dirt walls with proper blocks. Consequently, raw dirt interior walls look very dark and unpolished. Instead, replace interior dirt with warm spruce planks and stone. Thus, your subterranean rooms remain totally cozy, bright, and dry. Furthermore, hobbit hole designs are massive Minecraft building hits.
Defining Hobbit Hole Architecture
Next, let us properly define the hillside hobbit hole concept. Essentially, it is highly functional earth-sheltered subterranean living. Furthermore, it strongly emphasizes circular front wooden entrance arches. Moreover, surrounding wild flower patches beautifully enhance farm charm. Consequently, the overall house look is deeply inviting, rustic, and peaceful. Additionally, this style greatly benefits from warm interior lantern lighting. Therefore, glowing lanterns make underground rooms feel exceptionally cozy. Ultimately, the aesthetic heavily prioritizes living in total harmony with nature. However, measuring your hill depth is extremely crucial first. Consequently, digging out the back of shallow hills exposes open air. Thus, an aesthetic hobbit hole requires a thick, tall natural dirt hill. First, it beautifully organizes your survival living space underground. Next, it happily serves as a hidden, blast-proof sanctuary. Moreover, it proudly represents incredibly smart natural landscape integration.
Step-by-Step Build Guide
Now, here is the step-by-step excavation and build guide. First, locate a steep five-block tall natural dirt hill in a plains or forest biome. Next, carve out a 5×5 circular front opening into the hill face. Furthermore, dig seven blocks deep into the hill to create an interior room. Consequently, securely line interior walls with stripped spruce logs and oak planks. Moreover, replace the plain dirt floor with smooth cobblestone or oak wood. Additionally, construct a circular entrance arch using spruce wood stairs and slabs. Therefore, install a centered round glass design with a sturdy wooden door. Next, drape oak leaf blocks and wild flowers over the top arch exterior. Ultimately, place a glowing iron lantern above the front door arch. Furthermore, smartly add wooden flower boxes along the exterior hill path. Consequently, your highly functional hillside hobbit hole is ready. Finally, happily step inside your secret underground wooden haven.
Required Blocks and Materials
Finally, here is the required hobbit hole materials list today. First, you definitely need two stacks of raw spruce logs. Next, actively harvest two stacks of smooth oak wood planks. Furthermore, carefully collect one stack of spruce wood stairs. Moreover, smartly acquire sixteen clear glass panes for the circular door. Consequently, securely craft one iron shovel for hill excavation. Additionally, properly use a pickaxe for internal stone clearing. Therefore, you happily need one stack of oak leaf blocks. Ultimately, confidently craft four glowing iron lanterns for light. Furthermore, gather one bed, two double chests, and wild flower seeds. Consequently, these smart materials completely solve starter housing needs. Next, cleanly carve out your cozy underground arch entrance today. Thus, your smart terrain integration will trend everywhere quickly.
8. Modern White Concrete & Glass Box Villa

First, a modern white concrete and glass villa is sleek and sophisticated. Moreover, minimalist modern architecture looks incredibly clean in Minecraft. Consequently, this design strictly uses pristine white concrete and dark wood accents. Furthermore, it heavily relies on floor-to-ceiling glass walls and flat rooflines. Additionally, modern box styling completely eliminates complex, tedious roof framing. Therefore, the villa instantly feels high-end, organized, and modern always. Next, this sophisticated idea is perfect for builders who love clean lines. Specifically, pairing bright white walls with dark oak trims looks stunning. Ultimately, it elegantly captures a luxury architectural studio villa feel. However, crafting white concrete requires sand, gravel, and white dye. Consequently, prepare your concrete powder and water buckets beforehand. Thus, your modern villa walls remain smooth, vibrant, and seamless always. Furthermore, modern concrete villas are popular luxury building staples.
Defining Modern Box Architecture
Next, let us clearly define the modern villa concept. Essentially, it is building utilizing sharp rectangular geometric boxes. Furthermore, it heavily manipulates large glass walls and cantilevered balconies. Moreover, dark oak wood panels break up pristine white surfaces beautifully. Consequently, the overall feeling is extremely sleek, bright, and luxurious. Additionally, this style frequently utilizes outdoor rooftop lounge decks. Therefore, flat roofs are transformed into functional second-floor terraces. Ultimately, the aesthetic feels incredibly tailored, modern, and polished. However, maintaining strict clean block discipline is vital always. Consequently, rough cobblestone blocks ruin the pristine luxury modern illusion. Thus, an aesthetic modern villa requires totally smooth block textures. First, it beautifully provides a bright, high-end visual presence. Next, it famously highlights sharp geometric architectural framing. Moreover, it quietly commands intense admiration for modern design.
Step-by-Step Build Guide
Now, here is the step-by-step modern villa guide. First, clear a flat 9×9 plot in a meadow or oceanfront biome. Next, lay a smooth white concrete foundation border along the perimeter. Furthermore, erect five-block tall white concrete rectangular wall frames. Consequently, fill entire front and side wall panels with black or clear glass panes. Moreover, construct an accent wall using vertical dark oak wood planks. Additionally, build a flat second-floor roof terrace using smooth quartz or concrete slabs. Therefore, install a small outdoor rooftop garden with potted flowering azaleas. Next, build an interior minimalist spiral staircase connecting the floors. Ultimately, place recessed sea lanterns or end rods for clean modern lighting. Furthermore, construct a small outdoor swimming pool lined with cyan terracotta. Consequently, your highly striking modern white concrete villa is complete. Finally, proudly admire your sleek architectural masterpiece today.
Required Blocks and Materials
Finally, here is the modern villa required materials list today. First, you definitely need four stacks of white concrete blocks. Next, eagerly gather two stacks of dark oak wood planks. Furthermore, specifically craft two stacks of black or clear glass panes. Moreover, carefully acquire one stack of smooth quartz slabs. Consequently, securely collect four glowing sea lantern blocks or end rods. Additionally, properly craft one dark oak door for sleek entry. Therefore, you strictly need sixteen dark oak trapdoors for detailing. Ultimately, safely purchase one bed, two double chests, and flower pots. Furthermore, collect water buckets for your outdoor swimming pool. Consequently, these exact blocks ensure a stunning modern build. Next, beautifully photograph your luxury villa for showcase. Thus, your clean modern taste will impress many players.
9. Rustic Farmhouse with Attached Crop Barn
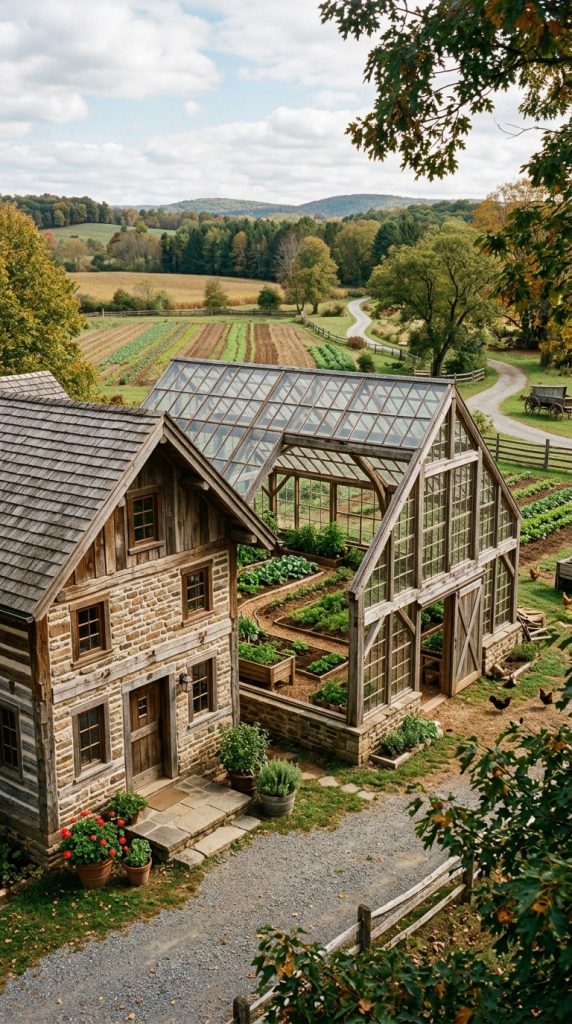
First, a rustic farmhouse with an attached crop barn is wonderfully productive. Moreover, combining your living quarters with automated farming steps is brilliant. Consequently, this design focuses entirely on functional agricultural living. Furthermore, it transforms simple crop farming into a grand countryside homestead. Additionally, the farmhouse aesthetic predominantly uses oak logs, hay bales, and stone. Therefore, you will have instant access to food, wheat, and livestock nearby. Next, this specific concept works perfectly for expansive plains biomes. Specifically, an attached greenhouse barn allows farming safely through dark nights. Ultimately, you can harvest wheat and breed animals without leaving your home. However, you must carefully plan your water irrigation channels. Consequently, unwatered farm soil turns back into plain dirt quickly. Instead, hide water source blocks under wooden slabs inside the barn. Thus, your attached crop farm remains completely green, hydrated, and neat. Furthermore, farmhouses are classic survival favorites.
Exploring Agricultural Farmhouse Aesthetics
Next, let us deeply explore the rustic farmhouse concept. Essentially, it is a multi-wing survival base combining housing and farming. Furthermore, it incorporates warm materials like stripped oak logs and hay bales. Moreover, glass-roofed greenhouse wings let in bright sunlight for crops. Consequently, the overall homestead look is deeply functional, warm, and grand. Additionally, this style greatly benefits from outdoor animal pen fences. Therefore, attached chicken coops and cow pens work remarkably well. Ultimately, the aesthetic confidently communicates self-sufficient country living. However, balancing house and barn proportions is critical always. Consequently, making the barn ten times larger than the house looks awkward. Thus, build the main house two stories tall with a single-story barn wing. First, it beautifully provides an all-in-one food and survival hub. Next, it happily organizes all farming chests and tools in one wing. Moreover, it proudly represents classic survival homestead design.
Step-by-Step Build Guide
Now, here is the step-by-step rustic farmhouse guide. First, outline an L-shaped foundation: a 7×7 main house attached to a 5×7 barn wing. Next, erect stone brick foundations and five-block tall oak log corner posts. Furthermore, fill the main house walls with oak planks and glass windows. Consequently, construct a large glass-paneled pitched roof over the farm wing. Moreover, till the interior barn floor into irrigated farmland rows. Additionally, plant wheat, carrots, and potatoes inside the protected barn. Therefore, build a cozy upper-floor bedroom inside the two-story main house. Next, construct an overhanging cobblestone stair roof over the main house. Ultimately, hang iron lanterns from the barn roof trusses for night growth. Furthermore, place wooden barrels and farming tool chests in the barn entrance. Consequently, your grand rustic farmhouse with attached crop barn is finished. Finally, harvest your first indoor crop batch safely tonight.
Required Blocks and Materials
Finally, here is the specific required materials list today. First, you absolutely need four stacks of raw oak logs. Next, strictly ensure you have three stacks of smooth stone bricks. Furthermore, thoroughly grab three stacks of smooth oak wood planks. Moreover, securely craft two stacks of cobblestone stairs for roofs. Consequently, actively collect one stack of clear glass panes for the barn roof. Additionally, safely procure two water buckets for crop irrigation. Therefore, you completely need one stack of crop seeds and carrots. Ultimately, cleanly select four golden hay bales and four barrels. Furthermore, carefully select six glowing iron lanterns for light. Consequently, these agricultural items build a complete survival homestead. Next, perfectly set up your attached farmhouse today right now. Thus, your productive base will delight every visiting player.
10. Lush Jungle Treehouse Lookout
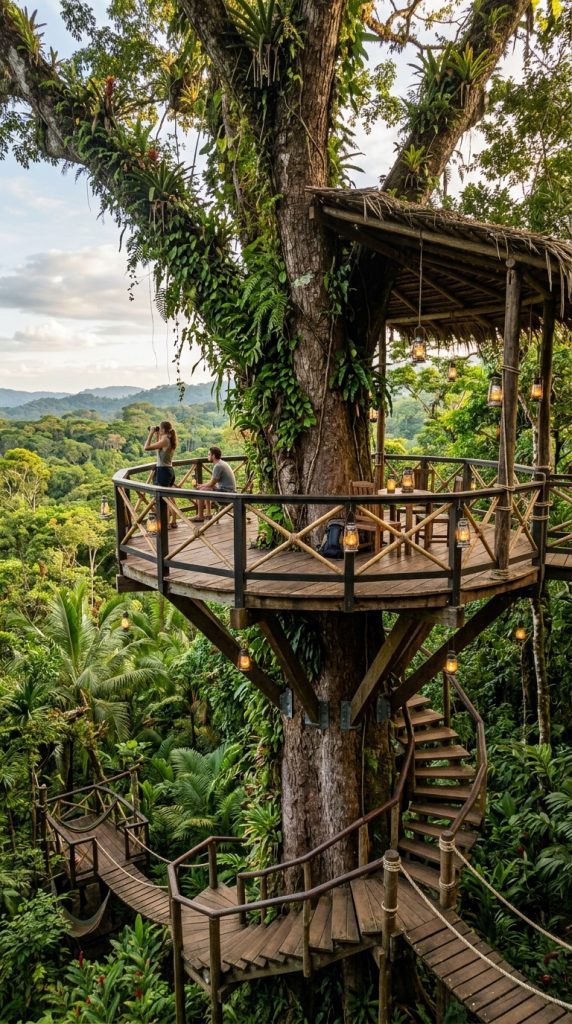
First, a lush jungle treehouse lookout is delightfully adventurous and fun. Moreover, building high up inside massive jungle trees offers natural defense. Consequently, this design cleverly utilizes towering jungle tree trunks and vines. Furthermore, it completely avoids ground-level zombie and creeper attacks. Additionally, elevated canopy living provides breathtaking 360-degree jungle views. Therefore, your treehouse layout pops with wild, tropical adventure energy instantly. Next, this creative idea pushes your vertical climbing and bridge-building skills. Specifically, building wooden platforms wrapped around living tree trunks feels epic. Ultimately, it turns a single giant jungle tree into a multi-tiered sanctuary. However, securely placing your platform support brackets is very important. Consequently, floating wooden platforms without branch supports look unnatural. Instead, place angled wooden fence brackets beneath all platform slabs. Thus, your jungle treehouse looks completely grounded and secure always. Furthermore, treehouse lookouts are massive visual hits.
Exploring Jungle Canopy Architecture
Next, let us properly define the jungle treehouse concept. Essentially, it is building elevated wooden living platforms high in tree canopies. Furthermore, it heavily utilizes raw jungle wood, bamboo, and green leaves. Moreover, natural climbing vines and wooden ladders provide quick vertical access. Consequently, the overall canopy look is deeply organic, wild, and adventurous. Additionally, this style greatly benefits from suspension rope bridges. Therefore, linking multiple neighboring jungle trees with bridges looks stunning. Ultimately, the aesthetic heavily prioritizes living in total harmony with nature. However, planning interior platform safety railings is critical always. Consequently, open platform edges lead to fatal falls in the dark. Thus, install jungle fences around every platform edge without gaps. First, it beautifully captures an authentic tropical jungle expedition feel. Next, it happily provides total safety from hostile ground mobs. Moreover, it proudly represents creative natural landscape integration.
Step-by-Step Build Guide
Now, here is the step-by-step jungle treehouse guide. First, locate a giant 2×2 trunk jungle tree soaring high into the sky. Next, attach wooden ladders and climbing vines up the trunk to the lower branches. Furthermore, construct a 7×7 wooden platform around the trunk using jungle slabs. Consequently, support the platform underside using angled jungle fence brackets. Moreover, build a cozy enclosed wooden hut on the platform using jungle planks. Additionally, leave an open perimeter viewing deck with fence railings all around. Therefore, construct a pitched roof over the hut using green jungle leaf blocks. Next, hang glowing iron lanterns from the bottom of overhanging branches. Ultimately, build a small suspension bridge connecting to an adjacent tree lookout. Furthermore, place a bed, crafting table, and storage chests inside the hut. Consequently, your highly adventurous lush jungle treehouse lookout is complete. Finally, climb up your ladder and watch the sunrise above the jungle canopy.
Required Blocks and Materials
Finally, here is the jungle treehouse required materials list. First, you definitely need two stacks of raw jungle logs. Next, actively select three stacks of smooth jungle wood planks. Furthermore, carefully pick two stacks of jungle wood slabs. Moreover, smartly acquire one stack of jungle fence posts. Consequently, securely craft thirty-two wooden ladder segments. Additionally, properly harvest one stack of fresh green jungle leaves. Therefore, you happily need four glowing iron lanterns for light. Ultimately, confidently select one bed, two double chests, and barrels. Furthermore, perfectly obtain sixteen cocoa beans for trunk decoration. Consequently, these tropical materials solve boring ground-level housing completely. Next, cleanly build your adventurous jungle treehouse right now. Thus, your tropical canopy base will trend everywhere quickly.
11. Dark Oak & Deepslate Medieval Starter

First, a dark oak and deepslate medieval starter is fiercely striking and bold. Moreover, pairing dark chocolate wood with slate-gray stone creates rich depth. Consequently, this design strictly uses high-contrast medieval color palettes. Furthermore, it heavily relies on cobbled deepslate foundations and steep timber roofs. Additionally, medieval styling brings immediate historical fantasy charm home. Therefore, the house instantly feels fortified, ancient, and deeply cozy always. Next, this sophisticated combination is perfect for dark forest or mountain spawns. Specifically, an all-dark timber and stone theme looks stunning under rain. Ultimately, it elegantly captures a cozy gothic or medieval village house. However, you must carefully balance your dark block textures. Consequently, solid deepslate walls without warm wood look gloomy and heavy. Instead, boldly mix polished deepslate with warm dark oak planks. Thus, your medieval home remains visually balanced, warm, and detailed. Furthermore, deepslate medieval houses are timeless community favorites.
Defining Medieval Gothic Architecture
Next, let us clearly define the dark oak medieval concept. Essentially, it is building utilizing heavy stone bases and steep timber gables. Furthermore, it heavily manipulates exposed dark oak logs and stone bricks. Moreover, decorative iron bar window grates enhance this historical style. Consequently, the overall feeling is extremely sturdy, grand, and atmospheric. Additionally, this palette frequently utilizes overhanging second-story jetties. Therefore, the second floor steps outward by one block past the ground floor. Ultimately, the aesthetic feels incredibly tailored, authentic, and medieval. However, maintaining strict structural block alignment is vital always. Consequently, flat wall faces ruin the rich medieval depth effect. Thus, an aesthetic medieval house requires deep wall recesses and brackets. First, it beautifully provides a fortified, high-end visual presence. Next, it famously highlights custom overhanging timber roof framing. Moreover, it quietly commands intense respect for traditional architecture.
Step-by-Step Build Guide
Now, here is the step-by-step medieval starter house guide. First, lay a 7×7 foundation using cobbled deepslate and polished deepslate. Next, erect four-block tall dark oak log corner pillars at the corners. Furthermore, fill the ground floor walls with polished deepslate and stone bricks. Consequently, extend the second floor outward by one block on all sides using dark oak stairs. Moreover, build the second-floor walls using dark oak planks with iron bar windows. Additionally, construct a steep, high-pitched roof using cobbled deepslate stairs. Therefore, detail the roof gables with dark oak trapdoors and slabs. Next, hang glowing iron lanterns from the overhanging timber corner brackets. Ultimately, build an interior wooden staircase connecting the workshop to the bedroom. Furthermore, place a crafting table, blast furnace, and armor stand on the ground floor. Consequently, your highly striking dark oak medieval starter is complete. Finally, proudly admire your fortified gothic masterpiece today.
Required Blocks and Materials
Finally, here is the medieval starter required block list. First, you definitely need three stacks of cobbled deepslate. Next, eagerly harvest two stacks of polished deepslate bricks. Furthermore, specifically craft three stacks of dark oak wood planks. Moreover, carefully acquire two stacks of cobbled deepslate stairs. Consequently, securely collect sixteen iron bars for medieval windows. Additionally, properly craft twenty dark oak trapdoors for detailing. Therefore, you strictly need four glowing iron lanterns for light. Ultimately, safely purchase one bed, two double chests, and an armor stand. Furthermore, carefully select one dark oak door for front access. Consequently, these exact blocks ensure a stunning medieval build. Next, beautifully photograph your dark gothic home for showcase. Thus, your refined architectural taste will impress many players.
12. Coastal Sandstone & Mangrove Beach Shack
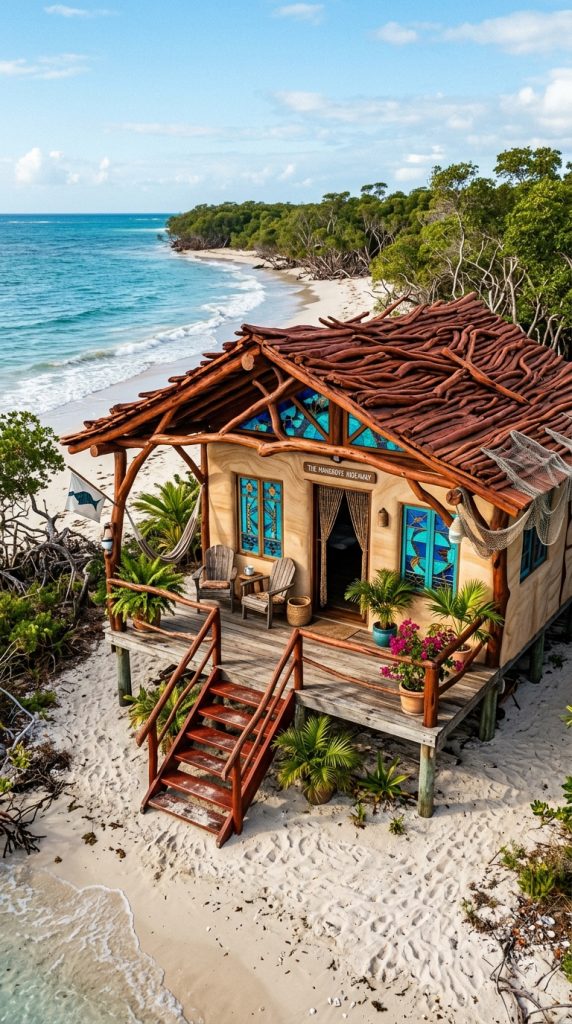
First, a coastal sandstone and mangrove beach shack is delightfully vibrant. Moreover, pairing warm yellow sand with rich red mangrove wood looks tropical. Consequently, this design strictly uses bright, summery coastal color tones. Furthermore, it heavily relies on smooth sandstone, red mangrove timber, and open porches. Additionally, beach shack styling completely eliminates cold, dreary visual vibes. Therefore, the house instantly feels warm, breezy, and relaxing always. Next, this delightful combination is perfect for ocean, beach, and swamp spawns. Specifically, an all-red and warm tan theme looks amazing overlooking blue water. Ultimately, it elegantly captures a tropical surf shack or island beach bungalow. However, you must carefully balance bright red mangrove planks. Consequently, too much solid red wood looks overpowering and flat. Instead, use mangrove wood for roof trims, doors, and stilts over sand. Thus, your beach shack remains balanced, airy, and inviting. Furthermore, mangrove beach shacks are modern aesthetic staples.
Exploring Tropical Coastal Architecture
Next, let us clearly define the coastal beach shack concept. Essentially, it is building utilizing warm beach sand and tropical red timber. Furthermore, it heavily manipulates open wrap-around porches and large windows. Moreover, woven trapdoor window shutters enhance this relaxed island style. Consequently, the overall feeling is extremely breezy, sunny, and cheerful. Additionally, this style frequently utilizes light blue stained glass panes. Therefore, ocean-matching glass adds rich colorful flair to window openings. Ultimately, the aesthetic feels incredibly fresh, organic, and tropical. However, maintaining clean sand foundation transitions is important always. Consequently, building directly on loose sand without stone footings looks unfinished. Thus, an aesthetic beach shack requires smooth sandstone pier foundations. First, it beautifully provides a warm, tropical visual presence. Next, it famously highlights custom red mangrove rooflines over water. Moreover, it quietly commands intense affection from island builders.
Step-by-Step Build Guide
Now, here is the step-by-step beach shack guide. First, clear a 7×7 plot along a sandy beach or ocean shoreline. Next, lay smooth sandstone foundation pillars at all four corners. Furthermore, erect four-block tall stripped mangrove log pillars. Consequently, fill the wall sections with smooth sandstone and light blue glass panes. Moreover, construct an open wooden front deck facing the ocean using mangrove slabs. Additionally, build a colorful pitched roof using red mangrove wood stairs. Therefore, frame window openings with mangrove trapdoors as tropical shutters. Next, place wooden barrels and fishing rod racks along the front porch. Ultimately, hang iron lanterns from the porch roof eaves cleanly. Furthermore, construct a small wooden pathway leading directly into the ocean water. Consequently, your highly charming coastal mangrove beach shack is finished. Finally, sit on your front deck and watch the ocean sunset today.
Required Blocks and Materials
Finally, here is the beach shack required block list today. First, you definitely need three stacks of smooth sandstone. Next, eagerly harvest two stacks of raw mangrove logs. Furthermore, specifically craft two stacks of red mangrove wood planks. Moreover, carefully acquire two stacks of mangrove wood stairs. Consequently, securely collect twelve light blue stained glass panes. Additionally, properly craft sixteen mangrove trapdoors for shutters. Therefore, you strictly need four glowing iron lanterns for light. Ultimately, safely purchase one bed, two double chests, and fishing barrels. Furthermore, carefully select one mangrove door for front entry. Consequently, these tropical blocks ensure a stunning coastal build. Next, beautifully photograph your sunny beach home for showcase. Thus, your coastal taste will delight every player.
13. Minimalist 5×5 Survival Cube

First, a minimalist 5×5 survival cube is an engineering masterpiece of compact space. Moreover, fitting all essential survival workstations into a tiny 5×5 footprint is brilliant. Consequently, this design focuses entirely on maximum spatial efficiency and resource economy. Furthermore, it transforms the simplest geometric shape into a chic, highly functional micro-home. Additionally, the micro-cube aesthetic uses clean wood framing and glass walls. Therefore, your starter house remains incredibly tidy, modern, and cheap to construct. Next, this practical idea is perfect for speedrunners and nomads. Specifically, building a complete two-story micro-home takes less than fifteen minutes. Ultimately, it offers a complete, fully functional base inside a tiny footprint. However, you must carefully calculate your interior block clearances. Consequently, placing beds under full blocks prevents players from waking safely. Instead, place your bed on the upper loft floor under open stair roofs. Thus, your 5×5 survival cube functions with total comfort always. Furthermore, 5×5 micro-homes are universally praised online.
Exploring Micro-Home Space Planning
Next, let us clearly define the 5×5 survival cube concept. Essentially, it is packing a workshop, storage, furnace array, and bed into a 5×5 box. Furthermore, it heavily utilizes vertical space with a ground floor and upper loft. Moreover, large glass windows make the small interior feel surprisingly spacious. Consequently, the overall room feel is extremely efficient, modern, and clever. Additionally, this style greatly supports rapid early-game construction in any biome. Therefore, you can gather all required materials in a single in-game day. Ultimately, the aesthetic feels incredibly smart, practical, and well organized. However, maintaining easy access to all storage chests is vital always. Consequently, burying chests under solid blocks prevents them from opening. Thus, an aesthetic 5×5 cube utilizes top-half slabs and trapdoor covers. First, it beautifully provides an all-in-one survival command center. Next, it happily fits into tight mountain ledges and small islands. Moreover, it proudly represents master-level compact space planning.
Step-by-Step Build Guide
Now, here is the step-by-step 5×5 survival cube guide. First, outline a 5×5 square foundation on flat ground using cobblestone. Next, erect four-block tall oak log corner pillars at all four corners. Furthermore, fill the ground floor walls with oak planks, glass panes, and a front door. Consequently, recess four furnaces and a crafting table flush into the ground floor. Moreover, place a double chest flush under the floor with a top-half slab cover. Additionally, build an upper loft floor at height level three using oak wood slabs. Therefore, install a vertical ladder in the corner connecting the ground floor to the loft. Next, place your bed, extra storage chests, and an armor stand on the upper loft. Ultimately, construct a flat glass skylight roof or a low slab roof overhead. Furthermore, hang an iron lantern from the center ceiling for complete lighting. Consequently, your highly efficient minimalist 5×5 survival cube is complete. Finally, test all your utility blocks from one central standing tile.
Required Blocks and Materials
Finally, here is the 5×5 survival cube required block list. First, you definitely need twenty-four raw oak logs. Next, eagerly acquire thirty-two smooth oak wood planks. Furthermore, specifically craft sixteen smooth cobblestone blocks. Moreover, carefully collect twelve clear glass panes for windows. Consequently, securely select two double chests, four furnaces, and a craft table. Additionally, properly craft six wooden ladder segments and one door. Therefore, you strictly need two glowing iron lanterns for light. Ultimately, safely purchase one bed and eight wooden slabs for the loft. Furthermore, carefully select oak trapdoors for exterior detailing. Consequently, these exact items ensure a stunning ultra-compact build. Next, beautifully position your 5×5 micro-home in your world right now. Thus, your smart efficient lifestyle will inspire you daily.
14. Traditional Japanese Cherry Blossom Hut

First, a traditional Japanese cherry blossom hut is deeply peaceful and romantic. Moreover, pairing pale pink cherry wood with white walls looks stunning. Consequently, this design strictly uses soft, elegant Asian architectural geometry. Furthermore, it heavily relies on flared pagoda rooflines, white wool, and cherry leaves. Additionally, traditional Asian hut styling completely eliminates basic boring farm boxes. Therefore, the house instantly feels serene, majestic, and graceful always. Next, this sophisticated combination is perfect for cherry grove biome spawns. Specifically, an all-pink, white, and dark timber theme looks breathtaking under falling petals. Ultimately, it elegantly captures a peaceful storybook tea house sanctuary. However, you must carefully calculate your flared pagoda roof curves. Consequently, flat roof eaves destroy traditional Asian roof silhouettes. Instead, curve roof edges upward by placing upside-down stairs on corners. Thus, your cherry blossom hut remains authentically flared and sweeping always. Furthermore, cherry blossom huts are timeless community favorites.
Defining Traditional Asian Architecture
Next, let us clearly define the traditional cherry hut concept. Essentially, it is building utilizing raised timber platforms and sweeping roofs. Furthermore, it heavily manipulates white wool panels and dark oak timber frames. Moreover, falling pink cherry leaves and paper lanterns enhance this style. Consequently, the overall feeling is extremely peaceful, light, and elegant. Additionally, this palette frequently utilizes birch trapdoors as sliding Shoji screens. Therefore, plain wooden doors are replaced with traditional paper-style dividers. Ultimately, the aesthetic feels incredibly detailed, serene, and historical. However, maintaining strict soft color harmony is essential always. Consequently, rough gray cobblestone ruins the gentle Asian illusion. Thus, an aesthetic cherry hut requires smooth quartz or dark wood foundations. First, it beautifully provides a serene, peaceful visual presence. Next, it famously highlights custom flared pagoda roof framing. Moreover, it quietly commands intense affection from aesthetic builders.
Step-by-Step Build Guide
Now, here is the step-by-step traditional cherry hut guide. First, lay a 7×7 raised timber platform using dark oak logs and slabs. Next, erect four-block tall dark oak log pillars at the four corners. Furthermore, fill wall sections with white wool blocks and birch trapdoor screens. Consequently, construct large central window openings using white stained glass panes. Moreover, build a flared pagoda roof using dark oak stairs stepping upward. Additionally, extend roof corners outward and curve them up using upside-down stairs. Therefore, hang glowing paper lanterns from all four sweeping roof corners. Next, line interior floors using pale birch planks and yellow wool Tatami mats. Ultimately, place a cozy pink bed and crafting table inside the central room. Furthermore, plant a custom cherry blossom tree beside the front wooden deck. Consequently, your highly charming traditional Japanese cherry hut is complete. Finally, sit on your raised porch and watch pink petals drift past today.
Required Blocks and Materials
Finally, here is the traditional cherry hut required block list. First, you definitely need three stacks of dark oak logs. Next, eagerly harvest two stacks of white wool blocks. Furthermore, specifically craft two stacks of dark oak wood stairs. Moreover, carefully acquire one stack of smooth birch planks. Consequently, securely collect sixteen birch trapdoors for paper screens. Additionally, properly harvest twelve white stained glass panes for windows. Therefore, you strictly need four glowing iron or paper lanterns. Ultimately, safely purchase one pink bed and four yellow wool carpets. Furthermore, carefully select pink cherry blossom leaves for tree accents. Consequently, these serene blocks ensure a stunning traditional build. Next, beautifully photograph your peaceful cherry home for showcase. Thus, your refined aesthetic taste will delight every player.
15. Terracotta & Pumpkin Autumn Lodge
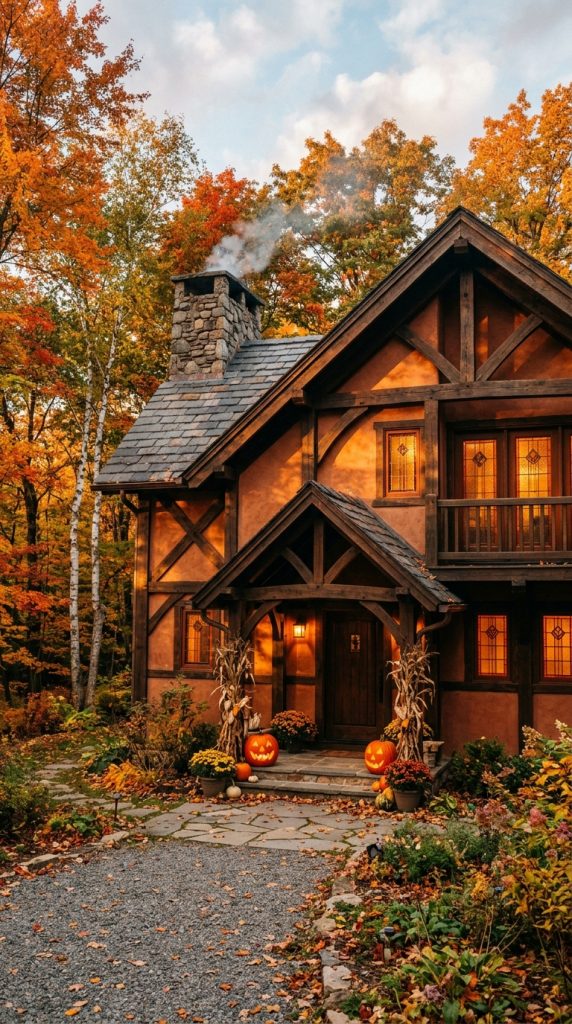
First, a terracotta and pumpkin autumn lodge is deeply cozy, rich, and warm. Moreover, pairing warm burnt orange clay with dark timber creates autumnal beauty. Consequently, this design strictly uses deep, harvest-season forest tones. Furthermore, it heavily relies on uncolored terracotta clay, dark oak, and carved pumpkins. Additionally, autumn styling brings immediate warm harvest season vibes home. Therefore, the house instantly feels deeply comfortable, sturdy, and historical always. Next, this delightful combination is perfect for autumn forests and mountain biomes. Specifically, an all-orange and rich brown theme looks amazing surrounded by orange leaves. Ultimately, it elegantly captures a cozy rustic hunting lodge or mountain cabin. However, you must carefully select your terracotta color variants. Consequently, bright neon orange dyed terracotta looks overly intense on walls. Instead, select uncolored or brown terracotta for natural warmth. Thus, your autumn lodge remains visually pleasing, earthy, and grounded. Furthermore, terracotta lodge houses are timeless aesthetic staples.
Exploring Warm Autumn Lodge Aesthetics
Next, let us properly define the rustic terracotta lodge concept. Essentially, it is building utilizing warm autumn earth shades and heavy timber. Furthermore, it heavily manipulates terracotta clay walls and dark oak posts. Moreover, glowing carved pumpkin lanterns beautifully enhance this harvest style. Consequently, the overall room look is extremely warm, rustic, and inviting. Additionally, this style frequently utilizes orange stained glass windows. Therefore, cold white daylight is softened into warm golden autumn glows. Ultimately, the aesthetic feels incredibly cozy, historical, and rich. However, maintaining strict warm color balance is essential always. Consequently, bright cyan or blue blocks ruin the cozy autumn illusion. Thus, an aesthetic terracotta lodge requires rich warm earth blocks. First, it beautifully provides a deeply cozy visual presence. Next, it famously highlights dark oak timber frame wall designs. Moreover, it quietly commands intense affection from cozy survival builders.
Step-by-Step Build Guide
Now, here is the step-by-step autumn lodge guide. First, lay a 7×7 foundation using dark oak logs and smooth stone bricks. Next, erect four-block tall dark oak log pillars at all four corners. Furthermore, fill wall sections with warm uncolored terracotta clay and dark oak planks. Consequently, install orange stained glass panes in room windows for a warm glow. Moreover, construct a thick, heavy roof using dark oak stairs and slabs. Additionally, build a small front porch with carved pumpkin lanterns flanking the steps. Therefore, plant sweet berry bushes and yellow sunflowers along the front yard. Next, construct an interior stone fireplace with a glowing campfire inside. Ultimately, line interior floors with dark oak planks and warm brown wool rugs. Furthermore, hang iron lanterns from dark ceiling beams for safe lighting. Consequently, your highly charming terracotta and pumpkin autumn lodge is complete. Finally, happily step inside your cozy mountain lodge and warm up tonight.
Required Blocks and Materials
Finally, here is the terracotta lodge required block list today. First, you definitely need three stacks of uncolored terracotta clay. Next, eagerly harvest three stacks of raw dark oak logs. Furthermore, specifically craft two stacks of dark oak wood planks. Moreover, carefully acquire two stacks of dark oak stairs for roofs. Consequently, securely collect twelve orange stained glass panes for windows. Additionally, properly harvest four carved pumpkins and torches for lanterns. Therefore, you strictly need four glowing iron lanterns for light. Ultimately, safely purchase one orange bed and eight brown wool carpets. Furthermore, carefully select dark oak trapdoors for rustic window framing. Consequently, these cozy blocks ensure a stunning autumn build. Next, beautifully photograph your warm lodge home for showcase. Thus, your autumn lodge taste will delight every player.