
Step into the grand tradition of medieval fortress design with structural stone arches. A castle wall without arches often feels flat, defensive, and visually boring. Thoughtful archways introduce sweeping curves, deep shadows, and impressive scale instantly.
These structural features connect towering ramparts, royal courtyards, grand throne rooms, and fortress gateways. They invite players and wandering villagers into deeper realms of your kingdom. Best of all, striking architectural arches require only basic building blocks.

The Power of Depth and Curves
First impressions depend entirely on breaking past flat, two-dimensional stone block walls. In Minecraft, authentic curves are created using clever stair and slab combinations. Inverting stairs along upper doorframes softens harsh right-angle voxel grids effortlessly.
Stepping your arch frames outward or inward creates dynamic wall relief. These shadows shift as daylight crosses your fortress courtyards throughout the day. Your simple stone fortifications will look ancient, grand, and realistically engineered.
Establishing the Material Palette
Material choices define the historical age and security level of castles. A pristine royal palace calls for clean stone bricks and quartz. In contrast, battle-worn siege bastions need cracked bricks, cobblestone, and andesite.
Mixing textured gray stones simulates centuries of harsh weather and defense. Introduce dark oak, deepslate, or spruce timber to add natural warmth. These deliberate block choices ensure your survival fortress screens look exceptional.
Speed Building Fast Portals
You do not need endless hours of free time to construct. Even massive fortress gates can be assembled in under fifteen minutes. Keeping standard measurements in mind speeds up the entire construction process.
Use odd-numbered spans like three, five, or seven blocks for arches. Odd widths provide a clear center keystone block for hanging lanterns. Once you master the basic curved framework, duplicating walls is effortless.
Layering Authentic Fortress Textures
Texture gradients bring flat stone blocks to life with historical grit. Place heavier, broken cobblestone blocks near foundational dirt and moat waterlines. Transition upward toward polished stone bricks, smooth andesite, and decorative chiseled blocks.
Tuck mossy cobblestone into dark corners where virtual rain gathers naturally. Scatter buttons and walls across flat faces to mimic protruding masonry. These micro-details add historical authenticity without demanding expensive rare materials.
Functional Defensive Details
Medieval architecture always balanced decorative beauty with practical tactical warfare functions. Incorporate arrow slits, murder holes, and sturdy portcullis gates into archways. Deep arch designs provide shelter for guarding archers during nighttime raids.
Hang heavy iron chains and brass lanterns to illuminate approaching threats. Add iron bars, trapdoors, and stone pressure plates for working gates. These functional touches transform decorative entryways into true military defense installations.
Illuminating Fortress Corridors
Lighting turns cold stone passages into warm, welcoming strongholds after dark. Avoid haphazard torch placement scattered along pristine castle corridors and walls. Instead, tuck light blocks beneath stairs or inside carved wall niches.
Hang lanterns from iron chains suspended directly from archway keystones. Soul lanterns provide a chilling, supernatural blue glow for dungeon corridors. Layered lighting highlights soaring curved ceilings while keeping hostile mobs away.
1. The Classic Stone Brick Keystoned Arch
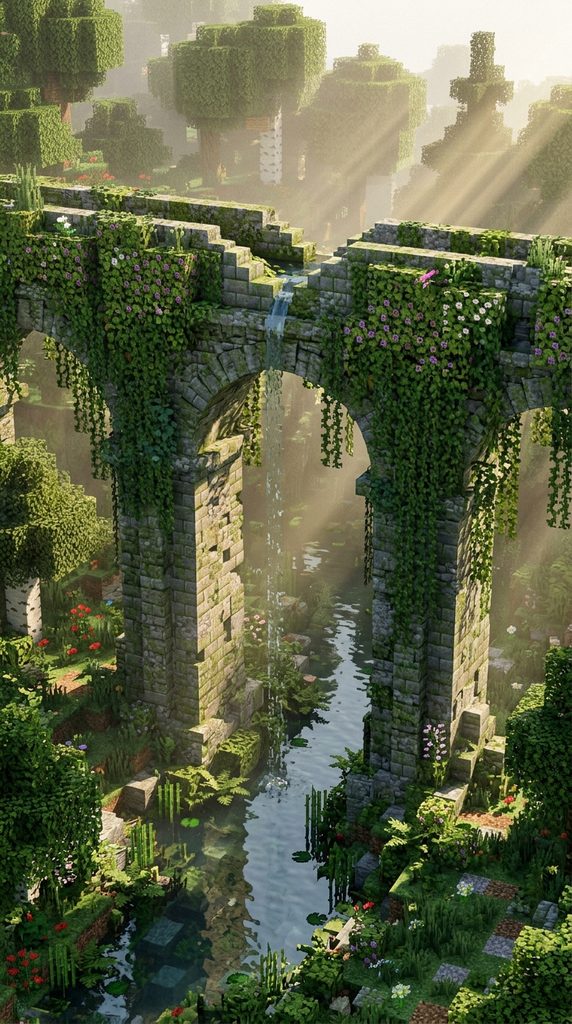
Standard Royal Fortress Entry
Build an iconic, symmetrical archway using standard stone bricks and stairs. This beginner-friendly design fits perimeter castle walls, guardhouses, and courtyard gates. Its clean lines and balanced proportions provide a timeless medieval look.
The central keystone slab drops down slightly to anchor the curve. Deep recessed inner frames create striking shadows that elevate flat surfaces. It takes less than five minutes to build yet transforms walls.
Materials You Will Need
- Stone bricks, stone brick stairs, and stone brick slabs
- Chiseled stone bricks for decorative foundational corner accents
- Cobblestone walls for slim side column detailing
- Iron bars for a sturdy overhead portcullis frame
- Iron chain and a brass lantern for keystone illumination
How to Style It
Erect two vertical five-block-tall pillars spaced three blocks apart horizontally. Cap the inner top corners using upside-down stone brick stairs. Place a single stone brick slab in the center to close.
Push the inner wall back by one full block for depth. Install vertical iron bars within the recessed gap as a gate. Hang an iron chain and lantern directly from the keystone slab.
2. Deepslate Corbelled Dungeon Gateway
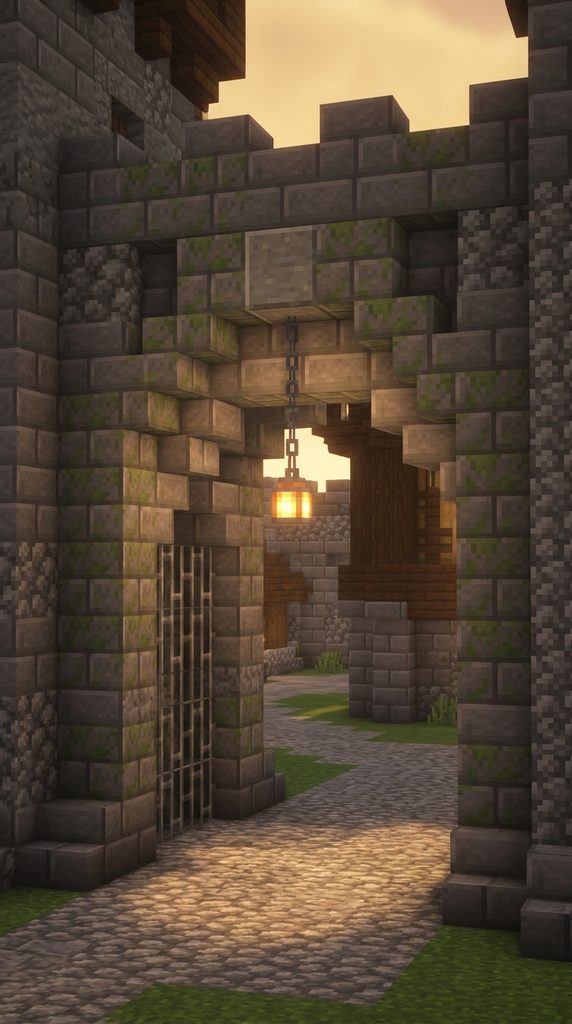
Subterranean Prison Portal
Descend into dark subterranean vaults with an imposing deepslate corbelled archway. Corbelled arches step inward horizontally rather than curving smoothly with stairs. This ancient construction style creates a heavy, brooding, and foreboding entrance.
The slate-gray stone blocks look dense, impenetrable, and cold to touch. Soul lanterns cast chilling blue light across the dark tiled floor. It serves as an intimidating entryway for underground prisons and crypts.
Materials You Will Need
- Polished deepslate blocks, deepslate tiles, and deepslate stairs
- Cobbled deepslate walls for structural side pilasters
- Deepslate tile slabs for stepped ceiling layering
- Soul lanterns and iron chains for chilling blue lighting
- Iron trapdoors to detail overhead murder hole grates
How to Style It
Build two heavy pillars using polished deepslate blocks four blocks tall. Step inward by placing inverted deepslate stairs facing outward on both. Place standard deepslate tile blocks directly on top of each stair.
Bridge the final center gap with inverted stairs meeting a slab. Line the outer corners with cobbled deepslate walls for textural contrast. Suspend a soul lantern from the center to cast blue shadows.
3. Overgrown Mossy Ruins Aqueduct Arch

Ancient Forgotten Waterway
Construct an ancient Roman-style aqueduct arch reclaimed by wild creeping nature. This design suggests centuries of abandonment through crumbling, moss-slicked stone surfaces. Water trickles gently down the stone face into a natural moat.
Trailing leaves, weeping vines, and cracked bricks provide rich environmental storytelling. It connects separate castle towers while acting as an elevated perimeter bridge. It brings organic life and lush color to cold gray walls.
Materials You Will Need
- Mossy stone bricks, cracked stone bricks, and cobblestone
- Mossy stone brick stairs and mossy cobblestone slabs
- Flowering azalea leaves and weeping vines for organic draping
- Water bucket for a trickling wall spring detail
- Glow lichen or hidden sea lanterns for subtle moss glow
How to Style It
Erect two wide pillars six blocks tall using mixed mossy stones. Arch the top using inverted mossy stairs curving toward a central slab. Knock out random blocks in the pillar faces, replacing with stairs.
Drape flowering azalea leaves down the outer side of the structure. Place a water source block at the top so it trickles down. Stick glowing lichen onto shaded stone faces for a faint glow.
4. Grand Timber-Framed Drawbridge Portal
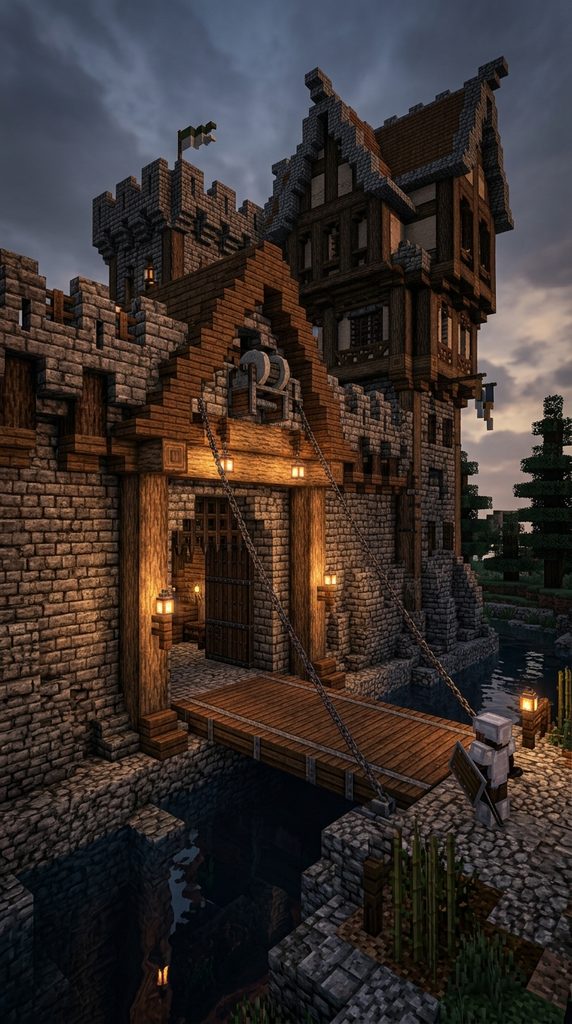
Reinforced Castle Moat Entry
Combine heavy spruce timber beams with stone for a reinforced drawbridge. This defensive arch guards the outer boundary across dangerous castle moats. The warm wooden beams contrast sharply against cold gray perimeter battlements.
Heavy iron chains look as if they raise a wooden bridge. Inverted wooden stairs soften the heavy timber framing along the gateway. It establishes a fortified, realistic entrance for high-traffic survival castle bases.
Materials You Will Need
- Stripped spruce logs and spruce wood planks
- Spruce stairs, spruce slabs, and dark oak trapdoors
- Stone brick walls and polished andesite for foundation piers
- Heavy iron chains and grindstones to simulate pulley winches
- Standard lanterns mounted on decorative wooden fence posts
How to Style It
Frame an outer stone gate opening five blocks wide using logs. Inset vertical stripped spruce logs on both sides as wooden jams. Curve the upper timber arch using inverted spruce stairs meeting slabs.
Mount grindstones sideways above the arch to represent mechanical bridge winches. Thread iron chains diagonally down from grindstones toward the bridge floor. Line the outer timber posts with warm brass lanterns for visibility.
5. Sleek Quartz Palace Colonnade

Regal White Marble Corridor
Channel high-fantasy royal palace elegance using crisp, polished smooth quartz blocks. This soaring archway style feels majestic, ethereal, and suited for kings. Repeating the arch forms a breathtaking colonnade along royal banquet halls.
The pure white blocks reflect sunlight, creating an uplifting, luminous atmosphere. Gold block accents and polished diorite pillars introduce subtle luxury touches. It feels distinctly aristocratic compared to rugged, battle-scarred medieval stone forts.
Materials You Will Need
- Smooth quartz blocks, quartz stairs, and smooth quartz slabs
- Quartz pillars for fluted classical side column construction
- Polished diorite blocks for subtle floor checkerboard tiling
- Gold blocks or yellow terracotta for heraldic keystone accents
- End rods and sea lanterns for concealed modern regal light
How to Style It
Erect two fluted quartz pillars five blocks tall over diorite. Place inverted quartz stairs at the pillar tops facing inward symmetrically. Top the stairs with smooth quartz blocks, curving upward with slabs.
Insert a gleaming gold block at the center as a keystone. Line the upper arch cornice with smooth quartz stairs facing outward. Conceal end rods vertically beneath the arch to provide bright illumination.
6. Nether-Touched Crimson Bastion Gate
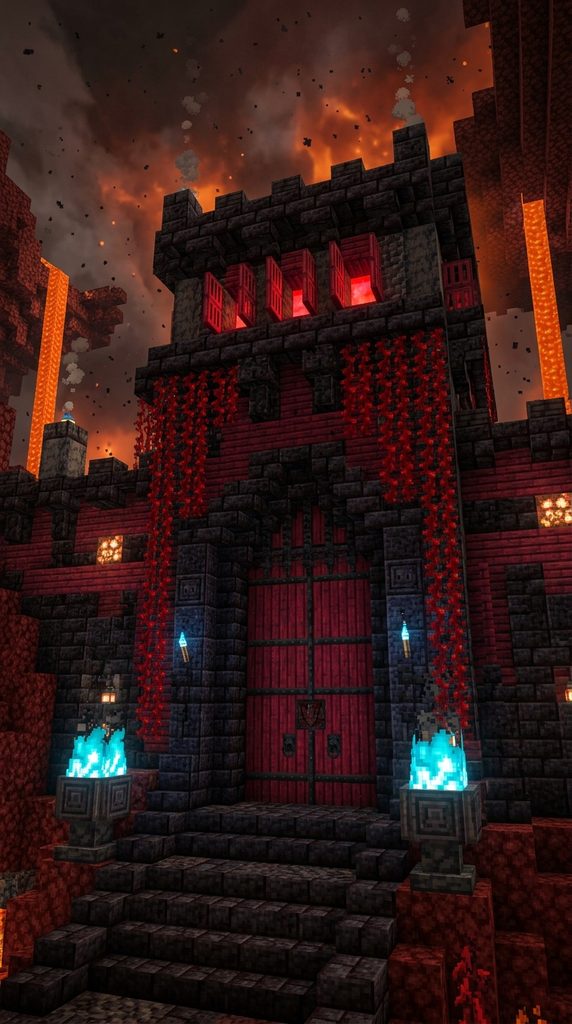
Demonic Lava Fort Portal
Incorporate otherworldly materials into your castle using warped and crimson Netherwood. This archway suggests a dark fortress built atop bubbling volcanic terrain. The fiery red tones contrast dramatically against dark blackstone and magma.
Weeping crimson vines hang like tendrils from the pointed archway. Glowing shroomlights concealed behind trapdoors pulse with strange alien biological energy. It delivers an intimidating gateway for dark fantasy fortresses and citadels.
Materials You Will Need
- Polished blackstone bricks, stairs, slabs, and blackstone walls
- Crimson planks, crimson stairs, and crimson wood trapdoors
- Weeping vines trailing down from upper arch stones
- Shroomlights disguised behind open crimson trapdoors for ambient glow
- Soul soil and flint and steel for decorative blue braziers
How to Style It
Build a tall, pointed gothic arch framework using polished blackstone. Invert blackstone stairs along the inner rim to create sharp curves. Back the interior wall frame with deep red crimson wooden planks.
Hang weeping vines from the highest blackstone blocks over the portal. Embed a shroomlight at the apex, covering it with crimson trapdoors. Flank the entrance base with soul soil braziers burning blue flames.
7. Pointed Gothic Cathedral Arch

Soaring High-Fantasy Vault
Construct an authentic, slender pointed arch inspired by dramatic Gothic cathedrals. Unlike rounded Roman arches, Gothic arches meet at a sharp point. This vertical emphasis draws the viewer’s eye upward toward the clouds.
The tall, narrow proportions make towers look taller than they are. Stained glass windows nestled inside the stone frame catch sunlight beautifully. It adds unmatched historical refinement to chapels, libraries, and grand halls.
Materials You Will Need
- Stone bricks, cracked stone bricks, and stone brick stairs
- Stone brick slabs and cobblestone walls for delicate framing
- Deepslate tile stairs for high-contrast dark exterior trim
- Assorted colored stained-glass panes for an interior window screen
- Hanging chains and lanterns for high vaulted ceiling lighting
How to Style It
Erect two slim pillars five blocks high spaced three blocks apart. Place inverted stone stairs facing inward at the pillar top edges. Stack standard stone blocks on top, then place another stair tier.
Meet in the center using two opposing stairs forming a point. Trim the outer curved edge with contrasting dark deepslate tile stairs. Fill the recessed interior cavity with jewel-toned stained glass window panes.
8. Fortified Arrow-Slit Battlement Arch
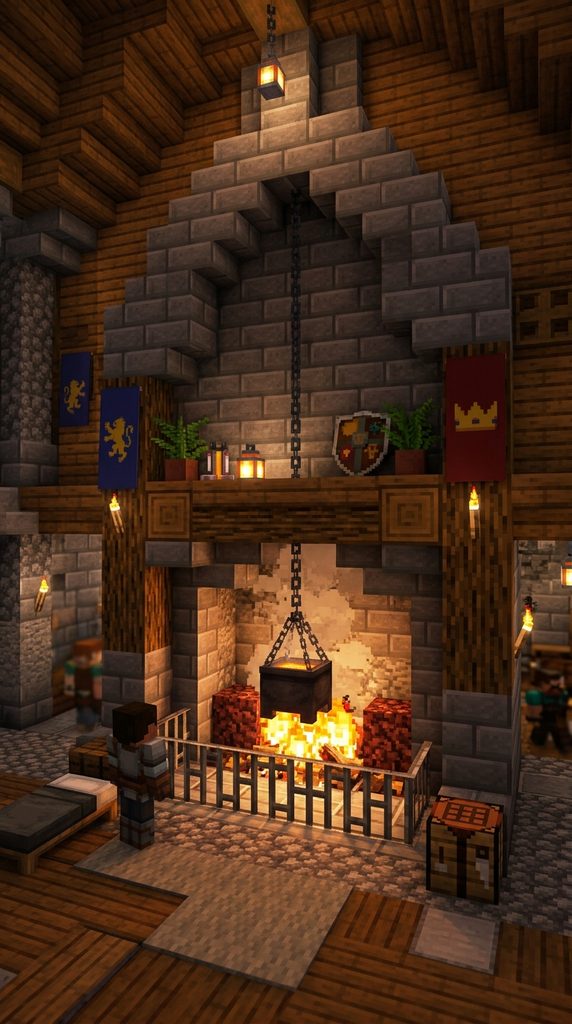
Tactical Castle Wall Defenses
Design a heavy, practical archway made for defensive archery during sieges. This thick gateway integrates narrow arrow slits into the side pillars. Archers stand sheltered behind thick masonry while firing arrows at intruders.
The squatted, low-clearance curve deflects catapult fire and flying enemy arrows. Heavy cobblestone walls and iron bars protect exposed structural weak points. It provides an authentic military feel for frontline outer curtain walls.
Materials You Will Need
- Cobblestone, stone bricks, and andesite for rugged wall texture
- Stone stairs and slabs for the reinforced, low-profile curve
- Birch fences or iron bars placed inside narrow arrow slits
- Dark oak trapdoors to serve as protective archer window shutters
- Campfires concealed beneath stone slabs to simulate smoking battlements
How to Style It
Build thick, double-layered stone pillars three blocks wide on both sides. Leave a one-block-wide vertical slit in the center of each pillar. Place an iron bar inside the vertical slit as an arrow loophole.
Bridge the wide gap using low-profile stone slabs and inverted stairs. Add dark oak trapdoors above the slits as functional arrow shutters. Crown the upper wall deck with crenelated battlements and smoking campfires.
9. Warm Sandstone Desert Palace Gateway
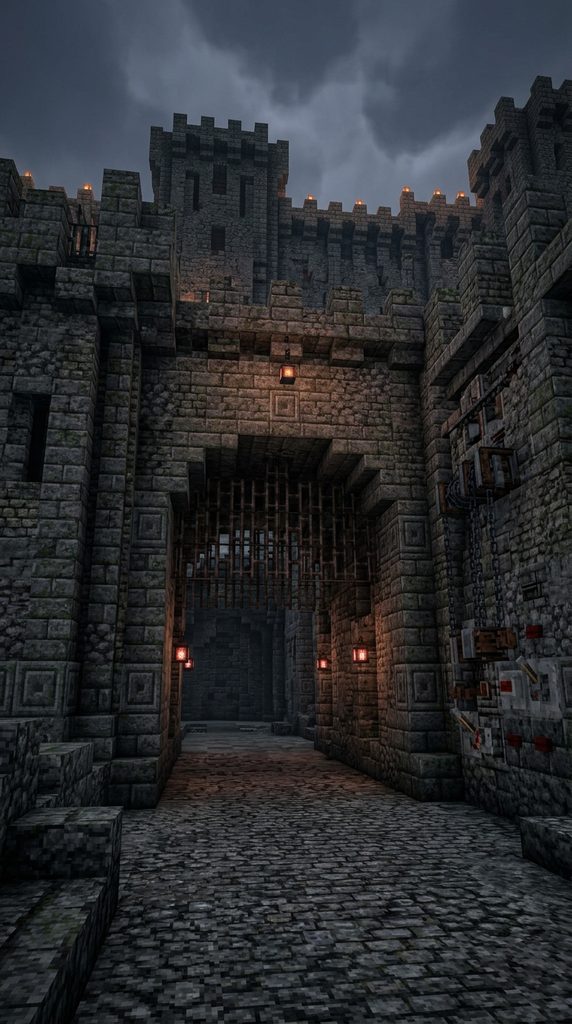
Arabian Nights Oasis Arch
Transport your castle architecture to sunlit desert biomes using smooth sandstone. Sandstone arches capture the exotic charm of arid palaces and citadels. The warm golden tones contrast beautifully against lush blue oasis waters.
Intricate geometric carvings cut into the sandstone add authentic palace texture. Incorporate cut red sandstone borders to introduce rich, fiery terracotta accents. It looks stunning framed against vibrant blue skies and swaying palms.
Materials You Will Need
- Smooth sandstone blocks, sandstone stairs, and smooth sandstone slabs
- Cut sandstone and chiseled sandstone for detailed hieroglyphic bands
- Red sandstone stairs and slabs for high-contrast decorative trim
- Blue and turquoise terracotta blocks for subtle mosaic palace insets
- Hanging lanterns and potted flowering cactus plants for decor
How to Style It
Construct two sandstone pillars four blocks tall using chiseled sandstone bases. Curve the interior arch using smooth sandstone stairs meeting flat slabs. Cap the upper outer perimeter using contrasting reddish cut sandstone stairs.
Carve geometric recesses into the wall above the arch with terracotta. Hang a brass lantern directly beneath the sandstone keystone for warmth. Place potted flowering cacti in terracotta pots beside the entryway base.
10. Heavy Iron Portcullis Gatehouse Arch
Impenetrable Citadel Chokepoint
Build an imposing fortified gateway complete with a working iron portcullis. The sliding iron portcullis gate represents the ultimate medieval fortress barrier. Trapping the gate between deep stone walls creates a deadly defensive chokepoint.
The mixture of stone masonry and cold iron looks formidable and functional. Positioned between two round guard towers, it commands total landscape control. It is an essential build for protecting precious survival storage vaults.
Materials You Will Need
- Stone bricks, cracked stone bricks, and mossy stone variants
- Deepslate walls and iron bars for the sturdy portcullis gate
- Polished andesite slabs and smooth stone for floor paving
- Redstone lamps, levers, and tripwire hooks for gate winch details
- Heavy iron chains hanging from high gatehouse ceiling beams
How to Style It
Construct a deep archway four blocks thick using weathered stone bricks. Recess a two-block-wide vertical channel into the interior side wall faces. Fill the vertical channel with stacked iron bars mimicking a dropped portcullis.
Stagger the bottom iron bars so the gate appears partially open. Mount levers and tripwire hooks beside the entrance as winch mechanisms. Flank the gatehouse approach with redstone lamps operated by hidden levers.
11. Cozy Castle Hearth Fireplace Arch
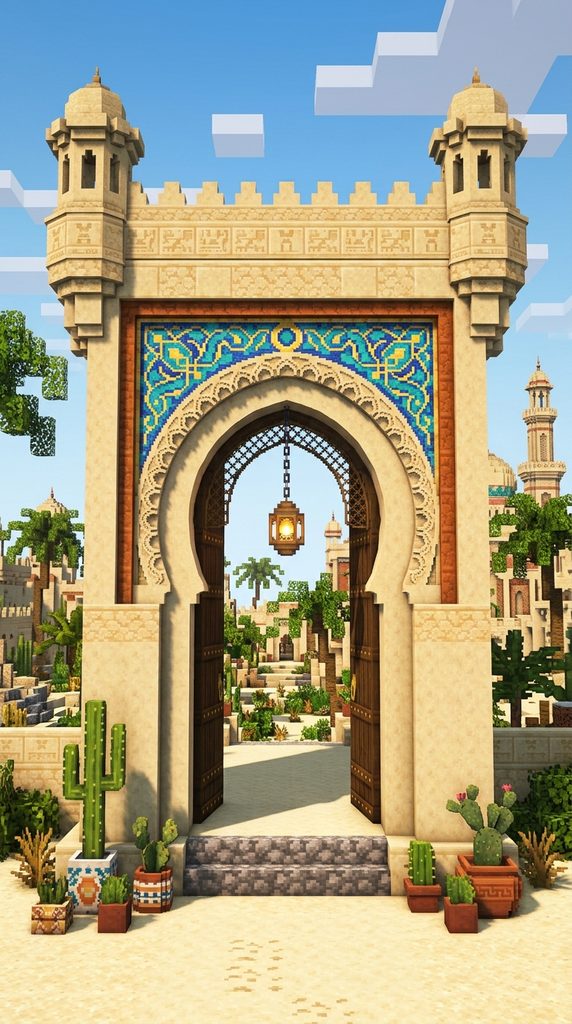
Grand Great Hall Hearth
Bring the elegance of stone castle arches indoors to your hearth. A massive stone fireplace arch serves as the heart of halls. It anchors the room while providing cozy warmth during snowy nights.
The sweeping stone arch protects wooden ceiling beams from roaring hearth fires. Iron cauldrons and hanging meat racks add tactile, domestic medieval charm. It transforms empty, echoing great halls into welcoming royal gathering spaces.
Materials You Will Need
- Cobblestone, stone bricks, and polished andesite for fireplace masonry
- Stone brick stairs and slabs for the heat-deflecting mantel arch
- Netherrack or campfires for safe, permanent indoor roaring hearth fire
- Iron bars, cauldrons, and heavy chains for hanging cooking pots
- Spruce wood logs and wood planks for adjacent great hall walls
How to Style It
Recess a firebox three blocks wide and two blocks deep into walls. Lay netherrack blocks inside the recessed floor, igniting with flint and steel. Place iron bars in front of the flames as a safety screen.
Span the upper firebox with an arched lintel using stone stairs. Build a tapering chimney breast ascending directly through the high wooden ceiling. Suspend an iron cauldron from chains inside the hearth over flames.
12. Floating Castle Cloudbridge Arch
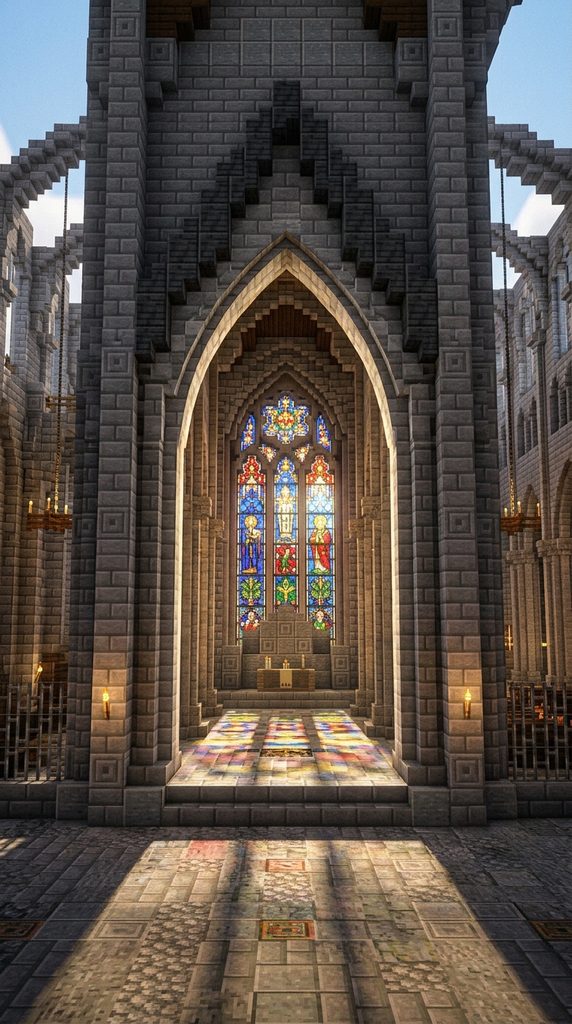
Skyway Celestial Crossing
Span open chasms and skyward drops with an ethereal, sweeping cloudbridge arch. This soaring archway connects disconnected mountain towers high above snowy valleys below. Looking through the open arch reveals endless skies and distant horizons.
The bottom of the arch curves upward smoothly from vertical cliffs. Lightweight white stone or pale granite keeps the bridge looking buoyant. It provides a breathtaking path for Elytra gliders soaring through kingdoms.
Materials You Will Need
- Diorite, polished diorite, and white concrete for pale stone
- Polished diorite stairs, slabs, and walls for lightweight curved spans
- Sea lanterns concealed beneath trapdoors for ethereal white lighting
- Iron chains and glowstone for bridge suspension lighting details
- Glass panes or open stone fences for safety bridge balustrades
How to Style It
Anchor stone bridge springings securely into opposing mountain rock faces. Arch the bridge deck upward gracefully, meeting at a high central apex. Invert polished diorite stairs along the underbelly to create clean spans.
Line both outer sides of the walking deck with diorite walls. Embed glowing sea lanterns into the bridge floor beneath iron trapdoors. Leave the archway underneath wide open so clouds drift through freely.