There’s something inherently magical about watching birds visit your garden, balcony, or backyard. The gentle flutter of wings, the bright splashes of color, and the soft chirping of songbirds create a tranquil atmosphere that connects us to nature. Whether you’re a seasoned gardener, a DIY enthusiast, or a family looking for a creative weekend project, building your own bird feeder is a rewarding and practical way to attract wildlife to your outdoor space. DIY bird feeders not only provide nourishment for birds, especially during harsh seasons, but also add a charming decorative element to your yard, patio, or balcony.
Bird feeding is more than just a pastime—it’s an opportunity to foster a closer relationship with nature. By creating custom feeders, you can choose designs that fit your outdoor aesthetic, select materials that are safe and sustainable, and even incorporate personal touches that reflect your style. From rustic wooden feeders to modern minimalist designs, DIY bird feeders come in countless shapes, sizes, and styles. The process allows you to experiment with creativity, practice woodworking or crafting skills, and enjoy the satisfaction of a project you can admire long after it’s completed.
Building a bird feeder is also an educational opportunity, particularly for children. It teaches responsibility, as feeders require regular maintenance and refilling. It introduces concepts of wildlife care, bird species identification, and ecosystem awareness. Families can turn the project into a fun hands-on learning experience, observing which birds are attracted to different feeders or types of seeds. Moreover, a homemade bird feeder can become a seasonal tradition, allowing for decorations and updates throughout the year.
DIY bird feeders are highly versatile. Depending on your space and materials, you can create feeders that hang from trees, mount on poles, attach to balconies, or even perch on windowsills. Each type offers unique advantages. Hanging feeders can sway naturally with the wind, attracting birds that prefer a bit of elevation. Pole-mounted feeders provide stability and accessibility. Window feeders allow for close-up observation of visiting birds, perfect for photography or educational purposes. This flexibility ensures that you can create a bird feeder that perfectly suits your needs, space, and style.
The design possibilities for DIY bird feeders are endless. Classic wooden feeders evoke rustic charm, often made from reclaimed wood or simple planks. Mason jar feeders are perfect for small spaces and offer a modern, chic look. PVC pipe feeders, bamboo feeders, and even upcycled household items like teacups, milk cartons, or old wooden crates can be transformed into functional bird feeders. Each material brings a different aesthetic and functionality, from minimalist and modern to whimsical and eclectic. The beauty of DIY projects is that they allow you to combine practicality with creativity, resulting in a feeder that is uniquely yours.
Material choice is critical when planning your bird feeder. Using durable, weather-resistant materials ensures that your feeder withstands the elements and remains safe for birds. Untreated wood, bamboo, or recycled materials are excellent choices because they are non-toxic and sturdy. Avoid materials with harmful chemicals, paints, or finishes that could damage birds. Additionally, selecting the right type of birdseed or food is equally important. Different birds have different dietary preferences, from sunflower seeds to peanuts, suet, or millet. By matching the feeder design with appropriate food, you create an inviting space that encourages a variety of birds to visit.
Functionality and accessibility are key aspects of a well-designed bird feeder. It should be easy to refill and clean while providing a comfortable perch for birds. Consider the feeder’s placement to ensure it’s visible yet safe from predators like cats or squirrels. Incorporating protective elements, such as overhangs to shield food from rain, baffles to deter squirrels, or anti-slip perches, enhances usability and longevity. A thoughtfully designed feeder not only attracts more birds but also makes maintenance a breeze, ensuring that your outdoor space remains a haven for feathered visitors.
Beyond functionality, DIY bird feeders are a form of outdoor décor. A beautifully crafted feeder can complement your garden’s theme, blend with surrounding plants, or become a focal point in a small balcony garden. Rustic wooden feeders with natural finishes evoke a classic countryside charm, while brightly painted feeders add a pop of color and whimsy. Some designs allow you to integrate planters or floral elements, combining the beauty of birds and flowers in a single feature. A DIY bird feeder can be as decorative as it is functional, making it an attractive addition to your landscape year-round.
Creating DIY bird feeders also fosters a sense of mindfulness and relaxation. The process encourages hands-on creativity, careful measurement, and attention to detail. Watching birds flock to your creation offers a sense of accomplishment and peace. Whether you build a simple feeder in an afternoon or embark on a more elaborate woodworking project, the activity provides a satisfying balance between productivity and leisure. The connection you form with your outdoor space and its wildlife can be deeply rewarding, making bird feeding more than just a hobby—it becomes a lifestyle.
In addition to personal satisfaction, DIY bird feeders make excellent gifts. Handcrafted feeders are thoughtful presents for friends, family, or neighbors who love nature and wildlife. They can be customized to match the recipient’s style or favorite bird species, offering a personal touch that store-bought options cannot match. Seasonal decorations, painted motifs, or engraved designs enhance the gift’s uniqueness, turning a functional object into a cherished keepsake.
Finally, planning and building your own bird feeder encourages environmental consciousness. By using sustainable or recycled materials, avoiding harmful chemicals, and providing food for local bird populations, you contribute positively to your ecosystem. Supporting wildlife in your backyard helps maintain biodiversity and promotes awareness of local species. Each DIY bird feeder is a small but meaningful step toward creating a greener, more connected, and aesthetically pleasing outdoor space.
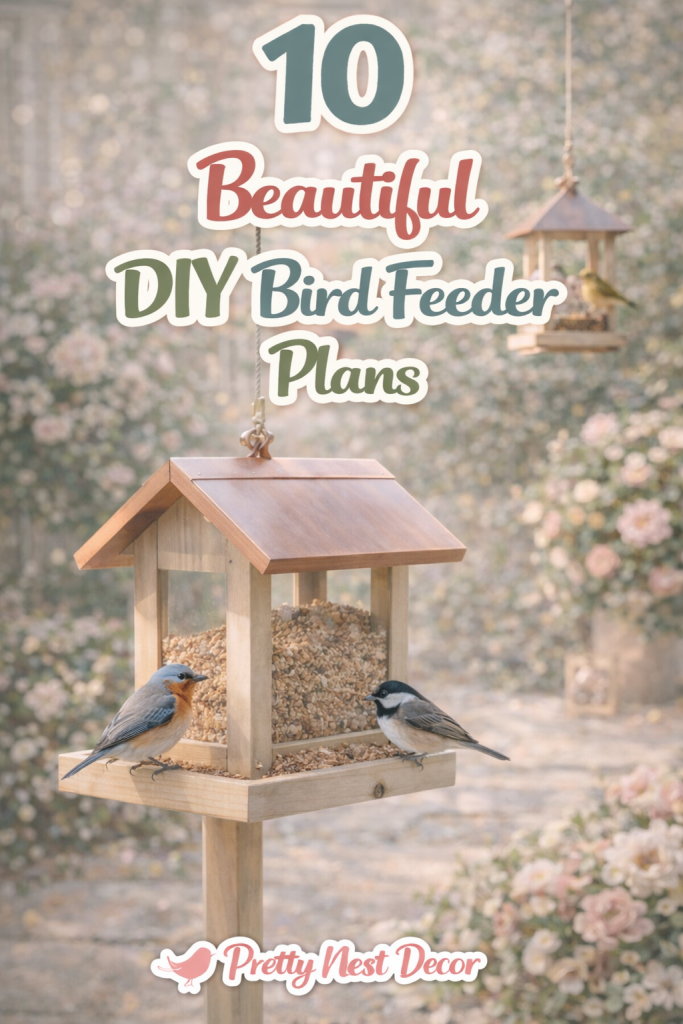
In this article, we will explore 10 beautiful DIY bird feeder plans suitable for beginners and seasoned crafters alike. Each plan includes clear instructions, materials lists, step-by-step guides, and design tips to ensure your feeder is functional, safe, and visually appealing. From rustic charm to modern elegance, hanging feeders to window-mounted styles, these ideas will inspire you to create a unique and inviting haven for birds. By the end, you’ll have the knowledge, inspiration, and confidence to craft bird feeders that transform your garden into a magical sanctuary for your feathered friends.
1. Rustic Wooden Bird Feeder
Introduction
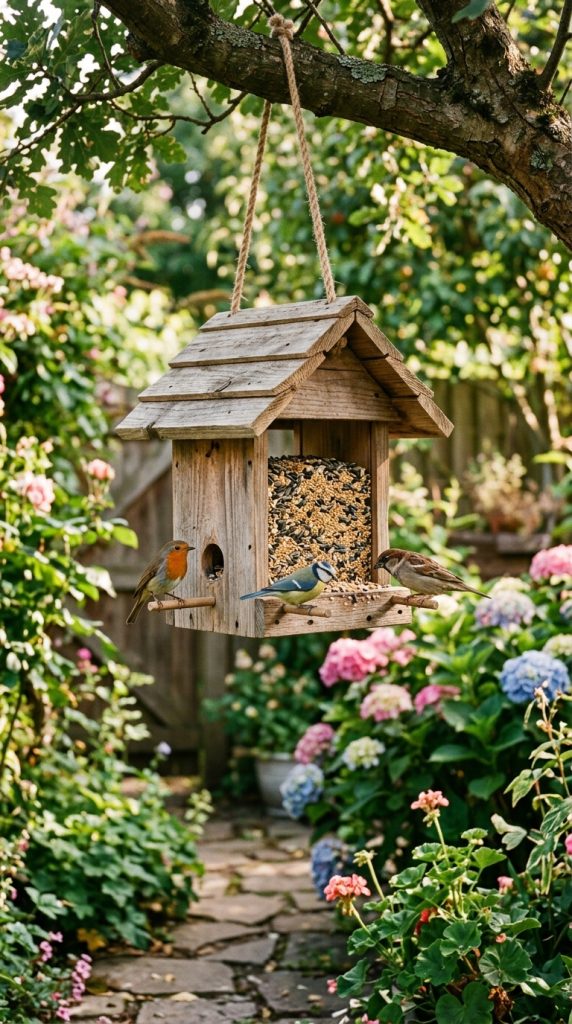
A rustic wooden bird feeder is a classic and timeless choice that complements any garden or backyard. This design emphasizes natural materials and earthy tones, providing a cozy and inviting environment for birds. Wooden feeders are sturdy, durable, and easy to customize, making them a perfect option for DIY enthusiasts of all skill levels. By using untreated or reclaimed wood, you create a safe, non-toxic habitat for local birds, while adding a charming decorative element to your outdoor space.
This type of feeder works well in small yards, patios, or even larger gardens, offering a place for songbirds, finches, and sparrows to gather. Its rustic appeal adds character to your outdoor décor, and it’s easy to position near trees, flower beds, or on a standalone post. Adding a sloped roof ensures food stays dry, while perches provide comfortable spots for birds to land. The hands-on process of building a wooden bird feeder allows you to experiment with size, shape, and decorative touches such as paint, engravings, or carved details.
This project is suitable for beginners and seasoned crafters alike. Not only does it provide a functional feeder, but it also enhances your outdoor space aesthetically, creating a focal point that attracts birds and compliments surrounding plants and garden elements.
Step-by-Step How to Build
- Cut wood panels for the base, sides, and roof.
- Assemble the box using nails or wood screws.
- Attach a sloped roof to protect seeds from rain.
- Drill small holes for perches or attach wooden dowels.
- Sand edges to prevent splinters.
- Optional: paint or seal with non-toxic finish.
- Fill with birdseed and hang or mount on a post.
Items / Materials Used
- Untreated wood panels
- Nails or screws
- Wood glue
- Sandpaper
- Wooden dowels for perches
- Non-toxic paint or sealant (optional)
- Birdseed
2. Mason Jar Bird Feeder
Introduction
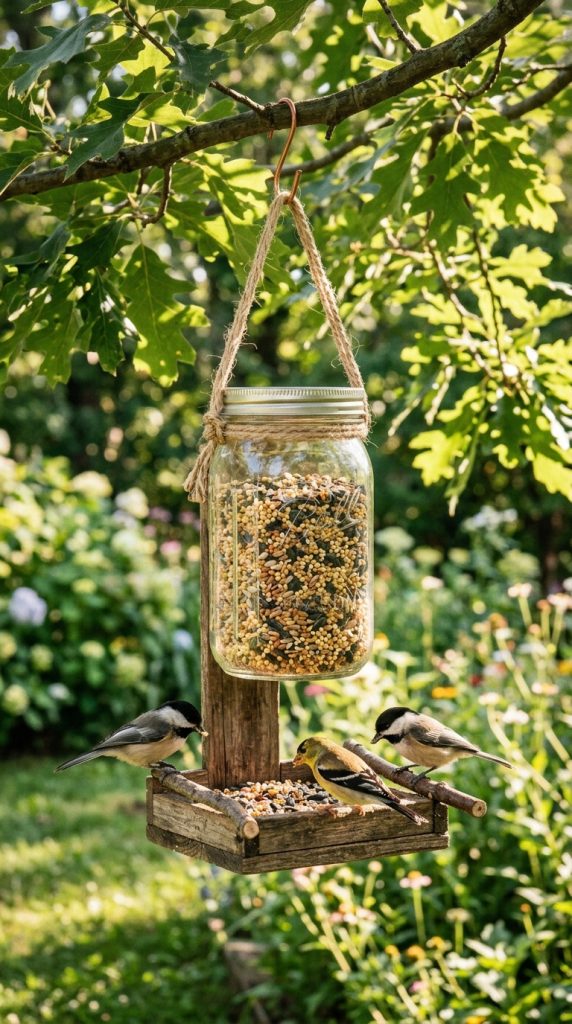
A Mason jar bird feeder is a simple, charming, and space-saving DIY project that works perfectly for small balconies, patios, or gardens. This feeder combines rustic aesthetics with practical design, using a recycled jar to hold birdseed while allowing easy dispensing for visiting birds. The transparency of the jar lets you monitor the seed level, making refilling straightforward.
Mason jar feeders are particularly versatile. They can be hung from tree branches, mounted on walls, or even attached to balcony railings. With the addition of a wooden or metal base and small perches, the feeder provides comfortable spots for birds to land while eating. The jar’s size can be adjusted based on how many birds you want to feed, making it suitable for small or medium flocks.
This design is ideal for beginners because it requires minimal tools and materials, yet it creates an attractive and functional bird feeder. You can personalize it with painted designs, labels, or decorative lids, making it both practical and Pinterest-worthy. The Mason jar bird feeder is a perfect combination of creativity, sustainability, and functionality, making it a favorite among DIY crafters and bird lovers alike.
Step-by-Step How to Build
- Clean a Mason jar thoroughly and remove the label.
- Create small holes in the lid for seed dispensing.
- Attach a wooden base with perches for birds.
- Fill the jar with birdseed.
- Screw the lid back on and hang using rope, twine, or hooks.
- Optional: paint or decorate the jar for a personalized touch.
Items / Materials Used
- Mason jar with lid
- Wooden base or small platform
- Small dowels for perches
- Rope, twine, or hooks for hanging
- Drill or screwdriver for holes
- Birdseed
- Optional paint or decorative items
3. PVC Pipe Tube Bird Feeder
Introduction
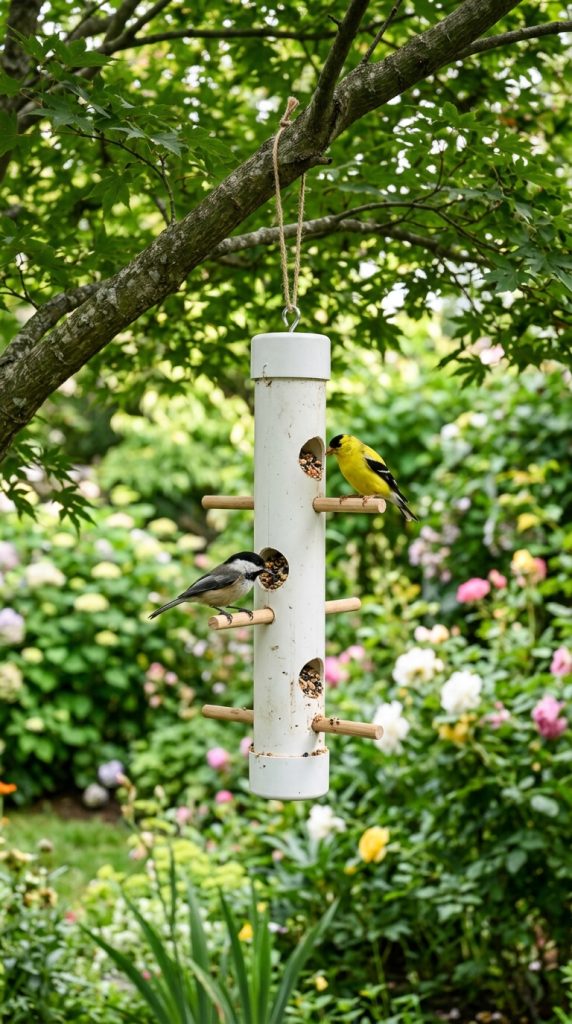
PVC pipe bird feeders are modern, minimalist, and extremely durable. Using a PVC pipe as the main structure allows for a long-lasting, weather-resistant feeder suitable for gardens or outdoor spaces exposed to rain, wind, and sun. This design is practical for feeding multiple birds at once, and it’s easy to refill, clean, and maintain.
The cylindrical shape of a PVC feeder ensures seeds are distributed evenly, and small openings along the pipe provide perches for birds to comfortably access the food. This feeder can be hung vertically from a tree branch or mounted on a pole, making it versatile for various outdoor layouts. Its neutral, simple design allows it to blend into garden aesthetics while still providing a functional and engaging space for birds.
PVC pipe feeders are beginner-friendly and highly customizable. You can paint the pipe, add decorative caps, or integrate multiple feeding holes for larger bird populations. The lightweight material makes it easy to move or adjust the feeder as needed. This project provides a practical, low-maintenance, and visually appealing option for anyone looking to attract birds while keeping construction simple and affordable.
Step-by-Step How to Build
- Cut a PVC pipe to desired length.
- Drill evenly spaced holes for seeds and perches.
- Insert wooden dowels as perches through drilled holes.
- Seal the bottom with a PVC cap.
- Fill the pipe with birdseed from the top.
- Seal the top with a removable cap and hang or mount the feeder.
Items / Materials Used
- PVC pipe and end caps
- Wooden dowels for perches
- Drill
- Rope, chain, or pole mount
- Birdseed
- Paint or decorations (optional)
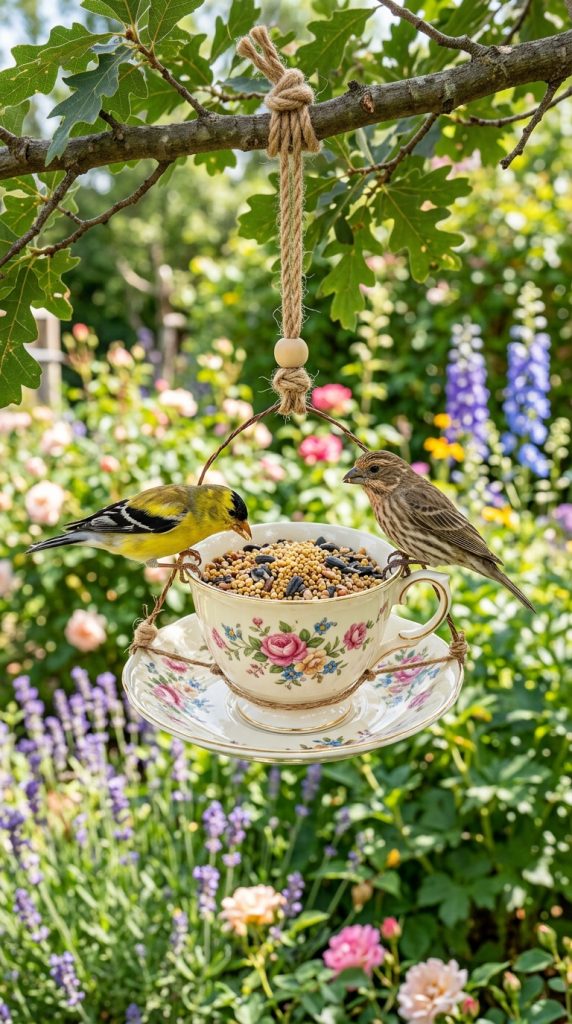
4. Teacup Hanging Bird Feeder
Introduction
A teacup hanging bird feeder is a whimsical and charming project perfect for adding character to any garden, balcony, or patio. Repurposing old or vintage teacups, this feeder combines functionality with decorative appeal, creating a miniature haven for small birds. Its playful and Pinterest-worthy design makes it ideal for those who love unique, handcrafted outdoor décor.
Teacup feeders are lightweight and versatile, easily hung from tree branches, hooks, or pergolas. They are best suited for small birds, such as finches or sparrows, and the small size of the teacup helps keep seed fresh and manageable. By adding a small plate or saucer as a base, the feeder provides a comfortable perch and catches any spilled seeds, keeping your outdoor space tidy.
This DIY project is beginner-friendly, requiring minimal tools and materials while offering a highly decorative result. Teacup bird feeders are perfect for repurposing old china or thrifted finds, combining sustainability with creativity. They make charming garden additions and can be personalized with paint, ribbons, or other embellishments to match your outdoor style.
Step-by-Step How to Build
- Select a sturdy teacup and matching saucer.
- Drill small holes in the saucer for drainage.
- Attach the cup to the saucer with waterproof adhesive.
- Drill holes in the saucer or cup for hanging with wire or rope.
- Fill with birdseed and hang from a tree branch or hook.
- Optional: paint or decorate the teacup for added charm.
Items / Materials Used
- Teacup and saucer
- Waterproof adhesive
- Wire, rope, or chain for hanging
- Drill
- Birdseed
- Optional paint or decorations
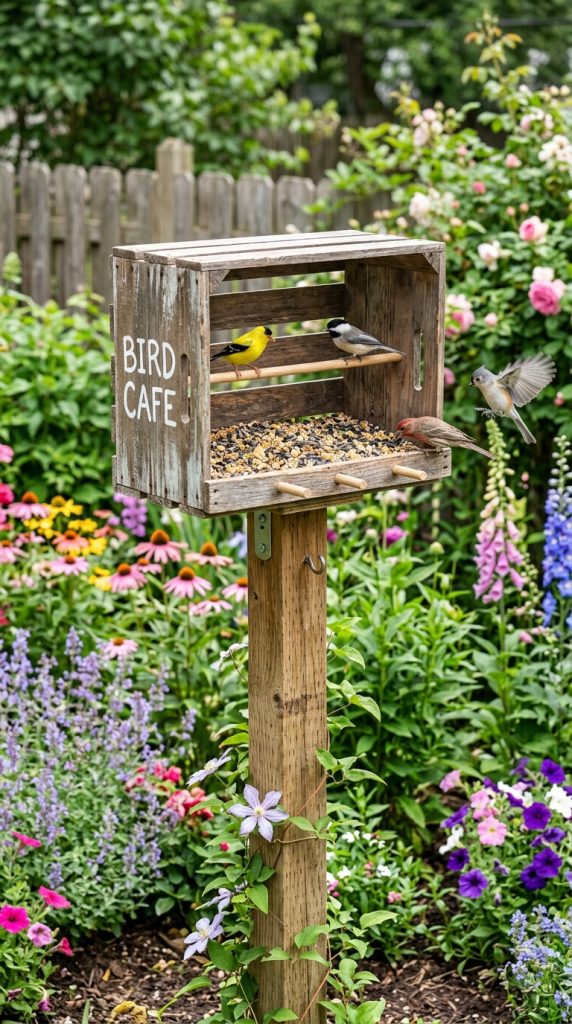
5. Upcycled Wooden Crate Bird Feeder
Introduction
Upcycling a wooden crate into a bird feeder is a sustainable and rustic DIY option. This project transforms old crates into functional feeders while adding vintage charm to your garden or backyard. Wooden crates provide ample space for seeds, perches, and even small plants, creating a multifunctional bird oasis.
This design is ideal for small or medium-sized gardens, patios, or even balcony setups. By positioning the crate at ground level, mounting it on a post, or hanging it from a tree, you can attract a variety of birds. The crate’s open structure allows multiple birds to feed simultaneously, and additional perches or supports can enhance usability.
Upcycling crates is environmentally friendly and budget-conscious. You can customize the feeder by painting, staining, or adding protective finishes. Some designs even include small roofs or covers to protect seeds from rain. This rustic yet functional project combines creativity, sustainability, and practicality, making it ideal for DIY enthusiasts seeking a visually appealing bird feeder with a story.
Step-by-Step How to Build
- Select a wooden crate and sand rough edges.
- Attach a roof or cover if desired for weather protection.
- Add perches using dowels or small sticks.
- Secure hooks or rope for hanging if needed.
- Fill with birdseed and place in the garden or mount on a post.
- Optional: paint or decorate for a rustic aesthetic.
Items / Materials Used
- Wooden crate
- Wooden dowels for perches
- Sandpaper
- Hooks, rope, or mounting hardware
- Birdseed
- Optional paint or stain
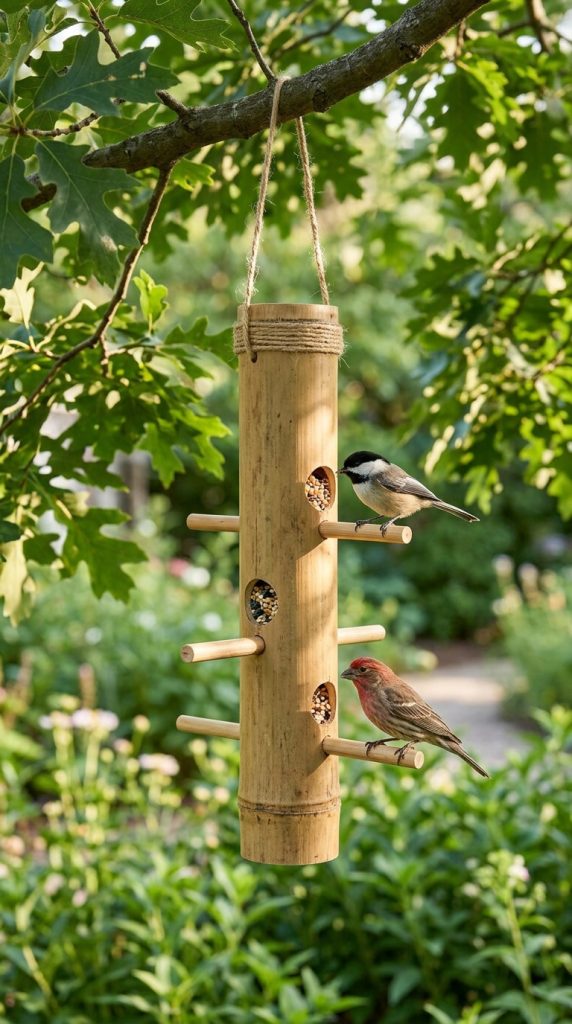
6. Bamboo Tube Bird Feeder
Introduction
A bamboo tube bird feeder brings a natural, eco-friendly charm to your backyard or garden. Bamboo is lightweight, durable, and weather-resistant, making it ideal for outdoor use. This type of feeder appeals particularly to small birds like finches and chickadees, who can perch on the feeder comfortably while enjoying seeds. Its minimalist, natural aesthetic blends seamlessly into gardens, patios, or forested yards.
The bamboo tube feeder can be hung from tree branches, pergolas, or balcony railings, offering a vertical feeding option that doesn’t take up much space. The natural material makes it environmentally friendly and safe for birds, while the hollow structure provides both storage for seeds and easy access for feeding. Adding perches or small wooden dowels enhances usability, giving birds a comfortable landing spot.
Bamboo tube feeders are beginner-friendly and highly customizable. You can cut bamboo to different lengths, paint or decorate the ends, and add decorative accents to match your outdoor style. This project encourages creativity while providing a functional and stylish feeder that attracts birds year-round. It’s perfect for small spaces or for anyone seeking a natural, minimalist, and eco-conscious DIY bird feeder solution.
Step-by-Step How to Build
- Select a sturdy bamboo tube and cut to desired length.
- Drill small holes near the base for drainage.
- Drill holes and insert wooden dowels as perches.
- Seal one end with natural cork or wood plug.
- Fill with birdseed and hang using rope or twine.
- Optional: decorate ends with non-toxic paint or natural finishes.
Items / Materials Used
- Bamboo tube
- Wooden dowels for perches
- Cork or wood plug
- Drill
- Rope or twine for hanging
- Birdseed
- Optional non-toxic paint
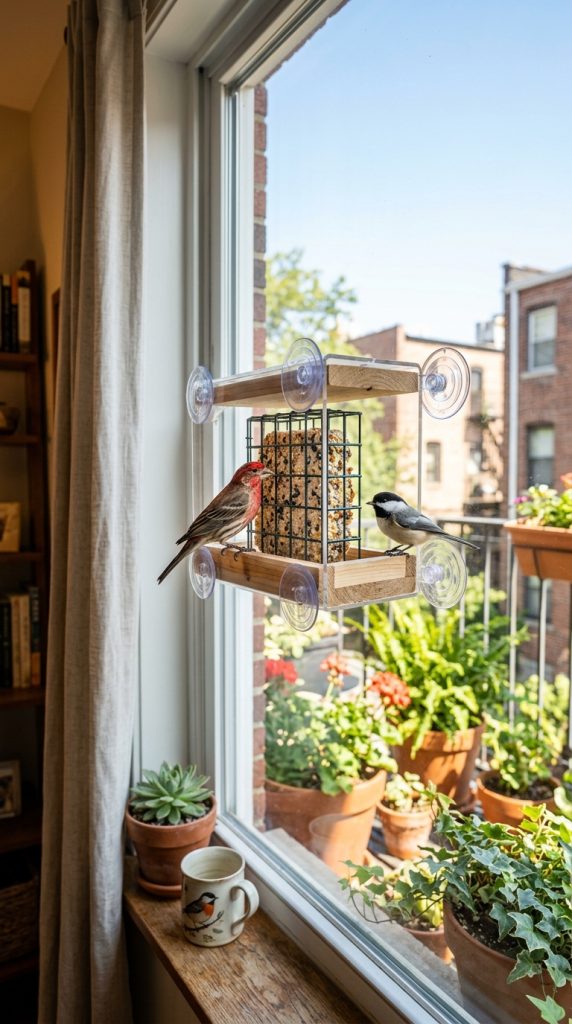
7. Window-Mounted Suet Feeder
Introduction
A window-mounted suet feeder allows you to enjoy up-close views of visiting birds from the comfort of your home. This feeder is ideal for small spaces, such as apartments or urban gardens, where traditional hanging feeders may be impractical. Suet feeders attract woodpeckers, chickadees, and nuthatches, providing high-energy food, especially in colder months.
The clear, window-mounted design offers a unique perspective, making it a favorite for birdwatchers and photographers. It usually consists of a small frame or tray with suction cups that adhere securely to the glass. This allows for easy refilling, monitoring, and cleaning without stepping outside. Perches or small ledges give birds a place to rest while feeding.
DIY window-mounted suet feeders are simple and beginner-friendly. They can be made from recycled materials, clear plastic, or small wooden frames. Adding decorative touches or custom shapes makes the feeder visually appealing while still functional. This design combines practicality, safety, and aesthetic charm, making it a must-try for anyone looking to attract birds while enjoying indoor observation.
Step-by-Step How to Build
- Select a clear plastic or wooden frame that fits your window.
- Attach suction cups securely to the frame.
- Create a small tray or compartment to hold suet cakes.
- Add perches or small ledges for birds.
- Fill with suet and attach to window.
- Clean and refill regularly to maintain bird visits.
Items / Materials Used
- Clear plastic or small wooden frame
- Suction cups
- Small tray or compartment
- Perches or ledges
- Suet cakes or bird fat mix
- Optional decorative elements
8. Hanging Coconut Shell Feeder
Introduction
A hanging coconut shell bird feeder is a tropical-inspired, eco-friendly option perfect for small gardens or balconies. Coconut shells are lightweight, naturally durable, and biodegradable, making them an excellent choice for sustainable DIY feeders. They offer a unique, rustic aesthetic and provide an intimate feeding spot for small birds like finches and sparrows.
This type of feeder is compact and versatile. It can be suspended from tree branches, pergolas, or balcony hooks using rope or twine. The hollow shell acts as a container for seeds or suet, while the outer rim doubles as a natural perch. Multiple shells can be hung together to create a charming cluster that attracts more birds.
Coconut shell feeders are beginner-friendly and highly customizable. You can paint, carve, or decorate the shells to match your garden décor. Their tropical look adds visual interest, while their functional design ensures birds can easily access food. It’s a fun, sustainable, and decorative project for families, DIY enthusiasts, and bird lovers alike.

Step-by-Step How to Build
- Select a halved coconut shell and clean thoroughly.
- Drill holes near the top edge for hanging.
- Insert rope or twine through the holes for suspension.
- Optional: attach a small wooden perch at the base.
- Fill with birdseed or suet.
- Hang in a safe, shaded location.
Items / Materials Used
- Coconut shell
- Rope or twine
- Drill
- Wooden dowel for perch (optional)
- Birdseed or suet
- Optional paint or decorations
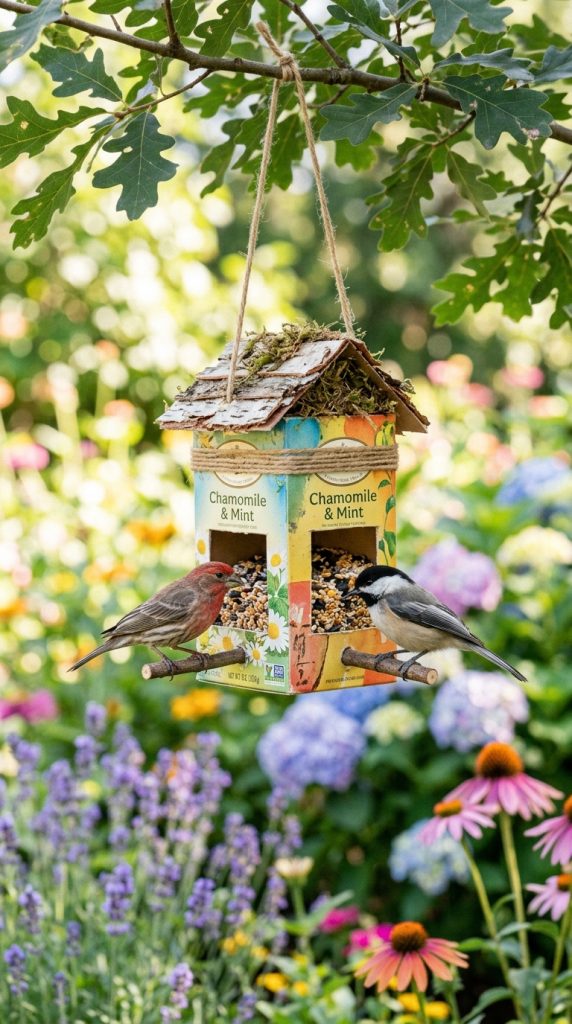
9. Teabag Box Bird Feeder
Introduction
Upcycling an old teabag box into a bird feeder is a clever, sustainable, and beginner-friendly project. This compact feeder is perfect for urban gardens, balconies, or small backyard spaces. Its small size makes it ideal for feeding finches, sparrows, and other small songbirds, while its unique recycled look adds character to your outdoor décor.
This feeder is lightweight and easy to hang from tree branches or balcony hooks. Its box shape provides a secure compartment for seeds, while perches or edges allow birds to rest comfortably while feeding. By repurposing a small container like a teabag box, you create a functional and eco-friendly solution for attracting birds without spending much money.
DIY teabag box feeders are quick to assemble, beginner-friendly, and highly customizable. You can decorate the box with paint, patterns, or even decoupage for a whimsical, Pinterest-worthy appearance. The small size makes it perfect for monitoring bird visits and refilling frequently, keeping your backyard lively with feathered visitors.
Step-by-Step How to Build
- Select a small cardboard or wooden teabag box.
- Cut openings on the front for seed access.
- Attach small dowels or sticks as perches.
- Add holes at the top and thread string or twine for hanging.
- Fill with birdseed.
- Hang securely in a safe location.
Items / Materials Used
- Teabag box (cardboard or wood)
- Small wooden dowels or sticks
- String or twine for hanging
- Scissors or craft knife
- Birdseed
- Optional paint or decorations
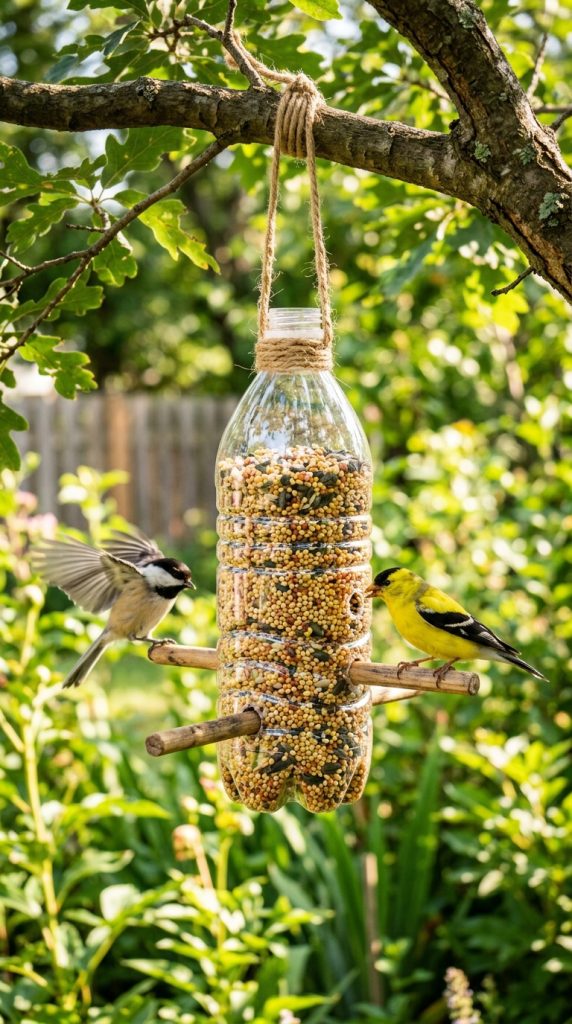
10. Recycled Plastic Bottle Feeder
Introduction
A recycled plastic bottle bird feeder is a sustainable, beginner-friendly, and highly versatile DIY project. Using a discarded bottle, you can create a functional feeder that minimizes waste while attracting birds to your garden or balcony. This feeder works well for a variety of small bird species and can be customized to fit different outdoor aesthetics.
Plastic bottle feeders are lightweight, easy to hang, and simple to refill. By cutting small openings and adding perches, birds can easily access the seeds inside. They can be suspended from trees, hooks, or balcony railings, offering flexibility in placement. This design also allows for quick cleaning and maintenance, ensuring a safe and hygienic feeding station for birds.
DIY plastic bottle feeders are inexpensive and adaptable. You can use bottles of different sizes, decorate them with paint, ribbons, or waterproof markers, and even make multiple feeders to attract a variety of birds. It’s an eco-conscious project that combines sustainability, creativity, and practicality, making it perfect for families, students, or anyone interested in engaging with nature in a hands-on way.
Step-by-Step How to Build
- Clean and dry a plastic bottle thoroughly.
- Cut small holes on the sides for seeds.
- Insert wooden dowels as perches.
- Create holes at the top and thread string for hanging.
- Fill with birdseed.
- Hang securely in a shaded or semi-protected area.
Items / Materials Used
- Plastic bottle
- Wooden dowels for perches
- String or twine for hanging
- Scissors or craft knife
- Birdseed
- Optional paint or decorative elements