
Building a cozy cottage in Minecraft Cottage is one of the most rewarding projects in survival mode. While a charming exterior with cobblestone walls and a pitched spruce roof looks beautiful from the outside, the interior is where you truly spend your time. A well-designed cottage interior should seamlessly blend rustic aesthetic details with smart, organized functionality. From compact starter homes to multi-story fairytale sanctuaries, organizing your storage, crafting stations, sleeping nooks, and display areas makes everyday gameplay smoother and far more enjoyable. In this comprehensive guide, you will discover twelve aesthetic and highly organized Minecraft cottage interior layout ideas. These layouts cater to cozy survival starter cabins, hidden cellar storage hubs, and elaborate cottagecore living spaces.

Understanding architectural layering will completely transform your interior building skills today. Cottage interior layouts rely heavily on warm wooden textures, unstripped logs, weathered stone foundations, and organic shapes. By combining spruce, dark oak, oak, and birch woods, you can craft aged interiors that feel functional, structured, and lived-in. Furthermore, integrating vertical mezzanine platforms doubles your usable interior square footage without expanding your building’s outer footprint. You can design small, cozy sleeping nooks or massive multi-tiered survival hubs. Therefore, experimenting with aesthetic cottage interior layouts expands both your building skills and resource organization..
In this guide, we will explore twelve unique aesthetic and organized Minecraft cottage interior ideas. Each concept includes a full overview, detailed materials list, and step-by-step instructions. You will learn how to balance rustic aesthetics with practical Minecraft survival mechanics. Additionally, these designs suit both early-game survival players and endgame creative builders. So, grab your iron axe, collect your wooden planks, and let us dive directly into these charming Minecraft cottage interior layouts.
1. The L-Shaped Split-Level Survival Hub

The L-shaped split-level survival hub is an iconic, space-maximizing layout designed for practical gameplay. By raising the sleeping and personal storage area onto a secondary floor deck, you double the usable floor area of a compact cottage footprint. The lower ground level functions as a centralized crafting, smelting, and food preparation workspace, while the upper platform holds your bed, armor displays, and high-priority chests.
Mezzanine platforms offer fantastic architectural efficiency without requiring expansive exterior footprints. The elevated platform separates your sleeping zone from daily crafting chaos while keeping the lower room open and airy. Furthermore, adding spruce trapdoors along the upper railing provides safety without blocking natural window light. Consequently, your starter cottage interior feels secure, practical, and incredibly cozy.
Vertical Space Optimization
Constructing a split-level platform using spruce slabs keeps the ceiling profile slim, ensuring comfortable headroom on both elevation levels. Using stripped oak logs for structural support posts adds visual weight and realism without crowding the room. Furthermore, placing an iron lantern beneath the loft platform illuminates the lower crafting desk smoothly.
Materials Needed
- Stripped Oak Logs
- Spruce Wood Slabs
- Spruce Wood Stairs
- Brick Blocks
- Bookshelves
Step-by-Step Guide
First, mark out an eight-by-ten block rectangular room footprint with a five-block-tall ceiling clearance using stripped oak corner posts. Lay down a polished spruce plank floor across the lower ground level. Consequently, you establish a solid, earth-toned base structure for your cottage interior.
Second, construct an upper mezzanine platform five blocks wide along the back wall using spruce slabs. Leave a three-block gap along the front edge for light and open visual volume. Attach a set of spruce stairs along the side wall leading from the ground floor up to the platform. Consequently, your room gains an upper elevated level smoothly.
Third, place a red bed, two bookshelves, and an armor stand on the upper mezzanine floor platform. On the lower level, construct a small brick fireplace with iron bars against the wall and place a crafting table, furnace, and anvil nearby. Finally, hang an iron lantern from the central roof beam above the loft gap.
2. The Recessed Wall-Chest Storage Grid
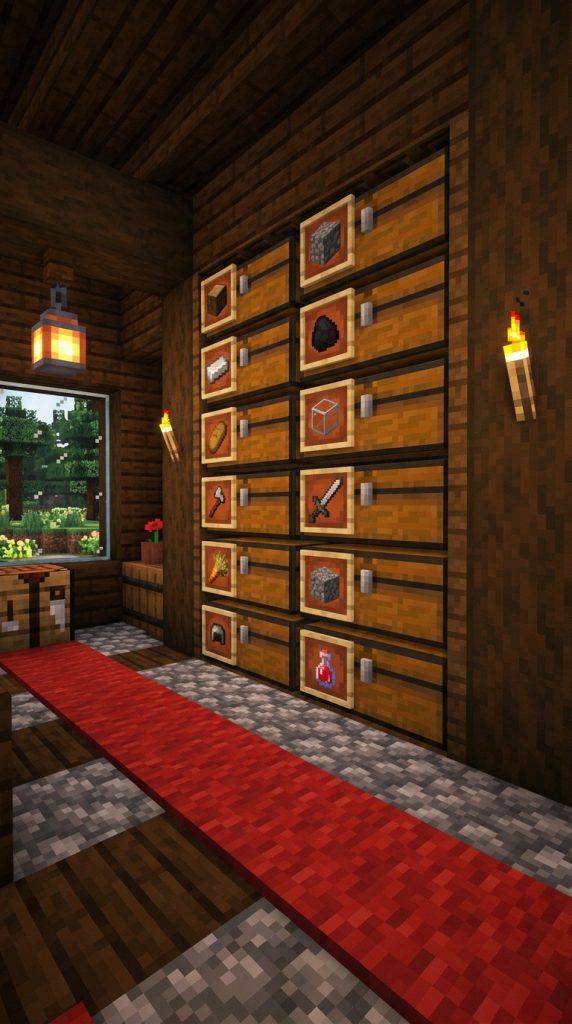
Organizing items in Minecraft often leads to cluttered rows of double chests taking up valuable floor space. The recessed wall-chest storage grid solves this issue by embedding double chests directly into the cottage walls, framing them with dark oak trapdoors and item frames. This creates a clean, flush interior wall surface while providing dozens of sorted storage slots.
Flush storage walls eliminate visual clutter and keep walking corridors open. By embedding chests into carved wall alcoves, your main living room maintains a sleek, intentional look. Furthermore, using wooden trapdoors to frame each chest column mimics built-in cabinetry found in traditional rustic homes. Consequently, your items stay organized and quickly accessible without disrupting room aesthetics.
Flush Storage Architecture
Embedding chests into walls prevents storage units from invading walking paths. Using trapdoors on the sides of the chest columns creates custom wooden cabinetry that fits rustic cottage aesthetics effortlessly. Furthermore, placing item frames displaying raw materials on the chest fronts makes sorting instant and intuitive.
Materials Needed
- Double Chests
- Dark Oak Trapdoors
- Item Frames
- Spruce Slabs
- Smooth Stone Slabs
Step-by-Step Guide
First, clear a four-block-wide by three-block-tall section of your cottage’s interior wall face, excavating one block deep behind the wall lining. Place two rows of double chests stacked vertically inside the wall cavity. Consequently, you create a high-capacity storage recess without sacrificing interior walking space.
Second, place dark oak trapdoors along the left and right outer edges of the chest column. Flip the trapdoors inward to frame the chests in rich, dark wood cabinetry. Next, attach item frames directly to the front face of every double chest. Consequently, your storage wall gains a structured, cabinetry-style appearance.
Third, place representative items inside each item frame—such as cobble, ores, wood, and crops—to label your organized storage grid clearly. Place spruce slabs above the top chest row to form a decorative display shelf for flower pots. Finally, place a soft carpet runner on the floor in front of the grid.
3. The Central Sunken Hearth Living Nook
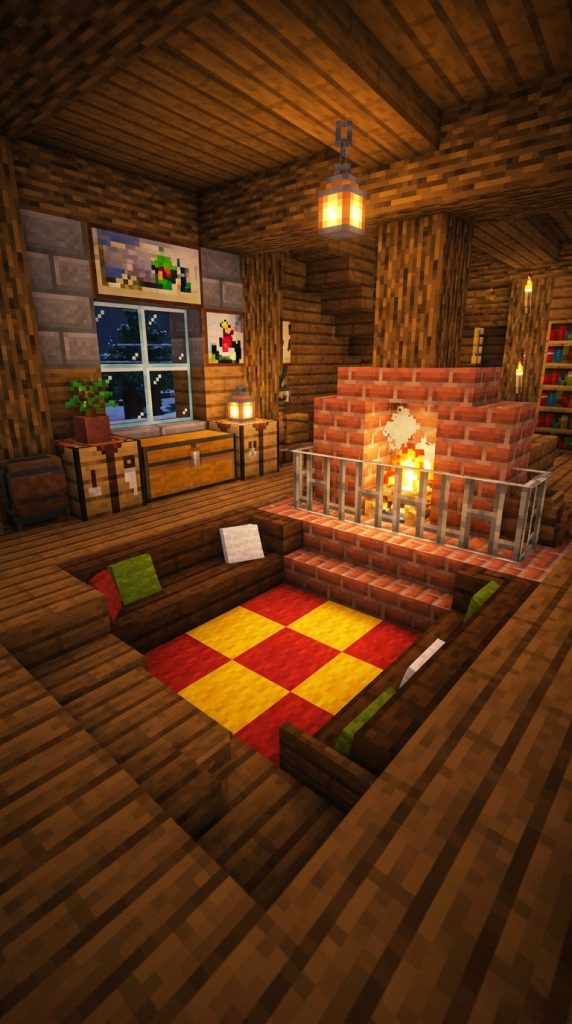
The central sunken hearth layout uses elevation drops to create an intimate, enclosed living space recessed into the floor. Surrounding the cozy seating area with dark wood paneling, warm campfires behind brick hearths, and soft wool rugs isolates the hearth nook from the rest of the cottage floor. It offers a warm, comforting atmosphere that serves as the visual centerpiece of your home.
Recessed seating pits bring dramatic architectural depth to flat wooden interior rooms. Stepping down into a sunken nook creates a distinct feeling of security and warmth after exploring cold caves. Furthermore, framing the surrounding upper ledge with flower pots and bookshelves organizes storage neatly. As a result, your sunken hearth nook looks stylish, cozy, and deeply comforting.
Recessed Floor Framing
Recessing a section of the room floor by one block height creates a physical boundary that defines the room’s function without needing full-height solid walls. This preserves an open, spacious sightline across the upper ceiling while keeping the seating area cozy. Furthermore, using red and yellow wool carpets inside the pit adds plush warmth underfoot.
Materials Needed
- Dark Oak Planks
- Stripped Spruce Logs
- Red & Yellow Carpets
- Bricks & Campfire
- Spruce Stairs (for Sofas)
Step-by-Step Guide
First, lay out a ten-by-ten block room floor using dark oak planks. Dig out a four-by-six block rectangular section along the main wall to a depth of one block to create the sunken nook pit. Consequently, you establish a physical floor drop that defines the seating area.
Second, line the walls and floor of the sunken pit using warm, stripped spruce logs and dark oak slabs. Build an enclosed brick hearth along the back recessed wall, placing a campfire behind iron bars to generate a cozy, flickering glow. Consequently, the nook gains a warm heat source and soft light.
Third, arrange spruce stairs along the sides of the pit to serve as cozy sofas facing the brick hearth. Cover the center floor space with red and yellow wool carpets. On the upper floor level surrounding the nook, place double chests, brewing stands, and a lectern desk. Finally, place potted ferns along the ledge rimming the sunken nook.
4. The Window-Bench Bed & Reading Nook
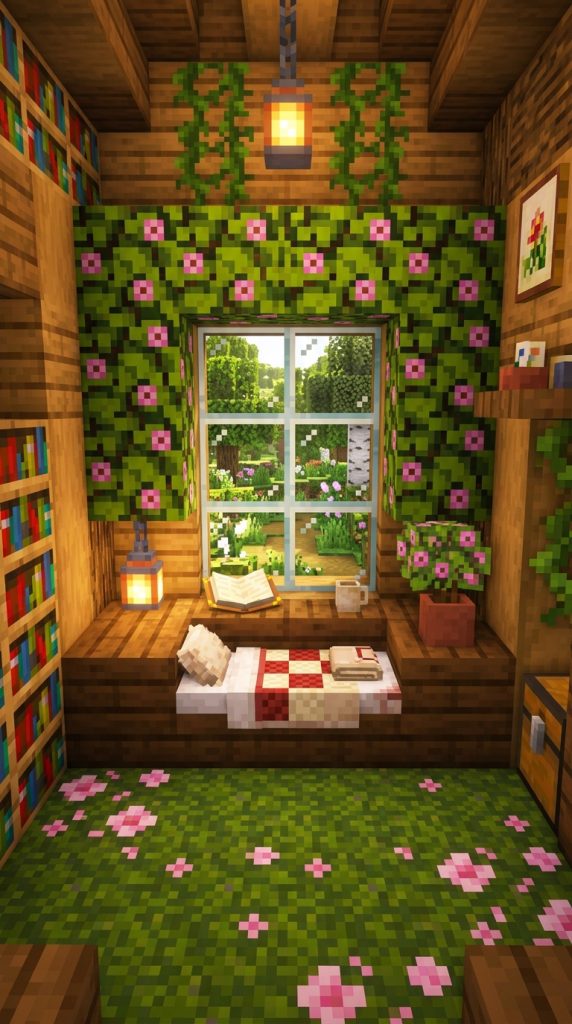
The window-bench bed layout focuses on natural daylight, lush indoor greenery, and cozy reading nooks built into wide window recesses. Large glass windows framed with flowering azalea leaves allow sunlight to flood over a low-profile bed and built-in bench seating, creating an idyllic, fairytale farm aesthetic. It offers a bright, cheerful, and relaxing atmosphere for long survival afternoons.
Cottagecore interior designs emphasize warm wood grains, textured fabrics, and vibrant botanical life. Placing your sleeping space directly inside a sunlit window frame makes mornings feel magical. Furthermore, using moss blocks and pink petals for flooring creates a soft, carpeted turf indoors. As a result, your window-bench bedroom feels sweet, comforting, and deeply charming.
Natural Light Optimization
Positioning the bed directly against or within a large multi-block window sill ensures the room receives maximum natural illumination during the day cycle. Combining soft wool carpets with leafy window borders creates a gentle, organic transition between the interior and the outdoors. Consequently, the space remains bright and inviting.
Materials Needed
- Spruce Planks
- Flowering Azalea Leaves
- Glass Panes
- Moss Blocks
- Pink Petals
Step-by-Step Guide
First, construct an eight-by-eight block room frame using spruce planks and stripped birch log corner posts. Build a large three-block-wide by two-block-tall window opening along the main outer wall face. Consequently, you create a bright focal point for the bedroom layout.
Second, extend the interior window sill inward by two blocks using spruce slabs to construct a wide, built-in window bench platform. Install clear glass panes along the window opening and line the inner frame with flowering azalea leaf blocks. Consequently, the window seat gains leafy, colorful borders.
Third, place a bed directly on the built-in window bench platform so it sits flush against the sunlit glass. Line the floor space surrounding the bench with moss blocks and scatter pink petals across the surface. Finally, build floor-to-ceiling bookshelves along adjacent walls and place a small reading table with a candle nearby.
5. The Compact Kitchen & Food Preservation Cellar
An organized cottage interior needs a dedicated kitchen for cooking food, brewing potions, and storing agricultural yields. This layout features a compact ground-floor kitchen equipped with smokers, water cauldrons, and crop barrels, connected to an underground cellar via a trapdoor hatch. The cellar below provides extensive storage for food crops, honey jars, and potion ingredients.
Dedicated culinary zones make daily survival maintenance organized and fast. Grouping food processing blocks together saves valuable steps when returning from crop harvests. Furthermore, extending storage into a cool underground cellar mimics historical food preservation techniques. Consequently, your cottage kitchen stays clean, active, and fully stocked.
Functional Culinary Layout
Grouping cooking and brewing blocks together speeds up food preparation between harvesting runs. Using barrels instead of chests for food storage fits the rustic pantry aesthetic while allowing full opening access even when stacked tight. Furthermore, placing water cauldrons and hanging dried kelp on walls mimics a bustling, realistic farm kitchen.
Materials Needed
- Smokers & Barrel Crates
- Water Cauldrons
- Dark Oak Trapdoors
- Composter
- Dried Kelp Blocks
Step-by-Step Guide
First, set up a three-block-wide kitchen counter along one wall using two smokers flanked by a water-filled cauldron. Place an item frame above the cauldron displaying a glass bottle to mark the washing station. Consequently, you lay out an efficient, compact food prep countertop.
Second, dig a one-block opening in the floor directly in front of the kitchen counter and install a spruce trapdoor over a vertical ladder leading down four blocks into an underground cellar room. Line the cellar walls with stacked barrels and hay bales. Consequently, your cottage gains a dedicated bulk food storage room.
Third, decorate the upper kitchen counter using cake blocks, pie items on smooth stone slabs, and hanging dried kelp on the wall. Place a composter in the corner to dispose of excess seeds and organic waste. Finally, hang an iron lantern above the counter to illuminate the kitchen workspace clearly.
6. The Multi-Tiered Loft Bedroom & Study

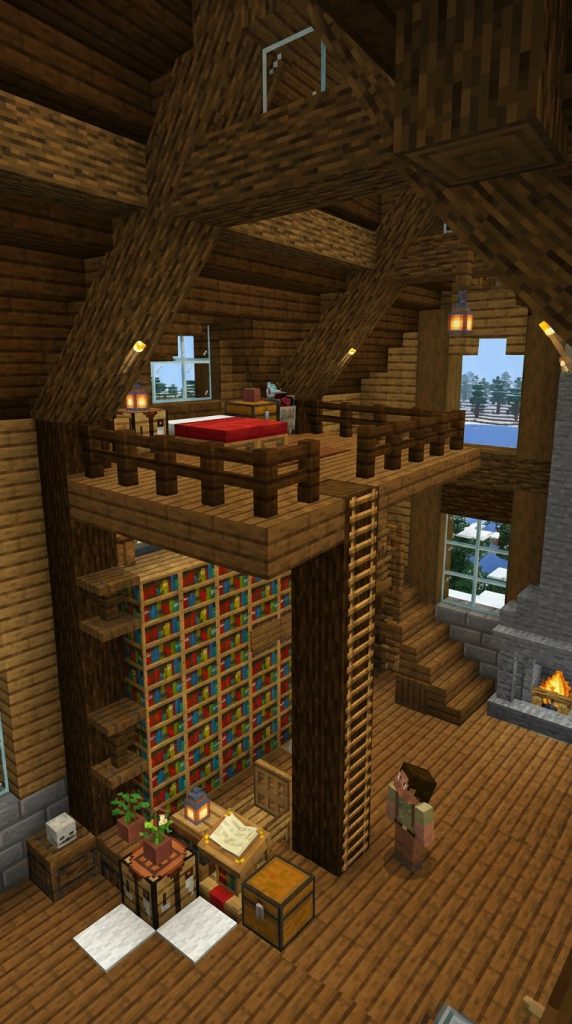
The multi-tiered loft bedroom and study layout is designed for tall, high-pitched cottage rooflines. By constructing a mezzanine loft high up under the roof ridge, you create a private master bedroom suite above a ground-floor study and library. The soaring vertical space eliminates flat ceiling monotony while keeping functional tools neatly organized below.
Utilizing vaulted roof spaces transforms empty attic volume into functional living quarters. Raising the sleeping deck preserves the entire ground floor for active crafting, reading, and storage. Furthermore, adding exposed log crossbeams frames the upper loft beautifully while adding authentic rustic timber aesthetics. Consequently, your multi-tiered cottage interior feels spacious, structural, and deeply cozy.
Vertical Space Utilization
Sloped roof structures often leave empty air volume overhead. Placing the sleeping quarters at the highest point of the cottage utilizes this space effectively while leaving the ground floor wide open for crafting, reading, and entertaining. Furthermore, adding exposed log crossbeams supports the loft platform while adding rustic structural beauty.
Materials Needed
- Spruce Slabs & Stairs
- Bookshelves
- Lectern
- Stripped Oak Logs
- Lanterns
Step-by-Step Guide
First, erect an eight-by-eight block cottage frame with a steep pitched roof reaching six blocks high at the center ridge. Construct an upper loft floor across the back half of the room four blocks above the ground using spruce slabs anchored into structural stripped oak crossbeams. Consequently, you establish a tall, split-level room volume.
Second, attach a vertical spruce ladder along the side wall leading from the ground floor up to the loft platform. Install spruce trapdoors along the open edge of the loft floor to serve as a low protective safety railing. Consequently, your upper sleeping loft becomes safe and easily accessible.
Third, place a bed, an armor stand, and a small chest on the upper loft floor under the roof peak. On the ground floor level below, build a floor-to-ceiling library wall filled with bookshelves, a lectern desk, and a cozy chair made of spruce stairs. Finally, hang a central lantern from the ceiling ridge.
7. The Subterranean Vault & Armory Cellar
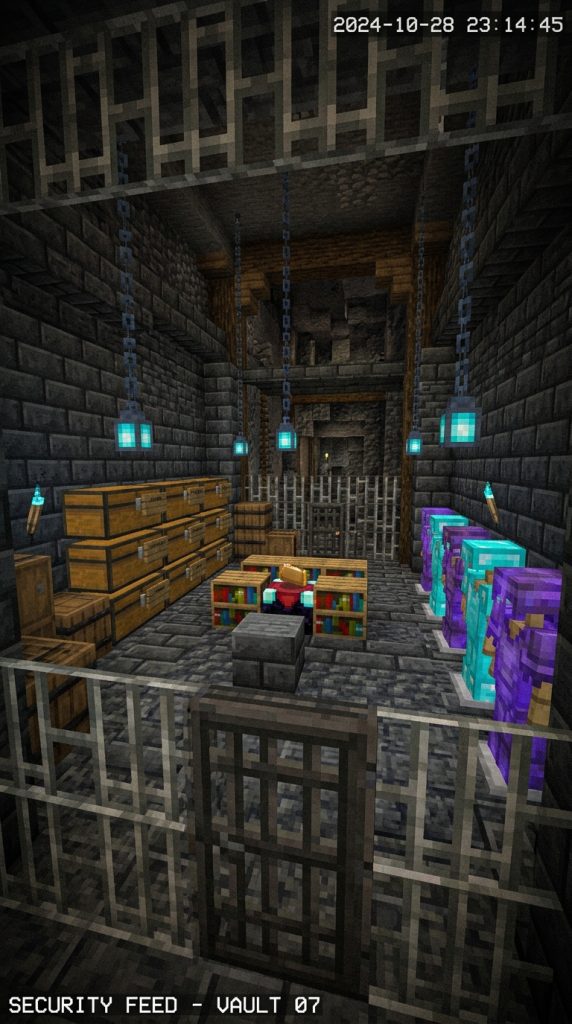
For endgame survival players, keeping high-value gear, enchanted books, and rare minerals secure requires a dedicated vault layout. This design features a hidden subterranean cellar accessed via a redstone trapdoor or secret bookcase door inside the cottage. The underground armory showcases armor stands, enchantment setups, and blast-proof deepslate storage chests.
Subterranean vaults keep your most precious assets completely protected from accidental creeper detonations on the surface. Decorating underground spaces with heavy stone bricks and dark tiles creates an authentic dungeon hold atmosphere. Furthermore, keeping armor displays organized underground ensures you are always prepared for combat expeditions. Consequently, your cottage remains a safe surface haven while housing a powerful subterranean base.
Secure Underground Framing
Building your primary gear vault underground protects valuable assets from accidental creeper explosions on the surface. Using heavy deepslate bricks, stone tiles, and iron bars for the cellar walls creates an industrial, fort-like atmosphere that contrasts beautifully with the soft, wooden cottage above.
Materials Needed
- Deepslate Bricks
- Armor Stands
- Enchanting Table
- Double Chests
- Iron Bars
Step-by-Step Guide
First, carve out an eight-by-eight block room four blocks deep beneath your cottage floor. Line the walls and floor with deepslate bricks and polished basalt pillars to create an explosion-resistant, fortress-style cellar shell. Consequently, you lay a secure subterranean vault foundation.
Second, construct a secret entrance from the ground floor cottage using a piston trapdoor hidden beneath a carpet or behind a bookshelf. Install a ladder or water elevator leading down into the vault chamber. Consequently, your high-value storage remains completely hidden from surface view.
Third, set up an enchantment table surrounded by fifteen bookshelves in the center of the vault floor. Line the side walls with armor stands displaying enchanted gear and stacked double chests for rare mineral storage. Finally, install cool blue soul lanterns along the walls for atmospheric lighting.
8. The Cottagecore Botanical Potting Corner

The cottagecore botanical potting corner brings lush indoor garden details and floral organization into your cottage living room. This layout features a dedicated indoor potting station equipped with moss blocks, flowering azalea bushes, composters, and flower pots filled with rare botanicals. It serves as both an aesthetic centerpiece and an organized hub for dye crafting and gardening supplies.
Botanical corners introduce vibrant green life and floral color to wooden interior spaces. Grouping flower pots, composters, and seed chests together makes dye crafting and crop management simple. Furthermore, suspending spore blossoms overhead fills the room air with gentle green particles. As a result, your botanical potting corner looks fresh, enchanting, and deeply aesthetic.
Indoor Garden Aesthetics
Integrating botanical life into your interior layout softens hard wood and stone block textures. Using moss blocks for flooring beneath the potting bench creates a soft, natural turf accent inside the room. Furthermore, storing seeds, bone meal, and dyes in labeled chests directly beside the bench keeps gardening tools organized.
Materials Needed
- Moss Blocks
- Flowering Azalea Leaves
- Composters
- Flower Pots
- Dyes & Seeds
Step-by-Step Guide
First, select a three-block-wide corner space inside your cottage near a sunlit window. Replace the floor blocks in this corner with plush green moss blocks and line the back wall with flowering azalea leaf blocks. Consequently, you establish a vibrant, natural garden nook foundation.
Second, construct a potting bench along the wall using two composters flanked by a spruce slab table. Place flower pots on top of the bench holding pink tulips, ferns, and bamboo stalks. Consequently, your garden corner gains an active, functional potting workstation.
Third, place a small chest beneath the potting bench to store bone meal, wheat seeds, and crafted dyes. Scatter pink petals and moss carpets across the floor around the bench to complete the organic aesthetic. Finally, hang a spore blossom from the ceiling above to generate floating green particles.
9. The Dual-Farmer Shared Bunk Layout

Designed specifically for co-op survival worlds, the dual-farmer shared bunk layout accommodates two players efficiently within a single cottage footprint. It features two symmetrical, semi-private sleeping bunks built into a shared wooden alcove unit, complete with personal storage, reading lights, and shared crafting utility stations on the floor below.
Co-op bedroom layouts ensure both players have equal storage and personal space within a shared home. Built-in alcove bunks offer comfortable privacy while leaving central floor corridors open for joint crafting. Furthermore, using color-coded beds and trapdoor railings personalizes each bunk module effortlessly. Consequently, your shared cottage interior feels structured, harmonious, and highly organized.
Symmetrical Utility Partitioning
Designing built-in alcove bunks allows two players to share a compact bedroom space without feeling crowded. Each player receives an identical, self-contained bunk module featuring a bed, personal chest, and localized lighting. Furthermore, placing shared crafting stations below encourages efficient teamwork.
Materials Needed
- Spruce Planks
- Spruce Trapdoors
- Double Chests
- Red & Blue Beds
- Lanterns
Step-by-Step Guide
First, construct a ten-by-eight block rectangular room footprint using spruce planks and stripped oak corner posts. Build a central dividing frame along the back wall using spruce logs to create two equal four-block-wide alcove spaces. Consequently, you establish a symmetrical room base.
Second, build two elevated bunk platforms inside the alcoves three blocks above the ground using spruce slabs. Install spruce trapdoors along the front edges of the bunks to form protective safety railings. Consequently, you create two distinct, semi-private upper sleeping bunks.
Third, place a red bed in the left upper bunk and a blue bed in the right upper bunk, adding a small chest and a wall lantern inside each alcove. On the ground floor area beneath the bunks, install a shared double chest storage grid and a large crafting desk. Finally, place a central wool rug on the floor.
10. The Open-Plan Artisan Workshop & Forge

The open-plan artisan workshop and forge layout is designed for players who want immediate access to all crafting, repairing, and smelting mechanics in one unified room. It features an open ground-floor plan divided into distinct functional bays—including an iron forge, a carpentry bench, an alchemy laboratory, and a map-making desk.
Open-plan workshops maximize crafting speed by keeping all essential utility blocks visible and accessible. Grouping tools by function prevents clutter while creating authentic artisan workspaces. Furthermore, using non-flammable stone blocks around the smelting forge keeps open flames safe in wooden cottages. As a result, your workshop functions as a powerful, organized crafting hall.
Zoned Industrial Layout
Dividing a large open room into dedicated tool bays keeps specialized workstations organized without constructing restrictive solid walls. Placing blast furnaces, anvils, and stonecutters along one wall forms an efficient metalworking forge, while brewing stands and cauldrons occupy an adjacent alchemy zone. Consequently, your workshop remains spacious, organized, and highly productive.
Materials Needed
- Blast Furnaces & Smokers
- Anvil & Grindstone
- Cartography Table & Stonecutter
- Brewing Stands & Cauldrons
- Barrels & Item Frames
Step-by-Step Guide
First, mark out a twelve-by-eight block open floor plan using polished granite and stone bricks for the foundation. Divide the perimeter walls into three distinct three-block-wide utility bays using vertical log pillars. Consequently, you construct an organized, multi-bay workshop shell.
Second, equip the first bay as a metalworking forge with blast furnaces, an anvil, a grindstone, and a lava cauldron enclosed behind iron bars. Equip the second bay as an alchemy station with brewing stands, water cauldrons, and ingredient barrels. Consequently, your primary crafting tools gain dedicated stations.
Third, equip the third bay as a cartography and building desk with a stonecutter, cartography table, loom, and map frames. Leave the central floor corridor completely clear for smooth player movement. Finally, hang iron chandeliers from the ceiling to illuminate every workstation brightly.
11. The Cozy Cottage Library & Enchantment Study

The cozy cottage library and enchantment study layout combines high-level magic utility with warm, academic cottage charm. It features a full 15-bookshelf enchantment table setup integrated into a cozy, book-lined study nook complete with lecterns, soul lanterns, and comfortable armchair seating. It is the perfect layout for enchanting gear in a relaxing environment.
Combining enchantment mechanics with library aesthetics creates an impressive academic sanctuary inside your cottage. Surrounding the enchanting table with filled bookshelves provides full level 30 magical power while insulating the alcove with rich wooden textures. Furthermore, adding lecterns, armchairs, and glowing soul lanterns makes the study feel scholarly and luxurious. Consequently, your magic nook feels peaceful, practical, and deeply atmospheric.
Academic Micro-Zoning
Integrating an enchantment station into your cottage interior requires proper spatial planning to ensure all 15 bookshelves register correctly with the enchantment table. Framing the bookshelf ring with dark oak stairs and lecterns creates a cozy alcove that feels like an ancient scholar’s study rather than a bare utility rig.
Materials Needed
- Bookshelves (15 Minimum)
- Enchanting Table
- Lectern & Books
- Dark Oak Stairs & Slabs
- Soul Lanterns
Step-by-Step Guide
First, clear a five-by-five block square area in a quiet corner of your cottage interior. Lay down a polished dark oak floor across the alcove footprint. Consequently, you establish a distinct floor foundation for your magic study nook.
Second, arrange 15 bookshelves in a two-block-tall C-shape ring around the central block space, leaving a two-block opening for the entrance. Place the enchanting table directly in the center of the bookshelf ring. Consequently, your enchantment setup reaches maximum level 30 capacity cleanly.
Third, place a lectern with a written book at the entrance of the alcove to serve as a study desk. Build a small armchair beside the bookshelves using dark oak stairs flanked by trapdoor armrests. Finally, hang a cool blue soul lantern above the enchanting table to cast magical light over the room.
Nighttime Base Security
Securing your organized cottage interior at night is essential for long-term survival safety. Hostile mobs like creepers, skeletons, and zombies spawn in dark, unlit interior spaces if light levels drop too low. Placing iron lanterns, candles, or hidden froglights beneath carpets every five blocks ensures your entire cottage floor remains well-lit and safe. Furthermore, enclosing your cottage yard with a stone brick wall or leaf hedge keeps wandering monsters at a safe distance from your doors and glass windows. Installing wooden trapdoors or double doors on all entrances guarantees quick, secure retreats during night explorations. Consequently, your cozy, organized cottage remains a completely secure, peaceful sanctuary through every night cycle.
12. The Grand Multi-Story Cottage Estate
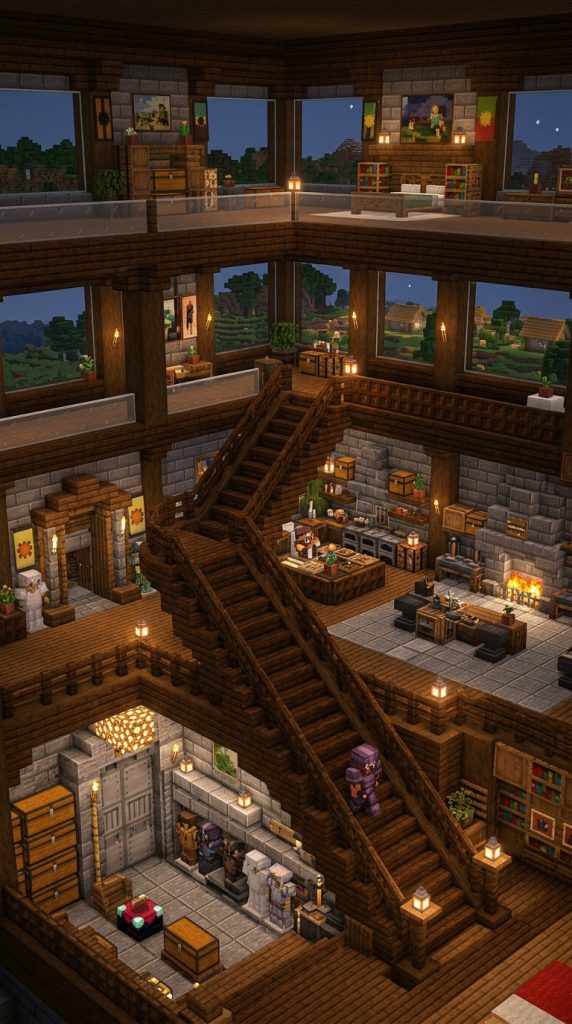
The grand multi-story cottage estate is the ultimate interior layout for large survival homesteads. It brings together all functional zones—including a split-level living room, a recessed chest storage wall, an upper loft bedroom suite, a basement food cellar, and a full enchantment study—into one seamlessly organized, multi-floor house.
Grand estate layouts provide unmatched organization for endgame survival bases. Dividing functional tasks across three distinct floor levels prevents clutter while giving every room a clear purpose. Furthermore, connecting all floors via grand wooden staircases and open mezzanine balconies creates sweeping visual sightlines throughout the interior. Consequently, your cottage estate offers a permanent, luxurious home for your entire survival world journey.
Comprehensive Interior Flow
Designing a grand multi-story cottage requires organizing floors by function. The basement handles heavy bulk storage and food cellars, the ground floor accommodates daily crafting, cooking, and entertaining, and the top floor reserves space for private resting and magical studies. This clear floor-by-floor zoning keeps your entire survival operation clean, organized, and effortlessly accessible.
Materials Needed
- Stripped Spruce & Oak Logs
- Deepslate Bricks & Cobblestone
- Double Chests & Barrels
- Enchanting Table & Bookshelves
- Iron Lanterns & Carpets
Step-by-Step Guide
First, construct a large twelve-by-twelve block three-story cottage frame using deepslate bricks for the basement foundation, stripped oak logs for the ground floor, and spruce timber for the upper loft. Consequently, you establish a grand, multi-tiered structural shell for your estate.
Second, organize the basement level with recessed chest storage grids, food barrels, and a hidden gear vault. Pave the ground floor with smooth spruce planks and set up an open-plan kitchen, fireplace hearth nook, and artisan crafting workshop. Consequently, your lower floors handle all survival storage and utility.
Third, construct an upper mezzanine loft for the master bedroom suite and enchantment library, accessible via a sweeping dark oak staircase. Decorate all floors with plush wool rugs, potted plants, and iron lanterns. Finally, step back to enjoy a completely aesthetic, organized, and functional Minecraft cottage estate.