Creating your own air dry clay bird feeder is not just a fun DIY project—it’s an opportunity to connect with nature, add charm to your backyard, and provide a safe feeding station for local birds. Air dry clay is an incredibly versatile and beginner-friendly material that allows anyone, regardless of crafting experience, to design personalized feeders that suit their aesthetic preferences. Unlike fired clay or ceramic, air dry clay doesn’t require an oven or kiln, making it perfect for home crafting, kids’ projects, and quick, satisfying results.
The beauty of making a bird feeder from air dry clay lies in its flexibility and the creative freedom it offers. You can sculpt bowls, plates, or decorative shapes, personalize them with textures or stamps, and even paint them with non-toxic acrylic paints after drying. The process of designing your feeder is not only artistic but also calming, making it a therapeutic activity for adults and children alike. This project allows you to experiment with colors, shapes, and natural designs inspired by the birds you want to attract, enhancing both your outdoor space and your connection with wildlife.
An air dry clay bird feeder also has practical benefits. Because you control the size and shape, you can tailor it to the types of birds in your region. For example, smaller shallow feeders attract finches and sparrows, while larger, deeper feeders can accommodate robins or cardinals. Hanging feeders can be suspended from tree branches, porch ceilings, or shepherd hooks, while flat plate-style feeders can sit safely on patios or garden tables. This flexibility ensures your feeder is functional, safe, and aesthetically pleasing.
Using air dry clay is environmentally friendly and safe. It’s non-toxic, easy to clean up, and allows for experimentation without permanent mistakes. You can quickly mold your clay into the desired shape, make adjustments, and even combine multiple clay pieces for more complex designs. Its smooth, malleable texture encourages creativity, and the drying process strengthens the structure without requiring specialized equipment. Once dry, the feeder is surprisingly sturdy and can be coated with a sealant to ensure it withstands outdoor elements like rain or humidity.
Another benefit of DIY clay bird feeders is the personalization factor. You can incorporate decorative elements such as imprints from leaves, pressed flowers, or textured patterns that give your feeder a unique, natural look. Adding personal touches not only makes your feeder stand out visually but also turns it into a conversation piece for visitors. It’s a great way to bring artistry into your garden while serving a practical purpose for wildlife.
This DIY project also encourages mindfulness and observation. Once your bird feeder is ready, placing it in a visible spot allows you to watch birds up close, learn about their behaviors, and even photograph them for your personal collection or social media. The act of feeding and observing birds fosters a deeper appreciation for nature, and the satisfaction of knowing you created a safe, functional feeder adds to the overall experience.
Air dry clay bird feeders are ideal for gifts, too. Handmade feeders can be thoughtful presents for friends, family, or neighbors who love nature. They are customizable in size, shape, and design, allowing you to tailor each piece to the recipient’s style or outdoor space. A handcrafted clay feeder is not only practical but also shows care, creativity, and effort—making it a gift that will be appreciated season after season.
For beginners, the project is accessible yet rewarding. Air dry clay is forgiving, meaning mistakes can be corrected, and experimentation is encouraged. You don’t need advanced sculpting skills to produce beautiful results; even simple shapes with thoughtful designs can be charming and functional. The process includes straightforward steps: molding, shaping, drying, and optionally painting or sealing. Each step allows for creativity and customization, ensuring that no two feeders are exactly alike.
Finally, creating an air dry clay bird feeder is an activity that combines craft, nature, and sustainability. It encourages reuse of materials, teaches responsibility in caring for wildlife, and enhances the beauty of your garden or balcony. Whether you’re a seasoned DIY enthusiast or a beginner looking for a rewarding craft project, air dry clay bird feeders are a perfect choice. They embody creativity, practicality, and connection with the natural world—all while being enjoyable and beginner-friendly.
In the following sections, we will explore 10 creative DIY air dry clay bird feeder ideas, complete with step-by-step instructions, materials lists, and styling tips. Each idea is designed to help you make your backyard or balcony a bird-friendly haven while expressing your personal style and creativity. From hanging feeders to decorative bowls and unique themed designs, these projects will inspire you to craft functional art that attracts your feathered friends and adds charm to your outdoor spaces.
1. Classic Hanging Clay Bowl Feeder
Introduction
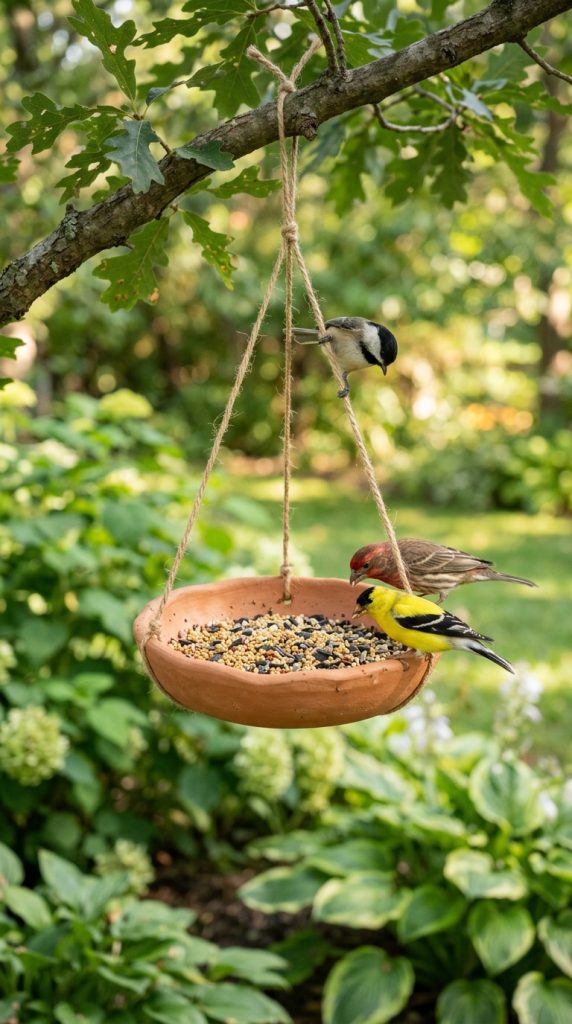
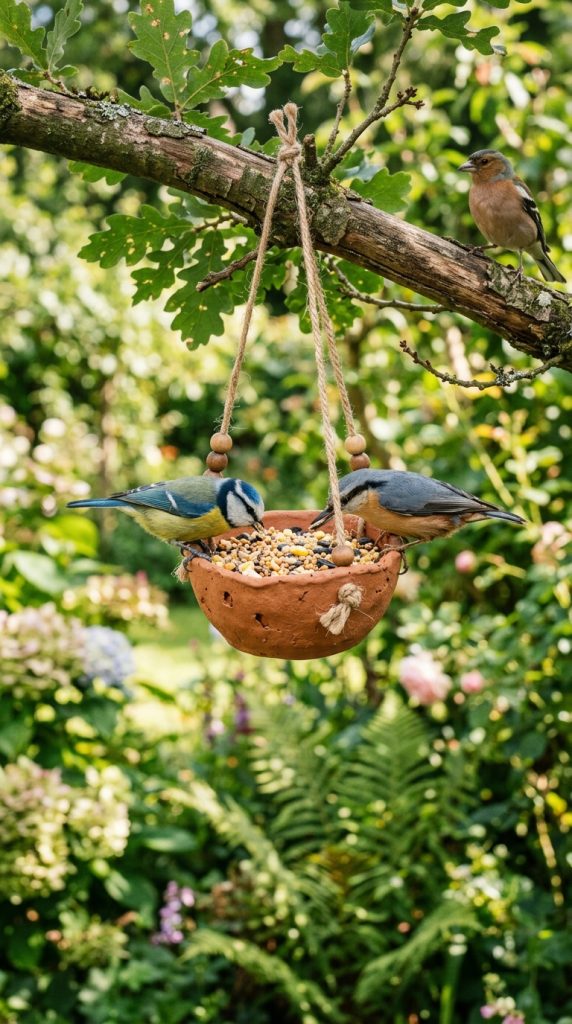
The classic hanging clay bowl feeder is a timeless design that is simple to make and highly functional. It features a shallow clay bowl suspended from strings, perfect for holding seeds, nuts, or small fruits. This design works well for attracting small backyard birds like sparrows, finches, and chickadees. The beauty of this DIY is its simplicity: even beginners can create a sturdy and charming feeder with minimal tools and materials.
This style allows you to experiment with shapes, textures, and patterns. You can leave the bowl smooth, add decorative impressions, or stamp designs on the clay before it dries. Hanging feeders are especially advantageous because they keep food elevated and safer from ground predators. They can be displayed in trees, on porch ceilings, or even on a shepherd hook in your garden. The hanging feature also allows the feeder to sway gently in the wind, making it visually appealing and adding dynamic movement to your outdoor space.
Creating this feeder is a great way to introduce children to crafting and birdwatching. They can participate in shaping the clay, adding patterns, or even painting the finished piece. The project encourages mindfulness and observation as you watch birds flock to the feeder you made with your own hands.
How to Make
- Roll a ball of air dry clay to the desired size.
- Flatten it into a shallow bowl shape.
- Use a pencil or skewer to poke three evenly spaced holes around the rim.
- Thread string through the holes and tie securely.
- Allow the clay to dry for 24–48 hours until hard.
- Optionally, paint with non-toxic acrylic paints and seal with a weatherproof sealant.
Materials Needed
- Air dry clay
- Pencil or skewer
- String or twine
- Non-toxic acrylic paint (optional)
- Sealant for outdoor use (optional)
2. Leaf-Imprinted Clay Feeder
Introduction
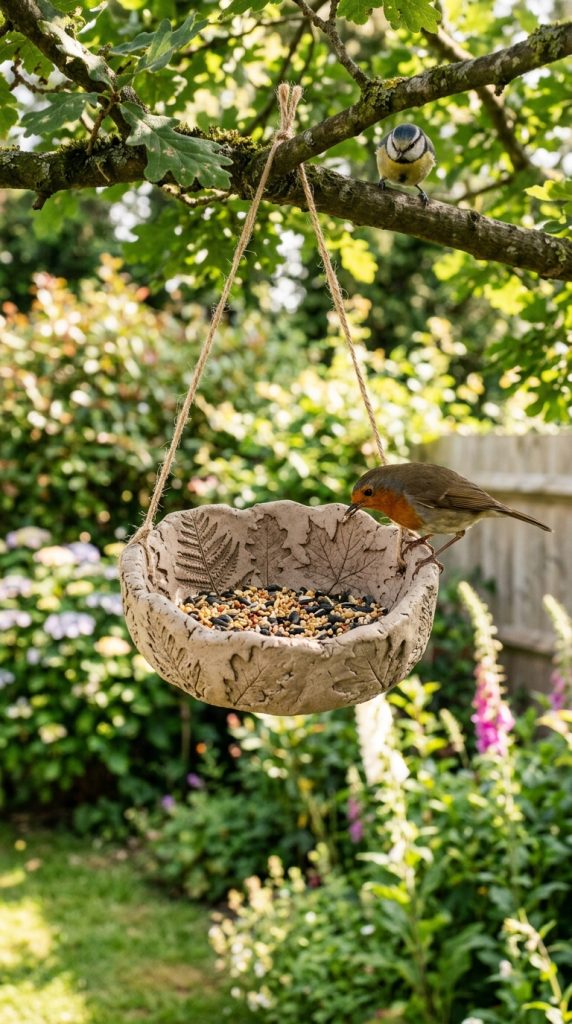
Leaf-imprinted clay feeders add a natural, organic touch to your garden while being fully functional. This style involves pressing real leaves into the surface of air dry clay to create intricate textures and patterns. Not only does this result in a beautiful feeder, but it also brings a piece of nature into your craft. It’s ideal for small birds and can serve as a decorative addition to any backyard or balcony.
The process is both simple and satisfying. You can choose leaves with prominent veins to create detailed imprints or experiment with different sizes and shapes. The clay can be shaped into a shallow bowl, disc, or even a small plate. Once dried, painting the leaves in soft natural colors or leaving them unpainted for a rustic look gives the feeder a personalized finish.
This project encourages creativity while teaching patience and attention to detail. It also makes an excellent group activity or kid-friendly DIY. The end result is a functional, beautiful bird feeder that is unique and environmentally friendly.
How to Make
- Flatten a portion of air dry clay into a disc or shallow bowl shape.
- Press a leaf gently onto the clay to imprint its pattern.
- Carefully lift the leaf off the clay.
- Poke a hole at the top if you want to hang it.
- Let the clay dry completely (24–48 hours).
- Optionally, paint or seal the clay for durability.
Materials Needed
- Air dry clay
- Fresh or dried leaves
- Pencil/skewer for holes
- Non-toxic paint (optional)
- Sealant for outdoor use (optional)
3. Small Clay Plate Feeder
Introduction
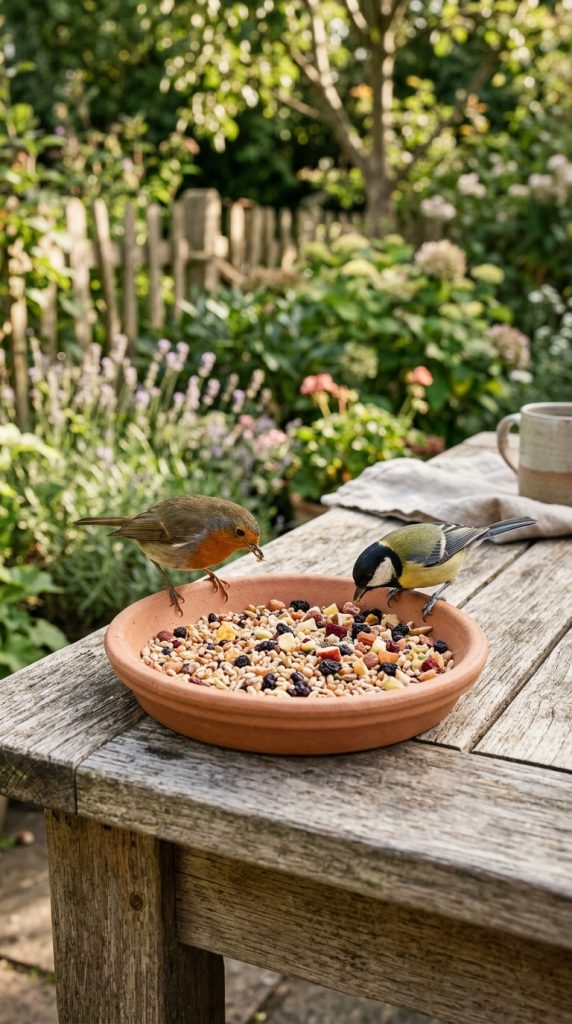
The small clay plate feeder is perfect for tabletop or balcony use. Unlike hanging feeders, this design rests securely on a flat surface, making it ideal for birds that prefer feeding close to the ground or low shrubs. Its shallow design ensures birds can easily access seeds, berries, or chopped fruit without difficulty. This project is beginner-friendly and can be completed in a single crafting session.
The clay plate feeder can be round, oval, or even creatively shaped like a heart or star. Adding textured edges or stamped patterns enhances its aesthetic appeal. Once dry, it can be painted in bright colors to attract birds or left natural for a rustic charm. This feeder is especially suitable for small gardens, patios, or indoor window displays, allowing you to observe birds up close.
Creating a plate feeder is also a great way to learn basic clay techniques like rolling, shaping, and smoothing. The compact size ensures quick drying, which makes it an excellent beginner project for adults and children alike. This DIY blends creativity with functionality, making it both practical and beautiful.
How to Make
- Roll air dry clay into a flat disc about ½–1 inch thick.
- Smooth the edges with fingers or a small spatula.
- Optional: add decorative textures along the rim.
- Let the clay dry for 24–48 hours.
- Paint or seal if desired.
Materials Needed
- Air dry clay
- Small spatula or fingers for smoothing
- Texturing tools (optional)
- Non-toxic paint (optional)
- Sealant for outdoor use (optional)
4. Hanging Heart-Shaped Feeder
Introduction
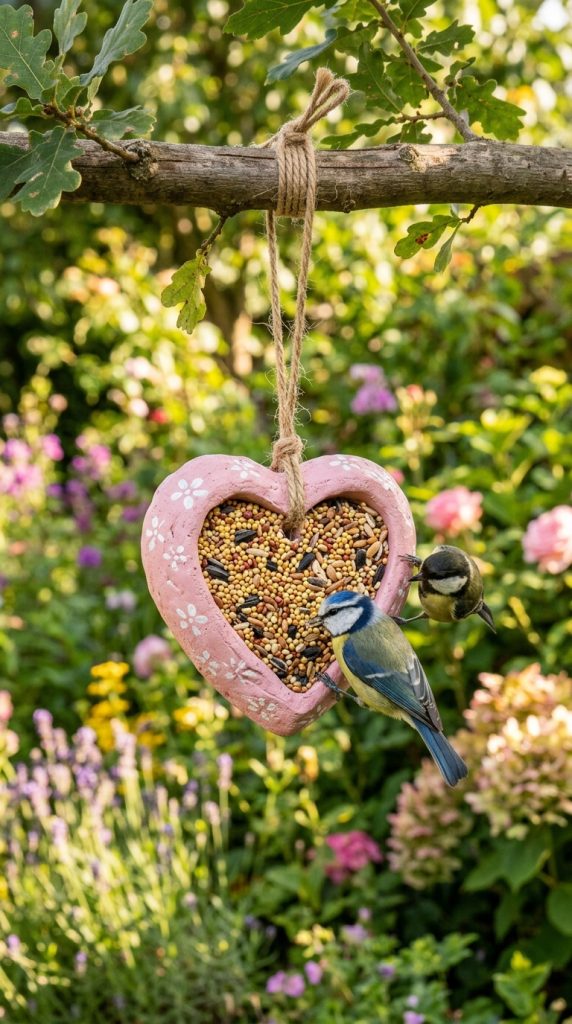
A heart-shaped air dry clay bird feeder is a whimsical and charming addition to any garden. This style combines creativity and function, making it perfect for gift-giving or personal backyard decoration. Its shape adds a playful touch while maintaining practicality, offering a shallow space for seeds or dried fruits that birds love.
The heart-shaped feeder is easy to hang using twine or string. It swings gently in the wind, adding dynamic movement to your garden space. Its unique design also makes it a standout DIY project that can be personalized with textures, patterns, or colors. This project is suitable for children and adults alike, offering an enjoyable and rewarding crafting experience.
Creating a heart-shaped feeder also encourages experimentation with clay shaping and finishing techniques. You can imprint patterns, add small decorative holes, or even paint the heart in vibrant shades. The final product is not only functional but also a beautiful decorative piece.
How to Make
- Shape air dry clay into a heart shape about ½–1 inch thick.
- Smooth the edges with fingers or a small spatula.
- Make a hole at the top for hanging.
- Let the clay dry completely (24–48 hours).
- Optional: paint or seal for extra durability.
Materials Needed
- Air dry clay
- Pencil or skewer for hole
- Small spatula or smoothing tool
- Twine or string
- Non-toxic paint and sealant (optional)
5. Mini Clay Cup Feeder
Introduction
Mini clay cup feeders are compact, versatile, and adorable additions to your outdoor space. These small cup-shaped feeders are ideal for tiny birds, such as finches and chickadees, and are perfect for table placement or hanging. Their simple design allows for creativity while providing a functional feeding station for birds in your backyard.
The clay cup can be molded into smooth or textured finishes. You can add small handles, decorative impressions, or even paint it after drying. These mini feeders are lightweight, making them easy to hang from branches or hooks. The small size encourages birds to visit frequently, creating lively backyard activity that you can observe up close.
This project is quick, easy, and beginner-friendly. It allows you to experiment with shaping techniques, texturing, and even painting. Mini clay cup feeders make charming DIY gifts and can be combined into sets to create a variety of feeding stations around your garden.
How to Make
- Roll a small portion of clay into a ball.
- Shape it into a shallow cup with smooth sides.
- Add a small hole for hanging if desired.
- Let the clay dry for 24–48 hours.
- Optionally, paint or seal for durability.
Materials Needed
- Air dry clay
- Pencil/skewer for hole (optional)
- Smoothing tool or fingers
- Twine for hanging (optional)
- Non-toxic paint and sealant (optional)
6. Hanging Clay Teacup Feeder
Introduction
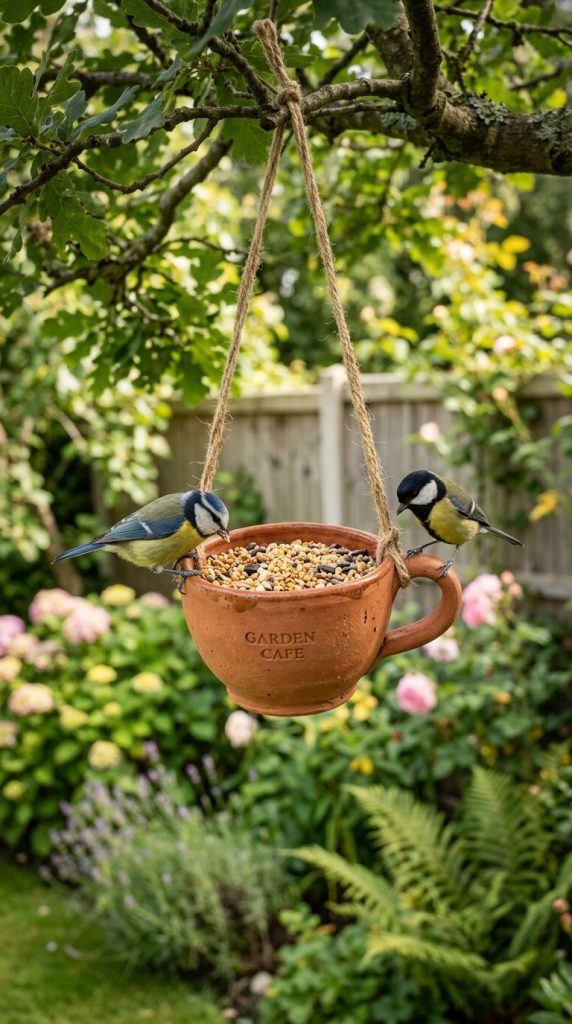
A hanging clay teacup feeder adds a whimsical and charming touch to any garden or balcony. This design uses a small teacup shape crafted from air dry clay, suspended with twine or rope, creating a mini feeding station for small birds. The teacup design is not only functional but visually appealing, making it an attractive decorative element that complements garden aesthetics.
This feeder is perfect for attracting finches, sparrows, and other small birds. Its elevated placement helps protect seeds from ground-dwelling animals and provides a secure feeding spot. You can personalize the teacup by adding textured patterns, small imprints, or even painting it in soft pastel colors for a delicate, artistic finish. This project is beginner-friendly yet allows plenty of room for creativity, making it perfect for adults and kids alike.
Hanging a clay teacup feeder encourages mindfulness and observation, allowing you to watch birds up close while enjoying the beauty of your handcrafted creation. It’s a delightful way to combine crafting with nature appreciation.
How to Make
- Shape air dry clay into a small teacup form with a rounded bottom and flat base.
- Smooth edges and add a small handle if desired.
- Poke three evenly spaced holes near the rim for hanging.
- Thread twine or rope through the holes and tie securely.
- Let the clay dry for 24–48 hours.
- Optional: Paint or seal for weatherproofing.
Materials Needed
- Air dry clay
- Twine or rope
- Pencil or skewer for holes
- Non-toxic paint (optional)
- Outdoor sealant (optional)
7. Rustic Log-Shaped Feeder
Introduction
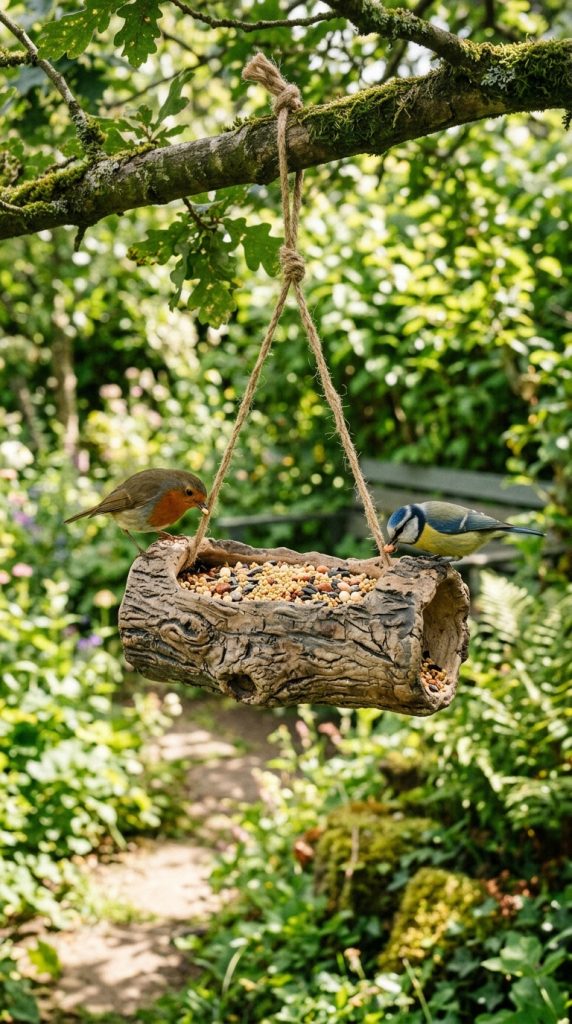
A rustic log-shaped air dry clay bird feeder brings a natural woodland vibe to your backyard. Inspired by fallen logs and natural textures, this design is perfect for creating a realistic, earthy aesthetic. It works well with small and medium-sized birds and adds a unique decorative element to your outdoor space.
This feeder allows for creative texturing using natural objects such as bark, small sticks, or rough tools to imprint the clay. You can shape it as a hollowed-out log, leaving a cavity for seeds or dried fruits. Hanging or flat placement options make it versatile, and painting in natural earthy tones enhances the realism.
Crafting a log-shaped feeder is ideal for nature enthusiasts who want their DIY project to blend seamlessly into a garden or wooded backyard. It encourages experimentation with textures and shapes, producing a functional and highly decorative feeding station.
How to Make
- Roll clay into a cylinder shape resembling a log.
- Hollow out the center to create a shallow cavity for bird food.
- Use tools or real bark to add texture to the surface.
- Optional: Add holes at the ends for hanging.
- Let dry for 24–48 hours.
- Paint or seal with non-toxic outdoor-safe paint.
Materials Needed
- Air dry clay
- Sculpting tools or bark
- Pencil/skewer for hanging holes (optional)
- Twine or rope (optional)
- Non-toxic paint/sealant
8. Mini Clay Bowl with Stand
Introduction
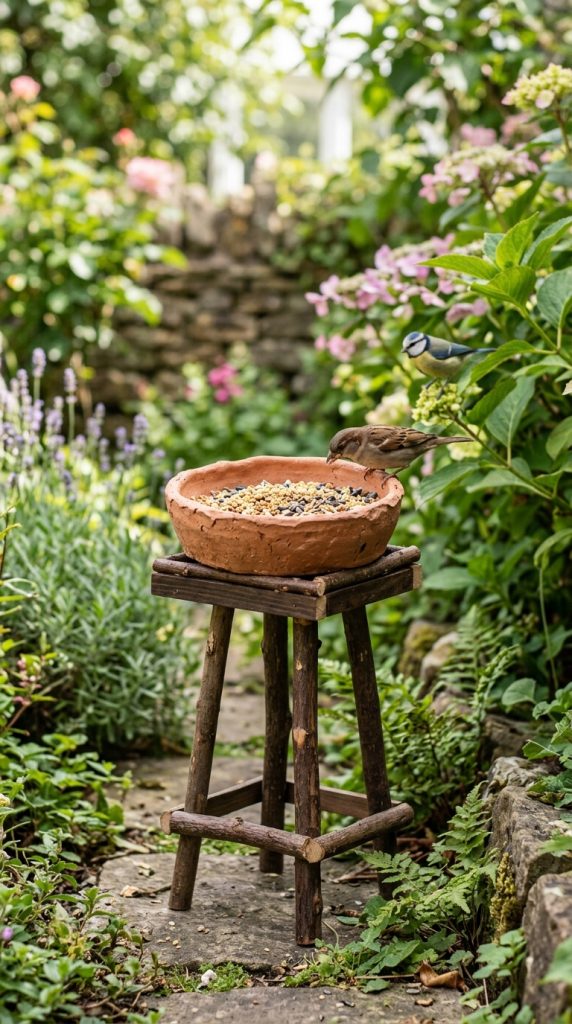
The mini clay bowl with a stand is a simple yet elegant bird feeder ideal for patios or balcony tables. This elevated design keeps seeds off the ground, reducing mess and protecting food from small animals. Its compact size makes it perfect for small birds, and the stand adds a decorative touch that elevates the clay bowl visually.
The stand can be made from clay, small wooden sticks, or even repurposed materials, allowing for customization. The shallow bowl can be textured, painted, or left natural. This feeder is beginner-friendly, requires minimal tools, and is a great way to introduce children to bird-friendly crafts.
Using a mini clay bowl with a stand allows you to place your feeder in areas where it can be easily observed, encouraging birdwatching and creating a lively outdoor environment. Its versatility makes it suitable for both functional and decorative purposes.
How to Make
- Shape a small clay bowl and smooth edges.
- Create a stand using clay or attach the bowl to a small wooden base.
- Hollow out the bowl for food.
- Let dry for 24–48 hours.
- Optional: Paint or seal for durability.
Materials Needed
- Air dry clay
- Small wooden sticks/base (optional)
- Non-toxic paint (optional)
- Sealant (optional)
9. Hanging Star-Shaped Feeder
Introduction
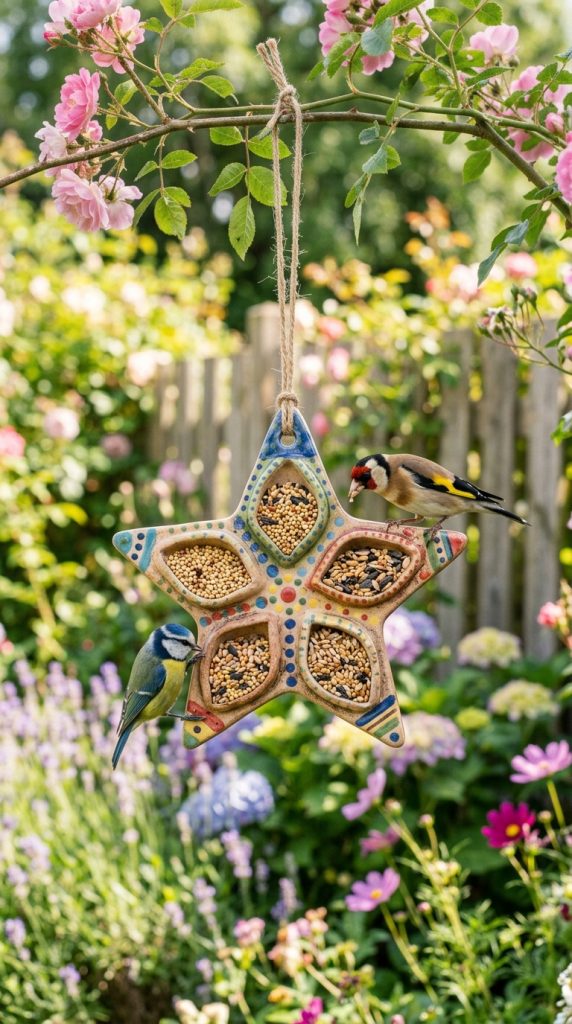
The hanging star-shaped air dry clay feeder adds a whimsical, decorative flair to any outdoor space. Its playful design is ideal for small birds and adds a magical touch to your garden or balcony. The star shape allows for multiple shallow pockets to hold seeds, nuts, or small fruits, making it both functional and visually appealing.
This feeder is beginner-friendly but offers plenty of room for creativity. You can add textures, patterns, or even paint each point of the star differently. Hanging the star feeder with twine allows it to sway gently in the breeze, attracting birds with movement and enhancing its visual charm.
Creating a star-shaped feeder encourages experimentation with geometric shapes and creative decoration, making it an enjoyable DIY project for adults and kids. It’s a charming way to combine artistry and practicality in your outdoor space.
How to Make
- Flatten clay and cut into a star shape.
- Shape shallow pockets on each point to hold food.
- Poke a hole at the top for hanging.
- Thread string or twine and tie securely.
- Let the clay dry for 24–48 hours.
- Optional: Paint and seal for durability.
Materials Needed
- Air dry clay
- Pencil/skewer for hole
- Twine or string
- Non-toxic paint (optional)
- Sealant (optional)
10. Mini Hanging Cupcake Feeder
Introduction
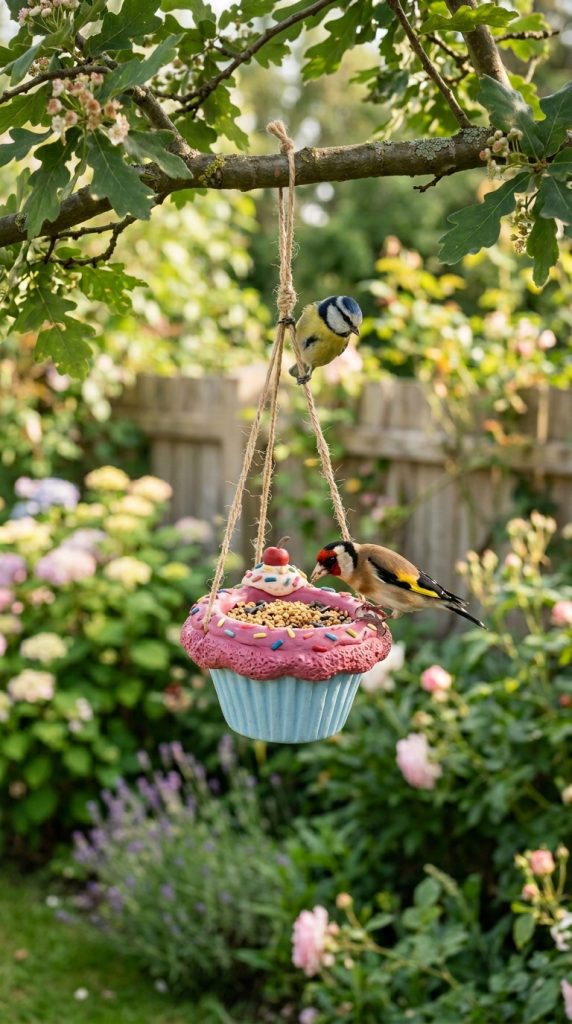
The mini hanging cupcake feeder is a playful and creative take on traditional clay feeders. Shaped like a cupcake with a shallow “bowl” top for seeds, this design is perfect for attracting small birds while adding a cute, whimsical element to your garden. Its elevated placement keeps food safe from predators and encourages frequent visits from local birds.
This feeder allows for decoration using simple patterns, imprints, or paint. You can add details such as frosting textures or tiny dots for sprinkles. Hanging with string or twine makes it easy to suspend from tree branches, pergolas, or porch ceilings. This fun and colorful feeder is especially great for children’s projects, making birdwatching an interactive and creative experience.
Crafting a cupcake feeder encourages creativity, attention to detail, and personalization, while also providing a functional feeding station for birds. It’s a perfect combination of playful design and practical use.
How to Make
- Shape a small clay ball into a cupcake base.
- Flatten the top to create a shallow bowl.
- Smooth edges and add decorative textures if desired.
- Poke a hole for hanging.
- Let dry 24–48 hours.
- Optional: Paint and seal for outdoor use.
Materials Needed
- Air dry clay
- Pencil/skewer for hole
- Twine or string
- Non-toxic paint and sealant