
Minecraft has always been a game that sparks creativity, exploration, and clever problem-solving. One of the most exciting aspects for players — from beginners to seasoned builders — is the ability to craft hidden spaces and secret passageways. Secret rooms and hidden doors add layers of intrigue, security, and personalization to your Minecraft worlds. They’re not just practical storage solutions or security features; they’re a chance to challenge your imagination, combine redstone engineering with design, and create playful elements that can amaze friends or make solo gameplay more immersive. Whether you’re storing valuable loot, designing a hidden lair, or simply adding an aesthetic twist to your base, these hidden spaces transform ordinary builds into extraordinary experiences.
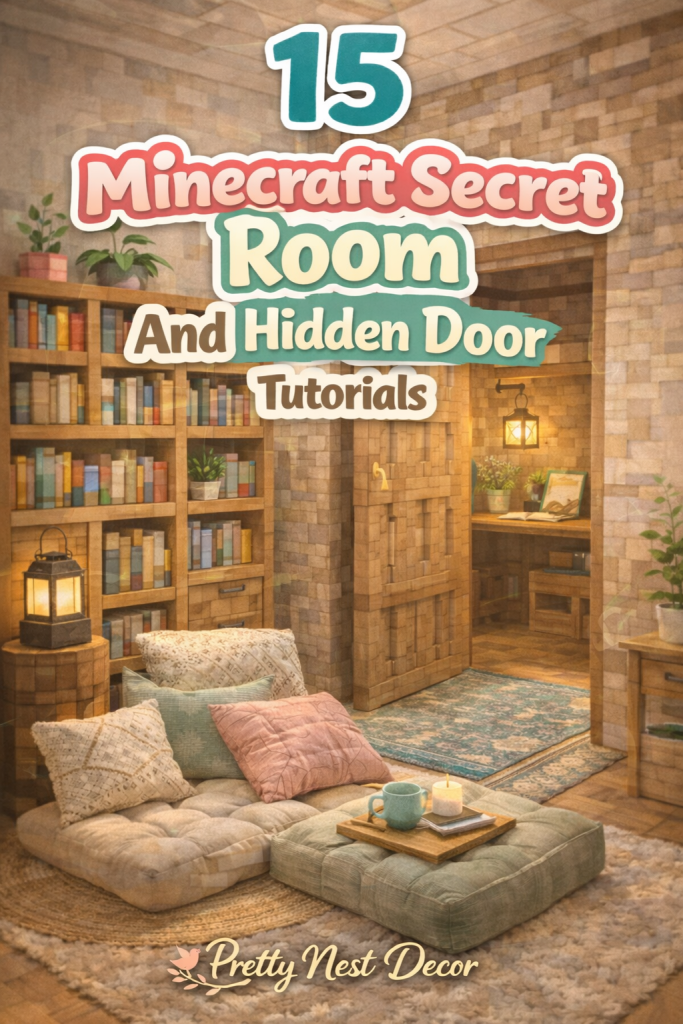
The appeal of secret rooms lies in their combination of function and surprise. A cleverly hidden door can make your base feel magical or mysterious, offering both visual delight and practical advantages. For example, redstone-activated doors can conceal treasure rooms, libraries, or enchanting areas, while simple piston mechanisms or disguised trapdoors can integrate seamlessly into walls, floors, or bookshelves. These designs encourage players to think critically about space, materials, and mechanics, making your Minecraft creations more dynamic and interactive. For small survival worlds, hidden rooms can maximize space efficiency, allowing you to store resources safely or create secret hideouts without disturbing the overall aesthetic of your build.
Hidden doors and secret rooms also play a significant role in storytelling within Minecraft. For adventure maps or roleplay servers, they provide opportunities for puzzles, quests, and exploration. Imagine a medieval castle with a disguised bookshelf that opens into a treasure vault, or a jungle temple with a hidden staircase leading to a secret laboratory. These clever constructions can make gameplay more immersive and rewarding, turning each exploration session into a mini adventure. Furthermore, they encourage experimentation — trying different mechanisms, materials, and camouflage techniques — which enhances both your building skills and understanding of Minecraft’s mechanics.
From a design perspective, there are countless ways to approach hidden spaces. You might prefer simple camouflage, where a door blends seamlessly with the surrounding wall, using wood, stone, or bookshelves. Alternatively, you could embrace redstone engineering, incorporating pistons, pressure plates, levers, or even more complex circuits to create automated entrances. Vertical and horizontal hidden doors, sliding walls, trapdoors, and rotating pillars are just a few possibilities. Each method has its advantages depending on your play style, available materials, and whether your world is survival or creative. Some methods prioritize subtlety, making it nearly impossible for visitors to detect the secret entrance. Others prioritize spectacle, adding a wow factor for friends exploring your world.
The versatility of hidden rooms also aligns perfectly with personalized creativity. For instance, a survival player might want a secret farm room that is secure from mobs. A builder in creative mode may want a secret aesthetic lounge or library hidden behind a waterfall or fireplace. The combination of practical function, aesthetic design, and surprise makes these builds some of the most satisfying projects in Minecraft. Players often share these ideas on Pinterest, YouTube, and Minecraft communities, creating a culture of inspiration and innovation. Step-by-step tutorials make it accessible for beginners while still offering advanced challenges for experienced players, bridging the gap between functional survival mechanics and visually striking creativity.
Moreover, building secret rooms and hidden doors fosters problem-solving and logical thinking. You must consider space, block mechanics, redstone timing, and accessibility. Even a simple hidden door can require experimenting with block placement, pressure plate activation, or piston arrangements. Complex designs may incorporate multiple triggers or secret codes, transforming your Minecraft base into a multi-layered puzzle. This combination of creativity, technical skill, and strategic thinking makes secret room tutorials highly valuable, both for learning game mechanics and for inspiring new ideas. The satisfaction of stepping into a hidden room, knowing the entrance is cleverly concealed, is a reward in itself — one that keeps players engaged and motivated to explore new building techniques.
In this article, we will explore detailed Minecraft secret room and hidden door ideas, each with step-by-step instructions, beginner-friendly guidance, materials lists, and design tips. From small, subtle doors for survival bases to elaborate redstone-powered mechanisms for creative worlds, these tutorials are optimized for save-worthy, Pinterest-ready content. Each idea is designed to inspire creativity, maximize functionality, and enhance the aesthetic appeal of your Minecraft builds. By the end of this guide, you’ll not only have practical hidden room solutions but also the confidence to experiment, modify, and innovate your own unique secret doors.
Whether you’re building in survival mode or creative mode, designing a hidden entrance adds intrigue, security, and style to your base. Secret rooms are not just about hiding; they’re about clever design, interactive mechanics, and creating a sense of wonder. They transform ordinary walls, floors, or landscapes into dynamic, functional art. From simple disguised doors to complex redstone traps and piston-activated passages, every tutorial in this guide is structured to be easy to follow while offering creative flexibility. This introduction sets the stage for an exciting journey into the world of Minecraft secret rooms and hidden doors — a journey that will unlock hidden potential in your builds, inspire your creativity, and make your world truly unique.
Idea 1: Hidden Bookshelf Door – The Classic Secret Entrance
One of the most iconic ways to hide a secret room in Minecraft is using a bookshelf as a door. Not only does it add charm to libraries or living rooms, but it also gives your base a sense of mystery. Imagine walking into a library and suddenly revealing a hidden vault or enchanting room behind what appears to be a plain bookshelf. This method is visually striking, practical, and highly customizable. You can create a simple lever-activated mechanism for beginners or experiment with pistons and redstone for a more advanced sliding bookshelf.
What This Idea Means
A bookshelf door uses pistons to move bookshelf blocks sideways or vertically, concealing an entrance. The result is a seamless and elegant secret room. This is ideal for storing valuables, creating private hideouts, or adding interactive features in your Minecraft build.

Step-by-Step How-To
- Choose a location: Pick a wall inside your base where a bookshelf can blend naturally.
- Set up pistons: Place sticky pistons behind where the bookshelf will sit. These will push and pull the bookshelf blocks.
- Redstone wiring: Connect the pistons to a lever, button, or hidden pressure plate. This will act as the activation mechanism.
- Place the bookshelves: Stack bookshelves in front of the pistons, ensuring alignment for smooth sliding.
- Test the movement: Activate your lever or button and check that the bookshelf opens and closes without obstruction.
- Decorate & disguise: Use wall paintings, torches, or other décor to make the entrance less obvious.
Materials Needed
- Sticky pistons
- Redstone dust
- Lever or hidden button
- Bookshelf blocks
- Building blocks for surrounding wall (wood, stone, etc.)
Pro Tip: You can add more complexity with a double-piston extender to allow the bookshelf to move two blocks at once, giving a wider opening.
Idea 2: Secret Floor Trapdoor Room – Concealed Underground Base
A secret trapdoor in the floor is perfect for hiding small rooms, storage areas, or escape tunnels. It’s an elegant way to make your base feel like it has hidden depths. This design is subtle, and visitors might step right over it without noticing the secret beneath.
What This Idea Means

A trapdoor room hides an entrance in the floor. You can use trapdoors for manual opening or pistons and redstone for an automated, high-tech feel. It’s ideal for bases with limited wall space.
Step-by-Step How-To
- Select a floor location: Pick a flat area that blends with the rest of your base floor.
- Install trapdoor(s): Place trapdoors flush with floor blocks to act as the entrance.
- Dig the hidden room: Below the trapdoor, dig your secret chamber. Size depends on your storage or design needs.
- Optional automation: For advanced players, add sticky pistons and redstone wiring to make the floor open automatically when a pressure plate is activated.
- Add ladder or stairs: Ensure safe access down into the secret room.
- Decorate inside: Place chests, beds, or enchanting tables to make the space functional.
Materials Needed
- Trapdoor blocks
- Sticky pistons (optional)
- Redstone dust & lever/button (optional)
- Floor blocks that match your base
- Ladder or stairs
Pro Tip: Use slabs instead of full blocks for a flatter, more seamless floor look.
Idea 3: Hidden Wall Lever Door – Stealthy Entry
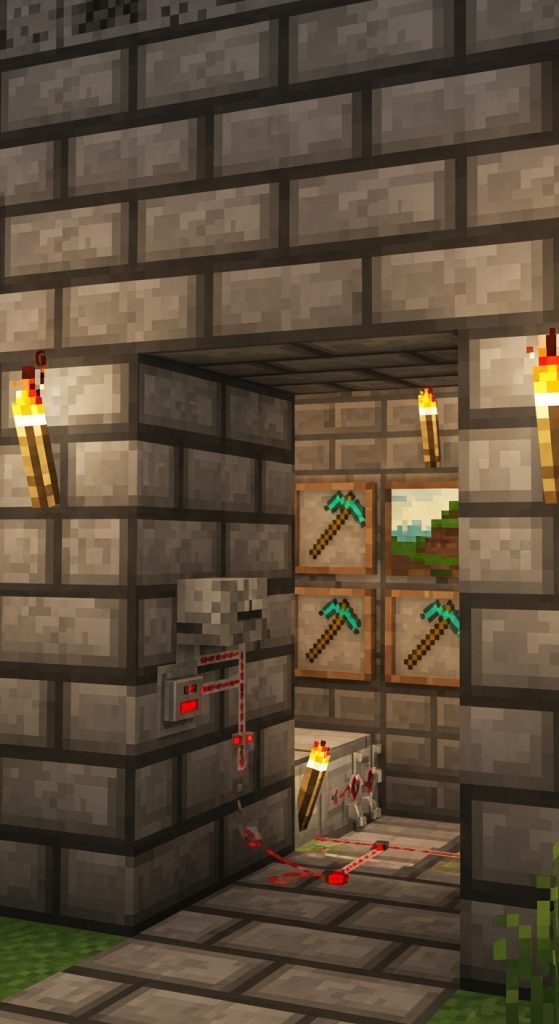
A hidden wall door controlled by a lever is perfect for stealthy entrances. It’s simple yet effective: the wall appears normal but opens with a hidden switch. Great for survival bases where you don’t want your valuables exposed.
What This Idea Means
A lever-activated hidden door allows manual control over piston blocks to reveal a secret passage. The entrance is camouflaged using matching wall blocks or even paintings.
Step-by-Step How-To
- Select a wall: Choose a wall where the door will be hidden naturally.
- Place sticky pistons: Behind your wall blocks, place sticky pistons that will retract blocks to open the door.
- Connect redstone: Link the pistons to a hidden lever, button, or pressure plate for activation.
- Install wall blocks: Replace wall blocks in front of the pistons to disguise the door.
- Test the mechanism: Make sure blocks slide smoothly and the door fully opens.
- Camouflage the entrance: Hang paintings or place other blocks to make it appear like a normal wall.
Materials Needed
- Sticky pistons
- Redstone dust
- Lever
- Matching wall blocks
- Optional: paintings or decorative blocks
Pro Tip: Using a hidden lever behind a painting makes the entrance almost impossible to detect.
Idea 4: Waterfall Secret Entrance – Magical Concealment
Hiding a door behind a waterfall adds drama and style to your base. It works well for castles, cliffside bases, or naturalistic builds. The flowing water conceals your entrance while maintaining a visually stunning feature.
What This Idea Means
A waterfall can hide a recess or piston door. You can manually or automatically open the hidden room, making it appear like a natural feature.

Step-by-Step How-To
- Select wall or cliff: Choose a spot for your waterfall near a wall or cliffside.
- Dig a recess: Create the secret room behind the waterfall.
- Install entrance mechanism: Use sticky pistons, trapdoors, or levers to allow safe access.
- Place water source blocks: Make water flow naturally over the entrance.
- Decorate hidden room: Add storage, seating, or enchanting tables.
- Test movement: Make sure you can access the room without getting swept away by the water.
Materials Needed
- Water source blocks
- Sticky pistons or trapdoors
- Redstone dust & lever/button
- Stone/wood blocks for hidden room
- Decorative blocks
Pro Tip: Add vines or lanterns to make the waterfall entrance feel more mystical.
Idea 5: Redstone Staircase Secret Room – Cinematic Reveal
A piston-activated staircase is perfect for a dramatic entrance to an underground room. Players can hide a staircase beneath a floor or platform, which slides open using redstone.
What This Idea Means
This design uses pistons to move stair blocks, creating a staircase only visible when activated. Perfect for survival bases or creative adventure builds.

Step-by-Step How-To
- Choose location: Pick a floor space for your staircase entrance.
- Build the hidden room: Make the underground area first.
- Place pistons: Install sticky pistons under each stair block for smooth movement.
- Connect redstone: Use a lever or hidden pressure plate to activate the staircase.
- Test repeatedly: Ensure the stairs move and retract without glitches.
- Decorate staircase and room: Add lighting, rugs, or chests for function and style.
Materials Needed
- Sticky pistons
- Redstone dust & lever/pressure plate
- Stair blocks
- Floor blocks for disguise
- Lighting blocks
Pro Tip: For a more advanced look, use a double-piston extender to allow two-step stair movement.
Idea 6: Hidden Bookshelf Ladder Room – Vertical Secret Access
Hiding a ladder behind a bookshelf adds a vertical dimension to your secret base. This method combines storage with vertical access and keeps entrances visually hidden.
What This Idea Means
The bookshelf slides aside to reveal a ladder leading up or down. Perfect for small survival worlds or multi-level bases.

Step-by-Step How-To
- Select bookshelf wall: Pick a spot where a bookshelf blends naturally.
- Place sticky pistons: Behind the bookshelf for horizontal sliding.
- Install ladder: Place ladder behind the moving bookshelf.
- Connect redstone: Use a lever or button to operate the pistons.
- Test movement: Ensure bookshelf slides smoothly.
- Decorate surrounding area: Add other bookshelves, torches, or rugs to disguise.
Materials Needed
- Sticky pistons
- Redstone dust & lever/button
- Bookshelf blocks
- Ladder
- Surrounding wall blocks
Pro Tip: Stack multiple bookshelves for a more dramatic, larger hidden ladder reveal.
Idea 7: Lava Wall Hidden Door – Extreme Security
A lava wall entrance is intimidating and visually striking. It deters intruders and hides the secret room in plain sight.
What This Idea Means
The lava wall covers a hidden doorway. Pistons or trapdoors can control access safely, making it secure and fun.

Step-by-Step How-To
- Build lava wall: Use lava source blocks contained by stone or obsidian.
- Create hidden room: Dig behind the lava wall.
- Install pistons or trapdoors: Control entrance safely.
- Add lever/redstone: Activate entrance remotely.
- Test thoroughly: Ensure safe access without burning items.
Materials Needed
- Lava source blocks
- Sticky pistons or trapdoors
- Redstone dust & lever
- Fireproof blocks (stone, obsidian)
- Interior blocks and decor
Pro Tip: Add water channels nearby for emergency fire protection.
Idea 8: Pressure Plate Floor Hidden Room – Stealthy Access
Pressure plates hidden in floors can trigger a secret room. It’s perfect for stealth entrances that are invisible unless stepped on.

Step-by-Step How-To
- Place a pressure plate flush with floor blocks.
- Connect redstone to pistons hiding the door.
- Test timing to avoid accidental openings.
- Place floor blocks to blend with surroundings.
- Decorate inside hidden room.
Materials Needed
- Pressure plates
- Sticky pistons
- Redstone dust
- Floor blocks matching surroundings
- Hidden room blocks and decor
Idea 9: Hidden Bookshelf Switch Puzzle – Code Entry
A bookshelf can act as a puzzle where only correct item placement opens the door. Great for adventure maps.

Step-by-Step How-To
- Place bookshelves with item frames.
- Use redstone comparators or observers to detect correct items.
- Connect to sticky pistons revealing hidden door.
- Test code combinations.
- Decorate surrounding library.
Materials Needed
- Bookshelves
- Item frames
- Redstone comparators
- Sticky pistons
- Hidden door blocks
Idea 10: Hidden Water Slide Entrance – Fun Access
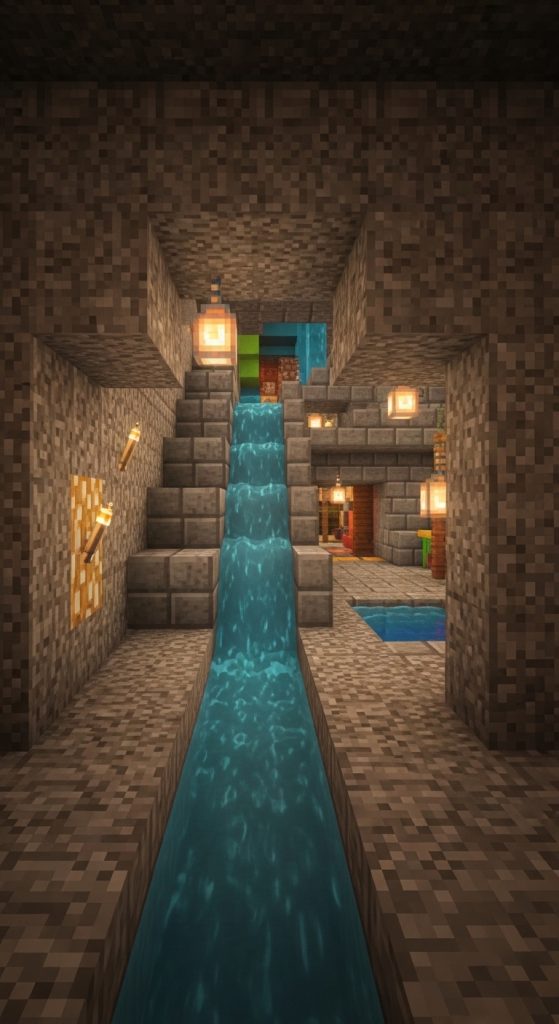
Players slide down water to a hidden room. Playful and safe if done with correct water flow.
Step-by-Step How-To
- Dig hidden room.
- Build water shaft with flowing water.
- Add trapdoors/pistons to control entry.
- Ensure landing area is safe.
- Decorate room.
Materials Needed
- Water source blocks
- Pistons/trapdoors
- Building blocks for shaft
- Landing blocks
- Lighting and decor
Idea 11: Hidden Painting Door – Artful Secret
A hidden painting door is one of the most elegant and subtle ways to conceal a secret room. A simple painting on a wall can disguise an entrance, keeping the room completely hidden unless someone knows the secret.
Definition / Concept
Minecraft paintings can cover 1×1 or 2×2 gaps, allowing players to walk through them. By placing a doorway or opening behind a painting, you can create a seamless hidden entrance. It’s perfect for libraries, living rooms, or gallery-style builds.

Step-by-Step How-To
- Choose a wall: Select a flat wall with a blank space for your secret doorway.
- Create the opening: Remove one or more blocks where the entrance will be hidden.
- Place the painting: Position a painting over the opening to conceal the gap.
- Test walk-through: Ensure you can walk through the painting to enter the hidden room.
- Decorate hidden room: Add chests, enchanting tables, or seating for a functional secret space.
- Optional redstone integration: For advanced builds, use pistons behind the wall so the painting slides or a pressure plate triggers a hidden trapdoor.
Materials Needed
- Painting
- Wall blocks (wood, stone, brick, etc.)
- Chests or decorative blocks for hidden room
- Optional: pistons, redstone, pressure plate
Pro Tip: Use multiple paintings to cover larger entrances or create a stylish gallery effect.
Idea 12: Rotating Pillar Hidden Door – Dynamic Entry
Rotating pillar doors are perfect for players looking for a high-tech secret room entrance. These doors rotate a column of blocks to reveal a hidden passage, giving your base a dramatic, mechanical flair.
Definition / Concept
A rotating pillar uses pistons and redstone mechanics to spin a vertical column of blocks, revealing the entrance. It’s visually impressive and highly secure.

Step-by-Step How-To
- Select the entrance location: Pick a wall or corner for your rotating pillar.
- Build the pillar: Stack blocks vertically that will rotate to reveal the doorway.
- Set up sticky pistons: Place pistons around the pillar to push blocks sideways or rotate the column.
- Connect redstone circuit: Use a lever, button, or pressure plate to trigger the rotation.
- Test movement: Make sure the pillar rotates smoothly and fully reveals the passage.
- Decorate surrounding area: Blend pillars with walls or use decorative blocks to hide mechanics.
Materials Needed
- Sticky pistons
- Redstone dust & lever/button
- Building blocks for pillar (wood, stone, etc.)
- Decorative blocks for surroundings
Pro Tip: This works best for creative mode or advanced survival worlds, as redstone timing can be tricky.
Idea 13: Hidden Lava Floor Trap Entrance – Dramatic & Secure
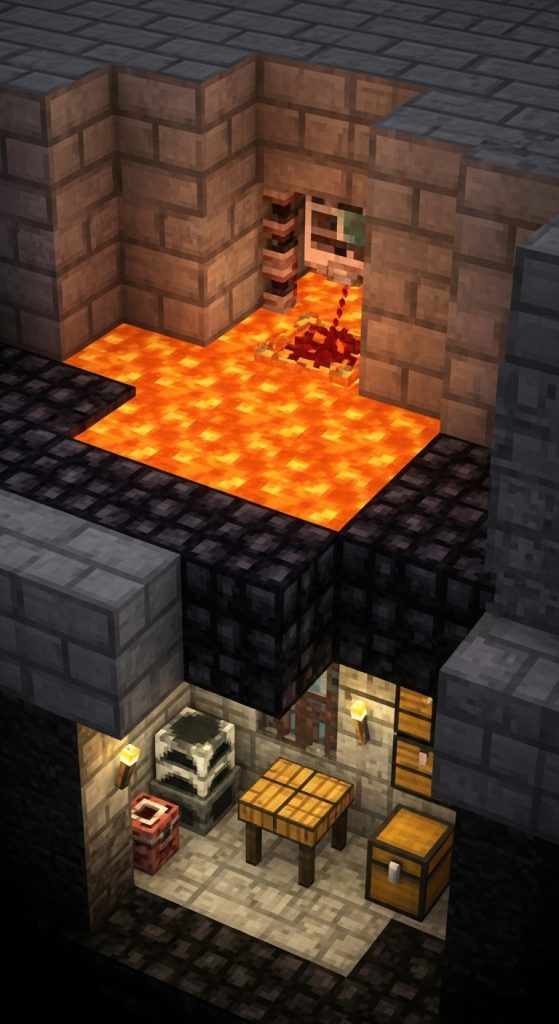
A hidden lava floor entrance is both dramatic and highly secure, perfect for a secret treasure vault. While visually intimidating, careful construction ensures safety for the player.
Definition / Concept
Lava blocks cover the entrance, concealing a trapdoor or piston-controlled floor. Only activating the mechanism opens the hidden room safely.
Step-by-Step How-To
- Select the floor location: Ensure lava can be safely contained.
- Create hidden room underneath: Dig your secret chamber.
- Install pistons: Use sticky pistons to retract lava or blocks, creating safe access.
- Redstone wiring: Connect a lever, button, or pressure plate to the pistons.
- Test for safety: Make sure players can enter without damage.
- Decorate hidden room: Add storage or a safe space for valuables.
Materials Needed
- Lava source blocks
- Sticky pistons
- Redstone dust & lever/button
- Fireproof blocks (stone, obsidian)
- Hidden room materials
Pro Tip: Use a double-layer floor for extra safety, preventing accidental lava contact.
Idea 14: Secret Bookshelf Ladder Puzzle – Code Entry
For adventure maps or fun base mechanics, a bookshelf ladder can act as a puzzle. Only when books or items are placed correctly does the ladder or door become accessible.
Definition / Concept
Bookshelves are linked to redstone and item frames to create a combination-based entry. This adds interactivity and a challenge for players discovering your secret room.

Step-by-Step How-To
- Place bookshelves: Build a wall or library area.
- Install item frames: Place on specific bookshelves.
- Connect redstone: Use comparators to detect item placement and trigger hidden pistons.
- Place ladder behind: The ladder or hidden door only becomes accessible when the correct combination is input.
- Test puzzle mechanics: Ensure combination works consistently.
- Decorate library: Add furniture or aesthetic touches to make the puzzle area visually appealing.
Materials Needed
- Bookshelves
- Item frames & items
- Redstone comparators and dust
- Sticky pistons
- Ladder or hidden door blocks
Pro Tip: Use colorful or thematic items in frames to make puzzles more visually appealing for Pinterest tutorials.
Idea 15: Water Slide Secret Room – Playful Hidden Entrance
A water slide entrance is a playful and fun way to access your secret room. Players slide down flowing water to a hidden chamber below, perfect for a lighthearted, creative build.
Definition / Concept
The water slide uses flowing water to move players into a secret room. Pistons or trapdoors can control flow and ensure safe landings.
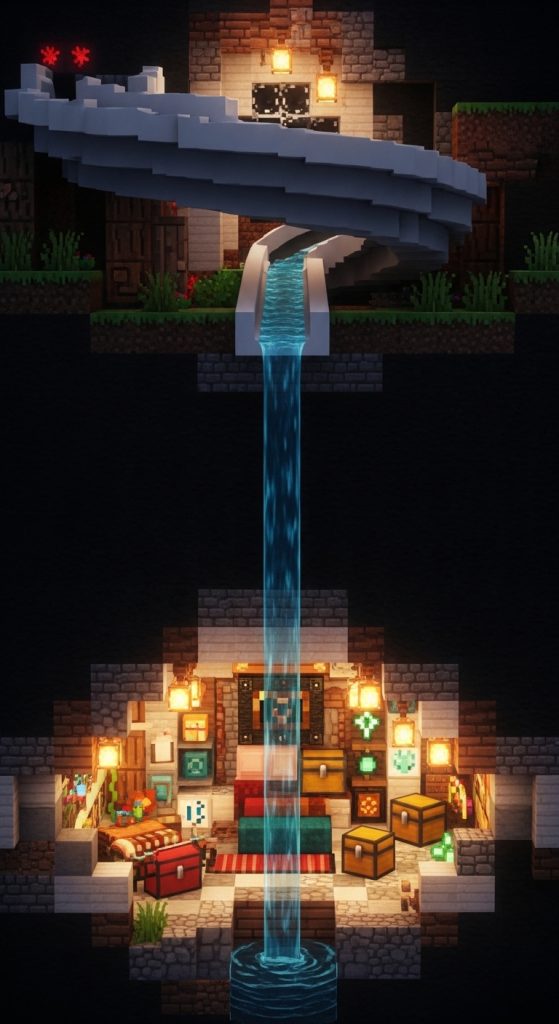
Step-by-Step How-To
- Create the hidden room: Dig an underground chamber for storage, enchanting, or fun activities.
- Build water slide shaft: Create a vertical or diagonal shaft leading into the room.
- Place water source blocks: Ensure water flows smoothly to carry players down.
- Optional safety mechanics: Add trapdoors, signs, or slabs to prevent fall damage.
- Decorate hidden room: Include chests, lights, and furniture to make it functional.
- Test flow: Make sure the water carries players safely and consistently.
Materials Needed
- Water source blocks
- Trapdoors/pistons (optional for flow control)
- Building blocks for shaft
- Landing area blocks
- Lighting and decor